Plugins
Not to be confused with VST and VSTi. VST support is added in Musescore 4, Musescore 3 does not support VST.
Visit Developers' Handbook Plugins for 3.x Chapter for step by step guide to write a new plugin or edit a current one.
Overview
A MuseScore plugin is a small piece of software that adds extra functionality to the program. A plugin need to be enabled first, and then executed by using the Plugins menu. Some plugins come pre-installed, they are disabled by default. There are also plugins created and shared by other musicians, anyone can download and use them.
Installing a new plugin
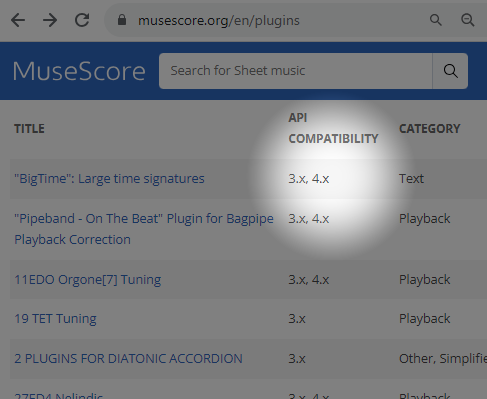
- Search for available plugins at, for example:
- https://musescore.org/en/plugins?category=All&compatibility=432 [musescore.org→Download→Plugins]
Warning: Plugins can potentially contain bad or malicious codes, which damage scores and compromise the machine. All plugins shared on musescore.org's plugin repository are unvetted. No warranty of any kind is provided. Users should download from a trusted author or double-check the code themselves. Seek advice on the Plugins forum. - https://github.com/topics/musescore-plugin
- https://github.com/topics/musescore-plugins
- https://musescore.org/en/plugins?category=All&compatibility=432 [musescore.org→Download→Plugins]
- Make sure it is compatible with version of Musescore used.
- Download the file:
- for musescore.org hosted .qml files, sometimes a web browser open it as plain text and refuses to download it as file. In this case, right click on a link and select Save link as...
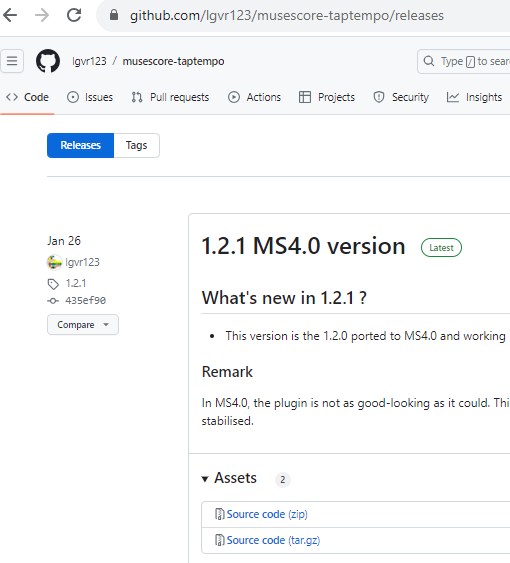
- for github.com unpackaged code, download the project as a zip file by clicking Code: Download ZIP

- for github.com packaged release, click on an appropriate item under Assets
- (If it is a zip file) Extract it using an archive extraction software.
- Move the files to MuseScore's plugins folder, configurable at Edit → Preferences:General tab window, see Preferences chapter. The default directories are
- Windows:
%HOMEPATH%\Documents\MuseScore3\Plugins - macOS:
~/Documents/MuseScore3/Plugins - Linux:
~/Documents/MuseScore3/Plugins
- Windows:
Note: (1) The folder name "Plugins" is translated according to Musescore's language setting, see Preferences:General chapter. (2) Some plugins require installing other components such as a specialized Font file.
Enabling and disabling plugins
- Click Plugins: Plugin Manager
-
Tick a plugin to enable it.

Running a plugin
Select Plugins → [The plugin name]
To assign a keyboard shortcut to a plugin, use the Plugin Manager.
Creating a plugin
One way to create and edit a plugin is using Musescore's Plugin Creator window, but see the developers' handbook Plugin documentation chapter. That chapter contains coding tutorials and code boilerplates.
- Click Plugins → Plugin Creator.

Pre-installed plugins
Some plugins come pre-installed with MuseScore. They are not enabled by default, see "Enabling and disabling plugins" section. They are available at MuseScore repository https://github.com/fp22june/MuseScoreTag362/tree/master/share/plugins.
- ABC Import :
This plugin imports ABC text from a file or the clipboard and converts it to MusicXML with Wim Vree's abc2xml Python script. Internet connection is required, because it uses an external web-service at https://abc2xml.appspot.com/ for the conversion. As of June 2023, the pre-installed ABC Import plugin does not work anymore due to expiration of web domain. Working alternatives:- ABC Import/Export plugin: Works offline, need to download and install python, abc2xml and xml2abc. Depending on python version, editing out the incompatible hash symbol (python comment token) at LINE 1 may be needed.
- ABC Import and ABC Export plugin: Connects to https://musescore.jeetee.net/abc/
- Color Notes: Notes → Color Notes .
Colors notes in the selected range (or the entire score), depending on their pitch. It colors the note head of all notes in all staves and voices according to the Boomwhackers convention. Each pitch has a different color. C and C♯ have a different color. C♯ and D♭ have the same color.
To color all the notes in black, just run that plugin again (on the same selection), or use Remove Notes Color plugin. - Create Score :Creates a new score. It creates a new piano score with 4 quarter notes: C, D, E, F. It's a good start to learn how to make a new score and add notes from a plugin.
- helloQml : Demonstrates some basic tasks.
- Note Names : Notes → Note Names. This plugin names notes in a selected range or for the entire score. It displays the names of the notes (as staff text) according to MuseScore's language settings: voices 1 and 3 notes above the staff; voices 2 and 4 notes below the staff; and chord notes in a comma separated list, starting with the top note.
- Panel : This demo plugin creates a GUI panel.
- random/random2 : Creates a random score.
- run : This demo plugin runs an external command. Probably this will only work on Linux.
- scorelist : This test plugin iterates through the score list.
- ScoreView : Demo plugin to demonstrate the use of a ScoreView
- Walk : This test plugin walks through all elements in a score
Pre-installed plugins are in the folder:
- Windows:
%ProgramFiles%\MuseScore 3\Plugins(or%ProgramFiles(x86)%\MuseScore 3\Pluginsfor the 32-bit versions) and in%LOCALAPPDATA%\MuseScore\MuseScore 3\pluginson Windows 7 and later - macOS:
/Applications/MuseScore 3.app/Contents/Resources/plugins(to reveal files in the app bundle, right-click onMuseScore 3.appand choose "Show package contents"), and in~/Library/Application Support/MuseScore/MuseScore 3/plugins. - Linux:
/usr/share/mscore-3.x/pluginsand in~/.local/share/data/MuseScore/MuseScore3/plugins. These folders should not be modified. The directory names might be different depending on language setting of the operating system.
See also
External links
- Developers' Handbook Plugins for 3.x