Aloittaminen
Tämä luku auttaa sinut asentamaan MuseScoren ja käynnistämään sen ensimmäistä kertaa. Luku näyttää myös, miten uusi partituuri luodaan.
Asennus
MuseScore toimii moninaisilla eri käyttöjärjestelmillä kuten Windowsilla, macOS:llä sekä monilla Linux-jakelupaketeilla ja useilla BSD-jälkeläisillä.
Asenna Windowsille
Asenna
Löydät Windows asennusohjelman MuseScoren verkkosivujen lataussivulta. Klikkaa linkkiä aloittaaksesi latauksen. Internet-selaimesi vahvistaa, että haluat ladata tiedoston. Klikkaa Tallenna tiedosto.
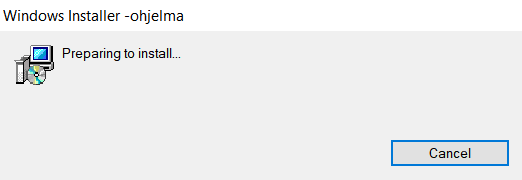
Kun lataus on valmis tiedoston kaksoisklikkaaminen aloittaa asennuksen. Windows saattaa avata turvallisuusikkunan ja pyytää teitä vahvistamaan ohjelman käynnistämisen. Valitse Suorita jatkaaksesi, Näet silloin lyhyesti

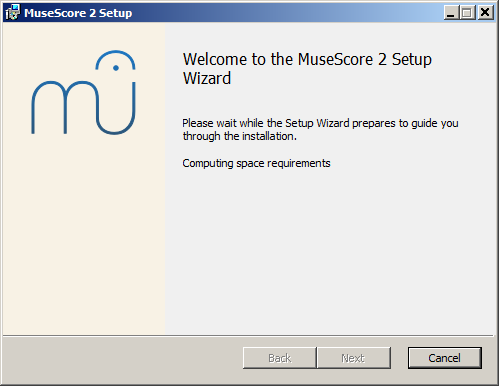
jota seuraa

Jos et näe asennusohjelman ikkunaa vaan jotain muuta, on mahdollista, että msi. laajennus ei ole liitetty msiexec.exe:een. Voit joko korjatan liittämisen tai sen sijaan ladata ja ottaa käyttöön MuseScoren kannettavan version.
Jatkaessa näet
Jos klikkaat Cancel, tässä tai myöhemmin, näet:
Sen sijaan jos klikkaat Next jatkaaksesi, asennusavustaja näyttää ilmaisen ohjelmistolisenssin ehdot.
Lue ohjelmistolisenssin ehdot, varmista, että laatikko on ruksattu kohdasta "I accept the terms in the License Agreement", ja klikkaa Next jatkaaksesi. Seuraavaksi asentaja pyytää sinua vahvistamaan MuseScoren asennussijainnin.
Jos olet asentamassa uudemman version MuseScoresta, mutta haluat silti pitää vanhan version tietokoneessasi, sinun pitää silloin vaihtaa kansiota (huomioi, että MuseScore 2 voi olla yhtä aikaa olemassa MuseScore 1:n kanssa ilman mitään muutoksia). Muulloin, klikkaa Next jatkaaksesi.
Klikkaa Install jatkaaksesi.
Anna asennusavustajalle aikaa asentaakseen tarvittavat tiedostot ja kokoonpanot. Näet
ja lopulta
KlikkaaFinish poistuaksesi asentajasta. Voit nyt poistaa lataamasi asennustiedoston.
Käynnistä MuseScore
Käynnistääksesi MuseScoren päävalikosta, valitse Start→Kaikki ohjelmat→MuseScore 2→MuseScore 2.
Asennuksen poisto
Voit poistaa MuseScoren asennuksen päävalikosta valitsemalla Käynnistä→Kaikki ohjelmat→MuseScore 2→Poista MuseScore; tai Windowsin ohjauspaneelista. Huomioi, että tämä ei poista sinun partituurejasi tai MuseScore-asetuksiasi.
Vianmääritys
Windows XP:ssä ja Vistassa järjestelmä saattaa estää asentajan. Jos et voi suorittaa MuseScoren asennusta, klikkaa hiiren kakkospaiikkeella lataustiedostoa ja klikkaa ominaisuudet. Jos näet viestin "This file came from another computer and might be blocked to help protect this computer", klikkaa "Unblock", "OK" ja tuplaklikkaa lataustiedostoa uudestaan.
Ulkoiset linkit
Asenna macOS:lle
Asennus
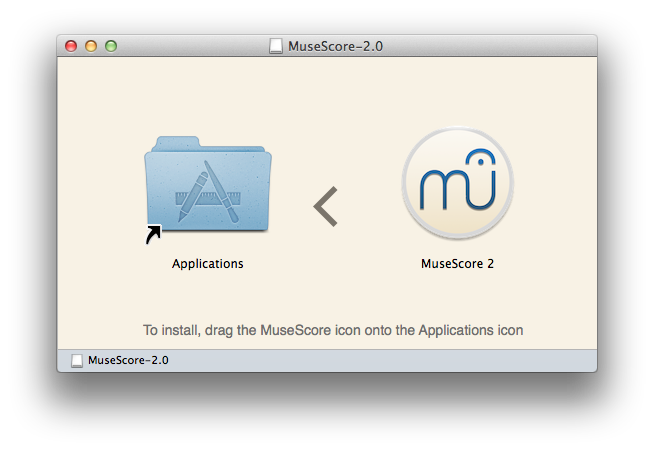
Löydät Macin DMG-tiedoston (disk image) MuseScoren lataa-sivulta. Käynnistä lataus klikkaamalla macOS-linkkiä. Kun lataus on suoritettu, tuplaklikkaa DMG-tiedostoa asentaaksesi näköistiedoston.

Drag and drop the MuseScore icon to the Applications folder icon.
Jos et ole kirjautunut ylläpitäjänä, macOS saattaa kysyä salasanaa: klikkaa Authenticate ja syötä salasanasi jatkaaksesi.

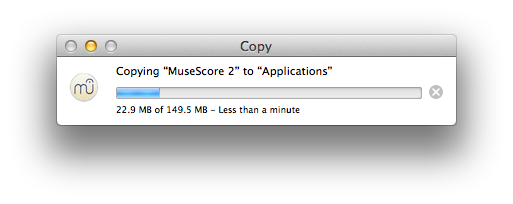
When the application has finished copying, eject the disk image. You can now launch MuseScore from the Applications folder, Spotlight, or Launchpad.
Poista asennus
Poista MuseScore Sovellukset-kansiosta, ei muuta.
Asenna Apple Remote Desktopilla
You can deploy MuseScore to multiple computers with the "Copy" feature of ARD. Since MuseScore is a self-contained application you can simply copy the application to the '/Application' folder on the target machines. It is also possible to install multiple versions of the application as long as their names differ.
Ulkoiset linkit
Asenna Linuxille
As of MuseScore 2.0.3 you can, for the first time, get hold of a copy for Linux straight from the download page, just like Windows and Mac users. This is possible thanks to the AppImage packaging format, which runs on pretty much all Linux distributions. If you prefer, there is still the option to get it the traditional way via your distribution's package manager (but you may have to wait for it to get packaged by the relevant maintainer). Of course, you can always build from source.
AppImage
The AppImage format is a new way of packaging Linux applications. AppImages are portable - they don't have to be installed - and they run on pretty much any Linux distribution. Dependencies are included in the one AppImage file.
Step 1 - Download
Before you download an AppImage, you need to know your processor's architecture. These terminal commands will show it:
archor
uname -m
The output will be something like "i686", "x86_64" or "armv7":
i686(or similar) - 32-bit Intel/AMD processor (found on older machines).x86_64(or similar) - 64-bit Intel/AMD processor (modern laptop and desktop computers, most Chromebooks).armv7(or later) - ARM processor (phones & tablets, Raspberry Pi 2/3 running Ubuntu Mate, some Chromebooks, usually 32-bit at present).
Now you can head over to the download page and find the AppImage that best matches your architecture. Once downloaded, the file will be named "MuseScore-X.Y.Z-$(arch).AppImage".
Step 2 - Give execute permission
Before you can use the AppImage you need to give permission for it to be run as a program.
From the Terminal:
This command gives the user (u) permission to execute (x) the AppImage. It works on all Linux systems.
    cd ~/Downloads
    chmod u+x MuseScore*.AppImage
Note: Use the "cd" command to change directory to wherever you saved the AppImage.
From a File Manager:
If you prefer to avoid the command line, there is usually a way give execute permission from inside a File Manager.
In GNOME Files (Nautilus), simply:
- Right-click on the AppImage and select "Properties".
- Open the "Permissions" tab.
- Enable the option labelled "Allow executing file as a program".
The process may be slightly different in other file managers.
Step 3 - Run it!
Now you should be able to run the program simply by double-clicking on it!
When you downloaded the AppImage it was probably saved in your Downloads folder, but you can move somewhere else it at any time (e.g. you could put it on your desktop for easy access). If you ever want to remove it then simply delete it.
Installing the AppImage (optional)
You can run the AppImage without installing it, but you must install it if you want it to be completely integrated with your desktop environment. This has the following benefits:
- Adds the AppImage to your Applications Menu or Launcher
- Sets the correct icons for MuseScore's files (MSCZ, MSCX) and for MusicXML files (MXL, XML)
- Makes the AppImage available via your File Manager's right-click "Open with..." menu
To install it, run the AppImage from the Terminal with the "install" option (see immediately below). This copies a desktop file and various icons to your computer. If you want to remove them you will need to run the "remove" option before you delete the AppImage. This does not affect any scores created with any version of MuseScore.
Using command line options
Running the AppImage from the Terminal allows you to use various command line options. The AppImage has some special options in addition to MuseScore's normal command line options.
You will need to change directory (cd) to wherever the AppImage is saved your system, for example:
    cd ~/Desktop
    ./MuseScore*.AppImage [option...]
Or give the path to the AppImage:
~/desktop/MuseScore*.AppImage [option...]
Use the "--help" and "man" options to get more information about the available command line options:
    ./MuseScore*.AppImage --help   # displays a complete list of command line options
    ./MuseScore*.AppImage man      # displays the manual page (explains what the options do)
Distribution Packages
Fedora
-
Import the GPG key:
su
rpm --import http://prereleases.musescore.org/linux/Fedora/RPM-GPG-KEY-Seve
-
Go to the download page of the MuseScore website. Click on the link for the stable Fedora download and choose the correct rpm package for your architecture.
-
Depending on your architecture, use one of the two sets of commands to install MuseScore
- for arch i386
    su
    yum localinstall musescore-X.Y-1.fc10.i386.rpm
- for arch x86_64
    su
    yum localinstall musescore-X.Y-1.fc10.x86_64.rpm
If you have difficulty with sound, see Fedora 11 and sound.
See also the hints for the various distributions on the download page.
External links
Asenna Chromebookille
Työpöytäsovellus
MuseScoren työpöytäsovellus ei toimi luonnostaan Chrome OS -käyttöjärjestelmässä, mutta siihen on olemassa joitakin hätäratkaisuja:
- Via Crouton: Involves installing a Linux based operating system which runs in parallel with Chrome OS, and then installing MuseScore on Linux.
- Via software-on-demand service such as rollApp: By just visiting this website, you can run MuseScore in the browser, but you can only start scores from scratch and only save them to your online MuseScore account through the menu File→Save Online..., and sound and playback does not work.
Android app (playback only)
Alternatively, it is possible to install MuseScore's Android app on recent Chromebooks. You will need to update to the latest version of Chrome OS first. See the Chromebook support documentation for help installing Android apps on Chromebooks, and a list of supported devices. The app only supports playback of existing scores, not score editing or creation, but you can sign-in to your MuseScore account for easy access to all your scores on MuseScore.com.
Ulkoiset linkit
Kieliasetukset ja käännösten päivitykset
MuseScore asennetaan ja toimii "järjestelmän" kielellä (joka on käytössä suurimmalla osalla ohjelmista, ja tavallisesti riippuen maastasi ja tietokoneesi kieliasetuksista tai käyttäjätilistä).
Vaihda kieltä
- Valitse päävalikosta Muokkaa→Asetukset... (Mac: MuseScore→Asetukset...);
-
Välilehdestä Yleinen, valitse haluttu kieli pudotusvalikosta kohdasta Kieli:
-
Päivttääksesi käännöksiä, napauta Päivitä kielten käännökset. Napauta sitten Päivitä-painikkeita kielistä, joita haluat päivittää (katso vaihtoehtoinen menetelmä alhaalta).
Sinun täytyy sulkea ja avata uudelleen MuseScore, jotta muutokset ja päivitykset astuvat voimaan.
Päivitä kielten käännökset
Voit päivittää käännökset ylläolevan esimerkin mukaan asetuksien kautta, mutta on olemassa myös toinenkin tapa:
- Valitse päävalikosta Ohje→Resurssienhallinta;
-
Napauta Päivitä-painiketta kielille, joita haluat päivittää.
Tässäkin tapauksessa sinun täytyy sulkea MuseScore ja avata se uudelleen, jotta muutokset ja päivitykset astuvat voimaan.
Katso myös
Ulkoiset linkit
Päivitysten tarkistaminen
Päivitysten tarkistamiseen on kaksi tapaa.
Automatisoitu päivitysten tarkastaminen
- Valitse päävalikosta Muokkaa→Asetukset... (Mac: MuseScore→Asetukset...);
- Valitse Päivitys-välilehti:
- Ruksaa laatikko, jonka vieressä lukee "Tarkista uusin MuseScoren versio."
Nyt MuseScore tarkistaa päivitykset jokaisen käynnistyksen yhteydessä ja ilmoittaa sinulle tarvittaessa.
Tarkista päivitykset
- Valitse päävalikosta Ohje→Tarkista päivitykset:
- Ilmestyy päivityksen tilaa ilmaiseva valintaikkuna: joko "Ei päivityksiä saatavilla" tai "päivitys MuseScorelle on saatavilla", jota seuraa päivityksen asennukseen ohjaava linkki.
Huomioi: Nämä vaihtoehdot ovat saatavissa vain MuseScoren Mac- ja Windows-versioille (poikkeuksena Windows Storen versio), koska vain ne voidaan päivittää suoraan sivustolta MuseScore.org. Linuxin jakelupaketeilla (ja Windows Storella) on eri mekanismeja päivitysten saatavuudelle.