תצוגה וניווט
נגישות
קוראי מסך
MuseScore 4 תומך בקוראי המסך הבאים בכל מערכת הפעלה:
- Windows 10 ו-11: Narrator ו-NVDA
- macOS: VoiceOver
- Linux: Orca
דיבור עובד בעיקר עם JAWS, אבל הפלט אינו מושלם כפי שהוא עם Narrator או NVDA.
דיבור ב-Windows
אם פלט דיבור של קורא מסך מפסיק לעבוד עבורך בכל עת, נסה ללחוץ Alt+F כדי למקד את תפריט הקובץ, ולאחר מכן לחץ על Esc פעמיים כדי לחזור למקום שבו היית באפליקציה, ובשלב זה הדיבור אמור לעבוד שוב כרגיל. זה יכול להיות נחוץ לעשות זאת אם אתה מפעיל את קורא המסך לאחר ש-MuseScore כבר פועל, למשל.
דיבור ב-macOS
יש לכבות את מצב הניווט המהיר של VoiceOver בזמן השימוש ב-MuseScore 4. אתה יכול להפעיל או לכבות את הניווט המהיר על ידי לחיצה על מקשי החיצים שמאל וימין בו-זמנית בזמן ש-VoiceOver פועל, או שאתה יכול להשבית את הניווט המהיר מתוך כלי השירות VoiceOver > Commanders.
ניתן לנווט בממשק של MuseScore עם סמן הכרטיסיות ועם הסמן של VoiceOver עצמו. באופן כללי עדיף להשתמש בסמן הכרטיסיות מכיוון שהוא תואם את הממשק בפלטפורמות אחרות, וככזה הוא הממשק המתואר ברוב התיעוד וההדרכות. ניתן להשתמש בסמן של VoiceOver כדי להגיע לאזורים באפליקציה שעדיין אינם נגישים באמצעות סמן הכרטיסייה. בעת שימוש בסמן הכרטיסייה, זכור להשתמש גם במקשי החיצים Tab עבור ניווט (ראה ניווט בממשק המשתמש).
דיבור ב-Linux
ב-Linux יש צורך להפעיל את קורא המסך לפני שתפעיל את MuseScore, אחרת תכונות הנגישות יושבתו כדי לחסוך במשאבי מערכת. אם תשכח לעשות זאת, פשוט צא מ-MuseScore והפעל אותו שוב. הדבר נכון לגבי כל יישומי Linux הבנויים על מסגרת Qt.
Orca הוא קורא המסך המלא ביותר הזמין עבור לינוקס. Orca מובנית בסביבת שולחן העבודה של GNOME, לכן מומלץ למשתמשי Linux עם צרכי נגישות להשתמש בהפצה המבוססת על GNOME או על אחת מהנגזרות שלו.
גישה למקלדת
ניווט בממשק המשתמש
ניווט מקלדת בממשק המשתמש (UI) של MuseScore 4 מסתמך על מקשי החיצים בנוסף למקש ה-Tab. הקש על מקש ה-Tab כדי לעבור בין כל קבוצת בקרה, ולאחר מכן השתמש במקשי החיצים כדי לנווט לפקדים בודדים בתוך הקבוצה. מערכת ניווט חדשה זו מאפשרת לך לנווט לכל מקום בממשק עם הרבה פחות לחיצות מקשים מאשר אם מקש ה-Tab משמש לגישה לכל פקד בודד, כפי שקורה בדרך כלל ביישומים אחרים, כולל גרסאות קודמות של MuseScore. מערכת הניווט החדשה עדיין בשיפור, ומשוב יתקבל בברכה בפורום הפיתוח.
בנוסף למקשי החיצים והכרטיסייה, יש קיצור דרך חדש F6 שיעביר אותך בין פאנלים שונים בתוכנית. הנה איך קיצורי הניווט עובדים יחד כדי ליצור מערכת ניווט היררכית:
-
מקשי החיצים למעלה, למטה, שמאל וימין: העבר את המיקוד מפקד אחד למשנהו בתוך קבוצת בקרה (למשל, נווט בין לחצנים בסרגל כלים).
-
Tab וShift+Tab: העבר את המיקוד מקבוצת בקרה אחת לקבוצה הבאה (למשל, נווט בין סרגלי כלים).
-
F6 וShift+F6: העבר את המיקוד בין לוחות וחלקים גדולים של ממשק המשתמש (למשל, נווט מסרגלי כלים לתצוגת לוחות הצבעים או התווים).
כברירת מחדל, מקש ההדגשה הרציני ` (המכונה לפעמים "backtick") יכול לשמש כחלופה לF6 לניווט בין לוחות. מקש ההדגשה הרציני נמצא מעל Tab ברוב מקלדות ה-QWERTY. אם זה לא קיים במקלדת שלך, שקול לשנות את קיצור הדרך הזה בהעדפות כדי להגדיר אותו למקש שמעל Tab במקלדת שלך, מכיוון שזה יכול להיות נוח שמקשי הניווט ממוקמים קרוב זה לזה.
לאחר שניווטת ללחצן או פקד, ברוב המקרים ניתן להפעיל אותו על ידי לחיצה על מקש הרווח, Enter או Return. בתוך רשימות ותצוגות פריטים אחרות, מקש הרווח משמש לעתים קרובות לבחירת פריטים במקום להפעלתם. לאחר הבחירה, ניתן למחוק פריטים מסוימים על ידי לחיצה על Delete, או על ידי לחיצה על פקדי ממשק משתמש אחרים שנעשים פעילים ברגע שמשהו נבחר. לדוגמה, ניתן להשתמש בגישה זו בתוך חלונית הכלים כדי להסיר כלים שהוספת בעבר לתווים.
ניווט בתווים
הניווט בתוך התווים (כלומר בתוך "תצוגת התווים") זהה במידה רבה לזה שהיה ב-MuseScore 3. להלן קיצורי הדרך בעלי ערך מיוחד למשתמשי נגישות:
| קיצור | פעולה |
|---|---|
| Alt+ימין וAlt+שמאל | עבור לאלמנט הבא או הקודם. קיצורי דרך אלה מאפשרים לך לבקר בכל מיני רכיבי תווים, לא רק תווים והפסקות. |
| Alt+למעלה וAlt+למטה | מעבר לצליל מעל או מתחת. קיצורי דרך אלו מאפשרים לנוע בין תווים בודדים באקורד, וגם להגיע לתווים והפסקות בקולות אחרים וחמשות אחרות. |
| F2 או Alt+Shift+E | ערוך את האלמנט שנבחר. זוהי המקבילה למקלדת של לחיצה כפולה על רכיב עם העכבר. זה מאפשר לך לערוך אובייקטי טקסט, כולל מילים, דינמיקה וסימוני טמפו. זה גם מאפשר לך להתאים את אורך רכיבי הקו כגון קרשנדו, קשת ווולטה (השתמש בTab כדי לשנות את קצה השורה שאתה מכוון). כשתסיים לערוך, לחץ על Esc כדי לחזור למצב הרגיל. |
היבטים אחרים של ניווט במקלדת מתוארים בדפים לאורך מדריך זה.
מדריכי וידאו
מדריכי הנגישות הבאים נועדו לתת לך דחיפה קדימה בניצול של MuseScore, באמצעות המקלדת וקורא המסך שלך. הם לא מכסים כל היבט של התוכנה, אבל הם אמורים לתת לך בסיס שיאפשר לך לנצל את מלוא היתרונות של שאר המדריך הזה.
| סרטון | תיאור |
|---|---|
| התקנת MuseScore | סרטון זה מכסה את ההתקנה של MuseScore on Windows, כולל Muse Hub ו-Muse Sounds. התהליך דומה ב-macOS ו-Linux, למרות שב-Linux אתה צריך להתקין את Muse Hub ו-MuseScore בנפרד. |
| הגדרות תווים | סרטון זה מכסה את ההגדרה הראשונית של התווים שלך, כולל בחירת כלי נגינה, בחירת המפתח, חתימת הזמן והגדרות נוספות. |
| נכנסים למוזיקה | סרטון זה מכסה קלט תווים בסיסי. |
| הוספת סימנים | סרטון זה עוסק בהוספת סימנים כגון דינמיקה לתווים שלך, על ידי שימוש בפלטות. |
| ממשק המשתמש | סרטון זה עובר בחלון הראשי של התוכנית, כך שתוכל להבין היכן נמצאים כל הפאנלים, סרגלי הכלים והפקדים השונים וכיצד להגיע אליהם באמצעות המקלדת. |
ממשק המשתמש
שורת התפריטים

שורת התפריטים ב-MuseScore 4 מכילה את התפריטים הבאים:
- קובץ: צור קובץ חדש, פתח ושמור קבצים, ייבא וייצא פורמטים שונים, צור וערוך חלקי מסמכים והדפס.
- עריכה: אפשרויות ביטול וביצוע מחדש, אפשרויות העתקה/גזירה/הדבקה ואפשרויות מצא/לך לפונקציה.
- תצוגה: הצג או הסתר פלטות שונות, דיאלוגים ורכיבי סביבת עבודה אחרים.
- הוספה: הוסף סוגים שונים של רכיבי תווים; תווים, טקסט, תיבות וכו'.
- תצורה: התאם עיצוב גלובלי ומקומי של התווים. מאפשר גם למתוח או לכווץ את התווים, לטעון ולשמור סגנונות תווים ועוד הרבה יותר.
- כלים: פקודות שימושיות רבות זמינות כאן, כולל טרנספוזיציה, החלפת קולות, סימון נטוי וכו'.
- תוספים: נהל את התוספים שלך.
- עזרה: גש למדריך המקוון, דווח על באגים, תן משוב ושחזר את הגדרות היצרן.
משתמשי מקלדת ב-Windows ו-Linux יכולים לגשת לתפריטים אלה על ידי החזקת המקש Alt ולחיצה על מקש אות או מספר מסוים, המכונה מקש גישה נמונית, המוצג עם קו תחתון בשם פריט התפריט שאתה מחפש. לדוגמה, הקש Alt+F עבור קובץ ואחריו Alt+A עבור שמירה בשם. האותיות 'F' ו'a' מסומנות בקו תחתון בממשק המשתמש בעוד מקש הAlt מוחזק.
ב-macOS, התפריטים של MuseScore הם חלק משורת התפריטים בכל המערכת, שאליו תוכל לנווט על ידי לחיצת Ctrl+F2.
לשונית הבית

מתחת לתפריט הראשי יש שלוש לשוניות, הראשונה שבהן היא לשונית בית. כרטיסייה זו מכילה את הסעיפים הבאים:
חשבונות
צור חשבון MuseScore חדש, או היכנס לחשבון הקיים שלך. עם חשבון פעיל, אתה יכול לקבל סיוע טכני ולדווח על באגים בפורומים בכתובת musescore.org. אתה יכול גם לשמור את הקבצים שלך על הענן בmusescore.com.
פרטיטורות
סעיף זה מאפשר לך ליצור פרטיטורות חדשות, או לפתוח קבצים קיימים. למד על יצירת תווים חדשים בהגדרת התווים שלך.
תוספים
חלון זה מציג רשימה של תוספים זמינים. ראה את הפרק על תוספים כדי ללמוד על ניהול התוספים השימושיים הללו.
למידה
זה המקום שבו נמצאים מדריכי הוידאו. לחיצה על סרטון הדרכה כלשהו פותחת אותו בערוץ YouTube הרשמי של MuseScore.
לשונית הפרטיטורה

זה המקום שבו אתה עושה את רוב העבודה שלך ב-MuseScore, כולל הוספת תווי מוזיקה והאזנה לתווים שלך. סביבת העבודה מורכבת ממספר אזורים (ממוספרים לפי תוויות בתרשים שלהלן):
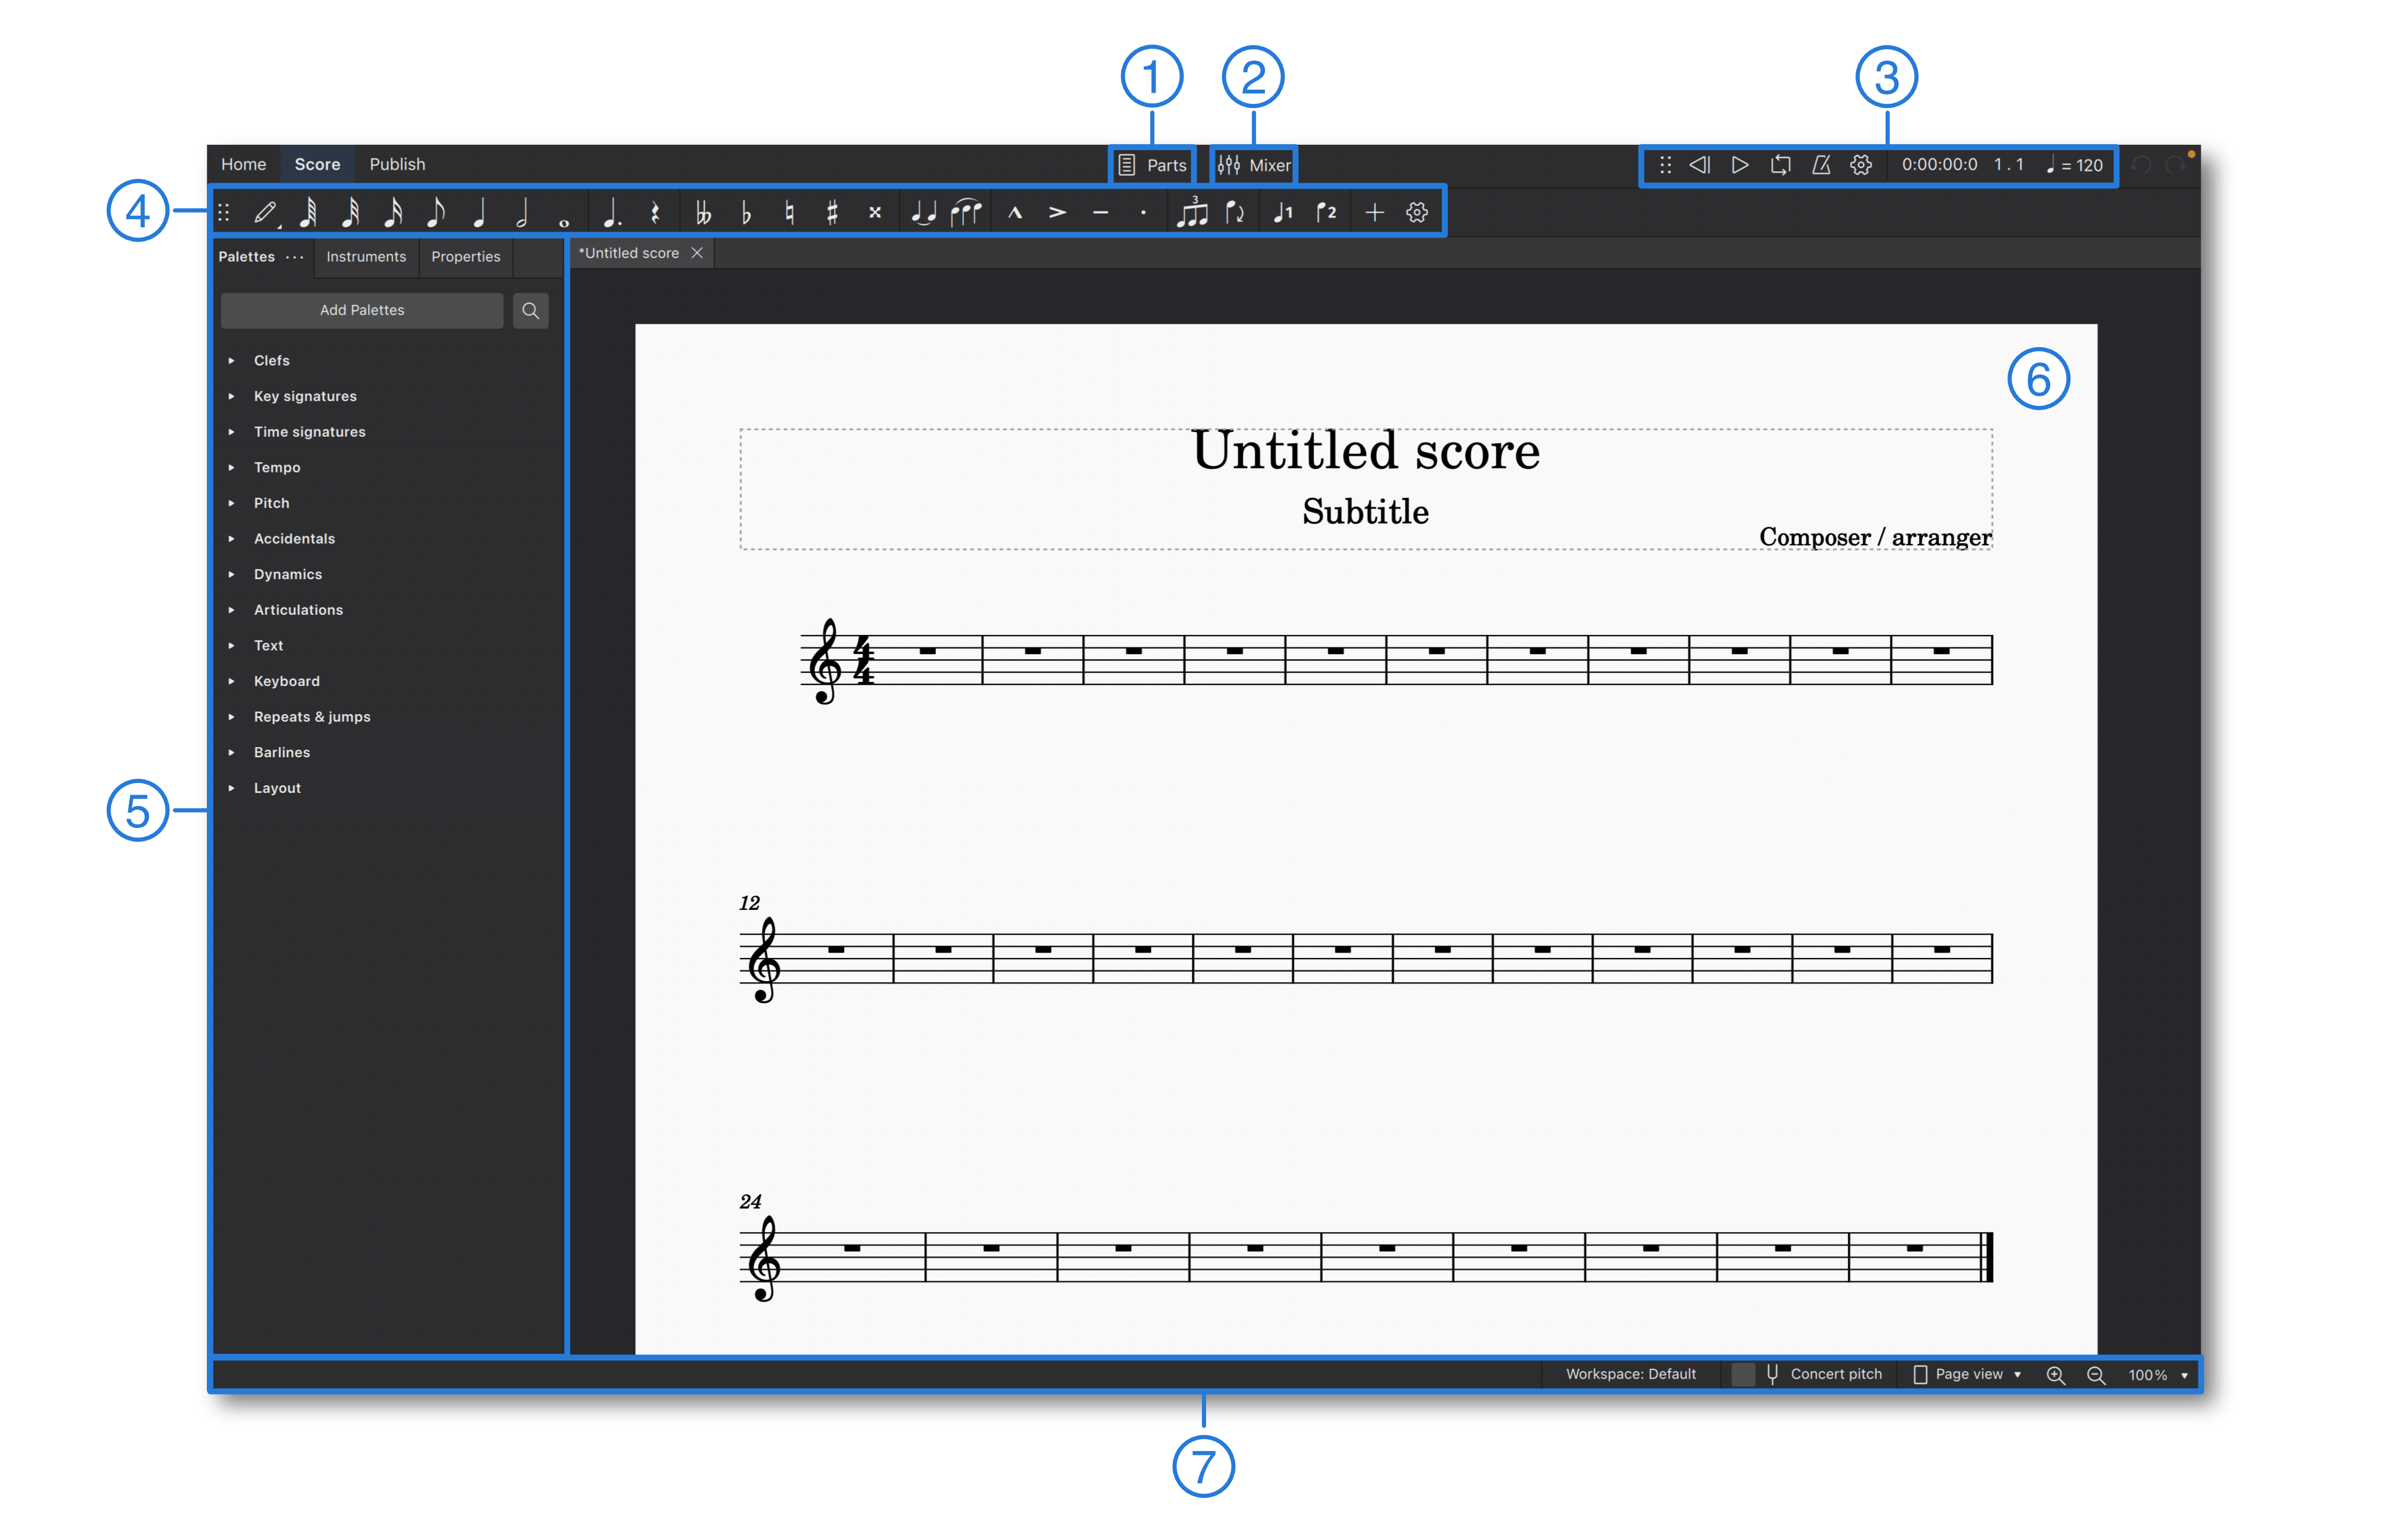
- תפקידים: הכפתור ליד המרכז העליון של החלון פותח את תיבת הדו-שיח תפקידים, שבה ניתן ליצור, לערוך ולמחוק חלקי מסמכי נגינה.
- מערבל: הכפתור מימין לתפקידים פותח וסוגר את חלונית המערבל.
- סרגל כלים של השמעה. ממוקם מימין לסמל המערבל.
- סרגל כלים לקלט תווים: זה משתרע על פני חלון התוכנה, כולל רכיבי סימון חיוניים המשמשים בכתיבת תווים. השתמש בו כדי להגדיר את אורך התווים, להוסיף סימני היתק, להוסיף ארטיקולציות נפוצות, להזין מקצבים אי־רציונליים ולשנות בין קולות.
- סרגל צד: האזור בצד שמאל של התוכנה מכיל לוחות שונים כגון לוחות כלים, מאפיינים, וכלי נגינה. ניתן להסתיר או להציג אותם לפי הצורך.
- חלון המסמך/התווים: אזור זה מכיל את התווים שלך, והוא המקום בו מוסיפים, עורכים ומוחקים רכיבי תווים.
- שורת המצב: זה פועל לאורך החלק התחתון של התוכנה. הצד השמאלי מציג מידע שימושי על התווים כאשר רכיב אחד או יותר נבחרים. הצד הימני מכיל פקדים למעבר בין סביבות עבודה, בחירת תצוגת קונצרט או גובה כיתוב, וציון תצוגת העמוד וגורם הזום (הגדלה).
משתמשי מקלדת יכולים להשתמש במקש Tab או F6 כדי לנווט בין אזורי ממשק משתמש אלה באמצעות המקלדת. בתוך כל אזור, הניווט מתבצע באמצעות מקשי החיצים וTab.
כמעט לכל הפאנלים וסרגלי הכלים ניתן לבטל את העגינה ולמקם מחדש בהתאם לדרישות הפרויקט והעדפות זרימת העבודה שלך. למידע נוסף על כך בסביבת עבודה.
לשונית הפרסום

כרטיסייה זו מאפשרת לך להציג את התווים שלך ללא העומס של סרגל הכלים להזנת תווים או סרגל הצד. ישנן אפשרויות להדפיס את התווים, ולייצא אותם במגוון פורמטים של תמונות, אודיו ומסמכים. כאשר התווים שלך גמורים, אתה יכול גם לפרסם אותם בmusescore.com.
תפריטי הקשר
בחלקים מסוימים של האפליקציה, בעיקר בלשונית הפרטיטורה, תפריטי הקשר זמינים עם פונקציונליות נוספת, כגון אפשרויות להעתיק, לערוך, להתאים אישית, למחוק או להציג את המאפיינים של כל הפריט/ים שנבחרו בזמן שפתחתם את התפריט.
תפריטי הקשר של אלמנטים
בתוך הפרטיטורה, לכל רכיב יש תפריט הקשר. כדי לפתוח את תפריט ההקשר של אלמנט מסוים, לחץ לחיצה ימנית על האלמנט עם העכבר, או בחר את האלמנט באמצעות המקלדת ולחץ על Shift+F10 (לחלק מהמחשבים למקלדות יש גם מקש ייעודי Menu מקש ליד Ctrl הימני). האפשרויות המדויקות הזמינות בתפריט ההקשר עשויות להשתנות בהתאם לסוג האלמנט שבחרת, לכן כדאי להתנסות כדי לגלות אילו אפשרויות זמינות עבור סוגים שונים של אלמנטים. לדוגמה, כאשר אתה לוחץ לחיצה ימנית על אזור ריק בתוך מידה, תפריט ההקשר המתקבל מכיל אפשרויות עבור מאפייני צוות/חלק ומאפייני מדידה. זו כרגע הדרך היחידה להגיע לאפשרויות האלה ולדיאלוגים שהם מובילים אליהם.
תפריטי הקשר של ממשק המשתמש
מחוץ לתווים, נוכחותו של תפריט הקשר מסומן לעתים קרובות על ידי כפתור קטן עם שלוש נקודות, או על ידי גלגל שיניים של הגדרות. לחץ על הכפתור כדי לפתוח את התפריט. לפעמים הכפתור משויך לפריט אחר בסביבה, כגון ב פלטות, כאשר יש כפתור שלוש נקודות עבור כל לוח. במקרה זה אתה יכול ללחוץ לחיצה ימנית על שם הפלטה, או לבחור בו באמצעות המקלדת וללחוץ על קיצור הדרך Shift+F10 או Menu, כחלופה לשימוש בלחצן שלוש הנקודות.
Navigating your score
גלילה
באמצעות גלגל העכבר
- השתמשו בגלגל העכבר על מנת לנוע מעלה או מטה.
- השתמשו במקש Shift יחד עם גלגל העכבר על מנת לנוע ימינה ושמאלה.
פסי הגלילה
פסי גלילה מופיעים בחלק הימני והתחתון של המסך. לחץ וגרור אותם על מנת לזוז בתצוגת פרטיטורה מעלה או מטה, ימינה ושמאלה. פסי הגלילה בדרך כלל חבויים אך ניתן להציג אותם על ידי הצבעה על קצות המסך באמצעות העכבר.
מקלדת
ניתן גם לגלול את הפרטיטורה באמצעות מקשי PgUp, PgDn, Home, ו-End במקלדת. אם במקלדת שלך אין מקשים כאלו, רוב מערכות ההפעלה יאפשרו לך לגשת לפעולות אלו גם באמצעות Fn או כפתור דומה, יחד עם למעלה, למטה, ימינה, או שמאלה בהתאמה.
By themselves, PgUp and PgDn scroll one screenful at a time. This may be less than an actual page of your score. If you hold Ctrl (Mac: Cmd) while pressing PgUp or PgDn, it moves a full page at a time.
Element navigation
When a single element is selected in your score, it acts as a cursor. You can change the selection—and thus move the cursor—using common keyboard shortcuts.
The Left and Right keys will move horizontally through your score one note or rest at a time. If you hold Ctrl (Mac: Cmd) while pressing Left or Right, you can navigate a full measure at a time.
To move the cursor vertically through the various notes, voices, and staves in your score, use the shortcuts Alt+Up and Alt+Down (Mac: Option+Up and Option+Down).
You can also use the shortcuts Alt+Left and Alt+Right (Mac: Option+Left and Option+Right) to select elements other than notes or rests. These commands allow you select almost any elements—including articulations, barlines, hairpins, and more—using the keyboard alone.
In addition, Ctrl+Home (Mac: Cmd+Home) will select the first element in your score, and Ctrl+End (Mac: Cmd+End) will select the last element. Again, for keyboards that lack dedicated Home and End keys, most systems provide the alternative of Fn+Left and Fn+Right respectively.
See Default keyboard shortcuts to learn more.
Navigator
The Navigator is a panel that displays thumbnails of score pages. To view or hide the Navigator, click View → Navigator.
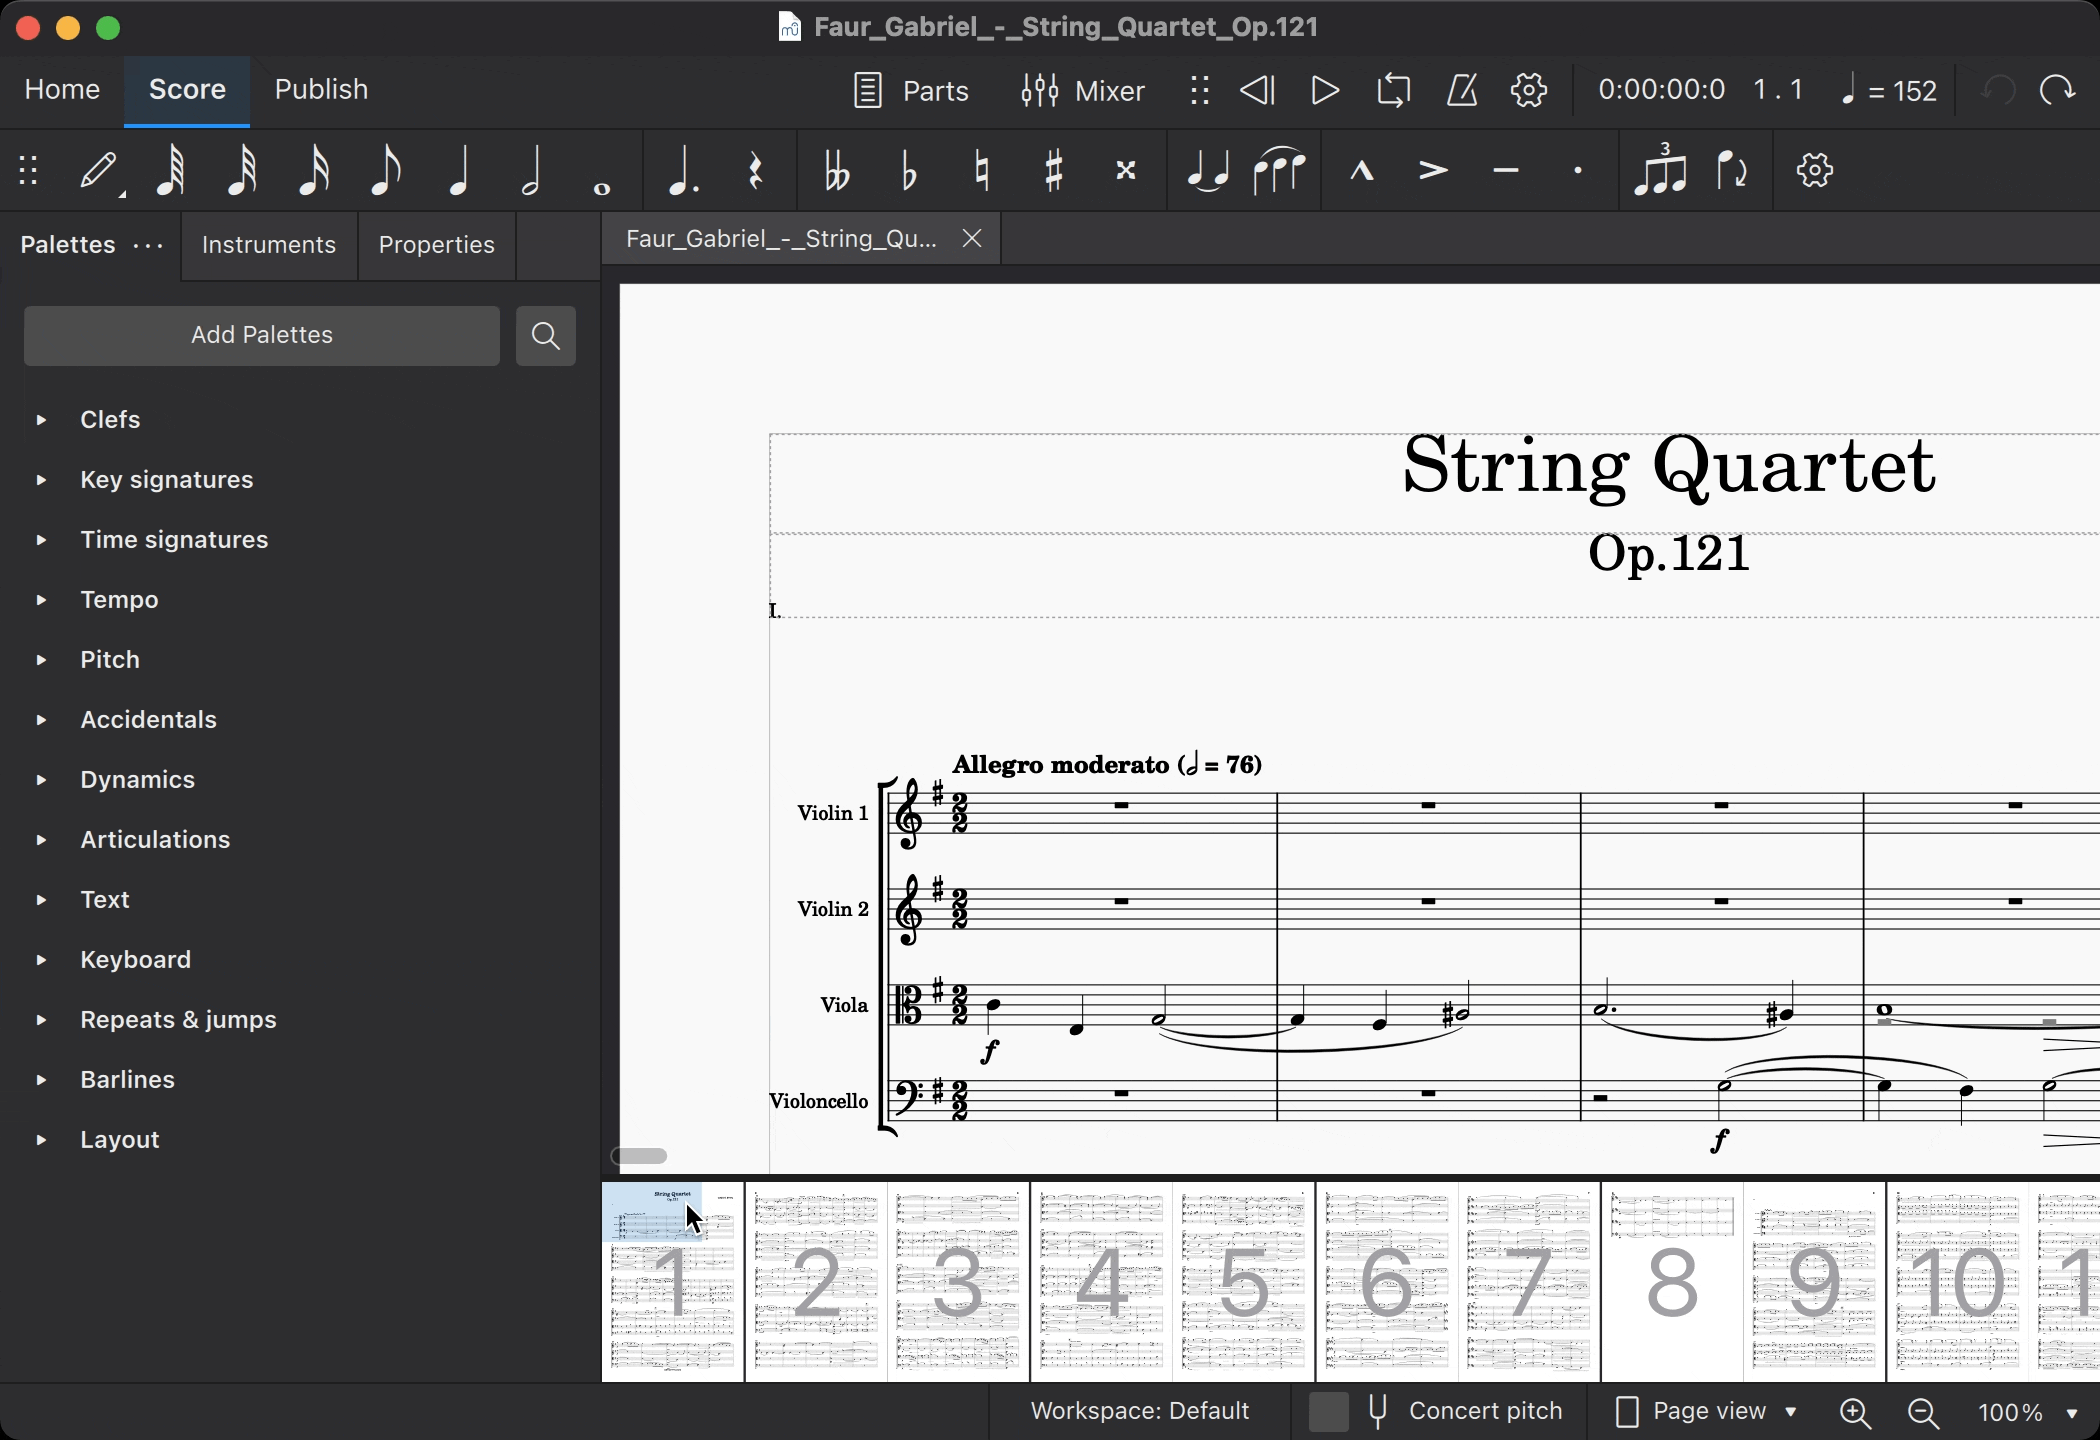
The blue bounding box represents the area of the score currently in focus in the score view. Click on the box and drag it to move around your score.
Timeline
A navigation aid that shows instruments and score structure. For details, see Timeline.
Views
You can switch between different views of the score using the pop-up in the right-hand side of the status bar.

Page view
The score is shown as it will appear when printed or exported as a PDF or image file: that is, page by page, with margins. MuseScore applies system (line) and page breaks automatically, according to the settings made in Page settings and Style. In addition, you can apply your own system (line), page or section breaks.
Continuous view (horizontal)
The score is shown as one unbroken system. Even if the starting point is not in view, measure numbers, instrument names, clefs, time and key signatures will always be displayed on the left of the window.
Continuous view (vertical)
The score is shown as a single page with a header but no margins, and with an infinite page height. System (line) breaks are added automatically, according to the settings made in Page settings and Style. In addition, you can apply your own system (line) or section breaks.
Zoom
There are several ways to zoom the score in or out:
Zoom in
Ctrl++ (Mac: Cmd++)
or scroll up with the mouse scroll wheel while holding Ctrl (Mac: Cmd).
Zoom out
Ctrl+- (Mac: Cmd+-)
or scroll down with the mouse scroll wheel while holding Ctrl (Mac: Cmd).
Status bar zoom controls
To zoom in and out of your score from the Status bar controls:
- Click on the magnifying glass icons in the right-hand area of the status bar
- Click the number field to the right of these icons, then type a custom zoom level
- Choose from one of the preset zoom levels in the pop-up list on the extreme right
Restoring 100% zoom
This restores the zoom to the default (100%) level.
Ctrl+0 (Mac: Cmd+0)
Find/Go to
The Find/Go to panel allows you to speedily navigate to a specific measure, rehearsal mark or page number in the score.
To show the panel:
- Go to Edit → Find, or
- Press Ctrl+F (Mac: Cmd+F).
To hide the panel:
- Click the X (close) button on the left side of the panel, or
- Press Esc while the panel has focus.
Navigating to a numbered measure
Enter the measure number (counting every measure, starting with 1, irrespective of pickup measures, section breaks or manual changes to measure number offsets).
Navigating to a numbered page
Enter the page number using the format pXX (where XX is the page number).
Navigating to a numerical rehearsal mark
Enter the number using the format rXX (where XX is the number of the rehearsal mark).
Navigating to an alphabetic rehearsal mark
Enter the name of the rehearsal mark (the search is not case sensitive).
Pro tip! It is best to avoid naming rehearsal marks with the single letters “R", “r", “P”, “p", or one of these letters with an integer (e.g. “R1” or “p3”), as this can confuse the search algorithm.
Timeline
Overview
Timeline is a navigation aid that displays at the bottom of the program window, giving you an overview of the instruments and main structural elements measure-by-measure. You can easily move about the score by clicking on a measure or a structural element.
There are four parts to the timeline:
Meta labels
This is found in the top left corner of the timeline. These are the names of the meta rows.
Instrument labels
This is found in the bottom left corner of the timeline. These are the names of the rows in the main grid.
Meta rows
This is found in the top right corner of the timeline. These hold the meta values of the score.
Main grid
This is found in the bottom right corner of the timeline. This holds multiple 'cells' (a specific measure and staff in the score represented as a square)
Meta elements
Meta elements are those found in the score that are not notes, but are still important to the score—such as key signature, time signature, tempo, rehearsal marks, bar lines, and jumps and markers.

Basic interactions
Selecting a measure
To select a measure in the timeline, press the mouse button on the cell. A blue box will appear around the selected cell and the respective measure in the score will be selected. The score view will place the selected measure in view.
Selecting multiple measures
Drag selection
Holding Shift and holding the left mouse button and dragging the mouse over the main grid will create a selection box. Upon releasing the mouse button, all the cells underneath the selection box will be selected, as well as all the measures in the score.
[Shift] selection
If a cell is already selected, holding Shift and selecting another cell in the timeline will stretch the selection to that new cell, similar to how the score does
[Ctrl] selection
If no cells are currently selected, holding Ctrl and selecting a cell will select the entire measure
Clearing a selection
To clear selection, holding Ctrl and clicking anywhere on the grid or the meta rows will clear any current selection.
Meta values selection
Selecting the meta values on the timeline will attempt to select the respective meta values in the score.
Scrolling
Standard scrolling
Scrolling the mouse wheel up or down will move the grid and instrument labels down or up respectively. The meta labels and rows do not move.
[Shift] scrolling
Holding Shift and scrolling the mouse wheel up or down will move the grid and meta rows left or right respectively. The meta labels and instrument labels do not move.
[Alt] scrolling
Holding Alt and scrolling the mouse wheel up or down will move the grid and meta rows left or right respectively, faster than Shift scrolling. The meta labels and instrument labels do not move.
Dragging
To drag the contents of the timeline, hold the left mouse button and move it around.
Labels interaction
Rearranging meta labels
All meta labels besides the measures meta may be rearranged in any way. By moving the mouse cursor onto one of the meta labels, small up and down arrows will appear. Click the left mouse button on the up arrow to swap the meta label with the one above it. Click the left mouse button on the down arrow to swap the meta label with the one below it.
Collapsing the meta labels
In order to hide all the meta labels while keeping all the meta information on the timeline, click the left mouse button on the measures meta to collapse all the currently visible meta rows into one row, where the meta values are staggered in that row. Click the left mouse button again on the measures meta to expand the meta rows.

Hiding instruments
All instruments--hidden or not--will be displayed on the timeline. To start this interaction, the mouse cursor is moved over an instrument label. A small eye will appear on the right side of the label that is open if the instrument is visible on the score, and closed if the instrument is hidden. Click the left mouse button on the eye to toggle between the two options.

Zooming
To zoom in or out of the score, hold Ctrl and scroll the mouse wheel up or down respectively (Mac: Cmd + scroll).
Braille
Overview
MuseScore 4.1 added a braille panel that displays the current measure in braille music notation. The content is similar to what you get if you export braille via the File menu, but the braille panel updates live as you navigate through the score.
As of MuseScore 4.2, the braille panel can be used to enter notes and some musical symbols using Perkins-style 6-key braille input.
Output to a physical braille display
The contents of the braille panel can be displayed on a braille terminal connected to your computer (e.g. via Bluetooth or USB).
The following limitations apply when using a physical braille display:
- NVDA must be used as the screen reader.
- MuseScore’s braille panel must have keyboard focus.
- When the score has focus, the braille terminal will just show ordinary status text from the screen reader.
- Braille navigation and 6-key input must be performed with the computer keyboard.
- Physical buttons on the braille terminal are not used, except to scroll within a measure that is too long to fit on your display.
Please let us know in the Documentation forum if you discover a way to bypass any of these limitations.
Terminology: braille vs. print
On this page, we refer to MuseScore's ordinary stave notation as "print music". This is the traditional music notation that sighted musicians use on paper or electronic devices, and is displayed in the central region of MuseScore's main window, known as the score view.
Braille can also be used on paper, but it's not printed with ink. Instead, it's embossed as raised dots, which blind musicians read by touch. It is common in accessibility circles to use the word "print" to mean non-braille notation.
Viewing braille
To open or close the braille panel
- Go to Preferences > Braille.
- Check (or uncheck) the Show braille panel box.
The braille panel appears directly below the score in MuseScore’s main window.
To focus the braille panel
With the braille panel open, press the Tab key while the score has focus. A caret (text cursor) will appear in the braille at the position of whatever element was selected in the score. For example, if a note was selected in the score, the text caret will appear on that note in the braille.
Press Shift+Tab at any time to leave the braille panel and return to the score. The braille panel will remain open so you can navigate to it again with Tab.
Navigating the braille
While the braille panel has focus, you can move the text caret around using the arrow keys. As the caret moves through the braille, the element to the right of the caret becomes selected in the score. If that element is a note, MuseScore will play the sound of the note.
The braille panel only shows one measure at a time, but it shows that measure for all instruments in the score. Each line of braille corresponds to a staff in the print notation, so grand staff instruments like the piano get two lines of braille, and the organ gets three lines.
If a staff has lyrics, these are written on another line of braille immediately below the line corresponding to that staff. If there are multiple lines of lyrics (e.g. for multiple verses), each line of lyrics is written on a separate line in the braille.
Shortcuts for navigation
The following keyboard shortcuts are available for navigating the braille.
| Action | Windows/Linux | macOS |
|---|---|---|
| Go to next braille cell | Right | Right |
| Go to previous braille cell | Left | Left |
| Go to braille line above | Up | Up |
| Go to braille line below | Down | Down |
| Go to next measure | Ctrl+Right | Cmd+Right |
| Go to previous measure | Ctrl+Left | Cmd+Left |
| Go to beginning of score | Ctrl+Home | Cmd+Fn+Left |
| Go to end of score | Ctrl+Emd | Cmd+Fn+Right |
| Toggle braille input mode on/off | N | N |
Writing braille
Notes and certain musical symbols can be entered in the braille panel using a 6-key method of braille input similar to that of the Perkins Brailler.
Turn braille input mode on or off
While the braille panel has focus, press N to toggle braille input mode on or off.
Constructing a braille cell
While in braille input mode, six letter keys on the computer keyboard are used to represent the six braille dots that make up a single braille cell (⠿).
The keys used are F, D, S for dots 1, 2, 3 down the first column of the cell, and J, K, L for dots 4, 5, 6 down the second column. The Space key is used to represent an empty braille cell (⠀), sometimes referred to as dot 0.
Up to six of these keys can be pressed in combination to construct any pattern of raised dots. For example, to enter a quarter note C, which in braille is ⠹ (i.e. dots 1, 4, 5, 6), press and hold F+J+K+L, then release these keys to confirm the pattern. The keys can be pressed and released in any order, providing at least one key is held at all times, until you have completed the pattern.
When the final key is released, MuseScore reads your braille pattern. If your pattern corresponds to a recognized note or musical symbol then this element is entered directly in the score, not in the braille panel, because print notation is the "ground truth" for MuseScore. Once the element is in the score, the braille panel automatically updates to reflect this change.
Sometimes in music braille, the same information can be expressed in multiple ways. For the sake of consistency, MuseScore always picks the same way regardless of how you entered the notation. Therefore, the braille that appears in the braille panel may not exactly match the pattern(s) you entered with the six keys, though it will have the same meaning.
Entering notes
Basic notes
In braille, eighth notes (quavers) and 128th notes are written as:
| Note | Braille | Dots | Keys |
|---|---|---|---|
| C | ⠙ | 1, 4, 5 | F+J+K |
| D | ⠑ | 1, 5 | F+K |
| E | ⠋ | 1, 2, 4 | F+D+J |
| F | ⠛ | 1, 2, 4, 5 | F+D+J+K |
| G | ⠓ | 1, 2, 5 | F+D+K |
| A | ⠊ | 2, 4 | D+J |
| B | ⠚ | 2, 4, 5 | D+J+K |
Additional dots are added to the above sequences to create other durations:
| Duration | Braille | Dots added | Keys added |
|---|---|---|---|
| Quarter (crotchet) and 64th notes | ⠠ | 6 | L |
| Half (minim) and 32nd notes | ⠄ | 3 | S |
| Whole (semibreve) and 16th notes | ⠤ | 3, 6 | S+L |
Hence a quarter note C is ⠹ (dots 1, 4, 5, 6) and is entered with F+J+K+L. This pattern is also used for a 64th note C.
16th notes and smaller
As mentioned above, 16th notes and smaller use the same dot patterns as larger durations. When reading braille, you can work out whether the shorter or longer duration is being specified by looking at the time signature as well as other notes in the measure. However, when writing braille, you need to tell MuseScore which durations you want to use.
| ⠤ | ⠄ | ⠠ | ⠀ | Dots to select | Keys to select | |
|---|---|---|---|---|---|---|
| Group 1 | whole | half | quarter | eighth | 0, 1 | Space+F |
| Group 2 | 16th | 32nd | 64th | 128th | 0, 2 | Space+D |
By default, MuseScore enters group 1 durations (whole, half, quarter, eighth). To switch to group 2, enter dots 0, 2 (i.e. press Space+D). Nothing will appear in the braille panel, but any notes or rests you write from now on will be in group 2 (16th, 32nd, 64th, 128th). To switch back to group 1 durations, enter dots 0, 1 (i.e. press Space+F).
It's not currently possible to enter durations of 256th and smaller, or breve (double whole) and larger, via the braille panel.
Dotted notes
Braille uses ⠄(dot 3) to represent an augmentation dot, which is added in a new braille cell immediately following a note. No other cells are allowed to come between the note and its augmentation dot.
To create a dotted note in the braille panel, first write the main note duration using the rules above, then follow it with dot 3 (i.e. press S).
For example, a dotted quarter note C is ⠹⠄, which can be stated as dot pattern 1456-3, where the dash means to start a new cell. In terms of keys, this is F+J+K+L, S.
It's not currently possible to enter multiple dot 3s to create double and triple dotted notes via the braille panel.
Octave marks
Octave marks in braille serve a similar purpose to clefs in print music. If you see a note in print, you don't know what pitch it is until you look at the preceding clef. In braille, if you see ⠙ (dots 1, 4, 5) then you know the note is a C, but it could be a C in any octave. To determine the octave, you need to look at the preceeding octave mark (and also at any notes between that octave mark and the current note).
A standard 88-key piano has 7 complete octaves. Starting on the lowest C, which is called C1 in braille as well as in scientific pitch notation, the first complete octave of white notes is C1, D1, E1, F1, G1, A1 and B1. After B1 comes C2, which is the start of the second complete octave. This scheme continues up to the final complete octave, which starts with C7 and ends with B7.
In this system, C4 is middle C, and A4 is "concert A" (i.e. the note that the orchestra tunes to at the start of a performance). Enharmonic spelling is important, so B♯3 sounds the same as C4 despite being notated in a different octave, and C♭4 sounds the same as B3.
Even standard 88-key pianos have a few notes outside the range C1 to B7. Braille refers to the C0 octave as the "sub" octave, and the C8 octave as the "super" octave. These simply double the markings used for the first and seventh octaves.
| Octave | Marks | Dots | Keys |
|---|---|---|---|
| 0 (sub) | ⠈⠈ | 4-4 | J, J |
| 1 | ⠈ | 4 | J |
| 2 | ⠘ | 45 | J+K |
| 3 | ⠸ | 456 | J+K+L |
| 4 (middle) | ⠐ | 5 | K |
| 5 | ⠨ | 46 | J+L |
| 6 | ⠰ | 56 | K+L |
| 7 | ⠠ | 6 | L |
| 8 (super) | ⠠⠠ | 6-6 | L, L |
When specified, octave mark are placed immediately prior to a note. So a middle C quarter note is ⠐⠹, or dots 5-1456, which is entered as K, F+J+K+L. No other cells are allowed to go between the octave mark and the note it belongs to.
Octave marks don't have to be given before every note. Octave marks are only required for the:
- First note on each line of braille.
- First note after a double bar line, number sign, word indicator, and certain other markings.
- Second of two notes separated by a melodic interval of a sixth or more, regardless of their octaves.
- Second of two notes separated by a melodic interval of a fourth or more, only if their octave numbers are different.