Per iniziare
Questo capitolo spiega come installare ed eseguire MuseScore per la prima volta. Il capitolo spiega anche come creare un nuovo spartito.
Installazione
MuseScore funziona su diversi sistemi operativi, compresi Windows e macOS, così come per molte distribuzioni Linux e diverse varianti BSD .
Di seguito sono riportate le istruzioni per il sistema utilizzato.
Installazione su Windows
Installazione
È possibile ottenere il programma di installazione di Windows dalla pagina di download del sito MuseScore. Un clic sul collegamento per avviare il download. Il browser Internet vi chiederà di confermare che si desidera scaricare il file. Fare clic su Salva File.
Terminato il download, fare doppio clic sul file per avviare l'installazione. Windows potrebbe chiedere, con un avviso di sicurezza, di confermare l'operazione prima di lanciare il programma. Un clic su Avanti per continuare, potrete brevemente visualizzare
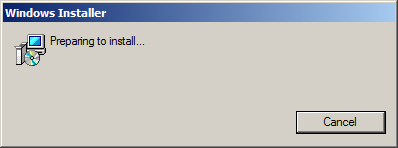
seguita da
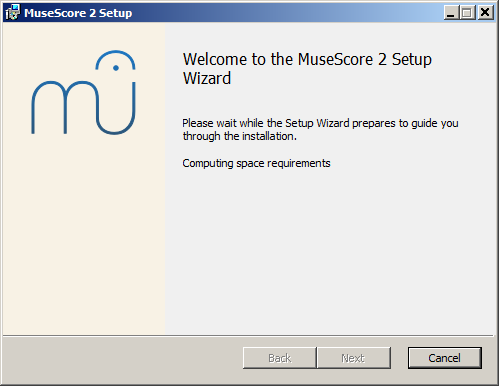
e poi
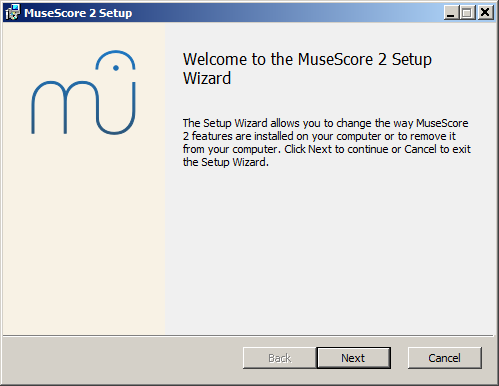
con un clic su Annulla, qui o successivamente, vedrete:
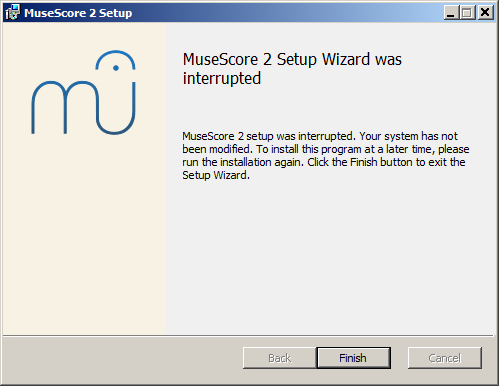
Se invece si fa clic su Avanti per continuare, la procedura guidata di installazione visualizzerà i termini della licenza del software libero.
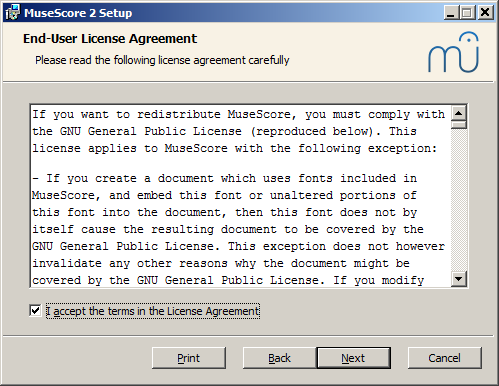
Assicuratevi che l'opzione Accetto i termini del contratto di licenza sia selezionata e fare clic su Avanti per continuare. La finestra successiva conferma il percorso d'installazione di MuseScore.
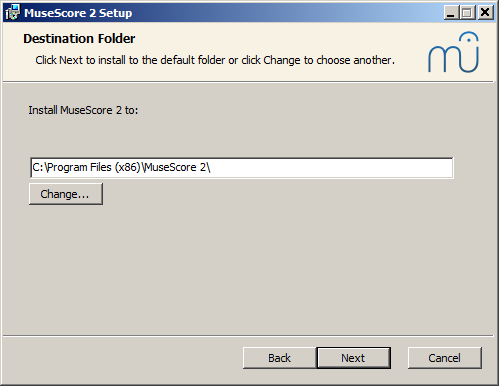
Se si installa una nuova versione di MuseScore ma si desidera mantenere la precedente sul computer, potrebbe essere necessario sostituire la cartella (le versioni 2.0 e 1.x possono coesistere e non si sovrascriveranno, così non saranno necessarie modifiche). In caso contrario, fare clic su Avanti per continuare.
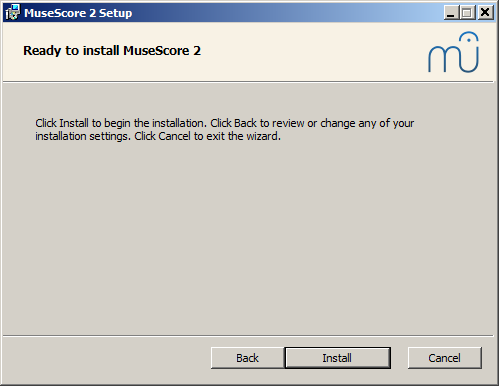
Clic su Installa per continuare.
Concedete alla procedura di installazione guidata pochi minuti per installare i file e le configurazioni necessarie. Vedrete:
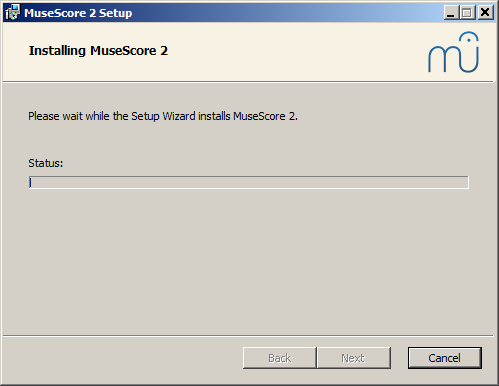
poi
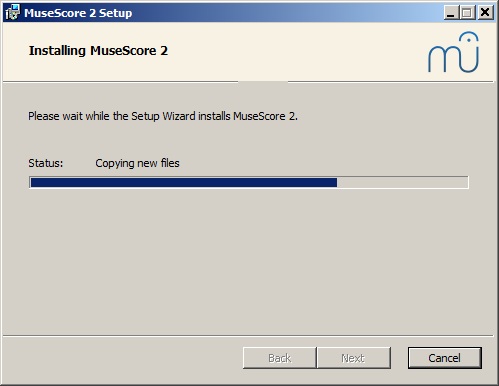
e, finalmente
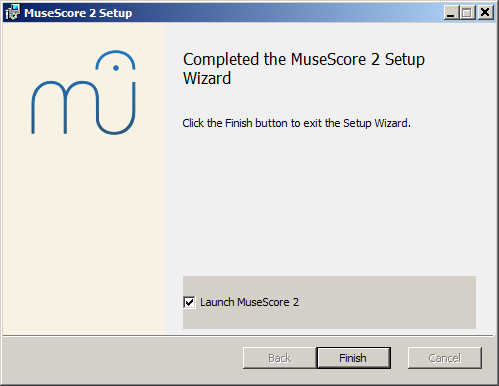
Un clic Fine per uscire dall'installazione. Potete cancellare il file di installazione scaricato
Avviare MuseScore
Per avviare MuseScore selezionare Start → Tutti i programmi → MuseScore 2 → MuseScore 2.
Disinstallazione
-
È possibile disinstallare su Windows a 32 bit con
cd C:\Program Files\MuseScore
Uninstall.exe /S
e su Windows a 64 bit con
cd C:\Program Files (x86)\MuseScore
Uninstall.exe /S
Risoluzione dei problemi
Su Windows XP e Vista, il programma di installazione potrebbe essere bloccato dal sistema. Se non si riesce a installare MuseScore, fare clic destro sul file scaricato e fare clic su Proprietà. Se appare un messaggio "Questo file proviene da un altro computer e potrebbe essere bloccato per proteggere questo computer", cliccare su "Sblocca", "OK" e fare doppio clic sul file appena scaricato.
Collegamenti esterni
Installazione sul macOS
Installazione
Puoi trovare il file DMG (immagine disco) sulla pagina download del sito di Musescore. Premi sul link per macOS per iniziare il download. Quando il download è stato completato, doppio clic sul file DMG per montarlo.
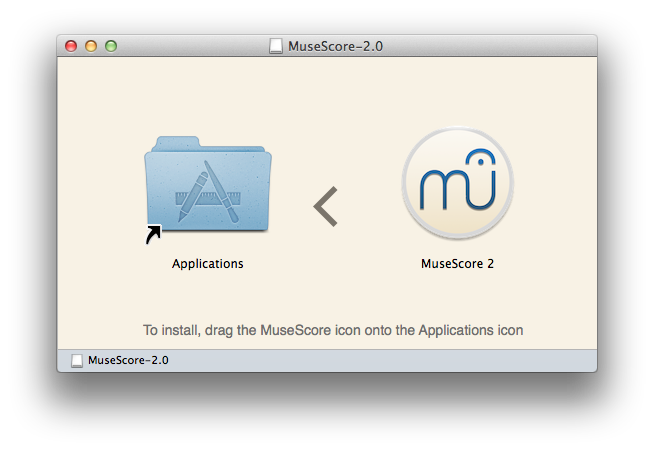
Trascina e rilascia l'icona di Musescore sull'icona della cartella Applicazioni.
Se non ti sei loggato come amministratore, macOS chiederà la password: premi Autenticati e scrivi la tua password per procedere.
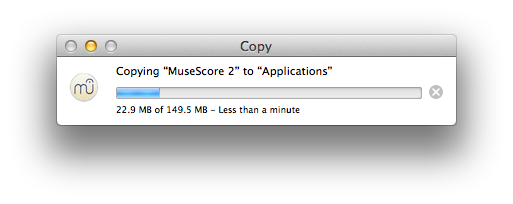
Quando l'applicazione ha finito di copiare, espelli l'immagine disco. Ora è possibile lanciare Musescore dalla cartella Applicazioni, Spotlight, o dal Launchpad.
Disinstallazione
Eliminare semplicemente Musescore dalla cartella applicazioni.
Collegamenti esterni
Install on Linux
As of MuseScore 2.0.3 you can, for the first time, get hold of a copy for Linux straight from the download page, just like Windows and Mac users. This is possible thanks to the AppImage packaging format, which runs on pretty much all Linux distributions. If you prefer, there is still the option to get it the traditional way via your distribution's package manager (but you may have to wait for it to get packaged by the relevant maintainer). Of course, you can always build from source.
AppImage
The AppImage format is a new way of packaging Linux applications. AppImages are portable - they don't have to be installed - and they run on pretty much any Linux distribution. Dependencies are included in the one AppImage file.
Step 1 - Download
Before you download an AppImage, you need to know your processor's architecture. These terminal commands will show it:
archor
uname -m
The output will be something like "i686", "x86_64" or "armv7":
i686(or similar) - 32-bit Intel/AMD processor (found on older machines).x86_64(or similar) - 64-bit Intel/AMD processor (modern laptop and desktop computers, most Chromebooks).armv7(or later) - ARM processor (phones & tablets, Raspberry Pi 2/3 running Ubuntu Mate, some Chromebooks, usually 32-bit at present).
Now you can head over to the download page and find the AppImage that best matches your architecture. Once downloaded, the file will be named "MuseScore-X.Y.Z-$(arch).AppImage".
Step 2 - Give execute permission
Before you can use the AppImage you need to give permission for it to be run as a program.
From the Terminal:
This command gives the user (u) permission to execute (x) the AppImage. It works on all Linux systems.
    cd ~/Downloads
    chmod u+x MuseScore*.AppImage
Note: Use the "cd" command to change directory to wherever you saved the AppImage.
From a File Manager:
If you prefer to avoid the command line, there is usually a way give execute permission from inside a File Manager.
In GNOME Files (Nautilus), simply:
- Right-click on the AppImage and select "Properties".
- Open the "Permissions" tab.
- Enable the option labelled "Allow executing file as a program".
The process may be slightly different in other file managers.
Step 3 - Run it!
Now you should be able to run the program simply by double-clicking on it!
When you downloaded the AppImage it was probably saved in your Downloads folder, but you can move somewhere else it at any time (e.g. you could put it on your desktop for easy access). If you ever want to remove it then simply delete it.
Installing the AppImage (optional)
You can run the AppImage without installing it, but you must install it if you want it to be completely integrated with your desktop environment. This has the following benefits:
- Adds the AppImage to your Applications Menu or Launcher
- Sets the correct icons for MuseScore's files (MSCZ, MSCX) and for MusicXML files (MXL, XML)
- Makes the AppImage available via your File Manager's right-click "Open with..." menu
To install it, run the AppImage from the Terminal with the "install" option (see immediately below). This copies a desktop file and various icons to your computer. If you want to remove them you will need to run the "remove" option before you delete the AppImage. This does not affect any scores created with any version of MuseScore.
Using command line options
Running the AppImage from the Terminal allows you to use various command line options. The AppImage has some special options in addition to MuseScore's normal command line options.
You will need to change directory (cd) to wherever the AppImage is saved your system, for example:
    cd ~/Desktop
    ./MuseScore*.AppImage [option...]
Or give the path to the AppImage:
~/desktop/MuseScore*.AppImage [option...]
Use the "--help" and "man" options to get more information about the available command line options:
    ./MuseScore*.AppImage --help   # displays a complete list of command line options
    ./MuseScore*.AppImage man      # displays the manual page (explains what the options do)
Distribution Packages
Fedora
-
Import the GPG key:
su
rpm --import http://prereleases.musescore.org/linux/Fedora/RPM-GPG-KEY-Seve
-
Go to the download page of the MuseScore website. Click on the link for the stable Fedora download and choose the correct rpm package for your architecture.
-
Depending on your architecture, use one of the two sets of commands to install MuseScore
-
for arch i386
su
yum localinstall musescore-X.Y-1.fc10.i386.rpm
-
for arch x86_64
su
yum localinstall musescore-X.Y-1.fc10.x86_64.rpm
-
If you have difficulty with sound, see Fedora 11 and sound.
See also the hints for the various distributions on the download page.
External links
Install on Chromebook
Desktop program
MuseScore's desktop program will not work natively on Chrome OS, but there are some workaround solutions:
-
Since Chrome OS 69, certain chromebook models are able to run Linux apps and so you can install MuseScore for Linux as provided on our Download page. Feedback about the installation process and supported hardware is welcome on the forum
-
Via software-on-demand service such as rollApp: By just visiting this website, you can run MuseScore in the browser. You can access your scores via cloud services such as Google Drive or save them to your online MuseScore account through the menu File→Save Online.... Note that currently, sound and playback does not work on rollApp.
-
Via Crouton: Involves installing a Linux based operating system which runs in parallel with Chrome OS, and then installing MuseScore on Linux.
Android app (playback only)
Alternatively, it is possible to install MuseScore's Android app on recent Chromebooks. You will need to update to the latest version of Chrome OS first. See the Chromebook support documentation for help installing Android apps on Chromebooks, and a list of supported devices. The app only supports playback of existing scores, not score editing or creation, but you can sign-in to your MuseScore account for easy access to all your scores on MuseScore.com.
External links
- How to run MuseScore on a Chromebook
- Check the installation procedure from the comments in this thread
- How to change the language in MuseScore
Impostazione lingua e aggiornamenti traduzione
MuseScore verrà installato e lavorerà con la lingua di "Sistema" (quella utilizzata per la maggior parte dei programmi e in generale a seconda del paese e delle impostazioni della lingua del PC, o account).
Modificare la lingua
- Andate su Modifica → Preferenze... (Mac: MuseScore → Preferenze...)
-
Nella scheda Generale c'è una sezione Lingua:
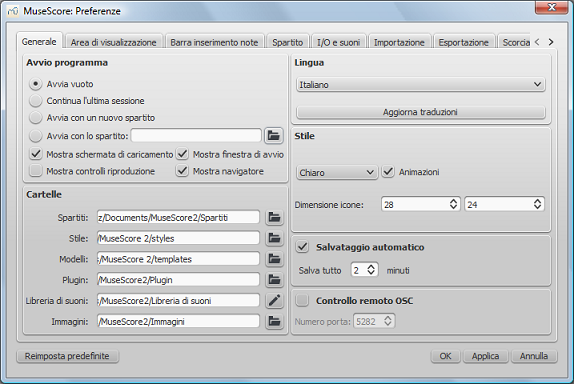
È possibile modificare e aggiornare anche la traduzione con il tasto Aggiorna traduzioni. Si aprirà una nuova finestra, che mostra, in alto, la vostra lingua - vedi sotto.
Come da avviso dovrete chiudere e riavviare MuseScore per rendere effettive le modifiche.
Aggiornare traduzioni
È possibile aggiornare la traduzione come spiegato sopra, tramite le impostazioni delle preferenze, ma c'è un altro metodo:
- Andate su Aiuto → Gestore delle risorse...
-
Un clic sul tasto Aggiorna
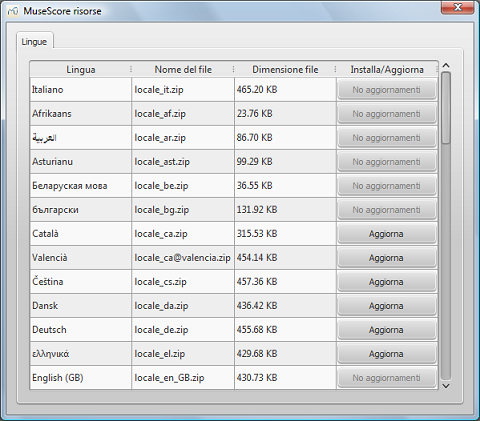
Anche qui sarà necessario chiudere e riavviare MuseScore perchè l'aggiornamento abbia effetto.
Vedi anche
Controllo degli aggiornamenti
Ci sono due modi per controllare gli aggiornamenti.
Controllo automatico degli aggiornamenti
- Da Modifica → Preferenze... (Mac: MuseScore → Preferenze...)
- Selezionare la scheda Aggiorna
-
Ricerca aggiornamenti ...
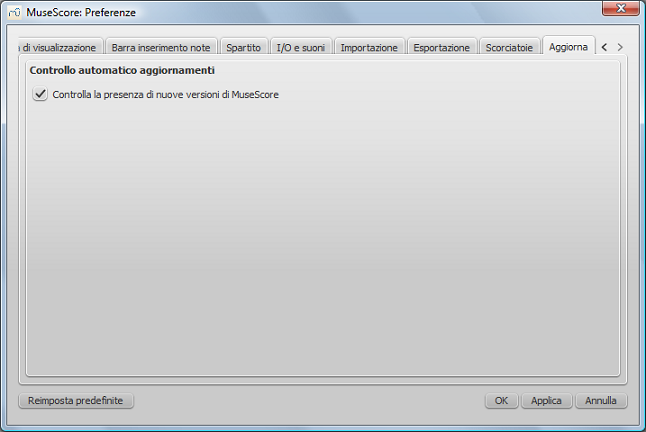
Ora MuseScore controllerà gli aggiornamenti all'avvio e avviserà se necessario.
Ricerca aggiornamenti
-
Selezionare Aiuto → Ricerca aggiornamenti
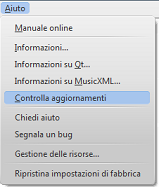
-
Si aprirà una finestra di dialogo con lo stato dell'aggiornamento: "Nessun aggiornamento disponibile" o "È disponibile un aggiornamento per MuseScore:" seguito da un collegamento per scaricarlo.