File management
Opening and saving scores
Overview
You can store your files either locally on your computer, or online (“in the cloud”) to your musescore.com account. If you don’t have an account yet, you can create one for free here.
In the case of scores saved online, MuseScore also keeps local copies on your computer, so you can work on them even without an active internet connection. Every time you save a "Cloud Score", the online copy at musescore.com is also updated. This system protects both the integrity of your local cloud scores while offering all the advantages of online storage, including backup, viewing and playback across multiple devices, ease of sharing, commenting, and much more.
Please note that, if you download one of your cloud scores from musescore.com and open it in MuseScore, the file you download and open will be a new, locally-stored file, separate from the file in the cloud.
Opening a score
There are a few ways to open a score in MuseScore 4.
File → Open
This triggers your file browser, allowing you to select and open scores stored on your computer or storage device (dialog will vary according to operating system).
Windows/Linux: Ctrl+O. MacOS: Cmd+O
File → Open recent
This option allows you to choose from a list of recently-opened scores.
Home tab → Scores
This window displays your most recently modified scores. Double-click on any score thumbnail to open it. You can also click Open other… to access locally-stored scores from your file browser.
Scores that have been saved to the cloud are indicated with a cloud icon. Unlike local scores, it is not possible to rename or otherwise modify a cloud file from your computer’s file browser. You can, however, do this from the score manager on musescore.com. Go directly to your score manager by clicking the Score manager (online) button in the Scores window.
It is possible to open multiple scores simultaneously. In this case, MuseScore opens each score in a separate window.
Import file formats
Apart from its native format files (*.mscz and *.mscx), MuseScore can also open MusicXML, compressed MusicXML and MIDI files, as well as a variety of files in other formats. You can customize various import settings by going to Preferences → Import.
Saving a score
To save a score:
1. Go to File
2. Choose any of the following options:
| Option | What it does | Shortcut |
|---|---|---|
| Save | Saves current score to new file, or saves changes to a previously saved file | Windows/Linux: Ctrl+S, MacOS: Cmd+S |
| Save As... | Saves current score to new file | Windows/Linux: Shift+Ctrl+S, MacOS: Shift+Cmd+S |
| Save a copy... | Saves current score to new file, but allows you to continue editing the original file | None |
| Save selection... | Saves selected measures to new file | None |
| Save to cloud... | Saves score as a new file on musescore.com | None |
The first time you use any of the above save options, a dialog opens asking you “How would you like to save”, then offering you the options of “Save to the cloud” or “Save to computer”.
To disable this window, click Don't show again to ensure you only see your operating system's native save dialog for future saves.
Save to computer
The Save to computer option triggers your operating system’s “Save” dialog, allowing you to save the score as a (compressed) MuseScore file, .mscx.
There is also an option in your “Save” dialog to save files in an uncompressed format (“Uncompressed MuseScore folder”). This option creates a new folder on your computer that contains a MuseScore (.mscx) file, as well as a thumbnail image file (.png) and any relevant .json, .mss, and .xml files.
Save to the cloud
Scores saved online (to the cloud) appear in the program’s Home: Scores tab with a cloud symbol at the corner of the file icon. A local copy is also automatically saved on your computer.
To save a score to the cloud, choose Save to the cloud. This triggers a dialog with the following options:
Name
This is the name under which your score will be identifiable on musescore.com
Visibility
- Private allows you to save changes to your score without others seeing your work online.
- Public makes your score visible to everyone on musescore.com.
When you’re ready, click Save. The first time you do this, MuseScore will ask whether you also want to upload your audio to musescore.com. You can choose from the following options:
Never
Each time you press Save, only the score itself will be uploaded to musescore.com. Online playback will use the MS Basic soundfont.
Always
Each time you press Save, MuseScore will generate an .mp3 file to upload together with your score. Score playback on musescore.com will sound the same as it does in your desktop app (including audio from the Muse Sounds library, if installed, or any VST instruments and effects you’ve added)
Every x saves
MuseScore will only generate and upload an .mp3 file at a save interval you specify.
These settings only affect your private cloud scores. You will only be asked to specify this setting once, however you can change this setting at any time by going to Preferences → Cloud. Once you click OK, MuseScore will confirm your score has been saved. Your file will be accessible from both the Home tab as well as the score manager on musescore.com.
File export
Overview
This chapter covers the saving of MuseScore scores in formats other than the native ones (*.mscz and *.mscx), such as MusicXML, MIDI, MEI, MP3, PDF, PNG etc.
Exporting your score
To export a score:
- Select File→Export
- Choose a Format from the dropdown list
- Select the parts to export by checking/unchecking the appropriate boxes on the left of the dialog
- If you want to combine all parts in one file click on the radio button titiled All parts combined in one file
- Click Export...
File formats
Graphical formats
Portable Document Format (PDF) is a universal format for text, pictures, music and so on. Use this format when you want to generate music scores for other musicians to read.
Virtually every computer will have a dedicated PDF reader; if not a PDF can also be opened using web browsers such as Firefox etc. PDF scores can also be printed to hard copy if desired.
SVG
Like PDF, Scalable Vector Graphics (SVG) enables you to zoom in and enlarge the image without loss of quality. Use SVG when you want to embed extracts of music inside another document or webpage.
All modern web browsers support SVG. However, many websites and apps do not support it, so if you try to use SVG somewhere and it doesn't work, try using PDF or PNG instead.
PNG
Portable Network Graphics (PNG) is a compressed graphical format suitable for editing or embedding in all kinds of documents. However, PNGs become pixelated if you zoom in or enlarge the image, so consider using PDF or SVG instead if your software supports it.
Audio formats
OGG
OGG files commonly contain lossy Vorbis-compressed audio, which offers higher quality than MP3 at the same file size. Use this format for personal listening, if your device supports it.
Most Android devices support OGG audio, but Windows, macOS, and iOS devices require third-party software in order to read these files. You may find MP3 easier to use.
MP3
MP3 is a lossy compression format that is universally supported. Use this format to share audio with other people for listening purposes (not for editing).
FLAC
FLAC is a lossless compression format that fully preserves audio quality, but produces larger file size than the lossy compression formats. Use FLAC when sending audio for someone else to edit, but only if you can't send them the actual MuseScore file (e.g. because they don't have the necessary instrument sounds or audio plugins installed for it to sound the way you intended).
WAV
WAV is an uncompressed format. It offers full audio quality but its files are extremely large. Use this format for audio that you plan to edit yourself in another program, such as Audacity.
Other audio formats
If you need audio in a format not mentioned above (e.g. Opus or AAC), this requires using an external audio conversion tool. Audacity is a free program that can be used for this purpose. It's developed by Muse Group, the same company that makes MuseScore.
Simply export your score from MuseScore as a WAV file, then open this file in Audacity, or whichever audio program you choose to do the conversion. Using WAV as the transition format ensures the highest quality after conversion and avoids wasting time compressing the file in MuseScore only to decompress it immediately in the other program.
Alternatively, you could use a website to do the conversion. In this case it's better to use FLAC as the transition format, as this will reduce the size of the upload while retaining maximum quality. Make sure you research any third-party software or web service carefully before using it. Some websites retain files after you have uploaded them, and some will even make the files available to other users.
Once the file has been converted to the desired format, you should listen to it to ensure the quality is acceptable and the entire file was converted.
Hybrid formats
MIDI
Musical Instrument Digital Interface (MIDI) is a well-established music industry standard for encoding all the notes and instruments in a score, but none of the visual formatting. MIDI files can be played in some media players, but only if the right software (or hardware) instruments are available to realize it. The files can be edited in a sequencer or other music notation software.
You should be aware that the sound generated by a MIDI file is dependent on the virtual instruments used to play it back, so it's likely to sound different when played outside of MuseScore. Also MIDI does not preserve visual formatting, so the file will look very different when opened in any notation program, including MuseScore, compared to the original score.
Score formats
MusicXML
MusicXML is a universal standard which aims to preserve as much of the original score formatting as possible. It can be opened in any modern score writer. MuseScore 4 uses MusicXML 4.0, although some features have yet to be implemented.
Braille
Braille Ready Format (BRF) is a plain text format that can store written text or music documents intended for use by people who are blind. These files can be opened in third-party software for reading with an electronic braille display or embossing onto paper as raised dots.
MuseScore's braille files use bar-over-bar formatting, which means there is a separate line of braille for each staff, and measures are vertically aligned between staves like in the print music. (An alternative would be bar-by-bar or section-by-section formatting, where one or more measures are written for the first staff, followed by those same measures for the next staff, and so on, all on a single line of braille. MuseScore does not support these types of formatting currently.) MuseScore's braille files use ASCII rather than Unicode character encoding, so sighted users who open these files in a text editor will just see random letters and punctuation characters; you would need to install a special braille font in order to see the braille as dots.
MuseScore's braille conforms to the Braille Authority of North America's Music Braille Code 2015, but many of its features have yet to be implemented. At present, you may get better results if you export scores as MusicXML, and then use a third-party MusicXML to braille conversion tool, such as the free web-based tool SM Music Braille.
MEI
Music Encoding Initiative (MEI) is an open XML format that represents the semantic structure of music notation documents and is developed as a community-driven effort. The MEI support in MuseScore focuses on MEI Basic, a subset of MEI that facilitates the use of MEI for data exchange and improves interoperability. The MEI support in MuseScore is available as of version 4.2 and is documented here.
Customizing export settings
[To be added]
MIDI import
- MIDI import panel not currently implemented, making this section largely moot
Working with MusicXML files
Overview
MusicXML is a universal file format that allows music scores to be shared between different music notation programs. For example, you can convert a MuseScore .mscz file to a MusicXML file and it will open in Sibelius, Finale, or any other compatible scorewriter; and vice versa.
MusicXML faithfully reproduces the notes and instrumentation, but, nevertheless, it is usually necessary to do some clean-up work to make the transferred score look exactly the same as the original.
Opening a MusicXML file
When a MusicXML file is first opened in MuseScore, the positions and custom properties of text objects are preserved as far as possible. There may also be other customizations visible in the score which you may or may not wish to keep.
MusicXML import options
These options can be found in Edit→Preferences→Import.
- Import layout will import layout settings such as page size, margins and stave size, if they are in the MusicXML file
Otherwise, the defaults will apply. Turned on by default. - Import system and page breaks does exactly what it says, but note that it is still possible that the exact layout of systems and pages will not be the same at first, since due to differences in spacing settings and fonts (etc.) it might not be possible to fit the same number of bars in a system as in the software which produced the MusicXML. Turned on by default.
- Apply default typeface (Edwin) to imported scores will set all text styles to Edwin (the MuseScore Studio default). This is turned off by default, meaning that the fonts specified in the MusicXML file will be used. (Though if they are not available on the system you are using, a fallback will be used instead.)
- Infer text type based on content where possible will do its best to intelligently determine the type of text based on its content. In many MusicXML files text of all sorts (tempos, fingerings, copyright lines, etc) is encoded as plain 'staff text'. With this option turned on, it will attempt to assign items to the correct text types. It also attempts to tidy up e.g. music symbols within text using legacy encodings. While not perfect, it often saves a huge amount of time required in manual cleanup. Turned off by default, because technically it means deviating from strict adherence to the MusicXML specification.
Cleaning up an imported score
Restoring stems
To reset the stems of all notes to their default positions and orientations:
- Right-click on a note and choose Select→Similar
- Press Ctrl+R.
Restoring default leading spaces
To reset the leading space of all notes to the score default:
- Right-click on a note and choose Select→Similar
- Click on the Appearance button in the Properties panel
- If the Leading space reset button (circular arrow) is active, click on it to reset to the score default; otherwise no further action is required.
Removing breaks
To remove all breaks—system, page and section:
1. Right-click on a break and choose Select→Similar
2. Press Delete.
To remove just system breaks (leaving section and page breaks in place):
- From the main menu, select Format→Add/Remove system breaks.
- Select Remove current system breaks
- Click OK to close the dialog.
Restoring default text styles
To reset all text objects in the score, and in frames, to their default styles:
- From the main menu, choose Format→Style
- Click on the button marked Reset all styles to default
- Click OK to close the dialog.
See Format→Style→Text styles to view the list of styles, and property values.
Resetting default text positions
Frame
To reset the positions of all text objects in frames:
- Right-click on a text object in a frame
- Choose Select→Similar
- Press Ctrl+R.
Score text
You can apply the same method for text objects in the score, as for frames. However you will need to repeat this for each individual class of object—all tempo texts, all staff texts and so on.
Preparing a score for export
To export a score as a MusicXML file see File export.
Export settings
When exporting a score to MusicXML, you can choose from a compressed (the default option) or uncompressed format; and whether to export all breaks or not, or to allow only manually-added breaks to appear in the file.
[To be added:
- gotchas - manual adjustments, misuse of element types, images, ...
- export settings]
Backup and recovered files
- TBD
Project properties
Overview
The Project Properties dialog contains metadata tags, editable descriptive digital data of the file. Every score created with Musescore 4 contains the following predefined metadata tags. Some of them are automatically assigned with information provided by user in the New Score dialog, see Setting up your score chapter.
| Property | Details |
|---|---|
| Work title | Assigned with "Title" provided in New Score dialog. |
| Subtitle | Assigned with "Subtitle" provided in New Score dialog. |
| Composer | Assigned with "Composer" provided in New Score dialog. |
| Arranger | |
| Lyricist | Assigned with "Lyricist" provided in New Score dialog. |
| Translator | |
| Copyright | Assigned with "Copyright" provided in New Score dialog. Feel free to copy and use this copyright symbol literally: © |
| Work number | |
| Movement title | |
| Movement number | |
| Creation Date | Date of the score creation. This could be empty, if the score was saved in test mode (see Command line usage). Edit manually if you are Beethoven's ghost. |
| Platform | The computing platform the score was created on. This might be empty if the score was saved in test mode. |
| Source | May contain a URL if the score was downloaded from or Publish to MuseScore.com. |
| Audio.com URL | |
| Musescore Version | Not editable. The version of MuseScore the score was last saved with |
| File Path | Not editable. The score file's location on the Computer. |
Note:
- Score created from certain template contains a top vertical frame and Musescore Text objects on the first page. These objects, such as Title, Subtitle etc, are also automatically assigned with information provided by user in the New Score dialog, but they are not related to metadata tags, see Entering and editing text chapter.
- The originalFormat, and poet metadata tags are automatically created in score created with previous versions of Musescore, but no longer so in Musescore 4.
- Project Properties is formerly Score properties.
Changing Project properties
To change a Project property (metadata tag),
- From the menu, choose File→Project Properties...
- Edit the desired tag
Adding and deleting new project properties

To add a new custom metadata tag, click on the New button. Fill in the "New tag name" field and press OK;
To delete a tag click on the trashcan symbol. Predefined metadata tags cannot be deleted.
Accessing project properties in a score
The only place to add project properties (metadata tags) on to a score is by referring them in header or footer, see Header and footer chapter.
Score comparison
- not currently implemented
Publish to musescore.com
Overview
Understand that these are separate entities before we begin this chapter:
- Musescore is a free and open source desktop (Windows, macOS, Linux) music notation software project.
- musescore.org gathers volunteers around the world contributing to the project.
- musescore.com is a separate, commercial business - a "sheet music-sharing social platform" that allows you to save and publish your scores online.
You can publish to musescore.com either directly, or from within Musescore, but note that musescore.org volunteers are not capable of handling any issues related to musescore.com such as payment, refund, ownership, copyright, licensing, piracy etc, see How and where to ask for support.
You may elect to keep your scores private or to allow others to read or download them. To use its service you need to open a musescore.com account, which can be either free or subscription (see also Opening and saving scores).
Publishing cost and profit
musescore.com seems to prioritize providing virtually free of charge score hosting service, rather than helping self-publishers generate income. Nevertheless, it has generous terms on how hosted scores are used. The platform has not been openly, directly working with or sharing revenue with self publishers / individual composers yet. It has begun collaborating with publishers in response to complaints about copyright protection. For musicians aiming for profit, try alternative methods such as listed on https://music.stackexchange.com/questions/696/sites-with-a-good-selecti…
Publishing rights
Respect copyright. Just as you own the copyright for music you create, others own the copyright for music they create. You may transcribe other people’s copyrighted music using Musescore, but you do not necessarily own the copyright for the resulting Sheet music.
A broad definition of "publish" is used in this chapter to avoid confusion only - the act of uploading/saving content to an online server is considered "publishing". You should pay attention to the definition of "publish" used in any legally binding licenses. From https://www.copyright.gov/help/faq-definitions.html ... Publication is the distribution of copies or phonorecords of a work to the public ... A score can be uploaded "unlisted", meaning it is not publicly searchable or shown inside a public systematic catalog, but the said score may arguably still be considered public.
From the forum post Copyright Infringement
... for a cover song you'd need the copyright holder's permission (maybe the author, the publisher, the heirs, etc) ...
... you cannot upload a piece even with a licence from the original author, unless said licence also includes the specific rights grant to MuseScore BVBA which the ToS require, but which are not necessary to obtain if (also) another suitable licence, such as any and all Open Source / Open Knowledge licences, are present. The ToS also (part of the same bug) require the uploader to waive certain moral rights of the artist ...
From the forum post Would somebody tell me what is original music?
... If you haven't deliberately based your score on another composition then upload it as an original. If it turns out to be similar to a known composition then someone will point it out. If it's close to a copyrighted score then it may get taken down, (made private), but without causing you any trouble ...
From https://bernardgreenberg.com/MuseScore.html (by Bernie/BSG, a long time volunteer music mentor on musescore.org and musescore.com) 29 June 2021
... the CPO (Chief Product Officer) of MuseScore.com, David Mandelstam, posted, in public discussion with me, that the site (musescore.com) is the world's largest free sheet music catalog. It is not a social media, and not a score hosting site ...
Last but not least, from https://musescore.com/community-guidelines
... Treat people the way you would like to be treated ...
Creating a MuseScore account
- Go to www.musescore.com
- Click "Log in" - it's at the top right of the window
- On the dialog that pops up click "Create an account" - it's at the bottom right of the dialog that popped up
- If your browser is already logged in to a Google, Facebook or Apple account you can sign up with any of those services by clicking on the appropriate button
- If you prefer to sign in with your email address, fill in the remaining fields, check "I'm not a robot"
- Click "Create new account"
Saving only to Musescore.com
The first time you save a score you will be asked if you want to publish the score to Musescore.com.

If you are not already logged in to Musescore.com, or you do not have an account, you will need to login.

You will be asked if the score should be Public, Unlisted, or Private.
- Public scores are visible to everyone on the internet.
- Unlisted scores are visible to everyone on the internet, but do not show up in search results. Only people with the link will be able to find an unlisted score.
- Private scores are visible only to you. You must be logged in to your musescore.com account to view.
If you’re publishing a score that you’ve already published at least once, you can choose to replace the existing online score or to publish as a new online score.

You will be asked whether you also want to upload your audio to musescore.com. See Managing publishing preferences

Musescore will tell you when it is ready. Large scores may take some time to generate the MP3 file.

Publish locally saved scores
Scores saved on your computer can also be published at Musescore.com but are not automatically updated.
To publish a score at Musescore.com
- Click the Publish Tab (below the menu bar)
- Click Publish to Musescore.com

Visibility in score manager
Scores published only at Musescore.com are marked with a "cloud" symbol in the Musescore score manager.
MuseScore also keeps local copies on your computer, so you can work on them even without an active internet connection.

Manage generation of mp3 during upload
When saving online Musescore creates an MP3 file of the audio of your score. Depending on the score length, and number of instruments in the score, this might take a long time. To control when this happens:
- From the menu, choose Edit→Preferences...→Cloud
-
Under "Generate MP3 audio for private cloud scores" choose Never, Always, or Every (X saves)
Never
Each time you press Save, only the score itself will be uploaded to musescore.com. Online playback will use the MS Basic soundfont.
Always
Each time you press Save, MuseScore will generate an .mp3 file to upload together with your score. Score playback on musescore.com will sound the same as it does in your desktop app (including audio from the Muse Sounds library, if installed, or any VST instruments and effects you’ve added)
Every x saves
MuseScore will only generate and upload an .mp3 file at a save interval you specify.
- If you chose "Every X saves" choose the number of saves

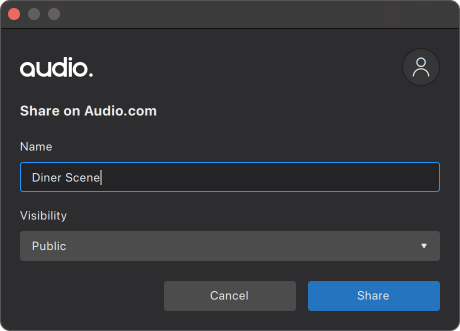
Share on Audio.com
Overview
In addition to publishing your score on MuseScore.com, you can share the MP3 audio generated by MuseScore to Audio.com, a free service from Muse Group. On Audio.com, you can share your tracks publicly, make them available to download, and upload unlisted audio.
To share audio from your score on Audio.com:
MuseScore 4.1 and above
- Open the Publish tab
- Click the Share on Audio.com… button in the toolbar
- If you’re not already signed in to an audio.com account, you will be prompted to do so or create an account
- Enter a title, choose whether the score should be Public or Unlisted, then click Share
- If you've already shared audio from the score, you can replace the existing audio or upload it as a new audio file
- If you've already shared audio from the score, you can replace the existing audio or upload it as a new audio file
- Audio.com will open in your browser to upload the track
- From here, you can set the title, URL, category, tags, description, sharing permissions, and downloading permissions of your track
To share on Audio.com every time you publish a score:
MuseScore 4.2 and above
The first time you publish a score, you will be prompted to share on Audio.com. You can choose to be prompted every time you publish, and this can be controlled in Preferences.
- Open Preferences
- Go to the Save & publish tab
- Check on Always prompt to share on Audio.com after publishing to MuseScore.com