Fingering
Types of fingering
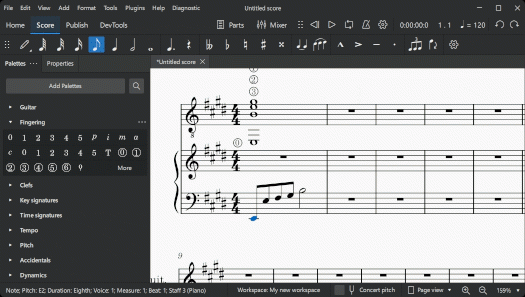
Fingering symbols for various instruments are found in the Fingerings palette; some of these are duplicated in the Guitar palette.

Mouse over the palette icons to reveal the names of the symbols.
The different types of fingerings are as follows:
- Fingering; In keyboard notation, used to indicate left and right hand fingering. Also used in guitar music for left hand fingering.
- LH guitar fingering: In guitar notation, 1–4, indicates the left-hand fingers. 0 (zero), an open string. T, the left hand thumb. Can also be used in keyboard music.
- RH guitar fingering: In guitar notation, used to indicate the right hand fingers, namely: p = thumb, i = index, m = middle, a = ring/annular, c = little.
- String number (circled): In guitar notation, used to indicate the strings (1–6, top to bottom). 0 (zero) is used for the open string.
- Other fingering: Lute fingerings may be found by clicking "More" in the Fingerings palette.
Adding fingering to your score
Note: If you want fingering to be displayed in tablature, right-click on the TAB, and select Staff/Part Properties…→Advanced Style Properties; then check the box labelled "Show fingering in tablature"
Adding fingering from a palette
To add fingering to a selection of notes:
- Select one or more notes;
- Click on the desired fingering symbol in a palette.
Alternatively, you can drag and drop a fingering symbol from a palette onto a single note.
When fingering is added to a note, the focus immediately shifts to the symbol, so you can adjust it right away.

Adding fingering using a keyboard shortcut
- Select a start note;
- Choose one of the following options:
- (for any fingering) Add the desired fingering symbol from a palette (as shown above);
- (for Fingering only) Enter the custom keyboard shortcut for "Add Fingering," then type the desired number.
(Note: you can create this shortcut from the menu Edit→Preferences→Shortcuts
- Choose one of the following options:
- To move the cursor to the next note: Press Space, or Alt+→;
- To move the cursor to the previous note: Shift+Space, or Alt+←;
- Type the desired number; a fingering is added of the same type as the initial one .
- Repeat steps 3 and 4 as required;
- Press Esc, or click on an empty space in the document window, to exit.

Adding fingering using the menu
- Select the start note;
- From the menu bar, select Add→Text→Fingering;
- Type the fingering number of the first note;
- Press space to move to the next note; and so on.
Adjusting position
To edit fingering position, see Changing position of elements.
Some fingerings can be flipped to the other side of the staff using the X shortcut, or the Flip direction icon on the note input toolbar.
Changing the appearance of fingering
The text formatting of fingering elements can be adjusted in the Text section of the Properties panel. See Formatting text for details.
Fingering properties
General and text properties for fingering can be edited from the Properties panel.
For General properties see General settings.
For Text properties, see Formatting text.
Fingering style
Each of the different classes of fingering have their own text style. These can be viewed and edited from the menu: Format→Style→Text styles.