Lead Sheets in MuseScore, Part 1: The Basics
MuseScore contains all the tools needed to create great-looking lead sheets, and the process of creating even complex charts is as easy as with Finale or Sibelius or any other program. However, some things can be tricky to figure out on your own. These articles walk you through the process of creating a lead sheet in MuseScore, using tunes of mine as examples. They also serve as something of a tutorial on the process of creating good charts in general.
I have divided this tutorial into two parts: this first one covering the basics of lead sheet creation using a simple 32-bar tune, and the second getting into more advanced features . I may eventually add more parts to cover other features. But even if your charts are mostly complex ones, start with this first tutorial, as it covers the techniques that will be common to all lead sheets.
Initial Setup
Before you begin, there are a few things to configure up front.
MuseScore 1.1 contains a number of pretty significant improvements that directly relate to creating lead sheets. The original version of this tutorial was written for MuseScore 1.0, but this version of the tutorial has been completely revamped to take advantage of the new features. So be sure you are running version 1.1 or later.
You will also want to install the following plugins from the plugin repository :
http://musescore.org/en/project/addstaff
http://musescore.org/en/project/slash
You may also at some point wish to create your own personalized version of the lead sheet template, set up your own your custom keyboard shortcuts, or change other program options. But the defaults should work well for most people.
In MuseScore, creating a simple lead sheet is every bit as easy as one could hope. Here is the chart we will be creating in this tutorial. It is a simple 32-bar melody with chord symbols, using just one staff:

Creating A New Document
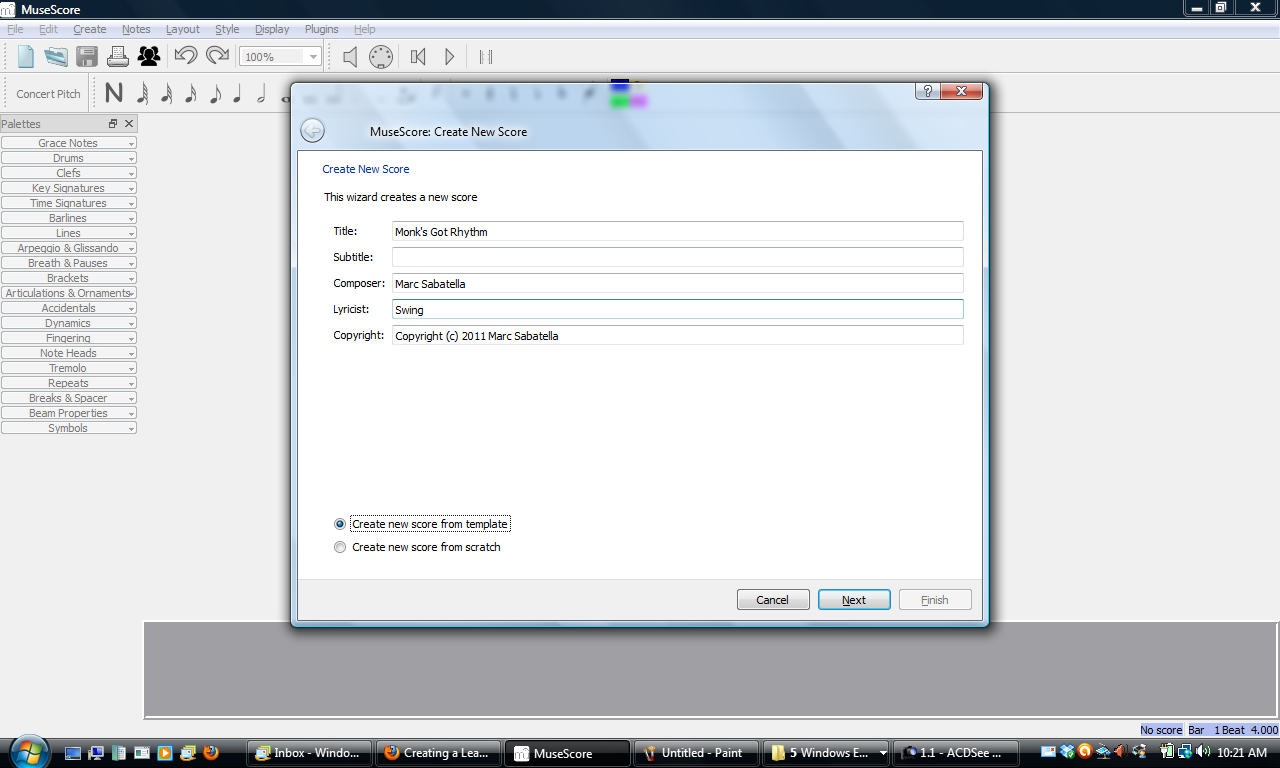
To create a new lead sheet, go to File->New (or hit the corresponding toolbar icon, or use the keyboard shortcut Ctrl-N) and enter your Title, Composer, and Copyright info. Anything you type in the Lyricist field is displayed at top left of the chart, so I use that for instructions like “Med. swing”. Here is the dialog filled in for our example:

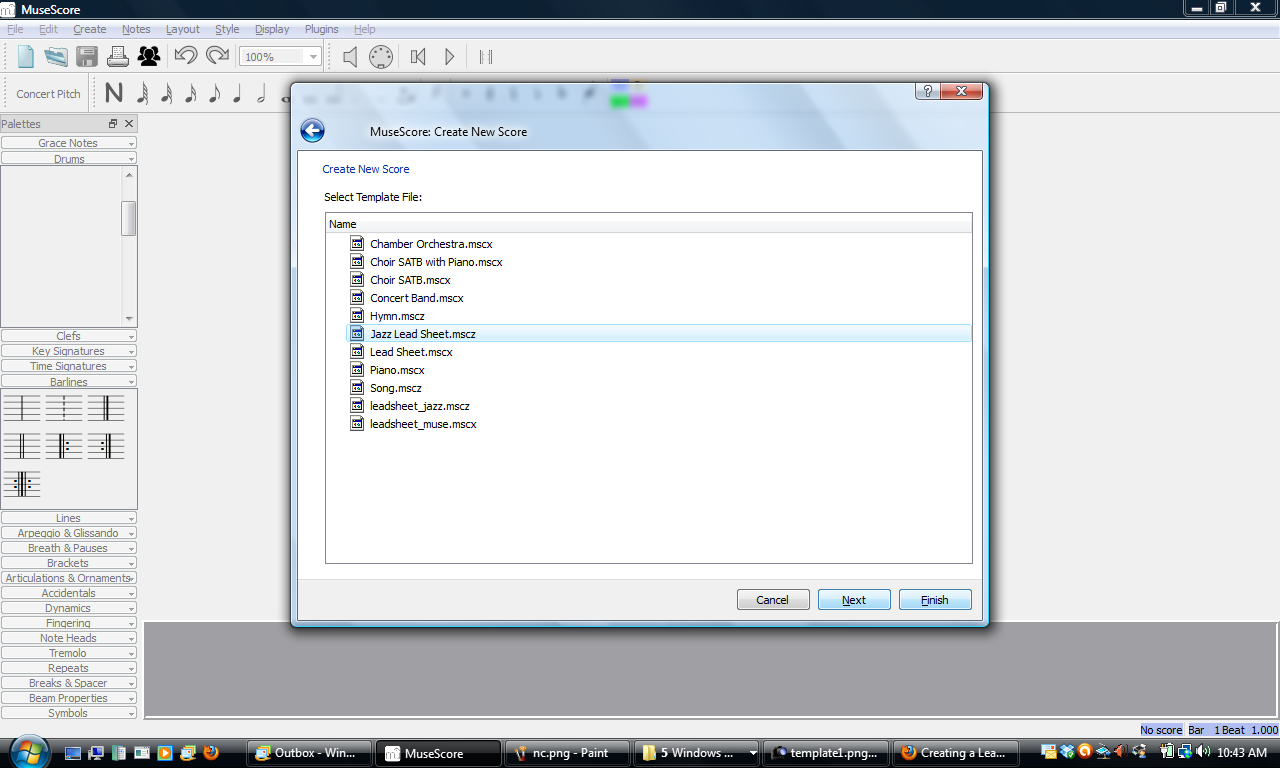
After filling in the fields in this screen, select the "Create new score from template" radio button, hit Next, and select “Jazz Lead Sheet.mscz” from the resulting list:

In the next screen of the wizard, you can select the key:

The next screen allows you to specify the time signature, the length of a partial measure pickup (if needed), and the total number of measures. Here is that screen filled in:

After hitting Finish, this is how the newly created lead sheet should look:

By the way, you may have noticed that MuseScore now includes a handwritten font (called MuseJazz) that can be used for titles and other text elements. In previous releases, MuseJazz could only be used for chord symbols.
Entering Notes
Entering notes for a lead sheet is no different than for any other type of score. To keep this tutorial a reasonable length, I will refer you to the Handbook , - in particular the section on Note Entry - and to the excellent tutorials on //www.musescoretips.com for more on this topic. But here is a very quick run down.
The basic process is: click a measure, hit "N" to go to Note Entry mode, and start typing using the shortcuts discussed in the Handbook. As an example, the first few notes of our example would be entered by typing “N, 4, 0, G, 0, E, 5, C, 4, D, E, Down, 7, +”:

To add a double bar or other special type of barline such as a repeat sign, just drag it from the Barlines palette to the desired measure:

Entering Chord Symbols
Entering chords is also very easy in MuseScore. Select a note or rest over which you would like a chord symbol to appear, hit Ctrl-K, and type your chord symbol, using “ma” for major, “mi” for minor, “o” for diminished, “mi7b5” for half-diminished, “b” for flat, and “#” for sharp:

You can then hit Tab to move to the next measure, or Space to move to the next position within the measure. Unlike in previous versions, hitting Space in MuseScore 1.1 and later allows you to enter chords on beats where there are no notes. This means you can easily enter multiple chords per measure even in bars containing only a whole note or rest:

You can also enter the “N.C” (no chord) symbol just like any other chord. In this particular tune, I wanted to make this symbol smaller than other chord symbols, so I selected the text after typing it and reduced the font size using the controls at the bottom of the screen:

By the way, if you prefer using other abbreviations for the basic chord types (like “maj” and “-” for major and minor, or triangle for major and circle with a slash for half-diminished), see Chord name in the Handbook for information on selecting other chord styles.
Copy and Paste
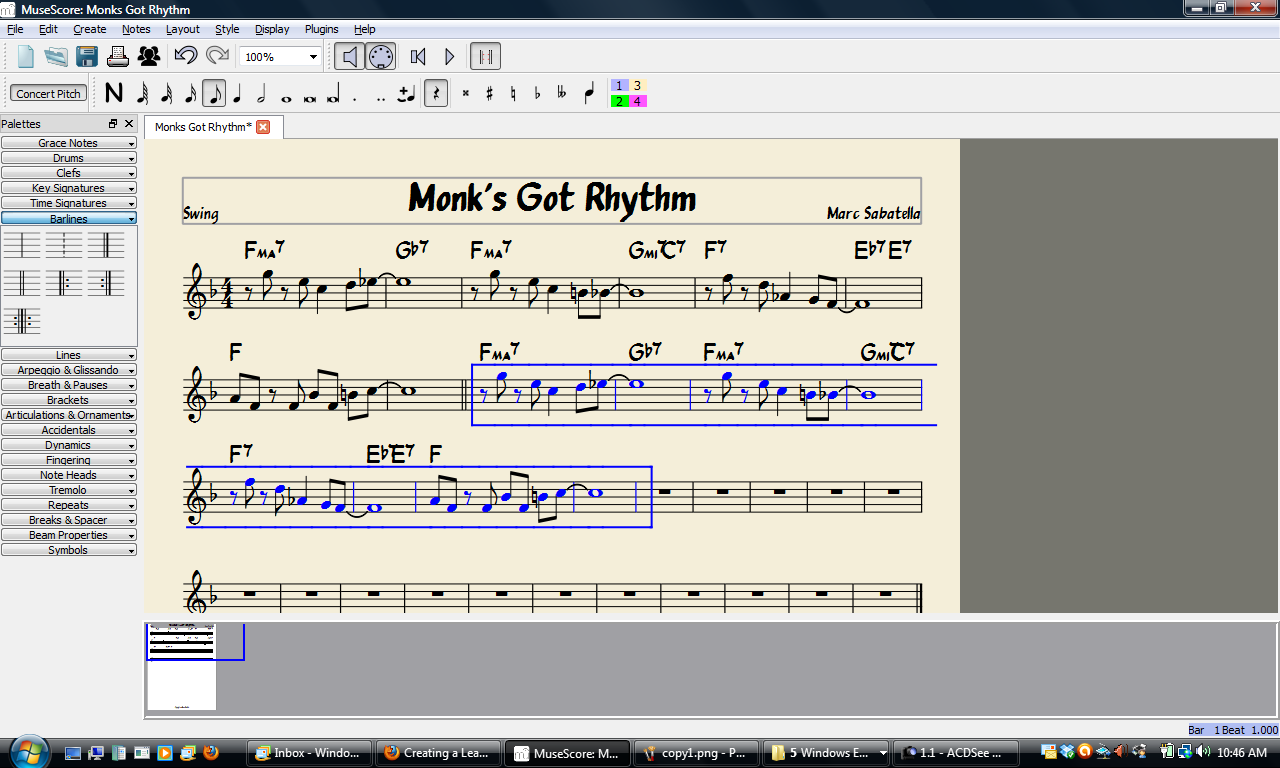
Many lead sheets contain sections that are similar to each other. Our example is an AABA form, so after entering notes and chords for the first eight bars, we can select them and hit Ctrl-C to “Copy”:

Then click the first measure of the next section and hit Ctrl-V to “Paste”:

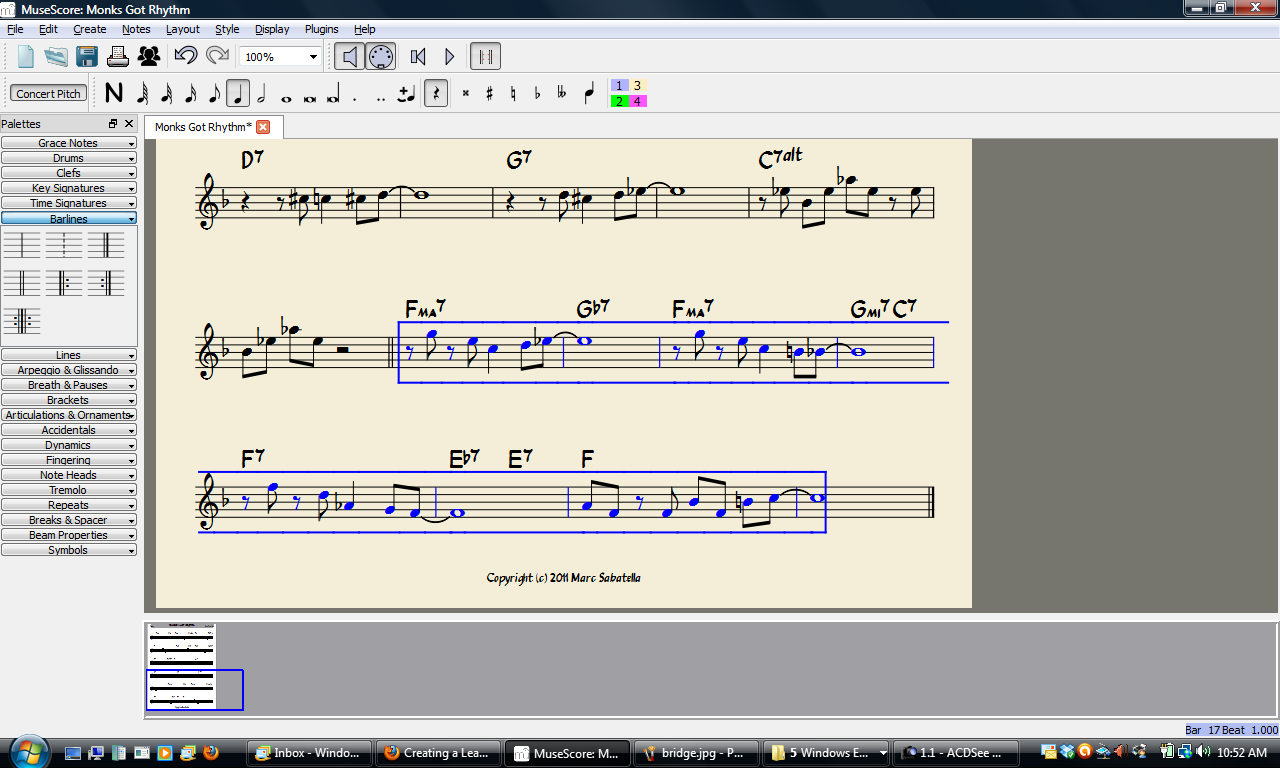
After entering the bridge normally, we can use copy and paste again for the final eight bars:

Layout
This chart has a very simple layout: four measures per line. The easiest way to get a consistent number of measures per line is to use the “Break Every X Measures” plugin. Select the region you wish to affect (the whole document is used if nothing is selected), run Plugins->Break Every X Measures, and enter the desired number of measures:

That’s all there is to creating a simple lead sheet in MuseScore! Here is a link to the completed score on musescore.com:
In the Part 2 of this tutorial, we will cover more advanced features like slash notation, irregular layout, text and other markings, transposition, and more.