Einführung in MuseScore 4
Download und Installation
Windows
Grundlegende Computerkenntnisse:
- Erfahren Sie mehr über die Hardware Ihres Gerätes
- Erfahren Sie mehr über die Software Ihres Gerätes 32-Bit- und 64-Bit-Windows
- Erfahren Sie mehr über das Installieren von Programmen aus Online Quellen unter Windows 10
Wissen zu Musescore 4:
- Erfahren Sie mehr über MuseScore, MuseScore 3, MuseScore 4
- Lesen Sie die Mindestsystemanforderungen für Musescore 4 und prüfen Sie, ob Ihr System diese Anforderungen erfüllt.
- Lernen Sie die neuen, kostenfreien, hervorragend klingenden virtuellen Instrumentenklänge Muse Sounds für Musescore 4 kennen, erstellt von der Firma MuseGroup. Darüber hinaus enthält Musescore 4 bereits zwei grundlegende Wiedergabemethoden: SoundFonts und VSTi
- Erfahren Sie mehr über die optionale Software Muse Hub, die von der Firma MuseGroup entwickelt wurde. Ob Sie Muse Hub brauchen oder nicht, entscheiden Sie. Kurzum: Sie benötigen Muse Hub, wenn Sie in den Genuss von Muse Sounds kommen wollen.
Musescore 4 für Windows kann direkt über https://musescore.org/en/download heruntergeladen und installiert werden.
- Laden Sie sich die Installationsdatei herunter und führen Sie sie durch einen Doppelklick aus. Beachten Sie bei Problemen die Hinweise zur Fehlerbehebung unter Troubleshooting.
- Lesen und befolgen Sie die Installationsanweisungen sorgfältig.
Wenn Sie begeistert sind und den Willen verspüren eine Gegenleistung zu erbringen, besuchen Sie https://musescore.org/de/spenden und lassen Sie sich einmal mehr überraschen.
To uninstall see Uninstall or remove apps and programs in Windows, feel free to leave messages on https://musescore.org/en/forum so that we can improve.
macOS
[Work in progress, please add missing info]
Linux
Also see Troubleshooting
AppImage
Install
The easiest way to install the program is by using an AppImage:
- Go to the Download→Software page at musescore.org
- Under Linux→AppImage (recommended), click on the Download (64 bit) link
- When the download is complete, right-click on the AppImage and select Properties
- Switch to the Permissions tab
- The next step varies depending on your file manager:
- Nautilus-based (Nemo, Files, Caja) : Check the “Allow executing file as program” box.
- Dolphin: Check the "Is executable" box.
- Thunar: Check the “Allow this file to run as a program” box.
- PCManFM: Change the “Execute” option in the drop down list to “Anyone”.
- Exit the dialog.
- Right-click inside the directory in which the AppImage is installed and select Open in Terminal
- In the Terminal type, ./[file name] install (the dot and slash at the beginning are important!)
Steps 7–8 ensure that a MuseScore entry appears in the system’s menu and is linked to the new location of the AppImage (/home/[user name]/.local/bin). The correct file associations are also automatically made.
Note: Instead of steps 7 and 8 (above) you can, of course, install using the absolute file path instead. That is:
- Open the Terminal
- Type [file path] install
Tip: if you apply copy to the AppImage and press Ctrl+Shift+V in the terminal this will enter the absolute file path of the file that has just been “copied”.
Uninstall
No formal uninstall proceedure is needed to remove the installed AppImage. Just delete menu entries and any shortcuts manually, then delete the App itself, and its links (which will be in ~/.local/bin).
Eine erste Partitur erstellen
Wir beginnen mit der Erstellung einer neuen Partitur von einer Vorlage. (Alternativ können Sie sich ansehen, wie eine leere Partitur komplett neu erstellt werden kann: Setting up your score).
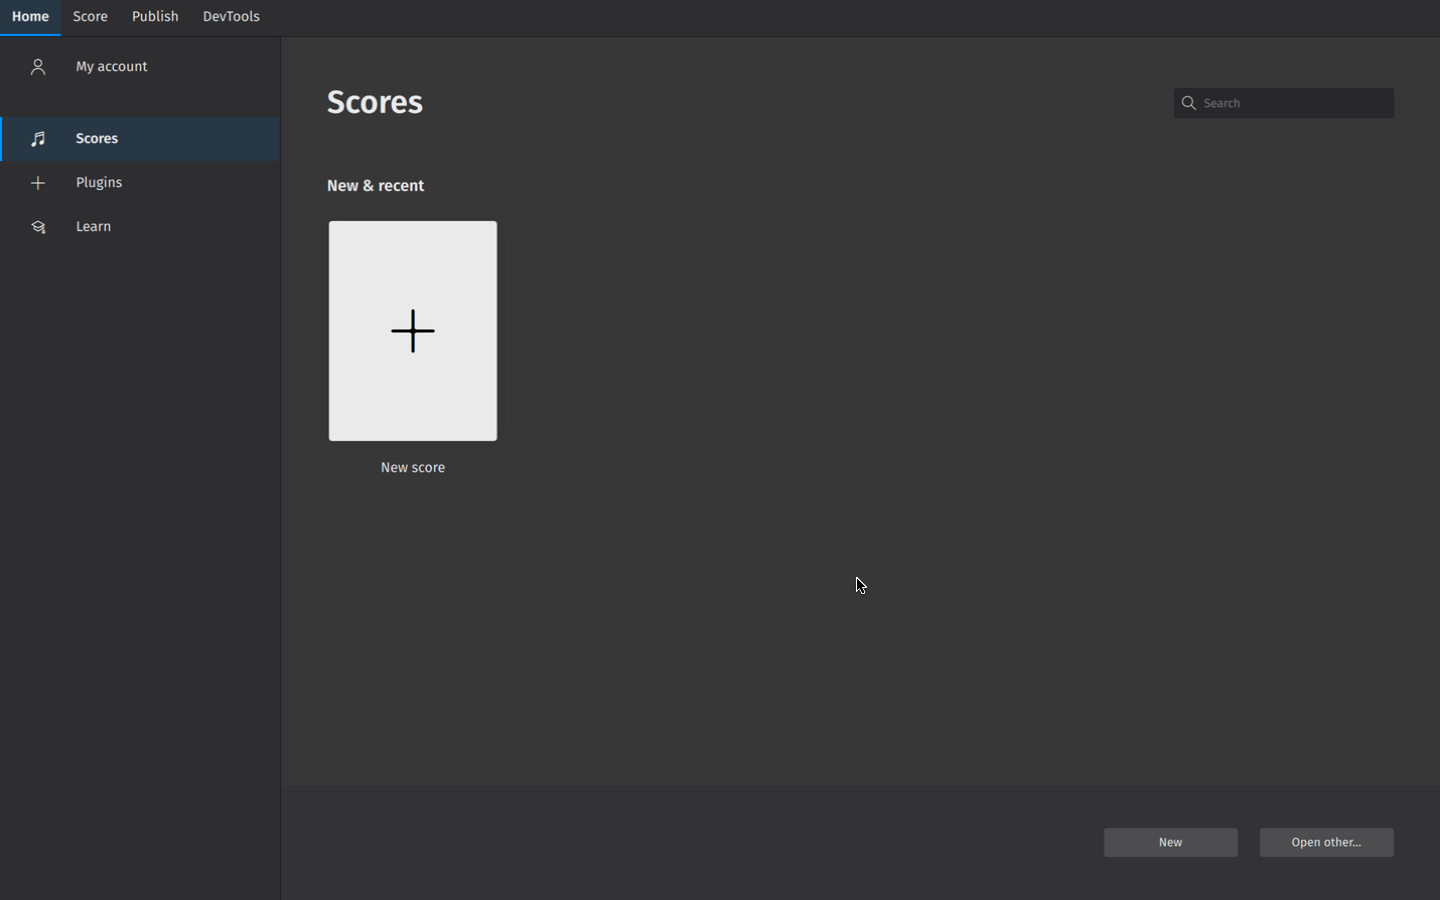
Um eine Partitur von einer Vorlage zu erstellen:
- Klicken Sie auf Neue Partitur im Abschnitt Partituren
- Im Reiter Aus Vorlage erstellen des Dialogs Neue Partitur kann eine Vorlage aus einer der aufgeführten Kategorien ausgewählt werden. Eine Vorlage kann auch direkt über das Suchen-Feld gesucht werden.
- Klicken Sie auf Weiter um die zusätzlichen Partiturinformationen einzugeben (oder überspringen Sie diesen Schritt und lassen Sie Ihre Partitur von MuseScore mit Standard-Werten ausfüllen, die sich später ändern lassen)
- Klicken Sie auf Erstellen, um die neue Partitur anzulegen
Entering score information
In the Additional score information screen, you can set:
- The initial key signature (the default key signature contains no sharps or flats)
- The initial time signature (the default time signature is 4/4)
- The initial tempo (Click Tempo, then Show tempo marking on my score for this to appear)
- A pickup measure (anacrusis or upbeat measure), and its duration
- The initial number of measures in the score (the default is 32, but you can add/remove measures from the score edit window)
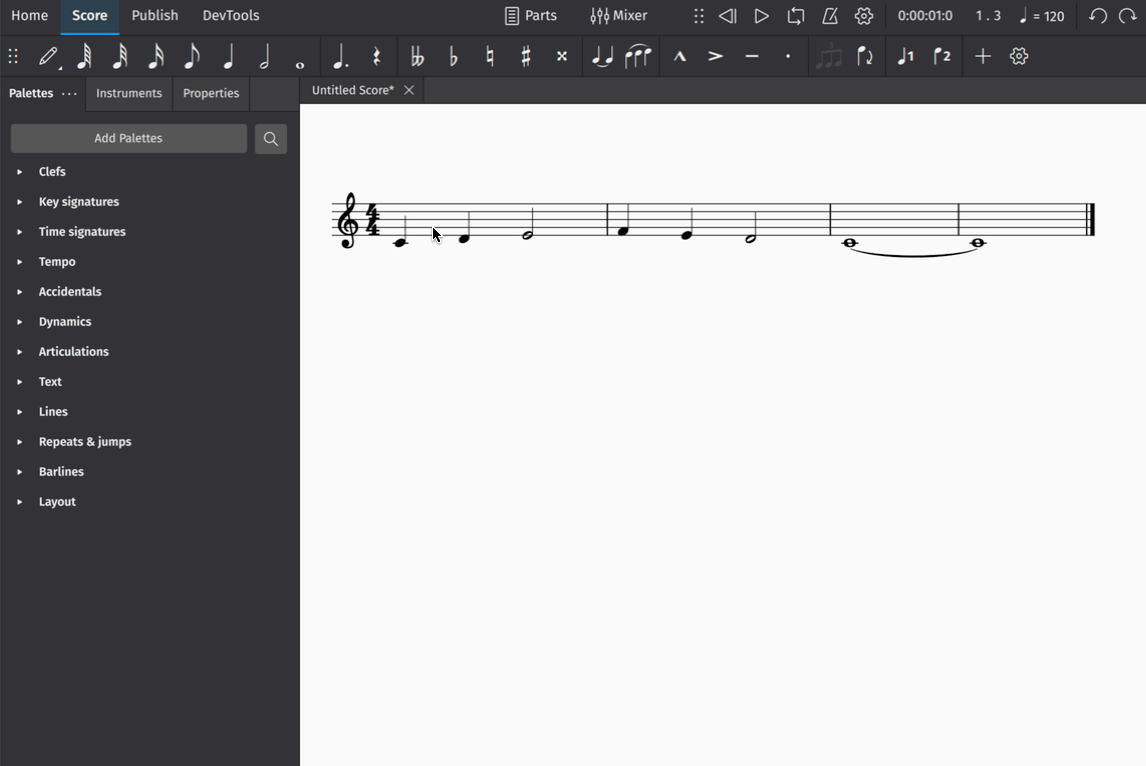
Entering notes
The simplest way to enter notes in MuseScore is to:
- Hit N on your keyboard to enter note input mode
- Start typing note names (A, B, C, D, E, F, G)
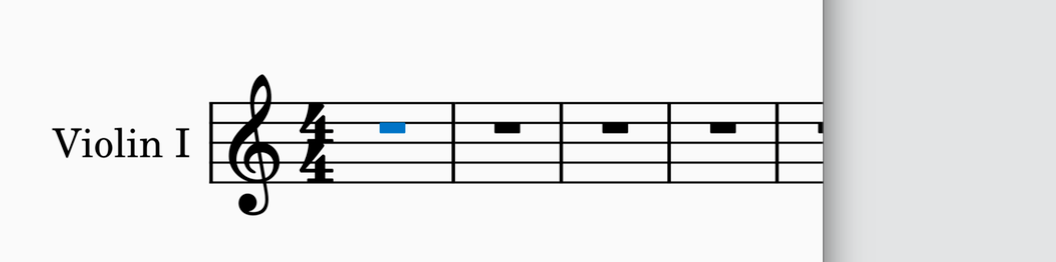
You’re now engraving in MuseScore! You’ll notice the blue note input highlight, which indicates that you are in note input mode. It shows you where in the measure your next note will be entered.
You can specify the duration of each note you enter in the Note input toolbar. To change note duration:
- Ensure you are in note input mode (See above)
- Click on the desired note duration, or
- Use shortcut keys 1 through 7 to select different note values
Learn more about this topic in Entering notes and rests.
Adding items from the palettes
The Palettes panel contains almost every notational object you might need to add detail to your score. The simplest way to add palette items to your notation is to:
- Select an existing object (or range of objects) in your score (e.g. a notehead, clef, measure, etc.)
- In the Palettes panel, open a palette by clicking the triangular arrow button
- Click once on a palette object
Learn more about this topic in Palettes
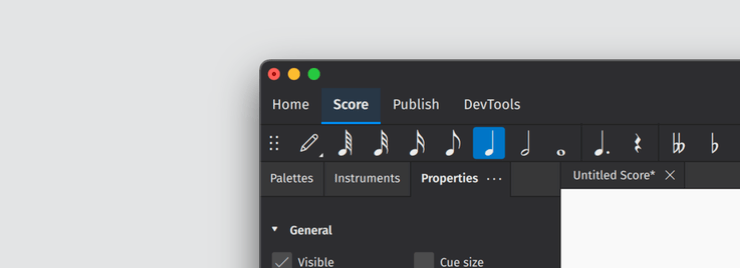
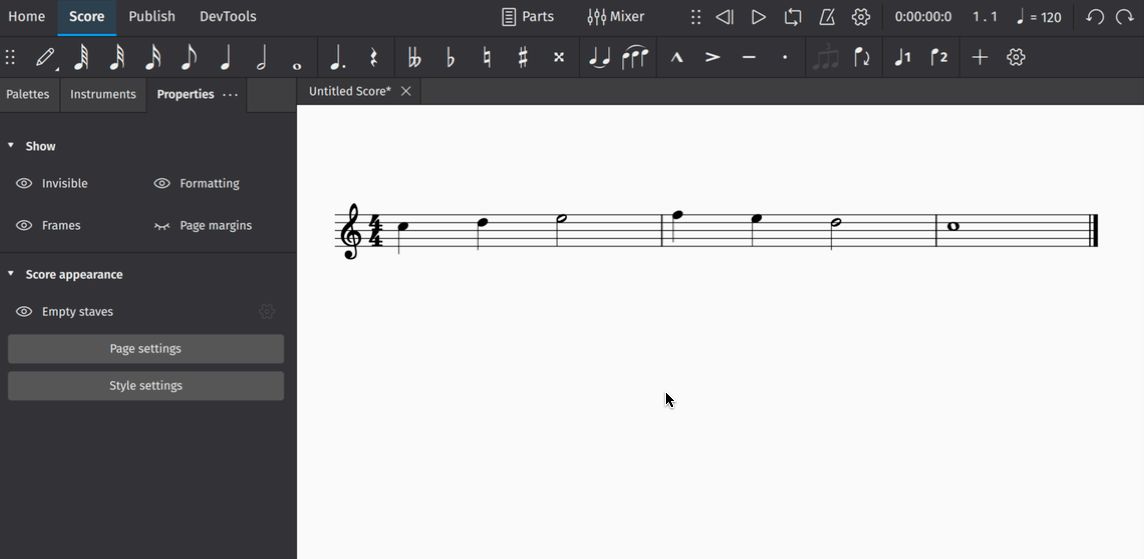
Making adjustments in Properties
The Properties panel can be revealed by clicking on the Properties tab on the left side of the screen:
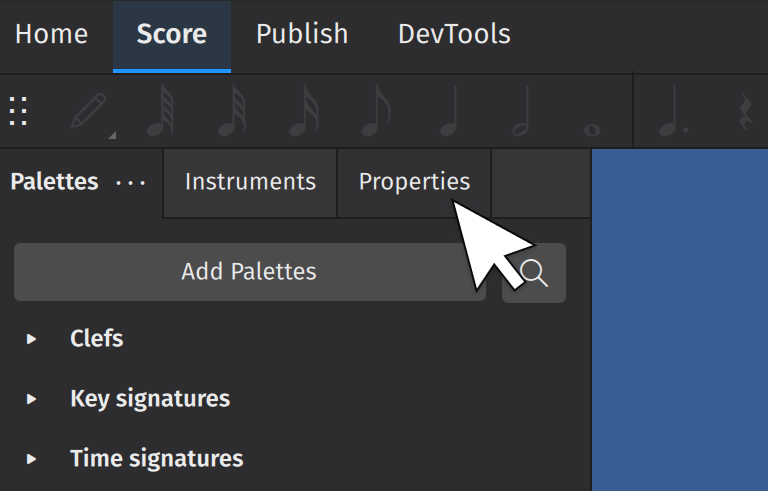
(Users of MuseScore prior to version 4 will know this as the Inspector).
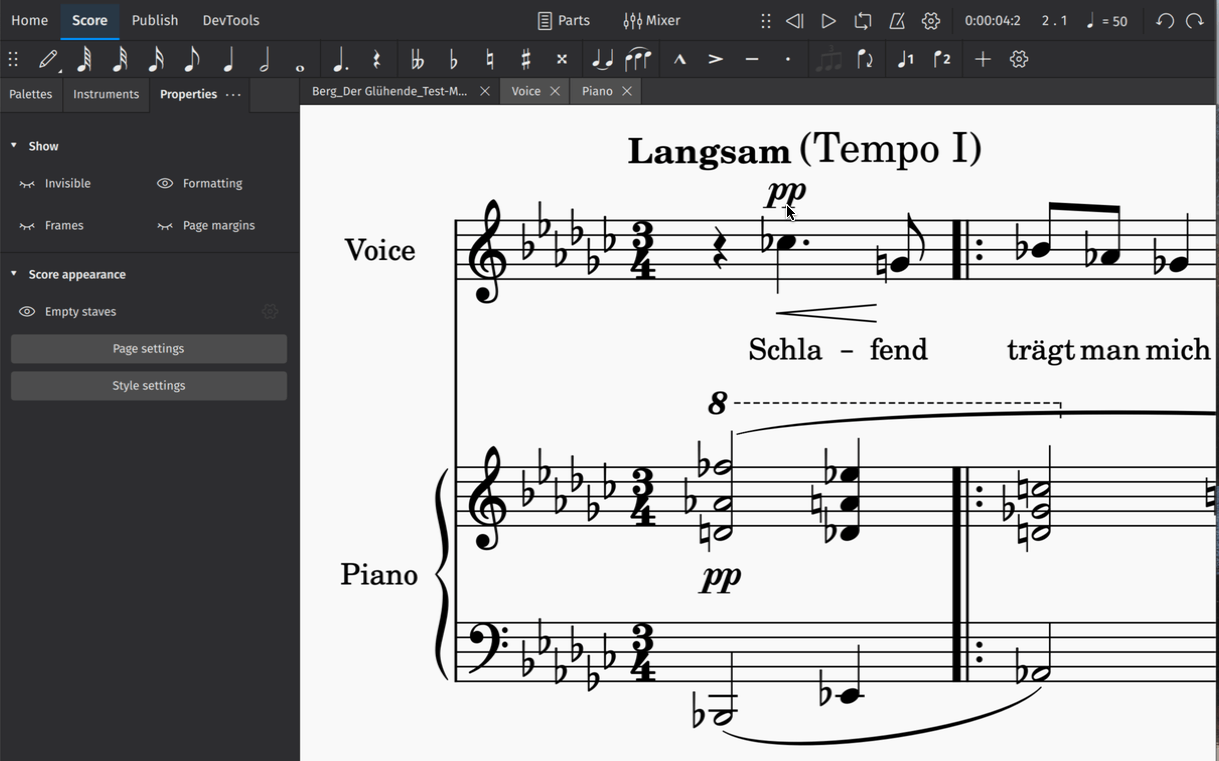
The properties panel will show settings that are specific to the object being selected. These settings usually affect the visual appearance of the selected object. Most of the time, changes you make in Properties will apply only to the object you have selected (e.g. you’ll change the selected hairpin, and not every hairpin in your score).
As you add details to your score, click on any object to see what settings are available.
Learn more about this topic in Properties.
Inserting and deleting measures
To insert a single measure:
- Click on a measure to select it
- In the Measure section of Properties, click Insert measures
- Click the + button
This Measure section contains controls that allow you to insert multiple measures at once. Simply set the number of measures you wish to insert in the text field. You can also use the dropdown menu to change the point where new measures will be inserted.
To delete a measure or group of measures:
- Select the measure(s) you wish to delete
- In the Measures popup, click the trash can icon
More information on this topic can be found in Measures.
Exporting your score
Export allows you to create non-MuseScore files, such as PDF, MusicXML, MIDI, and various audio and image formats.
To export your score:
- Select the Publish tab
- Click Export
- Select the parts you wish to export
- Choose the file format for your exported file(s)
- If exporting multiple parts, choose whether you want each part combined into one file or exported to as separate files
- Click Export
You can also share scores online on musescore.com.
Saving your score
Scores can be saved locally or to your MuseScore cloud storage.
To save your score:
- Go to File
- Click Save
A dialog opens asking you “How would you like to save”, then offering you the options of “Save to the cloud” or “Save to computer”.
Save to computer
The Save to computer option triggers your operating system’s “Save” dialog, allowing you to save the score as a (compressed) MuseScore file, .mscx.
Save to the cloud
Scores saved online (to the cloud) appear in the program’s Home: Scores tab with a cloud symbol at the corner of the file icon. A copy is also automatically saved on your computer in the Cloud scores folder in your user “MuseScore 4” folder.
Learn more about this topic in Opening and saving scores.
Neue Funktionen in MuseScore 4
Wenn Sie von früheren Versionen zu MuseScore 4 kommen, werden Sie Änderungen nicht nur an der Benutzeroberfläche, sondern auch an vielen vertrauten Funktionen und Vorgehensweisen feststellen. Diese Änderungen wurden entwickelt, um die Benutzererfahrung zu verbessern und gleichzeitig eine viel größere Funktionalität zu bieten. Hier ist ein sehr kurzer Überblick über einige der wichtigsten Änderungen.
Neue Benutzeroberfläche
MuseScore 4 kommt mit einer schlanken neuen Benutzeroberfläche. Fast jeder Teil der Anwendung wurde komplett neu gestaltet, um sauberer und leichter zu lesbar zu sein. You can choose between light, dark and high contrast themes, as well as pick your preferred accent color. Changes to the appearance of the app can be made in Preferences.
Instruments and parts
A new instruments panel allows you to hide, rearrange and customize your instruments without having to leave the score view.
The instruments panel integrates tightly with the process of creating parts, making it much easier to produce custom parts with any combination of available instruments. There’s now also a convenient button in the toolbar that allows you to quickly open any available part.
Der Inspektor
Der Inspektor aus früheren Versionen von MuseScore ist jetzt bekannt als der Panel Eigenschaften. Jede Option in diesem Panel wurde neu organisiert und die gesamte Erfahrung wurde verbessert. Standardmäßig zeigt das Eigenschaftenfenster mehrere nützliche Optionen an, Wie die Möglichkeit, leere Takte und verschiedene andere Arten von Partiturmarkierungen zu zeigen oder zu verstecken. Während Sie zuvor einzelne Elementtypen auswählen mussten, bevor Sie Änderungen an ihnen vornehmen konnten, zeigt MuseScore 4 immer relevante Einstellungen an, unabhängig davon, wie viele verschiedene Elemente Sie ausgewählt haben.
New playback and VSTi support
Playback improvements are the single largest change to MuseScore 4. Apart from new sample libraries (Muse Sounds, available as a separate download), there’s now support for VSTi plugins, which can be applied to instruments using the new mixer panel. The mixer also lets you easily switch between VSTi, SoundFonts and the Muse Sounds libraries, while also supporting VST effects. Sounds will now always be saved on a per-score basis, so there is no longer any need for the Synthesizer panel found in MuseScore 3 (this has been removed in MuseScore 4). If you previously used SFZ files for playback in MuseScore 3, we now recommend that you use a free VST sampler, like Sfizz or Sforzando, both of which support SFZ playback.
Engraving improvements
MuseScore 4 features many engraving improvements, some of which will have an effect on the appearance and layout of scores created in earlier versions. The most significant changes affect the placement of beams, slurs and ties, horizontal spacing, and page layout. There are far too many changes to list here, so those interested in learning more about the particularities may wish to read this dedicated document (link forthcoming) that explains and illustrates everything in detail.
An unavoidable consequence of having made such significant engraving improvements is that it will not be possible to open a score in MuseScore 4 from an earlier version of MuseScore and have it look identical.
Cloud storage
When you save a document for the first time, you’ll now be asked whether you want to save your file locally to your computer, or to the cloud. This new option is part of an exciting expansion we are making to services on musescore.com. Learn more about this in Open/Save/Export/Print and Share Scores Online.
Weitere Änderungen
As you use the program, you’ll find lots of other small but significant changes that have been designed to make the process of composing and notating music just that bit easier. These include:
- An expanded note input toolbar, with one-click access to frequently used elements like tuplets and articulation marks. There’s also a convenient “+” menu where you can quickly add everything from notes and intervals, to frames and text elements.
- Easy-access features in the Properties panel that let you quickly add and remove measures, and show and hide empty staves
- A beautiful new mixer
- Improvements to the time signature properties dialog
- A streamlined experience for setting the language of the app
- A new Learn center for instructional videos on how to get the most from the app
More changes are listed in Upgrading from MuseScore 3.x, including some keyboard shortcuts that are different or entirely new.