Download and Installation
MuseScore exists for various different operating systems, including Windows, macOS, Linux distributions and BSD variants. Note that "Musescore" got renamed to "MuseScore Studio" with version 4.3, see the online announcement.
MuseScore, MuseScore 3, MuseScore Studio 4
More on MuseScore and versions so that you can choose one that best suit your needs.
Minimum requirements for Musescore 3.6.2
- Windows
- Windows 7 or higher
- At least 300 MB hard disk space
- 1024x600 pixel resolution
- Mac
- macOS 10.10 or higher
- 1024x600 monitor resolution
Download and Installation
MuseScore is completely free. Users do not need any PRO or PLUS account subscription service to use Musescore. Musescore 3 is released under the GNU General Public License version 2, visit GNU for details.
Additionally, the right to redistribute (the unmodified binary) to friends and students is granted to all, as "you may give any of the versions of MuseScore on musescore.org to other people, or share it internally via a server." To impose an additional service charge or fee legally, read the GPLv2 terms.
Initial preferences
The first time you start MuseScore after the installation, you will be asked to confirm your basic preferences:
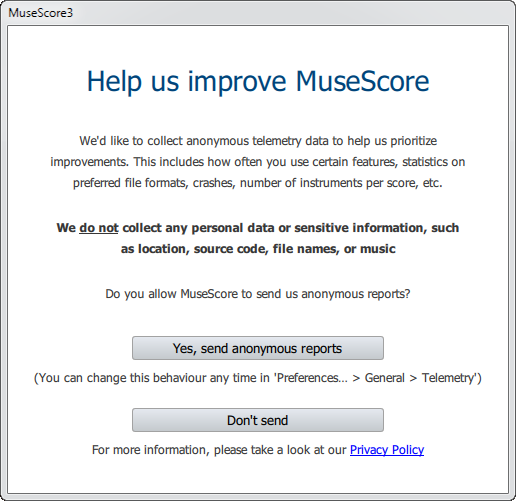
First, you can choose to authorize MuseScore (3.4 or later) to collect usage data, click on Yes, send anonymous reports or Don't send to continue:
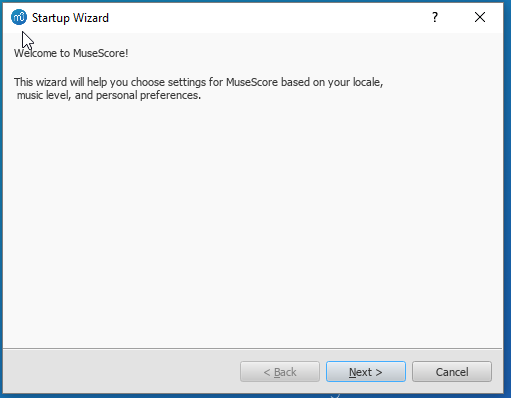
The settings for language is retrieved from your installation, and should normally not need to be changed. Just click Next to continue:
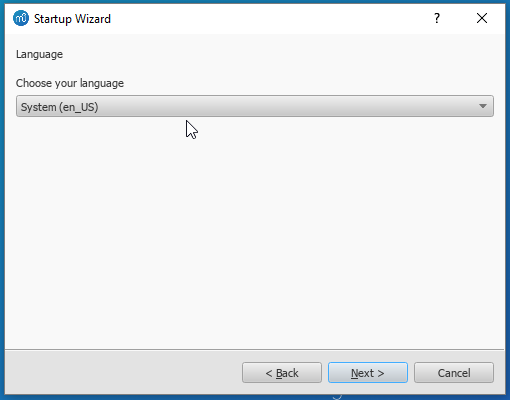
followed by:
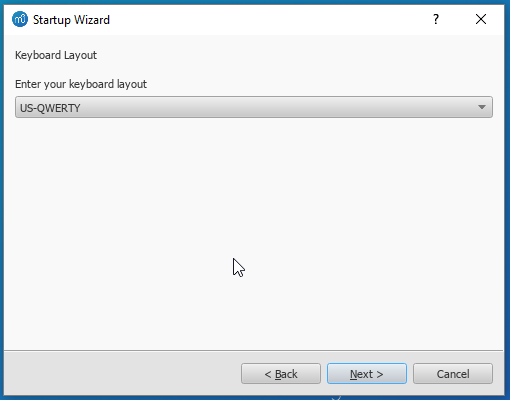
Select your keyboard layout in the drop down list, click Next to continue:
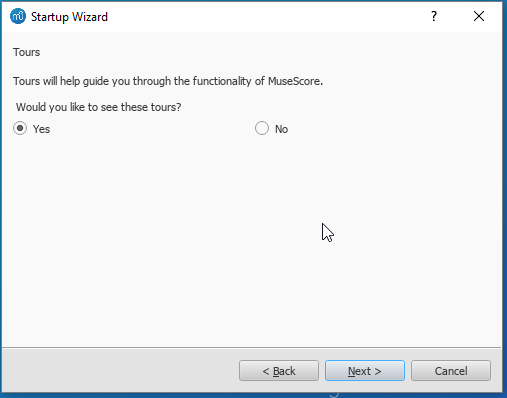
You will now be asked if you wish to take the Tours. If you are new to MuseScore keep the 'Yes' option checked, and click Next to continue:
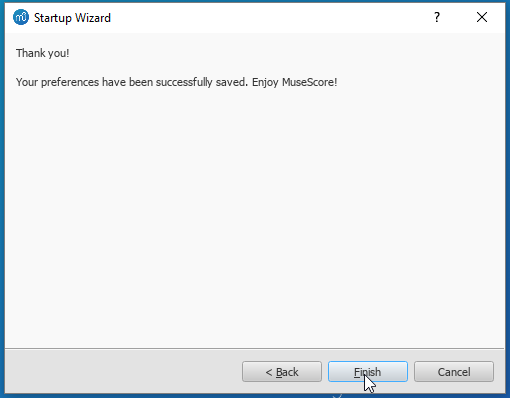
Finally click Finish to start MuseScore.
Install on Windows
Acknowledge Windows version
Before installation, do one of the following to acknowledge the version of your Windows operating system, MuseScore 3 works in Windows 7 and later, and on 32-bit and 64-bit versions of those. On 32-bit Windows make sure to install the 32-bit Versions of MuseScore, on 64-bit Windows it doesn't really matter, but the 64-bit versions should be preferred there.
Enter a command
Enter the following command (Note: applying to Windows 7 or greater):
winver
Go to Settings application
Go to Settings to acknowledge the version of your Windows operating system in either of the following ways (Note: applying to Windows 10 or greater):
-
Go to ⚙ Settings → System → System information
-
Open
Rundialog and enter the following command:ms-settings:about
and check under "Windows-Specifications"
Install
From Microsoft Store (Note: only for Windows 10 or greater)
If you're on Windows 10, a (rather outdated) 32-bit version of MuseScore can be installed from Microsoft Store. There you will only have to click Get the app > and MuseScore will be downloaded, installed, and subsequently automatically updated (warning: having not receiving any updates since the release of 3.3.4).
From our official website
Otherwise you can get the Windows installer from the download page of the MuseScore website. Click on the link corresponding your Operating system, scroll down to the bottom to see the latest versions, there select the version you want to start the download (for Windows choose your processor architecture of 64-bit or 32-bit, the Microsoft installer (*.msi) or the PortableApp (*.exe)). Your Internet browser will ask you to confirm that you want to download this file. Click Save File.
When the download finishes, double-click on the file to start the installation. Windows may prompt you with a User Account Control (UAC) window to confirm this before running the software. Click Run to continue.
The installation process will now start:
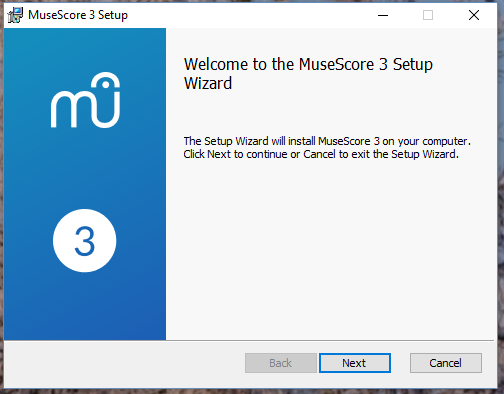
If you click Cancel, here or later, you'll see:
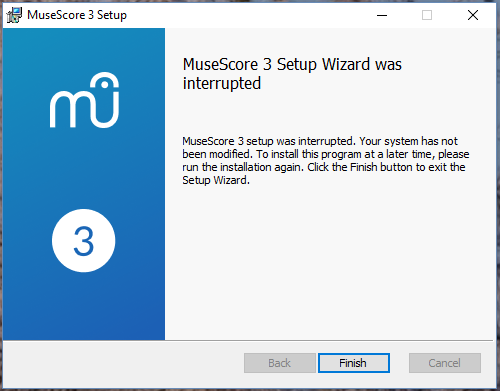
If instead you click Next to continue, the setup wizard displays the terms of the free software license.
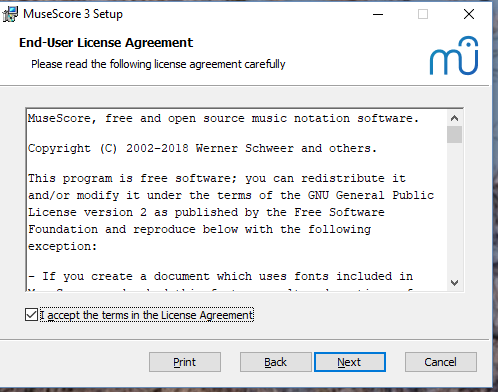
Read the terms of the license, make sure the box next to "I accept the terms in the License Agreement" is checked, and click Next to continue. Next the installer will ask you to confirm the location in which to install MuseScore.
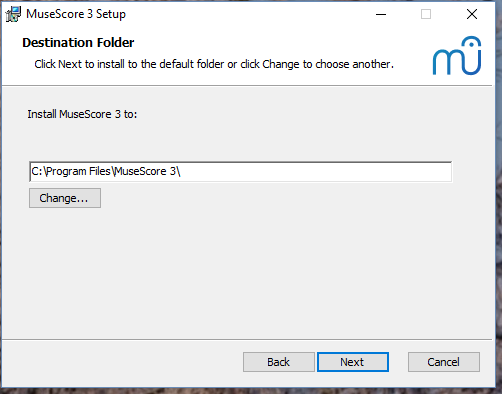
If you are installing a newer version of MuseScore but still want to keep the old version on your computer, then you should change the folder (note that MuseScore 3 can coexist with MuseScore 2 and 1 with no changes needed). Otherwise click Next to continue.
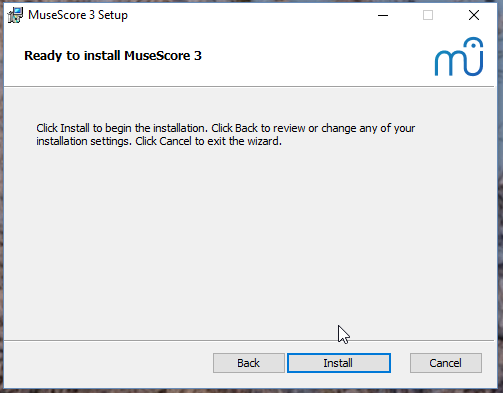
Click Install to continue.
Give the setup wizard a few minutes to install the necessary files and configurations. You'll see
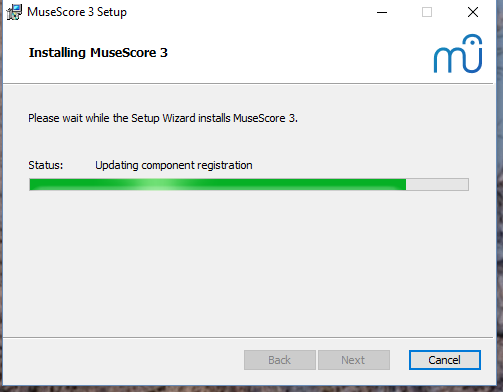
and finally
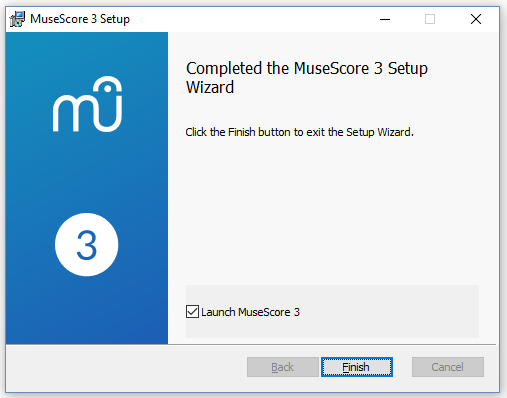
Click Finish to exit the installer. You may delete the installer file you downloaded.
Advanced users: Silent or unattended installation
- Enter the following
msiexeccommand to install MuseScore silently:
msiexec.exe /i MuseScore-<X.Y>.msi /qb
where <X.Y> represents the version of the package you have downloaded manually.
AppendALLUSERS=1if you want to install it for all users of the system rather than just the current one. - Enter either one of the following commands to install MuseScore via WinGet:
Note:- Only available for Windows 10 or greater.
- Independent at different locations and able to coexist although both managed by WinGet.
- Choice
--disable-interactivitymaking the installation silent but unable to avoid the UAC pop-up.
- From WinGet:
WinGet install --id Musescore.Musescore.3 -s winget --disable-interactivity
whose location will be:
"%ProgramFiles%\MuseScore 3\bin\MuseScore3.exe" - From Microsoft Store (Warning: giving you only the outdated 32-bit version MuseScore 3.3.4):
WinGet install --id 9P0CNR9RWZSX -s msstore --disable-interactivity
which will be in a sandbox.
Start MuseScore
To start MuseScore, click ⊞ Start → All Programs → MuseScore 3 → MuseScore 3 .
Uninstall
Note
Note that the uninstallation will not remove your scores, templates, extensions, plugins, or your MuseScore settings.
Via Start menu or Control Panel
Select ⊞ Start → All Programs → MuseScore 3 → Uninstall MuseScore; or via Windows' Control Panel.
Via command line
- Via
msiexec.exe
Enter the followingmsiexeccommand to uninstall MuseScore:
msiexec.exe /x<path_to_package>
where <path_to_package> specifies the location and name of the MuseScore installation package file. - Via WinGet (Note: only available for Windows 10 or greater)
Enter the following command using WinGet:
WinGet uninstall "MuseScore 3"
Troubleshooting
The installer might be blocked by the system. If you don't manage to install MuseScore, right-click the downloaded file and click Properties. If there is a message "This file came from another computer and might be blocked to help protect this computer", click on "Unblock", "OK" and double-click on the downloaded file again.
External links
- How to install MuseScore on Windows without administrator rights (MuseScore HowTo)
- How to run MuseScore as Administrator on Windows (MuseScore HowTo)
- How to fix MuseScore installation error on Windows (MuseScore HowTo)
- What version of Windows am I running?
- Getting the System Version
- Find Information About Your Windows Device
- MSI command-line options
- Standard installer command-line options
- msiexec
- Use WinGet to install and manage applications
MuseScore, MuseScore 3, MuseScore Studio 4
What does this handbook cover
This handbook describes features of MuseScore, the music notation program for Windows, macOS, and Linux supporting a wide variety of file formats and input methods. MuseScore Studio features an easy to use WYSIWYG editor with audio score playback for results that look and sound beautiful, rivaling commercial offerings like Finale and Sibelius. "MuseScore" got named "MuseScore Studio" as of version 4.3, see online announcement.
MuseScore is released as a free and open-source software. Musescore 3 is released under the GNU General Public License version 2. Musescore Studio 4 is released under the GNU General Public License version 3. To learn more about the GPL license, visit http://www.gnu.org or http://www.gnu.org/licenses/gpl-faq.html. To download MuseScore 3.6.2, see Installation: Download and installation chapter.
MuseScore is developed and supported by non paid volunteers and managed by Muse Group employees. MuseScore BVBA is a subsidiary of Muse Group. Source: wikipedia, forum discussion.
What is not covered in this handbook
The following items are often referred to as "MuseScore". However, as explained above, this handbook uses "MuseScore" to refer to Notation software itself only, "MuseScore" is not used to refer to any of the following unless otherwise specified.
- The score viewer and playback mobile apps (Android, iOS), or
- The score viewer and playback interface provided by musescore.com
See How and where to ask for support
Different versions of MuseScore
MuseScore is open-source. Its source code is available at github.
MuseScore 3.6.2 is the last official release of MuseScore 3, see Version information. For forks (wikipedia), see "External Link" section.
MuseScore Studio 4 is a result of continuous development from MuseScore 3.6.2. It has huge playback and countless engraving improvements. After MuseScore 3.6.2 was released, most of the software development moved on to MuseScore Studio 4. Muse Group employees no longer work on bug fixing of Musescore 3.6.2. Due to the substantial change in programming framework and library, some proposed improvements of Musescore 3.6.2 are impossible to be merged into MuseScore Studio 4. Reimplementation of important features is not yet complete, see also this issue, this forum topic, and this forum topic.
When choosing a MuseScore version to create scores, users should take note of the company's distribution versioning and feature implementation philosophy, and consider production needs. For example MuseScore 3.6.2 Linux supports audio and MIDI routing with JACK, which has implications for automation and video synchronization. Source: https://github.com/orgs/musescore/discussions/13745
MuseScore 3 and MuseScore Studio 4 can be installed and opened side by side on the same OS, see Version 3 and 4 installations side-by-side. Score files are opened by default with the last installed Musescore version, see Change default programs in Windows and Problem with Shortcuts to MuseScore 4 files. You can always choose manually with "Right-click > Open with". Note that MuseScore native format (*.mscz and *.mscx) are backward compatible - MuseScore Studio 4 opens MuseScore 3's *.mscz without error, see Native format compatibility
External Links
Notable forks (wikipedia):
- Musescore 3.7 Evolution
- https://github.com/Jojo-Schmitz/MuseScore/wiki
- Forum discussion End of Life plan for 3.x
- MuseScore3.0dev-PianoTutor
Install on macOS
Install
You will find the DMG (disk image) file on the download page of the MuseScore website. Click on the macOS link to start the download. When the download is complete, double-click the DMG file to mount the disk image.
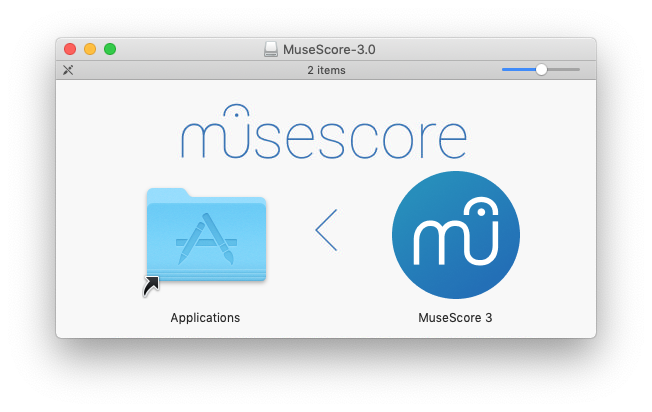
Drag and drop the MuseScore icon to the Applications folder icon.
If you are not logged in as administrator, macOS may ask for a password: click Authenticate and enter your password to proceed.
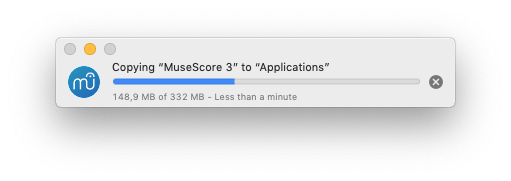
When the application has finished copying, eject the disk image. You can now launch MuseScore from the Applications folder, Spotlight, or Launchpad.
Note: As of macOS 10.15 "Catalina", the system has to be told to permit MuseScore to be allowed to access user parts of the file system. The first time you use it on Catalina, it will ask you if you wish to permit it; of course, answer "yes", but if you bypass this by accident, you can set it via System Preferences > Security and Privacy > Privacy > Files and Folders. Unlock with your Admin credentials, then navigate to MuseScore (whichever version(s) you have and want), add it or them to the list of apps, and select "Documents" and "Downloads" folders, or as you prefer.
Uninstall
Simply delete MuseScore from Applications folder (Admin access will be required to do that, however). Note that this will not remove your scores, templates, extensions and plugins nor your MuseScore settings.
Install with Apple Remote Desktop
You can deploy MuseScore to multiple computers with the "Copy" feature of ARD. Since MuseScore is a self-contained application you can simply copy the application to the '/Application' folder on the target machines. It is also possible to install multiple versions of the application as long as their names differ.
Install on Linux
Distribution packages for various Linux and BSD variants are available. Building from source is another possibility.
Download
Consider your production needs to choose a MuseScore version that best suits you. For example MuseScore 3.6.2 support JACK, which has implications for automation and video synchronization, JACK support is missing from MuseScore 4.0.2.
The Download page contains basic info on how to download, install and use MuseScore.
- Current page contains info for MuseScore 4, its Older and unsupported versions section contains info for MuseScore up to 3.2.3
- Archived page on Internet Archive contains complete info for MuseScore 3.6.2, links on it may not work.
- Working direct download link for MuseScore 3.6.2 stable:
- AppImages: https://ftp.osuosl.org/pub/musescore-nightlies/linux/3x/stable/ (
musescore-$(your system architecture).AppImage, what is my system architecture?)
- AppImages: https://ftp.osuosl.org/pub/musescore-nightlies/linux/3x/stable/ (
More info on AppImage
AppImage is the recommended way to use Musescore. An AppImage is a software that runs on all Linux (see https://appimage.org). It works like a portable app, all the files needed are contained within the AppImage itself.
To run MuseScore AppImage on your system:
Watch the how-to video, or follow these steps:
Step 1: Download a suitable version for your system architecture
AppImages come in different versions. Make sure you download the right one for your system. To check the architecture of your system:
- Open the Terminal.
- Type
arch
or
uname -m
The output will be something like "i686", "x86_64" or "armv7":
i686(or similar) - 32-bit Intel/AMD processor (found on older machines).x86_64(or similar) - 64-bit Intel/AMD processor (modern laptop and desktop computers, most Chromebooks).armv7(or later) - ARM processor (phones & tablets, Raspberry Pi 2/3 running Ubuntu Mate, some Chromebooks, usually 32-bit at present).
Download (jump to) a suitable version.
Step 2: Give the file permission to execute
There are two ways to do this:
From the File Manager:
- Right-click on the AppImage and select "Properties".
- Open the "Permissions" tab.
- Enable the option labelled "Allow executing file as a program".
The process may be slightly different in other file managers.
From the Terminal:
This command works on all Linux systems (Note: The code below assumes that the AppImage is in the Downloads folder. If not the case then amend the file path accordingly):
    cd ~/Downloads
    chmod u+x MuseScore*.AppImage
Step 3: Run the AppImage
- To run the program, just double-click it.
Note: You can move the AppImage to wherever it is most convenient. And to "uninstall" it, just delete it.
Step 4: Install the AppImage
The above procedure allows you to run the MuseScore AppImage but doesn't integrate it with the rest of your system: it doesn't appear in your App menu, and MuseScore files are neither associated with the program nor do they have the correct icon on them.
To remedy this, you need to actually install the program as follows:
- Open the Terminal.
- Type the following (Note: The code below assumes that the AppImage is in the Downloads folder. If not the case then amend the file path accordingly):
    cd ~/Downloads
    ./MuseScore*.AppImage install
Or, alternatively, you can combine the operation into one command:
~/Downloads/MuseScore*.AppImage install
Use the "--help" and "man" options to get more information about the available command line options:
    ./MuseScore*.AppImage --help   # displays a complete list of command line options
    ./MuseScore*.AppImage man      # displays the manual page (explains what the options do)
More info sorted by Linux and BSD
Debian
(Ideally before, otherwise while or after) installing MuseScore itself, you can install one or more soundfont packages (if none is installed, the dependencies will pull in a suitable soundfont automatically):
musescore-general-soundfont-small: the standard MuseScore_General soundfont in SF3 format, as shipped with MuseScore for other operating systemsmusescore-general-soundfont: the MuseScore_General HQ soundfont in SF3 format, as available via the Extensions managermusescore-general-soundfont-lossless: the MuseScore_General HQ soundfont in uncompressed SF2 format: takes up a lot more space on your hard disc, but offers the highest sound quality and extremely fast startup timesfluidr3mono-gm-soundfont: the old soundfont shipped with MuseScore 2.0 (antecessor of MuseScore_General), use only if resources are very tight or you need ittimgm6mb-soundfont: the old soundfont shipped with MuseScore 1.3; cannot substitute the others; use only if you need it; extremely tiny
Note: only the MuseScore_General soundfont (HQ or regular) supports single-note dynamics (SND), and you need at least version 0.1.6 of those soundfonts (from unstable or backports) for SND support!
The command sudo update-alternatives --config MuseScore_General.sf3 can be used at any time to select the default soundfont used by MuseScore if you install more than one (note timgm6mb-soundfont cannot be selected here).
Then, install the musescore3 package for MuseScore 3.x (the current stable version) or musescore for MuseScore 2.x (there’s also musescore-snapshot for the unstable developer preview). The packages are available in the following distributions:
musescore3: sid (unstable), bullseye (testing/Debian 11), buster-backports (stable/Debian 10), stretch-backports-sloppy (oldstable/Debian 9)musescore: buster (stable/Debian 10), stretch-backports (oldstable/Debian 9), jessie-backports-sloppy (oldoldstable/Debian 8)musescore-snapshot: experimental (usable on unstable)
See https://backports.debian.org/Instructions/ for instructions on how to add an official Debian backports repository to your system and install packages from there.
Note: without the appropriate backports, older versions may be available: MuseScore 2.0.3 on stretch, MuseScore 1.3 on jessie. Using the latest 2.3.2 version for 2.x-format scores instead (or conversion to 3.x) is strongly recommended!
KDE neon 20.04 (focal)
Message https://musescore.com/mirabilos if the regular or PPA packages don’t work.
KDE neon 18.04 (bionic)
KDE neon switched from bionic to focal in 2021, so the following should not be necessary any more, but keeping it for now for reference:
The KDE bionic-neon packages are built on a different repository than the normal Ubuntu PPAs, as this is the only way for us to build packages for KDE neon. Due to limitations of the OpenSuSE Buildservice used, this currently only provides amd64 (64-bit PC) packages, no ARM packages (Slimbook or Pinebook remix).
All commands listed below must be entered in a terminal, in one line each.
-
Remove the Ubuntu PPAs (all three of them) from your system if you’ve ever configured it before. This is generally in
/etc/apt/sources.listor one of the files below/etc/apt/sources.list.d/; if you usedadd-apt-repository(the recommended way) to enable the PPA, you can remove them with:sudo rm -f /etc/apt/sources.list.d/mscore-ubuntu-ubuntu-mscore*KDE bionic-neon is not compatible with the Ubuntu PPAs!
-
Install a few standard packages (usually they are already there, but just in case they aren’t) to be able to securely download the repository signature key:
sudo apt-get install wget ca-certificates
- Download (via secure HTTPS connection) and install the repository signing key:
wget -O - https://download.opensuse.org/repositories/home:/mirabile:/mscore/bionic-neon/Release.key | sudo apt-key add -
- Enable the repository:
echo deb https://download.opensuse.org/repositories/home:/mirabile:/mscore/bionic-neon ./ | sudo tee /etc/apt/sources.list.d/mscore.list
- Make the new packages available:
sudo apt-get update
Now, it’s time to install one or more soundfont packages (ideally install the one you want before installing MuseScore):
musescore-general-soundfont-small: the standard MuseScore_General soundfont in SF3 format, as shipped with MuseScore for other operating systemsmusescore-general-soundfont: the MuseScore_General HQ soundfont in SF3 format, as available via the Extensions managermusescore-general-soundfont-lossless: the MuseScore_General HQ soundfont in uncompressed SF2 format: takes up a lot more space on your hard disc, but offers the highest sound quality and extremely fast startup timesfluidr3mono-gm-soundfont: the old soundfont shipped with MuseScore 2.0 (antecessor of MuseScore_General), use only if resources are very tight or you need ittimgm6mb-soundfont: the old soundfont shipped with MuseScore 1.3; cannot substitute the others; use only if you need it; extremely tiny
If you skip this step, a suitable soundfont will be automatically installed when you install MuseScore itself in the final step.
Note: only the MuseScore_General soundfont (HQ or regular) supports single-note dynamics (SND), and you need at least version 0.1.6 of those soundfonts (from our repository) for SND support!
The command sudo update-alternatives --config MuseScore_General.sf3 can be used at any time to select the default soundfont used by MuseScore if you install more than one (note timgm6mb-soundfont cannot be selected here).
Finally, you can install the latest stable version of MuseScore with sudo apt-get install musescore3 and the old 2.x version with sudo apt-get install musescore (the musescore-snapshot package with an instable developer preview is also available).
Ubuntu, Kubuntu, Xubuntu, …
WARNING: these instructions are not for KDE neon 18.04 (bionic) users (see above)! Later versions, such as KDE neon 20.04 (focal), should work though.
MuseScore 2.x (the old version) is available from 18.10 (cosmic) to 19.10 (eoan) out of the box. Older Ubuntu releases carry older versions (18.04 (bionic) has 2.1, 16.04 (xenial) has 2.0, 14.04 (trusty) and 12.04 (precise) have 1.3 and 1.2, respectively). Similar to the Debian instructions, we recommend using the latest 2.3.2 version for old 2.x scores instead, or migrating those scores to MuseScore 3.
Besides the versions supplied by the distribution itself, the MuseScore Debian packager provides newer versions of MuseScore for older Ubuntu releases in official PPAs (package archives).
Please activate the Stable releases of MuseScore 3 repository on your system and then install the musescore3 package, available for all releases from 18.04 (bionic) onwards. (It is not feasible to provide MuseScore 3 for older Ubuntu releases, as those lack the minimum Qt version required by MuseScore 3.)
If you wish to install the older MuseScore 2, activate the Stable releases of MuseScore 2 PPA and install the musescore package, available for 12.04 (precise), 14.04 (trusty), 16.04 (xenial), and 18.04 (bionic) onwards. (Some intermediate releases may have slightly older MuseScore versions still available, but it’s best to update to the next LTS.) On the ancient 12.04 (precise) and 14.04 (trusty) releases, this will upgrade the Qt library in your system, which may break unrelated software (and on 12.04 even the C++ libraries are upgraded), mind you; best to upgrade to a newer LTS.
There’s also a MuseScore Nightly Builds (unstable development builds) PPA, from which the daring can install the musescore-snapshot package, for LTS, that is, 18.04 (bionic) only.
WARNING: these PPAs are only suitable for Ubuntu/Kubuntu/Xubuntu/… but not for Debian or KDE bionic-neon!
As with Debian, you can install one or more soundfont packages (ideally install the one you want before installing MuseScore, but if you don’t, a suitable one will be installed alongside MuseScore):
musescore-general-soundfont-small: the standard MuseScore_General soundfont in SF3 format, as shipped with MuseScore for other operating systemsmusescore-general-soundfont: the MuseScore_General HQ soundfont in SF3 format, as available via the Extensions managermusescore-general-soundfont-lossless: the MuseScore_General HQ soundfont in uncompressed SF2 format: takes up a lot more space on your hard disc, but offers the highest sound quality and extremely fast startup timesfluidr3mono-gm-soundfont: the old soundfont shipped with MuseScore 2.0 (antecessor of MuseScore_General), use only if resources are very tight or you need ittimgm6mb-soundfont: the old soundfont shipped with MuseScore 1.3; cannot substitute the others; use only if you need it; extremely tiny
Note: only the MuseScore_General soundfont (HQ or regular) supports single-note dynamics (SND), and you need at least version 0.1.6 of those soundfonts (possibly from the PPA) for SND support!
The command sudo update-alternatives --config MuseScore_General.sf3 can be used at any time to select the default soundfont used by MuseScore if you install more than one (note timgm6mb-soundfont cannot be selected here).
See also the hints for the various distributions on the download page.
External links
- How to run the MuseScore AppImage on Linux (MuseScore HowTo, video)
Install on Chromebook
Desktop program
MuseScore runs on Chrome OS within a Linux container (also known as Crostini). There is a special procedure you can use to install MuseScore on a Chromebook if you are not already comfortable with running Linux apps. See the article Install MuseScore on Chromebook for more information. You can also get a special build of MuseScore 3 for ARM processors via that link (the official builds are only for Intel).
Alternatively, if you prefer to use the plain Linux commands, follow the steps described in the video linked below:
- Install Linux Virtual Machine called Crostini. Go to Settings > Linux > Turn On
- Download Musescore AppImage package
- Configure AppImage to run. Set
chmod +xfor the AppImage file - Run AppImage with
./followed by the Musescore package file name -
Install required libraries if necessary, e.g.:
sudo apt-get install libvorbisfile3sudo apt-get install libnss3
-
Install AppImage (using the
installcommand line option) to avoid running it from Linux command line each time - Enjoy!
External links
- Watch this interactive video for more details
- Special article on how to Install MuseScore on Chromebook
- How to run MuseScore on ChromeOS (MuseScore HowTo)