はじめに
これらは MuseScore 3 の古い手順です。MuseScore 4 の手順については、MuseScore 4 の紹介 を参照してください。
この章は、MuseScore をインストールし、初めて実行するのに役立つでしょう。各種の学びや助けとなる資料への案内もあります。
MuseScoreを学ぶ
MuseScore は新しいユーザーを援助するよう、いくつもの学習リソースを用意しています。
ツアー
MuseScore を初めて立ち上げた時、スタートアップ・ウィザード が表示され、MuseScore の基礎的な機能の設定を援助するようになっています。そういった機能の一つが ツアー で、その名の通り、ガイド付きツアーです。
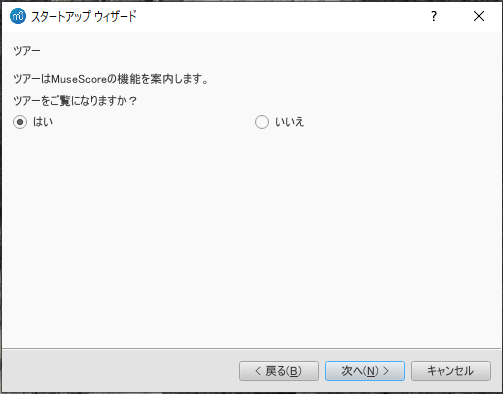
- この機能を有効にするには、スタートアップ・ウィザードのツアー ページで "Would you like to see these tours?" に対する答えの "Yes" にチェックを入れます。
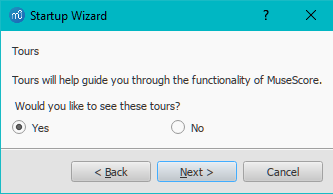
そうするとMuseScore を開いた際に ツアー が始まり、主だったユーザーインターフェースを紹介します。

- ツアーを終了するには: 閉じる ボタンを押します。
- MuseScore を開いた際のツアーの表示を止めるには: "今後もツアーを表示する" のチェックを外します。
- 再びツアーを有効にするには (MuseScore を再度開いた時に): ヘルプ→ツアー→ツアーを表示する を選択します。
- 再びツアーを全部見るには (MuseScore を再度開いた時に): ヘルプ→ツアー→ツアーのリセット を選択します。
現在用意されているツアーは:
- ユーザーインターフェースの紹介
- スコアへ音符と休符を入力
- パレットから記号を入力
- タイムラインでスコアをナビゲーション
- キーボードでスコアをナビゲーション
- 長休符を入力
- 記号の位置を自動配置
- インスペクタでプロパティを修正
- 要素の選択
- スコアに線を追加、編集
「はじめよう」 スコア
対話式の はじめよう スコアはスコアの入力の基本に関する実践的な案内です。初めて MuseScore を開いた時、スタートセンター の主画面に表示され、 それをクリックすれば開きます。青色で記載された指示に従って行けば、スコア記載の基礎を順に案内されます。
注: 「はじめよう」スコアが表示されない場合、スタートセンターの右側パネルにある左右矢印をクリックして表示されるまでオプションを探しましょう。
(校閲者注)「はじめよう(Getting Started)」 スコアは内容が現行バージョンにはそぐわなくなったため、現在は表示されなくなっています。
記述形式のチュートリアル
チュートリアル と How-to セクションに、MuseScore Drumline など、特定のトピックに関するチュートリアルがあります。
ビデオ・チュートリアル
MuseScore.org が Youtube に掲載していた MuseScore の3つのビデオ・チュートリアルは、2023年1月に私的共用に対する制限により、アクセスできなくなりました。
それに代わるべく Marc Sabatella が作成しました [masteringmusescore.com に置いてある Musescore 3 についての包括的なチュートリアル・ビデオ] をお試しください。 Marc Sabatella は MuseScore の codebase に大きく貢献していますが、彼が運営する masteringmusescore.com は Muse Group あるいはその子会社とは無縁です。
MuseScore は、主題毎に各種のビデオを用意しています。次の方法でアクセスできます。
- MuseScore のホームページ MuseScore.org で: Support/Tutorials
- スタートセンター で: 右側パネルにあるビデオページ で
- YouTube の "MuseScore in Minutes" を検索して直接に
-
次の表をご参考に
サポートを得る
MuseScore を使っているうちに問題を生じたなら、援助やサポートを得る方法があります。
ハンドブック
ハンドブックにアクセスするには:
- MuseScore ウェブサイト: サポート → ハンドブック のメニューから
- MuseScore プログラム: ヘルプ → オンラインハンドブック のメニューから
メニューを使ってハンドブックの中をブラウズしたり、検索 してみましょう。
コンテキスト ヘルプ
スコア内の要素を選択して F1 を押すとウェブページが開いて、ハンドブックの中でその要素に関連するものの一覧が表示されます。
フォーラム
MuseScore はユーザー協力のための各種オンライン フォーラム を用意しています。既存の投稿の中にあなたの問題の答えを見つけられるかもしれません。ウェブサイトを 全般サーチ すると全てのフォーラムとハンドブックにある関連項目が一覧できます。
How To's
あることを実行するには複数の異なる技術を使うことが必要な場合があり、そういったことに対する答えをハンドブックに求めるのは困難でしょう。それに対する解法が How To's で見つかるかもしれません。
疑問を投稿
あなたの問題に対する答えが見つからないなら、サポートとバグの報告 フォーラムに問い合わせましょう。
質問を投稿する時には:
- したいことは何か、既に試したことは何かを、できる限り詳しく記述しましょう。
- 問題を生じているスコアを添付しましょう。他の人にとってその問題をより容易に理解できるでしょう。投稿ページの下のSave と Preview ボタンの上にある "File attachments" オプションを使います。
バグ報告
バグだと考える事柄に遭遇した場合、第一のステップは サポートとバグの報告 フォーラムへの投稿です。そうすれば、他の人がそれがバグであるかチェックするのを助けたり、回避する方法を助言してくれたりして、あなたはスコアの作成を続けられます。 これに関して バグの報告や機能の要望を行うには により詳しい説明があります。
外部リンク
- How to write a good bug report: step-by-step instructions Isolate bug (MuseScore HowTo)
ダウンロードとインストール
MuseScore Studio は Windows、macOS、Linuxディストリビューション や BSD系列 を含む多くのオペレーティングシステムに対応しています。MuseScore Studio は以前 MuseScore とい名称でした。詳しくは online announcement をご参照ください。
2 2
MuseScore, MuseScore 3, MuseScore 4
MuseScore とバージョンの詳細 により、あなたの使用に適切な MuseScore を選択できます。
Musescore Studio 3.6.2 に対応する最小要件
Windows
Windows 7 以降
少なくとも 300MB のハードディスク容量
モニター解像度 1024x600ピクセル
Mac
macOS 10.10以降
モニター解像度 1024x600ピクセル
ダウンロードとインストレーション
MuseScore Studio は全くに無料です。利用するのに PRO とか PLUS などといった類の MuseScore Studio の利用サービスは必要ありません。 Musescore Studio は GNU General Public License version 2 に基づいて提供されており、詳細は http://www.gnu.org の GPLv2 をご参照ください。
加えて、変更を加えることなく友人や生徒に再流通することが可能で、詳細は https://musescore.org/en/faq#faq-20204 の "you may give any of the versions of MuseScore on musescore.org to other people, or share it internally via a server." をご参照ください。有償で行うことについては GPLv2 terms をご参照ください。
初期設定
インストールを行った後、MuseScore を初めて開始すると、基本的な環境設定の項目についての質問が表示されます。
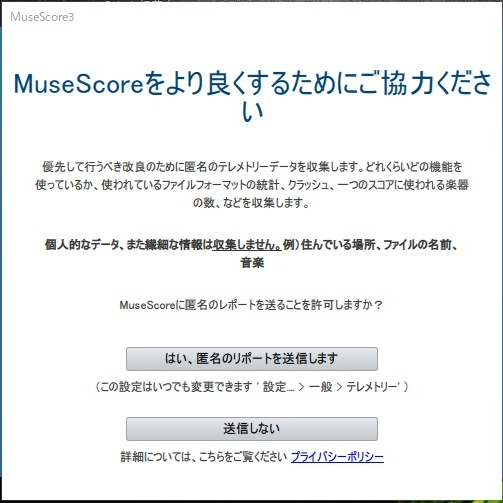
まず、MuseScore(3.4以降)が使用状況データを収集することを許可するかどうかを、 はい、匿名のリポートを送信します か 送信しない をクリックして選択します。
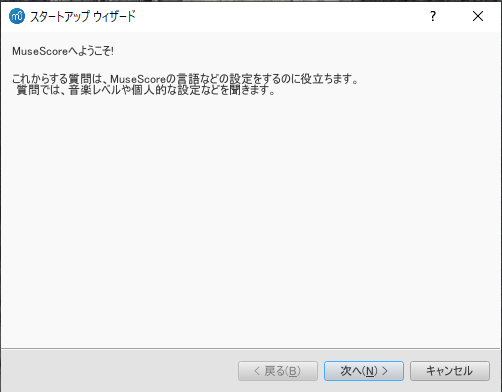
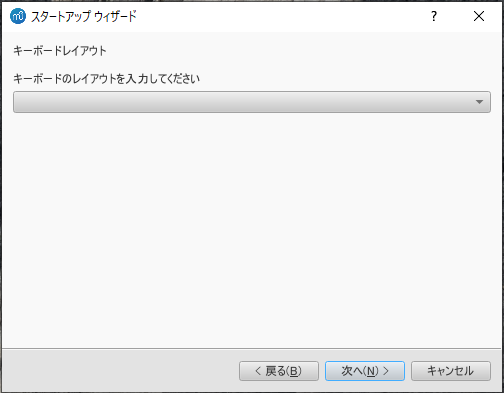
言語とキーボードレイアウトの設定はインストール中に記録されるので、特に変更する必要はありません。次へ をクリックして続けます。
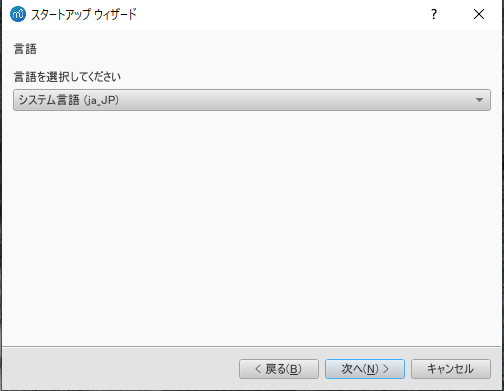
続いて、
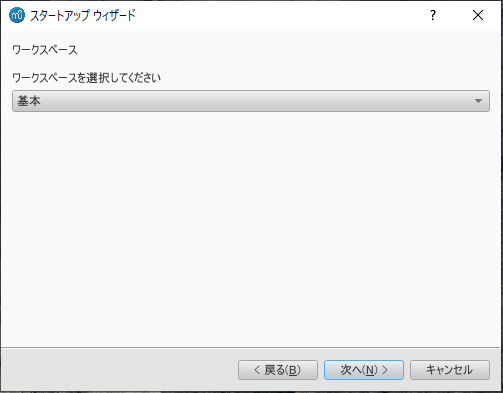
ワークスペース ページでは、デフォルトのツールバーとパレットを指定します。ドロップダウンリストから一つを選び、 次へ をクリックして続けます。
次の質問は ツアー を行うかどうかです。MuseScore が "初めて" であれば 'はい' をチェックし、次へ をクリックして続けます。
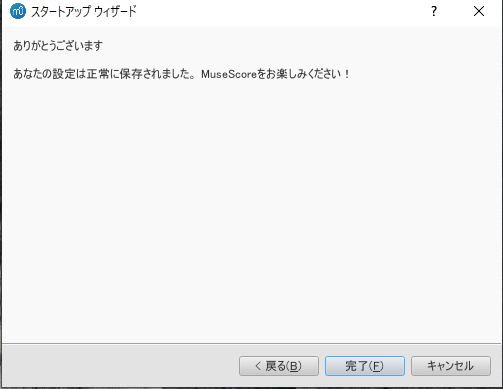
最後に 完了 をクリックすると、MuseScore が開始されます。
MuseScore, MuseScore 3, MuseScore 4
このハンドブックで MuseScore が指し示すのは何ですか
このハンドブックは、さまざまなファイル形式と入力方法をサポートする Windows、macOS、および Linux 用の楽譜作成プログラムである MuseScore の機能についてのガイドです。 MuseScore は、GNU General Public License に基づいて無料のオープンソース ソフトウェアとしてリリースされています。 MuseScore は無償のボランティアによって 開発 ・サポートされ、Muse Group の従業員によって管理されています。 MuseScore BVBA は Muse Group の子会社です。 出典: wikipedia、forum discussion
楽譜の作成、再生、印刷が無料でできます。 MuseScore は、Windows、MacOS、Linux 上で動作するオープンソースの楽譜作成ソフトウェアで、40 を超える言語で利用できます。 使いやすい WYSIWYG エディタとオーディオ スコア再生機能を備えており、Finale や Sibelius などの商用製品に匹敵する美しい見た目とサウンドの結果が得られます。 出典: Handbook: MuseScore product description
このハンドブックで MuseScore が言及していないものは何ですか
次のことがミューズスコアと呼ばれることがよくありますが、このハンドブックの内容ではありません。
- スコアビューアおよび再生モバイルアプリ (Android、iOS)、または
- musescore.com が提供するスコア ビューアおよび再生インターフェイス
How and where to ask for support を参照ください。
MuseScore バージョン、MuseScore 3、MuseScore 4
MuseScore 3.6.2 は MuseScore 3 の最新バージョンです。MuseScore はオープンソース ソフトウェアであり、公式 MuseScore のソース コードは github にあります。 MuseScore 3.6.2 からの分岐が存在します、それらは管理者によって (まだ) 認識されていない方法で MuseScore を改善します。そのような認識はライセンスとは関係ありません。 バージョン 3.6.3 または 3.7 を提案する人もいます。MuseScore 4 以降の MuseScore 3 に関するフォーラム ディスカッション を参照ください。 プログラミング フレームワーク/ライブラリの大幅な変更により、一部の改善点は MuseScore 4 にマージすることができません。
MuseScore ソフトウェア開発の大部分がバージョン 3.6.2 から 4 に移行して以来、Muse Group の従業員は Musescore 3.6.2 のバグ修正に取り組むことはなくなりました。 MuseScore 4 は実際、MuseScore 3.6.2 からの継続的な開発の結果であり、大幅な再生と数え切れないほどの印刷の改良が加えられています。 プログラミング フレームワーク/ライブラリに大幅な変更が加えられ、MuseScore 4 は MuseScore 3 のより良いバージョンになるよう努めていますが、現在の MuseScore 4 実装には JACK などの重要な機能がありません、discussion1、discussion2、discussion3。
使用する MuseScore のバージョンを選ぶときは、会社のディストリビューションのバージョン管理と機能の実装の考え方に注意し、運用上のニーズを考慮してください。 たとえば、MuseScore 3.6.2 Linux は自動化とビデオ同期に影響する JACK をサポートしていますが、MuseScore 4.0.2 には JACK サポートがありません。 出典: https://github.com/orgs/musescore/Discussions/13745
MuseScore 3 と MuseScore 4 は、同じ OS 上にインストールし、並べて開くことができます。バージョン 3 と 4 の並べてインストール を参照ください。 スコア ファイルは、デフォルトでは 最後にインストールされた Musescore バージョンで開かれます。ファイルを開くプログラムを変更する と Problem with Shortcuts to MuseScore 4 files を参照ください。
Windows でのインストール
インストール
Windows 10 でしたら MuseScore の(いささか古めいた)32-bit バージョンが Windows Store に用意されていて、ここ をクリックすると Store app. の MuseScoreのページが開きます。そこで Get the app > ボタンをクリックするだけで、MuseScore がダウンロードされ、インストールされ、引き続いて自動アップデートが行われます。
あるいは MuseScore のウェブサイトの ダウンロード ページから Windows インストーラーが得られます。 64-bit か 32-bit かを選んでダウンロードを開始します。使用するインターネットブラウザーがそのファイルをダウンロードするのか確認を求めてきます。ファイルを保存 をクリックしましょう。
ダウンロードが終了したら、そのファイルをダブルクリックしてインストールを始めましょう。始めるにあたって Windows のセキュリティ機能が確認を求めるウィンドウを表示します。Run をクリックして続行しましょう。
そうするとインストール手順が始まります。
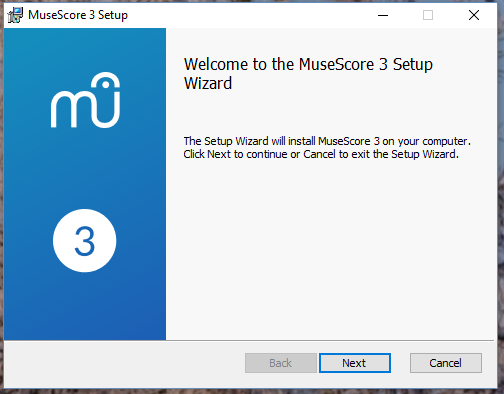
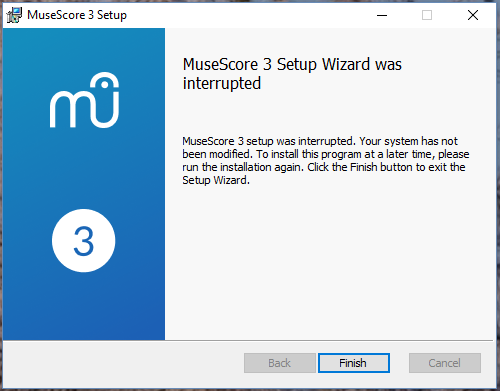
ここで、あるいは後でも、Cancel をクリックすると次の表示になります。
Next をクリックすると続行し、セットアップウィザードが free software license の条件を表示します。
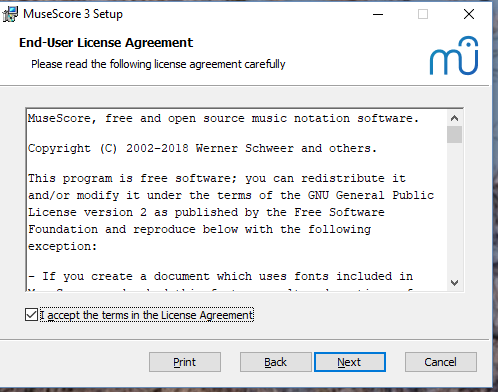
それらの条件を読み、条件を了解した旨の "I accept the terms in the License Agreement" にチェックを入れ、Next をクリックして続けます。次にインストーラーは MuseScore を保存する場所の確認を求めてきます。
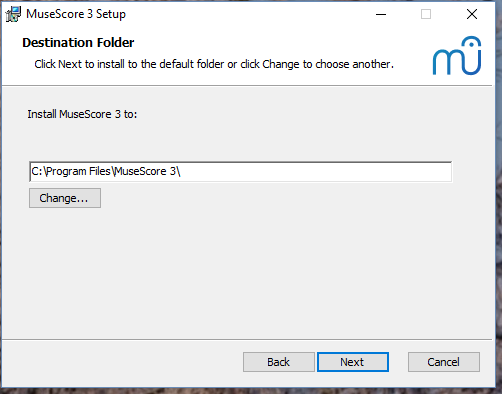
新しくインストールする MuseScore と同時に既にコンピュータにある旧バージョンも持っておきたい場合には、別のフォルダーに変えることができます(注:MuseScore 3 は MuseScore 2 や1 を変更することなく同時並行に利用できます)。
Next をクリックして続行します。
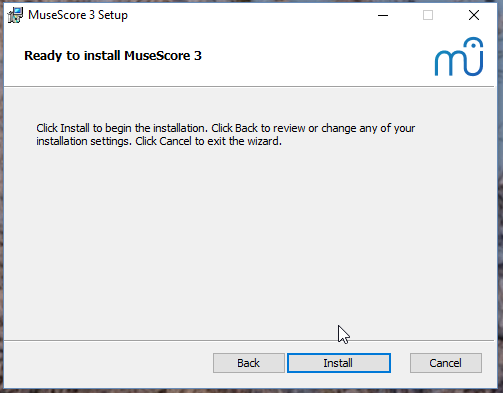
Install を押して続行します。
セットアップウィザードは2~3分で必要なファイルのインストールと設定を行い、次の画面表示となります。
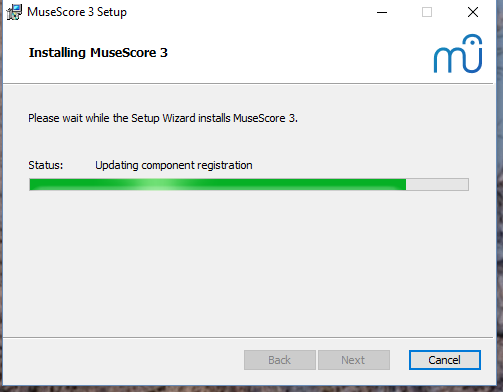
そして最終的に、
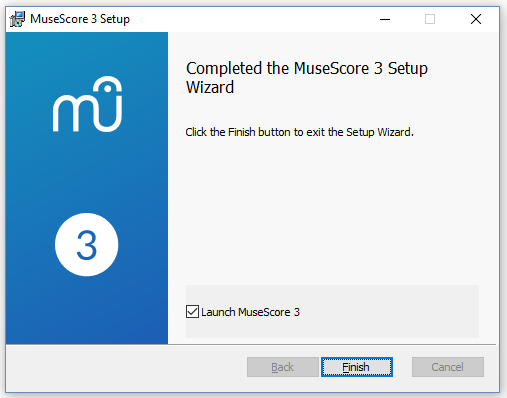
Finish をクリックしてインストーラーを終了します。ダウンロードしたインストーラーを削除してもかまいません。
MuseScore を始める
メニューから MuseScore を始めるには、スタート→全てのプログラム→MuseScore 3→MuseScore 3 と選びます。
上級ユーザー: Silent / unattended インストール
-
次のコマンドを使うと、画面表示することなく MuseScore をインストールできます。
msiexec /i MuseScore-X.Y.msi /qb-
アンインストール
MuseScore をアンインストールするには、メニューから スタート→全てのプログラム→MuseScore 3→MuseScore をアンインストール; を選ぶか、Windows' コントロールパネルを使います。アンインストールしても作成したスコアや MuseScore の設定は削除されません。
トラブルシューティング
システムによってinstallerがブロックされることがあるかもしれません。MuseScore をインストールすることができない場合には、ダウンロードしたファイルを右クリックし、プロパティーをクリックします。 もし "このファイルは他のコンピューターから取得したものです。このコンピューターを保護するため、このファイルへのアクセスはブロックされる可能性があります。" と表示された場合には、"許可する(K)"をチェックし、"OK" をクリックしてからダウンロードしたファイルを再度ダブルクリックします。
外部リンク
- How to install MuseScore on Windows without administrator rights (MuseScore HowTo)
- How to run MuseScore as Administrator on Windows (MuseScore HowTo)
- How to fix MuseScore installation error on Windows (MuseScore HowTo)
- MSI command-line options
- Standard installer command-line options
macOS でのインストール
インストール
DMG(ディスクイメージ)ファイルはMuseScoreのウェブサイトのダウンロードページにあります。macOSのリンクをクリックしてダウンロードを開始します。ダウンロードが完了したら、DMGファイルをダブルクリックしてディスクイメージをマウントします。
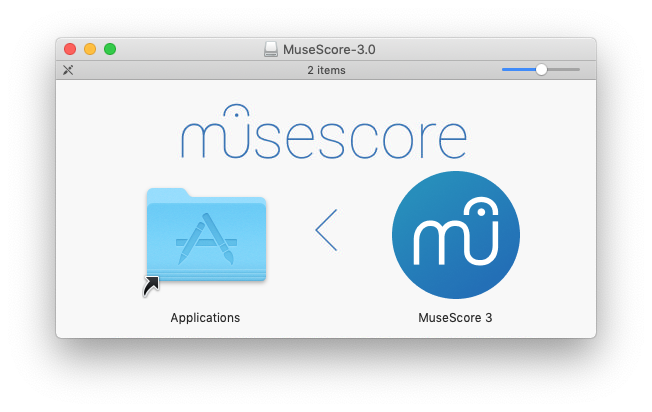
MuseScoreのアイコンを「アプリケーション」フォルダのアイコンにドラッグ&ドロップします。
If you are not logged in as administrator, macOS may ask for a password: click Authenticate and enter your password to proceed.
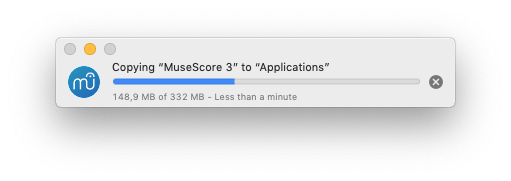
When the application has finished copying, eject the disk image. You can now launch MuseScore from the Applications folder, Spotlight, or Launchpad.
Note: As of macOS 10.15 "Catalina", the system has to be told to permit MuseScore to be allowed to access user parts of the file system. The first time you use it on Catalina, it will ask you if you wish to permit it; of course, answer "yes", but if you bypass this by accident, you can set it via System Preferences > Security and Privacy > Privacy > Files and Folders. Unlock with your Admin credentials, then navigate to MuseScore (whichever version(s) you have and want), add it or them to the list of apps, and select "Documents" and "Downloads" folders, or as you prefer.
アンインストール
ApplicationsフォルダからMuseScoreを削除するだけです(ただし、そのためには管理者のアクセスが必要です)。
Apple Remote Desktopでインストール
ARDの「コピー」機能を使えば、MuseScoreを複数のコンピュータにデプロイすることができます。MuseScoreは自己完結型のアプリケーションなので、コピー先のマシンの「/Application」フォルダにコピーするだけでOKです。また、アプリケーションの名前が異なる複数のバージョンをインストールすることも可能です。
Install on Linux and BSD variants
Distribution packages for various Linux and BSD variants are available. Building from source is another possibility.
Download
Consider your production needs to choose a MuseScore version that best suits you. For example MuseScore 3.6.2 support JACK, which has implications for automation and video synchronization, JACK support is missing from MuseScore 4.0.2.
The Download page contains basic info on how to download, install and use MuseScore.
- Current page contains info for MuseScore 4, its Older and unsupported versions section contains info for MuseScore up to 3.2.3
- Archived page on Internet Archive contains complete info for MuseScore 3.6.2, links on it may not work.
- Working direct download link for MuseScore 3.6.2 stable:
- AppImages: https://ftp.osuosl.org/pub/musescore-nightlies/linux/3x/stable/ (
musescore-$(your system architecture).AppImage, what is my system architecture?)
- AppImages: https://ftp.osuosl.org/pub/musescore-nightlies/linux/3x/stable/ (
More info on AppImage
AppImage is the recommended way to use Musescore. An AppImage is a software that runs on all Linux (see https://appimage.org). It works like a portable app, all the files needed are contained within the AppImage itself.
To run MuseScore AppImage on your system:
Watch the how-to video, or follow these steps:
Step 1: Download a suitable version for your system architecture
AppImages come in different versions. Make sure you download the right one for your system. To check the architecture of your system:
- Open the Terminal.
- Type
arch
or
uname -m
The output will be something like "i686", "x86_64" or "armv7":
i686(or similar) - 32-bit Intel/AMD processor (found on older machines).x86_64(or similar) - 64-bit Intel/AMD processor (modern laptop and desktop computers, most Chromebooks).armv7(or later) - ARM processor (phones & tablets, Raspberry Pi 2/3 running Ubuntu Mate, some Chromebooks, usually 32-bit at present).
Download (jump to) a suitable version.
Step 2: Give the file permission to execute
There are two ways to do this:
From the File Manager:
- Right-click on the AppImage and select "Properties".
- Open the "Permissions" tab.
- Enable the option labelled "Allow executing file as a program".
The process may be slightly different in other file managers.
From the Terminal:
This command works on all Linux systems (Note: The code below assumes that the AppImage is in the Downloads folder. If not the case then amend the file path accordingly):
    cd ~/Downloads
    chmod u+x MuseScore*.AppImage
Step 3: Run the AppImage
- To run the program, just double-click it.
Note: You can move the AppImage to wherever it is most convenient. And to "uninstall" it, just delete it.
Step 4: Install the AppImage
The above procedure allows you to run the MuseScore AppImage but doesn't integrate it with the rest of your system: it doesn't appear in your App menu, and MuseScore files are neither associated with the program nor do they have the correct icon on them.
To remedy this, you need to actually install the program as follows:
- Open the Terminal.
- Type the following (Note: The code below assumes that the AppImage is in the Downloads folder. If not the case then amend the file path accordingly):
    cd ~/Downloads
    ./MuseScore*.AppImage install
Or, alternatively, you can combine the operation into one command:
~/Downloads/MuseScore*.AppImage install
Use the "--help" and "man" options to get more information about the available command line options:
    ./MuseScore*.AppImage --help   # displays a complete list of command line options
    ./MuseScore*.AppImage man      # displays the manual page (explains what the options do)
More info sorted by Linux and BSD
Debian
(Ideally before, otherwise while or after) installing MuseScore itself, you can install one or more soundfont packages (if none is installed, the dependencies will pull in a suitable soundfont automatically):
musescore-general-soundfont-small: the standard MuseScore_General soundfont in SF3 format, as shipped with MuseScore for other operating systemsmusescore-general-soundfont: the MuseScore_General HQ soundfont in SF3 format, as available via the Extensions managermusescore-general-soundfont-lossless: the MuseScore_General HQ soundfont in uncompressed SF2 format: takes up a lot more space on your hard disc, but offers the highest sound quality and extremely fast startup timesfluidr3mono-gm-soundfont: the old soundfont shipped with MuseScore 2.0 (antecessor of MuseScore_General), use only if resources are very tight or you need ittimgm6mb-soundfont: the old soundfont shipped with MuseScore 1.3; cannot substitute the others; use only if you need it; extremely tiny
Note: only the MuseScore_General soundfont (HQ or regular) supports single-note dynamics (SND), and you need at least version 0.1.6 of those soundfonts (from unstable or backports) for SND support!
The command sudo update-alternatives --config MuseScore_General.sf3 can be used at any time to select the default soundfont used by MuseScore if you install more than one (note timgm6mb-soundfont cannot be selected here).
Then, install the musescore3 package for MuseScore 3.x (the current stable version) or musescore for MuseScore 2.x (there’s also musescore-snapshot for the unstable developer preview). The packages are available in the following distributions:
musescore3: sid (unstable), bullseye (testing/Debian 11), buster-backports (stable/Debian 10), stretch-backports-sloppy (oldstable/Debian 9)musescore: buster (stable/Debian 10), stretch-backports (oldstable/Debian 9), jessie-backports-sloppy (oldoldstable/Debian 8)musescore-snapshot: experimental (usable on unstable)
See https://backports.debian.org/Instructions/ for instructions on how to add an official Debian backports repository to your system and install packages from there.
Note: without the appropriate backports, older versions may be available: MuseScore 2.0.3 on stretch, MuseScore 1.3 on jessie. Using the latest 2.3.2 version for 2.x-format scores instead (or conversion to 3.x) is strongly recommended!
Fedora
-
Import the GPG key:
su
rpm --import http://prereleases.musescore.org/linux/Fedora/RPM-GPG-KEY-Seve
-
Go to the download page of the MuseScore website. Click on the link for the stable Fedora download and choose the correct rpm package for your architecture.
-
Depending on your architecture, use one of the two sets of commands to install MuseScore
-
for arch i386
su
yum localinstall musescore-X.Y-1.fc10.i386.rpm
-
for arch x86_64
su
yum localinstall musescore-X.Y-1.fc10.x86_64.rpm
-
If you have difficulty with sound, see Fedora 11 and sound.
KDE neon 20.04 (focal)
Message https://musescore.com/mirabilos if the regular or PPA packages don’t work.
KDE neon 18.04 (bionic)
KDE neon switched from bionic to focal in 2021, so the following should not be necessary any more, but keeping it for now for reference:
The KDE bionic-neon packages are built on a different repository than the normal Ubuntu PPAs, as this is the only way for us to build packages for KDE neon. Due to limitations of the OpenSuSE Buildservice used, this currently only provides amd64 (64-bit PC) packages, no ARM packages (Slimbook or Pinebook remix).
All commands listed below must be entered in a terminal, in one line each.
-
Remove the Ubuntu PPAs (all three of them) from your system if you’ve ever configured it before. This is generally in
/etc/apt/sources.listor one of the files below/etc/apt/sources.list.d/; if you usedadd-apt-repository(the recommended way) to enable the PPA, you can remove them with:sudo rm -f /etc/apt/sources.list.d/mscore-ubuntu-ubuntu-mscore*KDE bionic-neon is not compatible with the Ubuntu PPAs!
-
Install a few standard packages (usually they are already there, but just in case they aren’t) to be able to securely download the repository signature key:
sudo apt-get install wget ca-certificates
- Download (via secure HTTPS connection) and install the repository signing key:
wget -O - https://download.opensuse.org/repositories/home:/mirabile:/mscore/bionic-neon/Release.key | sudo apt-key add -
- Enable the repository:
echo deb https://download.opensuse.org/repositories/home:/mirabile:/mscore/bionic-neon ./ | sudo tee /etc/apt/sources.list.d/mscore.list
- Make the new packages available:
sudo apt-get update
Now, it’s time to install one or more soundfont packages (ideally install the one you want before installing MuseScore):
musescore-general-soundfont-small: the standard MuseScore_General soundfont in SF3 format, as shipped with MuseScore for other operating systemsmusescore-general-soundfont: the MuseScore_General HQ soundfont in SF3 format, as available via the Extensions managermusescore-general-soundfont-lossless: the MuseScore_General HQ soundfont in uncompressed SF2 format: takes up a lot more space on your hard disc, but offers the highest sound quality and extremely fast startup timesfluidr3mono-gm-soundfont: the old soundfont shipped with MuseScore 2.0 (antecessor of MuseScore_General), use only if resources are very tight or you need ittimgm6mb-soundfont: the old soundfont shipped with MuseScore 1.3; cannot substitute the others; use only if you need it; extremely tiny
If you skip this step, a suitable soundfont will be automatically installed when you install MuseScore itself in the final step.
Note: only the MuseScore_General soundfont (HQ or regular) supports single-note dynamics (SND), and you need at least version 0.1.6 of those soundfonts (from our repository) for SND support!
The command sudo update-alternatives --config MuseScore_General.sf3 can be used at any time to select the default soundfont used by MuseScore if you install more than one (note timgm6mb-soundfont cannot be selected here).
Finally, you can install the latest stable version of MuseScore with sudo apt-get install musescore3 and the old 2.x version with sudo apt-get install musescore (the musescore-snapshot package with an instable developer preview is also available).
Ubuntu, Kubuntu, Xubuntu, …
WARNING: these instructions are not for KDE neon 18.04 (bionic) users (see above)! Later versions, such as KDE neon 20.04 (focal), should work though.
MuseScore 2.x (the old version) is available from 18.10 (cosmic) to 19.10 (eoan) out of the box. Older Ubuntu releases carry older versions (18.04 (bionic) has 2.1, 16.04 (xenial) has 2.0, 14.04 (trusty) and 12.04 (precise) have 1.3 and 1.2, respectively). Similar to the Debian instructions, we recommend using the latest 2.3.2 version for old 2.x scores instead, or migrating those scores to MuseScore 3.
Besides the versions supplied by the distribution itself, the MuseScore Debian packager provides newer versions of MuseScore for older Ubuntu releases in official PPAs (package archives).
Please activate the Stable releases of MuseScore 3 repository on your system and then install the musescore3 package, available for all releases from 18.04 (bionic) onwards. (It is not feasible to provide MuseScore 3 for older Ubuntu releases, as those lack the minimum Qt version required by MuseScore 3.)
If you wish to install the older MuseScore 2, activate the Stable releases of MuseScore 2 PPA and install the musescore package, available for 12.04 (precise), 14.04 (trusty), 16.04 (xenial), and 18.04 (bionic) onwards. (Some intermediate releases may have slightly older MuseScore versions still available, but it’s best to update to the next LTS.) On the ancient 12.04 (precise) and 14.04 (trusty) releases, this will upgrade the Qt library in your system, which may break unrelated software (and on 12.04 even the C++ libraries are upgraded), mind you; best to upgrade to a newer LTS.
There’s also a MuseScore Nightly Builds (unstable development builds) PPA, from which the daring can install the musescore-snapshot package, for LTS, that is, 18.04 (bionic) only.
WARNING: these PPAs are only suitable for Ubuntu/Kubuntu/Xubuntu/… but not for Debian or KDE bionic-neon!
As with Debian, you can install one or more soundfont packages (ideally install the one you want before installing MuseScore, but if you don’t, a suitable one will be installed alongside MuseScore):
musescore-general-soundfont-small: the standard MuseScore_General soundfont in SF3 format, as shipped with MuseScore for other operating systemsmusescore-general-soundfont: the MuseScore_General HQ soundfont in SF3 format, as available via the Extensions managermusescore-general-soundfont-lossless: the MuseScore_General HQ soundfont in uncompressed SF2 format: takes up a lot more space on your hard disc, but offers the highest sound quality and extremely fast startup timesfluidr3mono-gm-soundfont: the old soundfont shipped with MuseScore 2.0 (antecessor of MuseScore_General), use only if resources are very tight or you need ittimgm6mb-soundfont: the old soundfont shipped with MuseScore 1.3; cannot substitute the others; use only if you need it; extremely tiny
Note: only the MuseScore_General soundfont (HQ or regular) supports single-note dynamics (SND), and you need at least version 0.1.6 of those soundfonts (possibly from the PPA) for SND support!
The command sudo update-alternatives --config MuseScore_General.sf3 can be used at any time to select the default soundfont used by MuseScore if you install more than one (note timgm6mb-soundfont cannot be selected here).
See also the hints for the various distributions on the download page.
External links
- How to run the MuseScore AppImage on Linux (MuseScore HowTo, video)
Chromebookでのインストール
デスクトップアプリ
MuseScoreはChrome OS上で、Linuxコンテナ(Crostiniとも呼ばれる)内で動作します。 Linuxアプリの実行に慣れていない場合、ChromebookにMuseScoreをインストールするための特別な手順があります。 詳しくは、 Install MuseScore on Chromebook の記事を参照してください。また、このリンクから ARM プロセッサ用の MuseScore 3 の特別なビルドを入手できます(公式ビルドは Intel 用のみです)。
また、Linuxのコマンドをそのまま使いたい場合は、以下のリンク先のビデオで説明されている手順に従ってください。
- Install Linux Virtual Machine called Crostini. Go to Settings > Linux > Turn On
- Download Musescore AppImage package
- Configure AppImage to run. Set
chmod +xfor the AppImage file - Run AppImage with
./followed by the Musescore package file name -
Install required libraries if necessary, e.g.:
sudo apt-get install libvorbisfile3sudo apt-get install libnss3
-
Install AppImage (using the
installcommand line option) to avoid running it from Linux command line each time - Enjoy!
外部リンク
- 詳細は interactive video を参照
- インストール方法に関する特別記事 Install MuseScore on Chromebook
- How to run MuseScore on ChromeOS (MuseScore HowTo)
言語、翻訳、拡張機能
MuseScore はあなたの "システム言語" (ほとんどのプログラムがそれを用いており、あなたが PC に設定した国と言語に従っています)で動作します。
言語の変更
- メニューを 編集→環境設定... (Mac: MuseScore→環境設定...) と進み、
-
一般 タブの 言語 セクションでのドロップダウンリストから選びます。
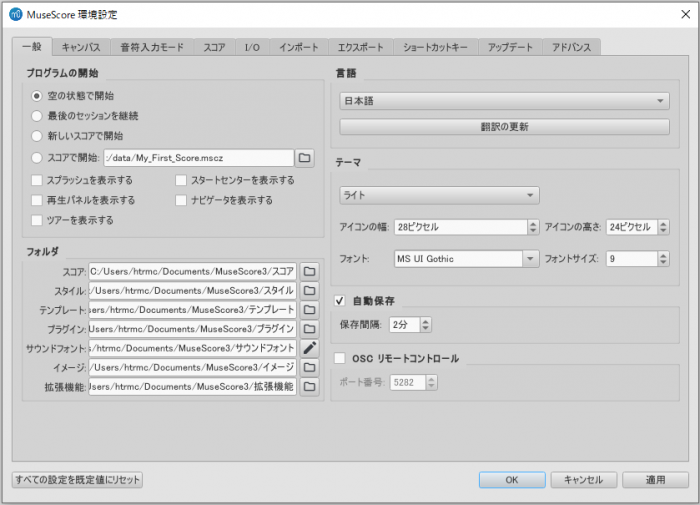
リソースマネージャー
リソースマネージャー を使うと、拡張機能をインストール/アンインストールと、翻訳のアップデートができます。次のどちらかのメニュー操作でアクセスします。
- メニューバーから、ヘルプ→リソースマネージャー を選択
-
メニューバーから、編集→環境設定... (Mac: MuseScore→環境設定...) を選び、一般 タブの言語セクションにある 翻訳の更新 ボタンをクリック
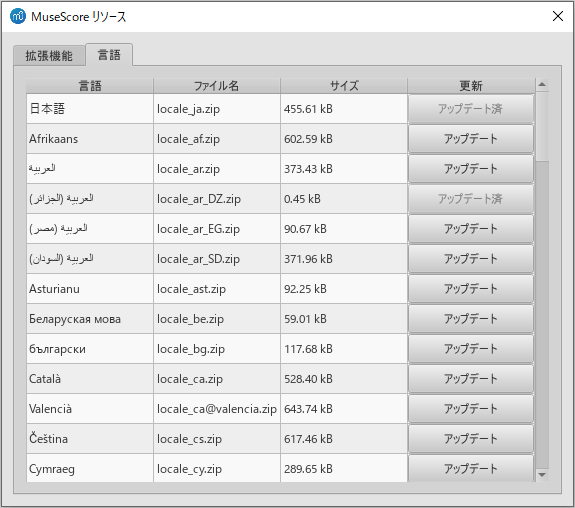
拡張機能のインストール/アンインストール
拡張機能をインストール/アンインストールするには:
- リソースマネージャ- の中の 拡張機能 タブを選び、
- 目的の拡張機能を選んで、
- インストール / アンインストール ボタンをクリックします。
翻訳のアップデート
翻訳をアップデートするには:
- リソースマネージャー の中の 言語 タブを選び、
- アップデートしたい言語の アップデート のボタンをクリックします。
注: その言語のメニューとダイアログが即座に変わりますが、インスペクターは MuseScore が再起動されるまで変化しません。
参照
外部リンク
- How to change the language in MuseScore (MuseScore HowTo)
アップデートのチェック
注: ここでお知らせするオプションは、MuseScore.org から直接アップデートが可能な Mac と Windows 版 MuseScore (ただし Windows Store 版を除きます)) にのみ適用されます。Linux distributions(及び Windows Store 版)のアップデートには別の仕組みがあります。
直接のアップデートが可能な MuseScore 各バージョンについて、次の2つの方法があります。
自動でアップデートをチェック
- メニューを 編集→環境設定... (Mac: MuseScore→環境設定...) と進み、
- アップデート タブを選んで、
- "新しいバージョンのチェック" がチェックされていることを確かめます(チェックされる初期設定になっています)。

このオプションにより MuseScore は起動する度にアップデートをチェックします。Mac と Windows 版(Windows Store 版を除き) はこのオプションによって自動的にアップデートをダウンロードし、インストールします。
手動でアップデートをチェック
- メニューを ヘルプ→更新の確認 と進み、
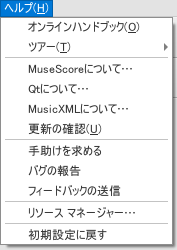
- アップデート状況を示す "最新のバージョンをご利用中です!" あるいは "MuseScore のアップデートが用意されています" のどちらかが表示されます。