The user interface
Menu bar

The Menu bar in MuseScore 4 contains the following menus:
- File: Create a new file, open and save files, import and export various formats, create and edit instrument parts, and print
- Edit: Undo and redo options, copy/cut/paste options, and Find / Go to function
- View: Show or hide various palettes, dialogs, and other workspace elements. Items under the Show submenu adjusts display of non-printing elements:
- Show invisible: Show/hide elements depending on their Properties panel: Invisible setting. If this option is ticked, invisible elements are shown in the score window as light gray.
- Show formatting: Show/hide Systems and horizontal spacing: System Breaks or Pages and vertical spacing: Page Breaks symbols.
- Show frames: Show/hide the dotted outlines of Frames.
- Show page margins: Show/hide Score size and spacing: Page margins.
- Show irregular measures: A plus sign or minus sign at the top right of a measure indicates that its duration differs from that set by the time signature.
- Add: Add different kinds of score elements; notes, text, measures etc.
- Format: Adjust global and local formatting of the score. Also allows you to stretch or contract the score, load and save score styles, and much more
- Tools: Many useful commands are available here including transpose, exchange voices, slash notation etc.
- Plugins: Manage your plugins
- Help: Access the online handbook, report bugs and give feedback, and restore factory settings

Keyboard users on Windows and Linux can access these menus by holding the Alt key and pressing a certain letter or number key, known as the mnemonic access key, that is displayed with an underline in the name of the menu item you are looking for. For example, press Alt+F for File followed by Alt+A for Save as. The letters 'F' and 'a' are underlined in the UI while the Alt key is held.
On macOS, MuseScore's menus are part of the system-wide menu bar, which you can navigate to by pressing Ctrl+F2.
Home tab

Beneath the main menu are three tabs, the first of which is the Home tab. This tab contains the following sections:
My account
Create a new MuseScore account, or login to your existing account. With an active account, you can get technical assistance and report bugs in the forums at musescore.org. You can also save your files to the cloud on musescore.com.
Scores
This section allows you to set up a new score, or to open an existing one. Learn about creating new scores in Setting up your score.
Plugins
This window displays a list of available plugins. See the chapter on Plugins to learn about managing these useful add-ons.
Learn
This is where video tutorials are hosted. Clicking on any video tutorial opens it on the official MuseScore YouTube channel.
Score tab

This area is where you do most of your work in MuseScore, including adding music notation and listening to the playback of your score. The workspace consists of several regions (numbered according to labels in the below diagram):
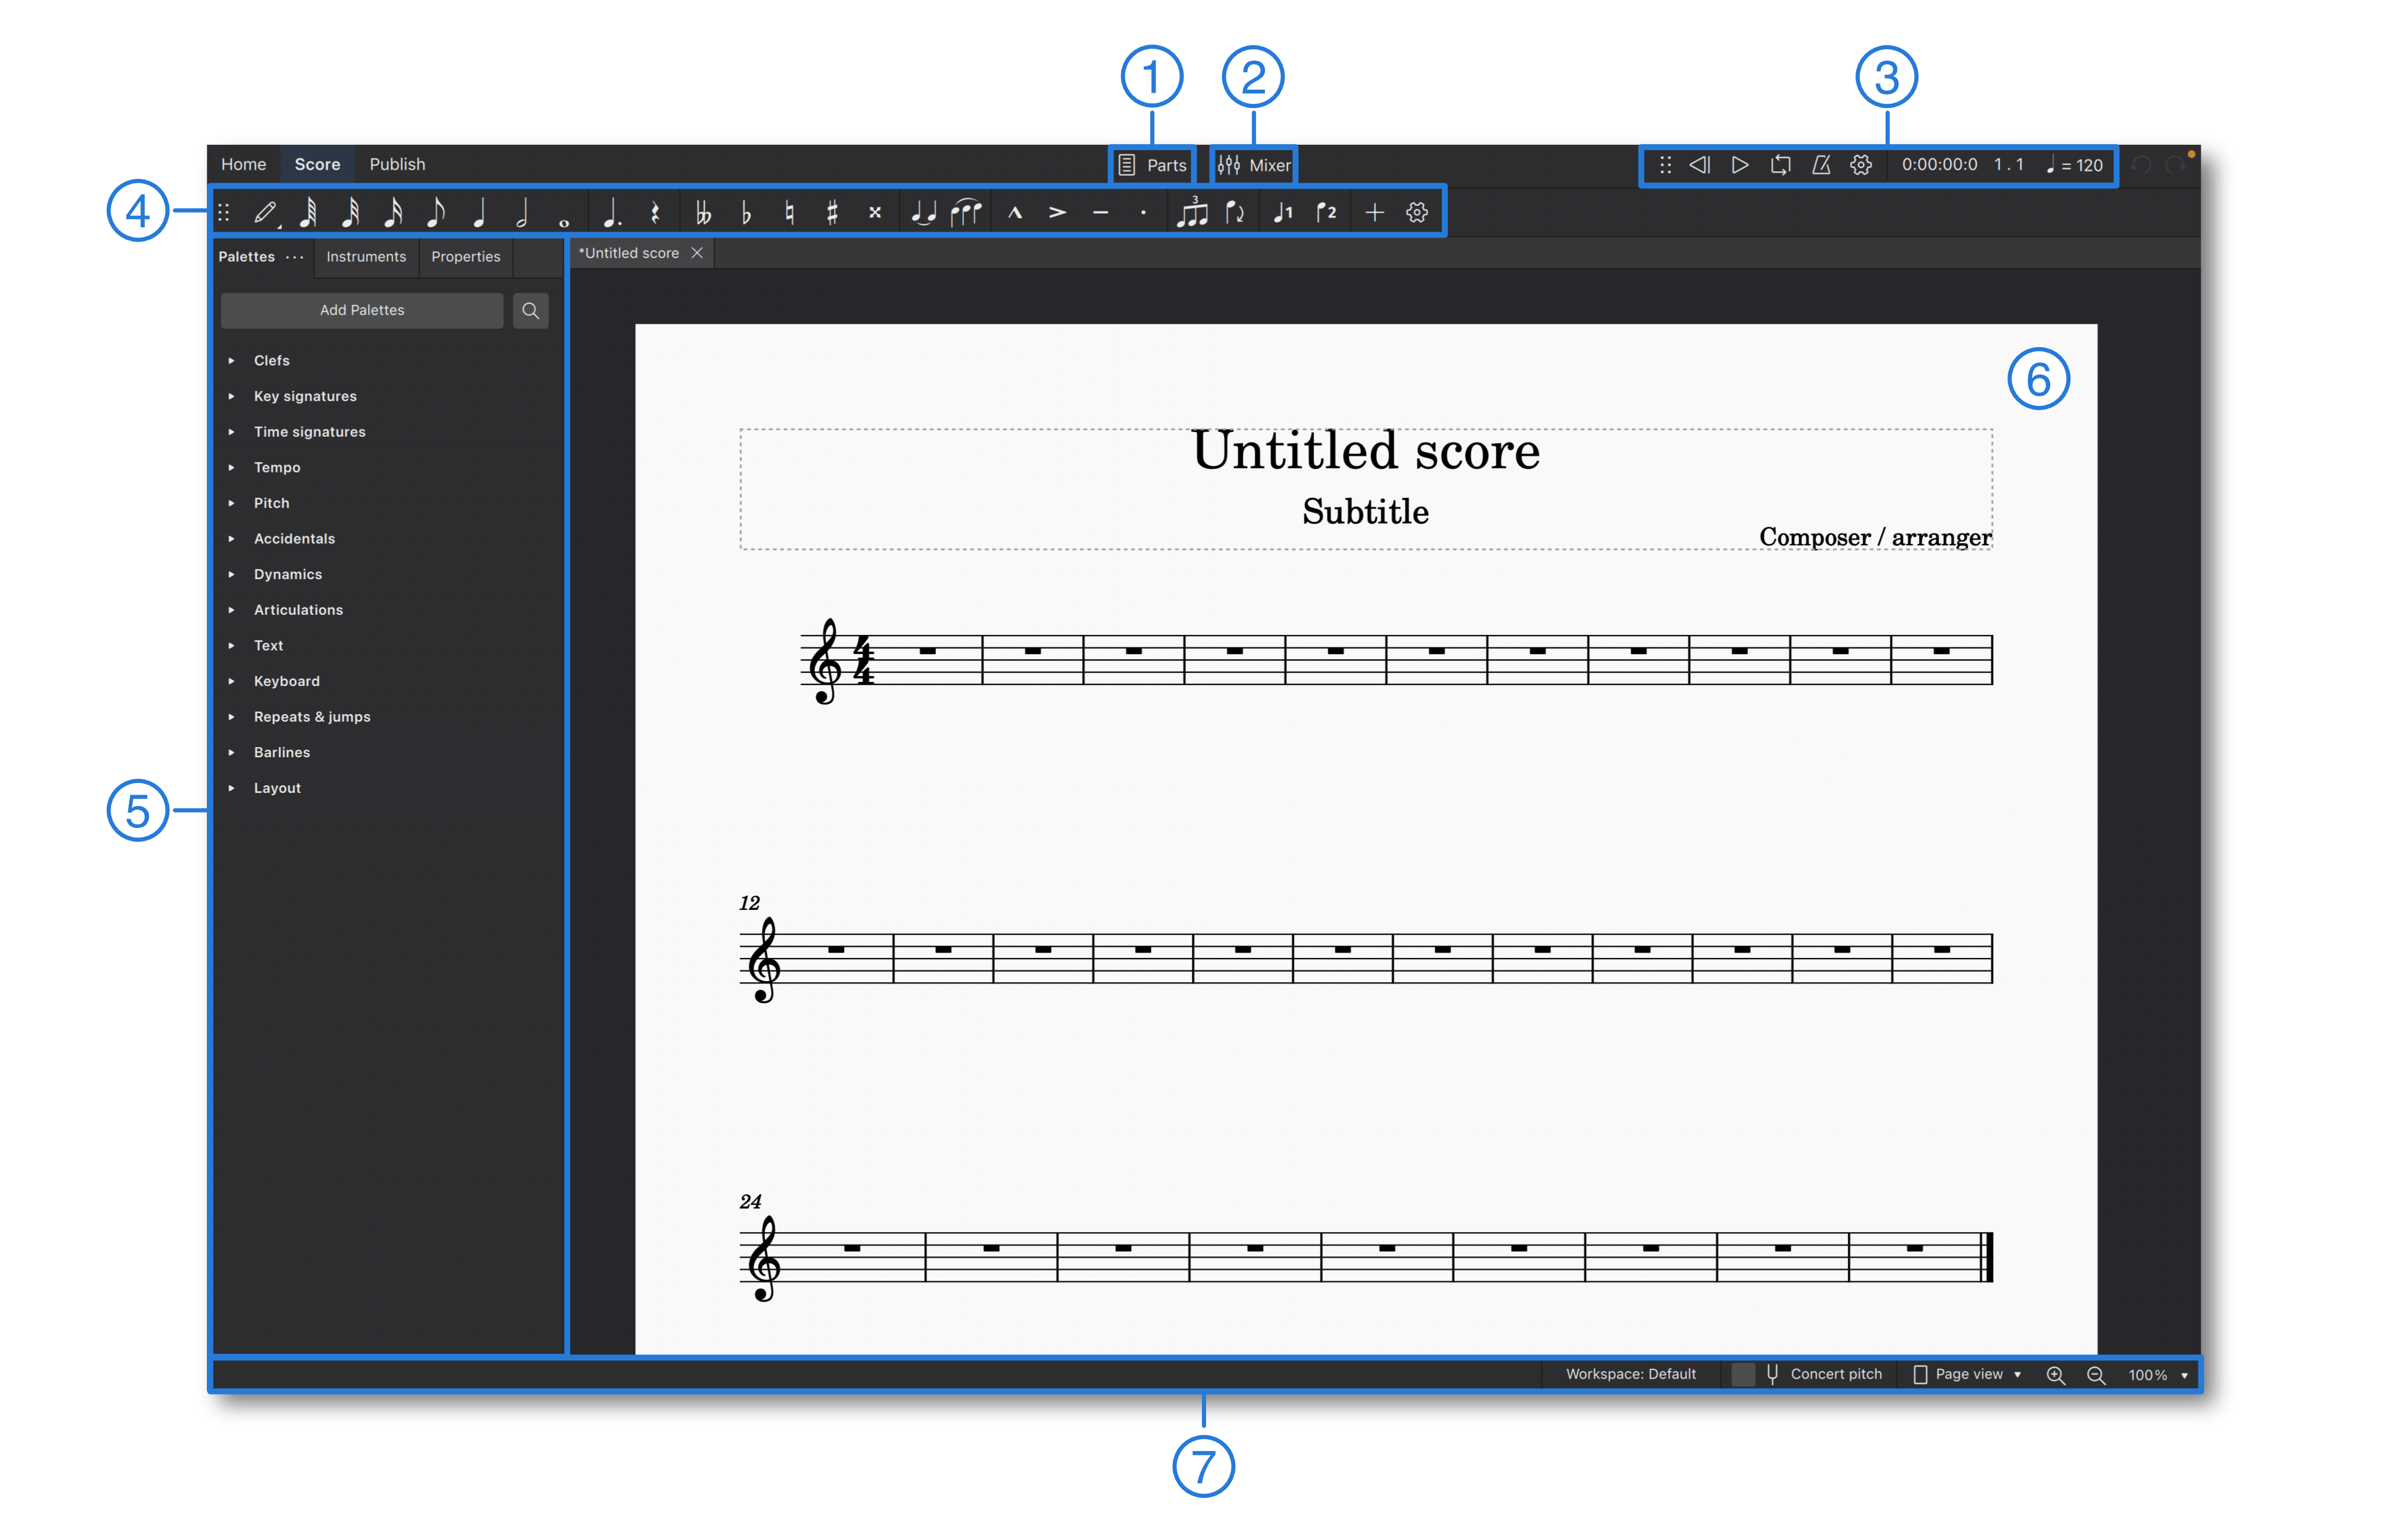
- Parts: The button near the top center of the window opens the Parts dialog, where you can create, edit and delete instrument part scores.
- Mixer: The button to the right of Parts opens and closes the Mixer panel.
- Playback toolbar. Located to the right of the mixer icon.
- Note input toolbar: Extending across the program window, this includes essential notation elements used in score writing. Use it to set the note input duration, toggle accidentals, apply common articulations, enter tuplets, and change between voices.
- Side bar: The area on the left-hand side of the program window contains various panels such as Palettes, Properties, and Instruments. These can be hidden or displayed as desired.
- Document/Score window: This area contains your score, and is where notation elements are added, edited, and deleted.
- Status bar: This runs along the bottom of the window. The left-hand side displays useful information about the score when one or more elements are selected. The right-hand side contains controls for switching between workspaces, selecting concert or written pitch views, and specifying the page display and zoom factor (magnification).
Keyboard users can use the Tab key or F6 to navigate between these UI regions via the keyboard. Within each region, navigation is performed with the arrow keys and Tab.
Almost all panels and toolbars can be un-docked and repositioned according to your project requirements and workflow preferences. Learn more about this in Workspaces.
Publish tab

This tab allows you to view your score without the clutter of the note input toolbar or sidebar panels. There are options to print the score, and to export it in a variety of image, audio and document formats. When your score is finished, you can also publish it to musescore.com.
Context menus
In certain parts of the application, primarily in the Score tab, context menus are available with additional functionality, such as options to copy, edit, customise, delete, or view the properties of whatever item(s) were selected at the time you opened the menu.
Element context menus
Within the score, every element has a context menu. To open the context menu for a particular element, right-click on the element with the mouse, or select the element via the keyboard and press Shift+F10 (some PC keyboards also have a dedicated Menu key near to the right Ctrl key). The exact options available in the context menu can differ depending on the type of element you selected, so it is worth experimenting to find out what options are available for different kinds of elements. For example, when you right-click on an empty region within a measure the resulting context menu contains options for Staff/Part properties and Measure properties. This is currently the only way to get to those options and the dialogs they lead to.
UI context menus
Outside of the score, the presence of a context menu is often indicated by a small button with three dots, or by a settings cog. Press the button to open the menu. Sometimes the button is associated with another item in the vicinity, such as in the Palettes, where there is three-dots button for each palette. In this case you can right-click on the palette name, or select it with the keyboard and press the Shift+F10 or Menu key shortcut, as an alternative to using the three-dots button.