Getting started
This page is an administration page intended for the editing community only. Click this link to go to the handbook front page intended for public viewing.
Aprenent MuseScore
MuseScore et proporciona recursos d'aprenentatge per ajudar a començar a l'usuari novell.
Guies
Quan inicies MuseScore per primera vegada, s'obre automaticament l' Assistent d'inici ajudar-te a configurar les funcions bàsiques del programa. Una d'aquestes funcions és la de Guies, la qual et fa una visita guiada pel progrma.
- Per activar aquesta característica, marca "Si" a la pregunta "Voleu veure aquestes guies?" de l'assistent d'inici.
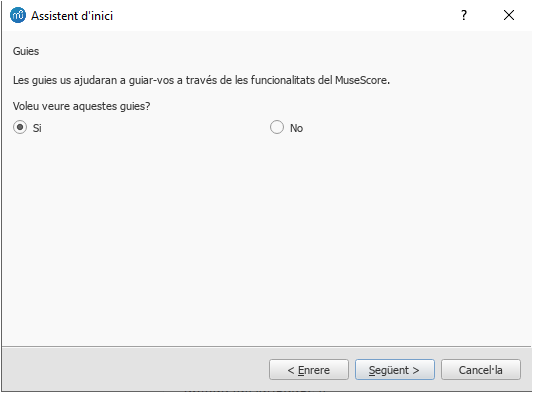
Això permetrà que les Guies s’executin quan s’obri el programa, introduint-vos a les principals característiques de la interfície d’usuari.

- Per acabarla guia: apreta el botó tancar.
- Per deixar de veureles Guies quan s'obre MuseScore: Deselecciona "Continuar mostrant Guies".
- Per tornar a habilitar l'opció de Guies (quan el programa es torna a obrir): Seleccionar Help→Guies→Mostrar les guies.
- Per poder tornar a veure les guies una altra vegada (quan el programa es torni a obrir): Selecciona Help→Guies→Reastablir les guies.
Actualment la funció Guies t'informa de:
- Introducció a la Interfície d’Usuari.
- Introduint notes i silèncis en una partitura.
- Introducció de símbols des d'una paleta.
- Navegació per la partitura amb la línia de temps.
- Navegació per la partitura amb el teclat.
- L’entrada de silencis multicompàs.
- Posicionament automàtic dels símbols.
- Com modificar les propietats amb Inspector.
- Selecció d'elements.
- Afegir i editar línies a la partitura.
Partitura interactiva de primers passos
La partitura interactiva de Primers pasos és una introducció pràctica dels elements bàsics per escriure una partitura. En el moment d'obrir MuseScore per primera vegada, t'apareixerà a la finestra principal de la finestra d'Inici: només has de clicar per obrir-la. Segueix les instruccions escrites en blau i us guiaran a través dels passos bàsics per escriure les partitures.
Atenció: Si no veus la partitura interactiva a la finestra d'inici, pots trobar-la fent clic a les fletxes del panell de mà dreta. També la pots veure en aquest enllaç a musescore.com: https://musescore.com/user/731936/scores/3801051
Vídeo tutorials
MuseScore ofereix molts vídeos introductoris per ajudar-te a aprendre a fer servir el programa. Cada un tracta sobre un tema en concret. Pots veure'ls de diverses maneres:.
- Des de la pàgina de suport en anglès de MuseScore.org: Suport/Tutorials
- En la finestra d'Inici: buscar el vídeos en el panell de mà dreta.
- Utilitzar els enllaços de la secció Vídeos (tot seguit).
- Buscar directament "MuseScore in Minutes" a You Tube
Altres tutorials
A l'apartat Tutorials de musescore.org tutorials d'ajuda de temes més específics com per exemple "MuseScore Drumline" o com crear i ajustar soundfonts personalitzades.
Vídeos
Són en anglès però pots activar els subtítols en català a les preferències de youtube.
* Lliçó 1- Configuració de partitura
* Lliçó 2 - Treballant amb MuseScore
* Lliçó 3 - Escriptura de notes
* Lliçó 4 - Escriptura amb teclats MIDI
* Lliçó 5 - Més idees d'entrada
* Lliçó 6 - Text, lletres i acords
* Lliçó 7 - Tablatures i notació per percussió
* Lliçó 8 - Repeticions i finals, Part 1
* Lliçó 9 - Repeticions i finals, Part 2
* Lliçó 10 - Articulacions, dinàmiques i text
* Lliçó 11 - Maquetació i parts
Rebre suport
Si experimentes algun problema mentre utilitzes MuseScore, hi ha moltes maneres d'aconseguir ajuda i suport.
Manual
Per accedir al Manual:
- Des del web de MuseScore : selecciona Ajuda → Manual des del menú superior.
- Des del programa menú del programa MuseScore: selecciona Ajuda → Manual en línia.
Pots cercar la informació a través dels menus del manual o amb el buscador.
Ajuda a partir del context
Si selecciones qualsevol element de la partitura sobre el que necessitis ajuda i prems la tecla F1, s'obrirà una pàgina del navegador web amb els enllaços associats en el manual sobre l'element seleccionat.
Fòrums
La pàgina de MuseScore disposa de Fòrums per tal que els usuaris puguin col·laborar entre ells. Allí pots trobar la resposta del teu problema en algun dels fils existents. Una cerca general de la pàgina web et proporcionarà un llistat interessant de resultats tant als fòrums com en el manual en línia.
Com fer-ho
Algunes coses necessiten l’ús de diverses tècniques i en els manuals pot ser difícil trobar-hi la resposta. Potser es poden trobar solucions en l'enllaç Com fer-ho
Escriure una pregunta
Si tot i així no pots trobar la resposta al teu problema, pots escriure un fil al fòrum d'Ajuda i notificació d'errors.
Quan pengis un fil tingues en compte que:
*Has de ser precís sobre el que vols, en la descripció del que vols fer, els passos que ja has intentat...
* Comparteix el fitxer on tens el problema, això farà molt més fàcil als altres usuaris d'entendre'l. — Utilitza l'opció "File attachments" que es troba al final de la pàgina, just a sobre dels botons Save and Preview .
Informa d'una errada
Si trobes alguna errada del programa, el primer pas per a resoldre-la és publicar-la al fòrum d'Ajuda i notificació d'errors. Això permetrà comprovar a la comunitat veure si es tracta d'un error real i a aconsellar possibles solucions al mateix, de manera que no t'impedeixi continuar escrivint música. Trobareu més informació al respecte als fòrums de d'ajuda i notificació d'errors i de demandes de funcions noves.
Instal·lació
(Les imatges pertanyen a la versió en anglès. S'actualitzaran en català quan s'alliberi 3.5)
MuseScore està disponible per a diversos sistemes operatius diferents, com Windows i macOS, i també a moltes distribucions de Linux i a variants de BSD. Pots descarregar la versió pel teu sistema des d'aquí.
Instal·lació
Quan hagis descarregat el programa, segueix les instruccions d'instal·lació pel teu sistema operatiu:
Instal·lar a Windows.
Instal·lar a macOS.
Instal·lar aLinux.
Instal·lar a Chromebook.
Configuració inicial
La primera vegada que inicis MuseScore el programa et demanarà que fixis la configuració bàsica:
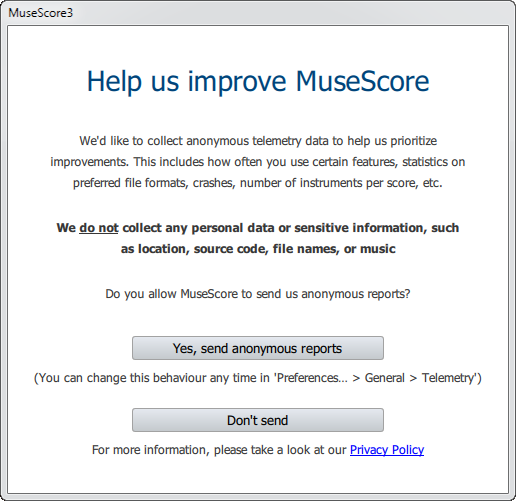
Primer, pots autoritzar a MuseScore (3.4 o superior) a agafar dades d'usuari, fes click a Yes, send anonymous reports o Don't send per continuar:
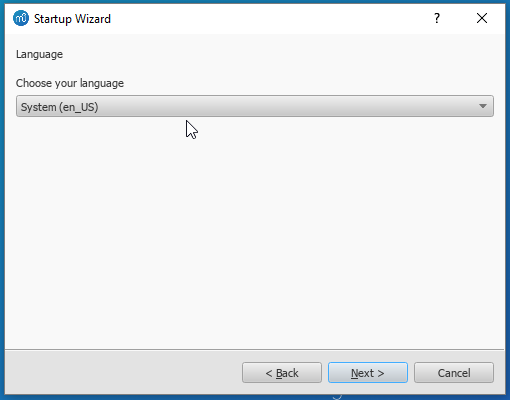
La configuració de l'idioma és la que heu posat durant la instal·lació. Podeu canviar-la. Per continuar feu clic a Següent:
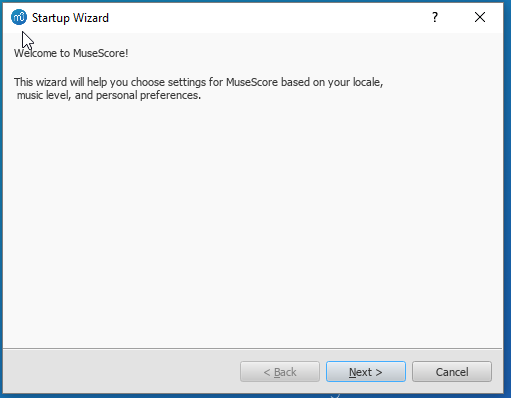
Seguit per:
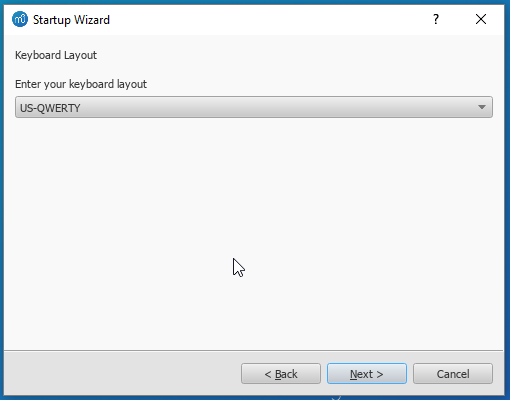
Un cop escollida la disposició del teclat que utilitzeu a la llista feu clic al botó Següent per continuar:
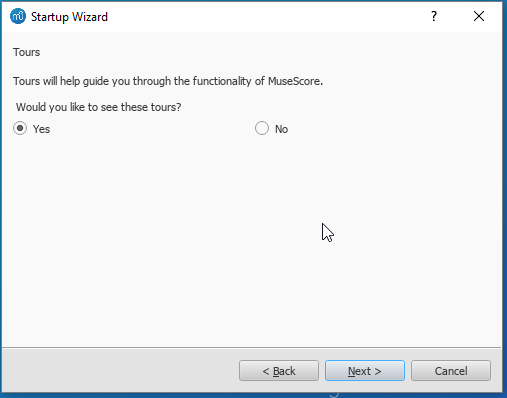
Ara us demanarà si voleu veure la guia. Si ets nou a MuseScore, et recomanem marcar l'opció "Sí". Fes clic a Següent per continuar:
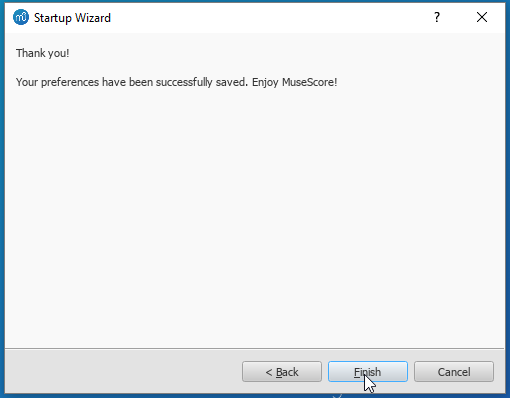
Per finalitzar la configuració bàsica clica aFinalitza . Ara ja pots començar a utilitzar Musescore.
Install on Windows
Install
If you're on Windows 10, a (rather outdated) 32-bit version of MuseScore can be installed from the Windows Store. Clicking here will open MuseScore's page in the Store app. There you will only have to click Get the app > and MuseScore will be downloaded, installed and subsequently automatically updated.
Otherwise you can get the Windows installer from the download page of the MuseScore website. Click on the link to start the download (pick your choice of 64-bit or 32-bit). Your Internet browser will ask you to confirm that you want to download this file. Click Save File.
When the download finishes, double-click on the file to start the installation. Windows may prompt you with a security window to confirm this before running the software. Click Run to continue.
The installation process will now start
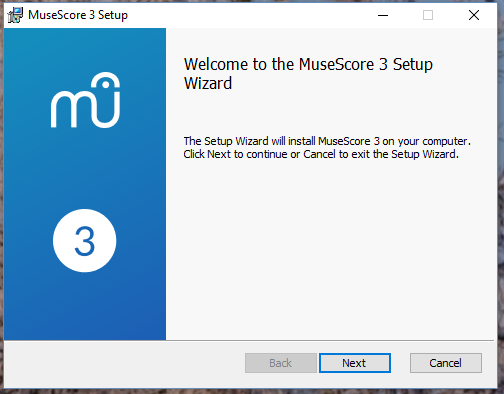
If you click Cancel, here or later, you'll see:
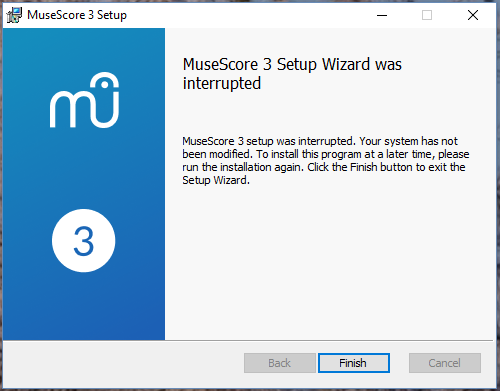
If instead you click Next to continue, the setup wizard displays the terms of the free software license.
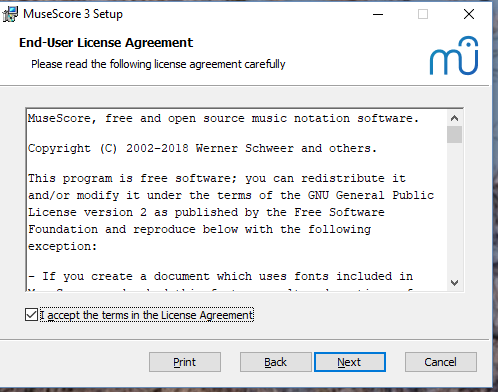
Read the terms of the license, make sure the box next to "I accept the terms in the License Agreement" is checked, and click Next to continue. Next the installer will ask you to confirm the location in which to install MuseScore.
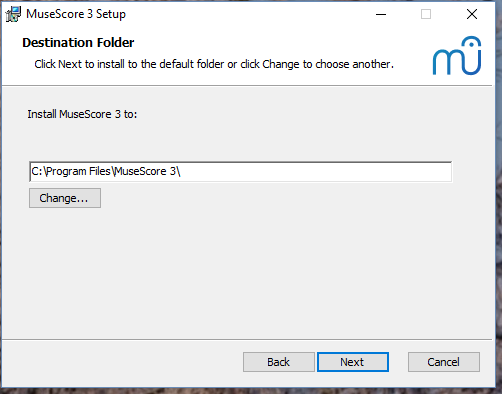
If you are installing a newer version of MuseScore but still want to keep the old version on your computer, then you should change the folder (note that MuseScore 3 can coexist with MuseScore 2 and 1 with no changes needed). Otherwise click Next to continue.
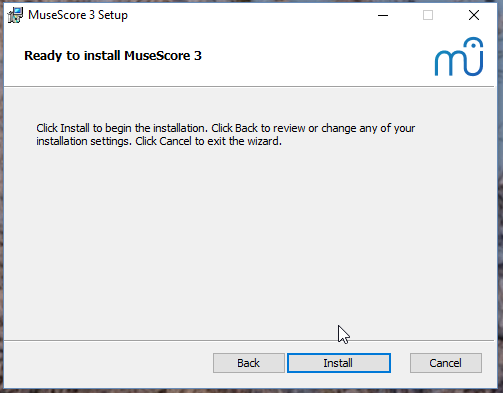
Click Install to continue.
Give the setup wizard a few minutes to install the necessary files and configurations. You'll see
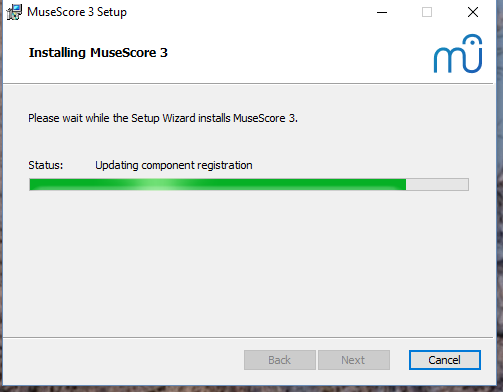
and finally
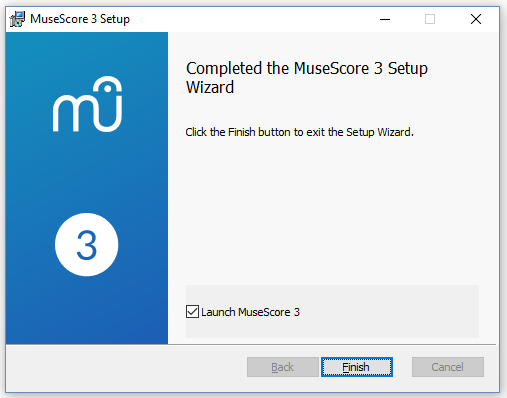
Click Finish to exit the installer. You may delete the installer file you downloaded.
Start MuseScore
To start MuseScore, from the menu, select Start→All Programs→MuseScore 3→MuseScore 3.
Advanced users: Silent or unattended install
-
You can install MuseScore silently with the following command
msiexec /i MuseScore-X.Y.msi /qb-
Append ALLUSERS=1 if you want to install it for all users of the system rather than just the current one.
Uninstall
You can uninstall MuseScore from the menu by selecting Start→All Programs→MuseScore 3→Uninstall MuseScore; or via Windows' Control Panel. Note that this will not remove your scores, templates, extensions and plugins nor your MuseScore settings.
Troubleshooting
The installer might be blocked by the system. If you don't manage to install MuseScore, right-click the downloaded file and click Properties. If there is a message "This file came from another computer and might be blocked to help protect this computer", click on "Unblock", "OK" and double-click on the downloaded file again.
External links
- How to install MuseScore on Windows without administrator rights (MuseScore HowTo)
- How to run MuseScore as Administrator on Windows (MuseScore HowTo)
- How to fix MuseScore installation error on Windows (MuseScore HowTo)
- MSI command-line options
- Standard installer command-line options
MuseScore, MuseScore 3, MuseScore 4
What does this handbook cover
This handbook describes features of MuseScore Studio, the music notation program for Windows, macOS, and Linux supporting a wide variety of file formats and input methods. MuseScore Studio features an easy to use WYSIWYG editor with audio score playback for results that look and sound beautiful, rivaling commercial offerings like Finale and Sibelius. "Musescore Studio" was previously named "MuseScore", see online announcement.
MuseScore Studio is released as a free and open-source software. Musescore Studio 3 is released under the GNU General Public License version 2. Musescore Studio 4 is released under the GNU General Public License version 3. To learn more about the GPL license, visit http://www.gnu.org or http://www.gnu.org/licenses/gpl-faq.html. To download MuseScore Studio 3.6.2, see Installation: Download and installation chapter.
MuseScore Studio is developed and supported by non paid volunteers and managed by Muse Group employees. MuseScore BVBA is a subsidiary of Muse Group. Source: wikipedia, forum discussion.
What is not covered in this handbook
The following items are often referred to as "MuseScore". However, as explained above, this handbook uses "MuseScore" to refer to "MuseScore Studio" only, "MuseScore" is not used to refer to any of the following unless otherwise specified.
- The score viewer and playback mobile apps (Android, iOS), or
- The score viewer and playback interface provided by musescore.com
See How and where to ask for support
Different versions of MuseScore Studio
MuseScore Studio is open-source. Its source code is available at github.
MuseScore Studio 3.6.2 is the last official release of MuseScore Studio 3, see Version information. For forks (wikipedia), see "External Link" section.
MuseScore Studio 4 is a result of continuous development from MuseScore Studio 3.6.2. It has huge playback and countless engraving improvements. After MuseScore Studio 3.6.2 was released, most of the software development moved on to MuseScore Studio 4. Muse Group employees no longer work on bug fixing of Musescore Studio 3.6.2. Due to the substantial change in programming framework and library, some proposed improvements of Musescore Studio 3.6.2 are impossible to be merged into MuseScore Studio 4. Reimplementation of important features is not yet complete, see also discussion1, discussion2, discussion3.
When choosing a MuseScore Studio version to create scores, users should take note of the company's distribution versioning and feature implementation philosophy, and consider production needs. For example MuseScore Studio 3.6.2 Linux supports audio and MIDI routing with JACK, which has implications for automation and video synchronization. Source: https://github.com/orgs/musescore/discussions/13745
MuseScore Studio 3 and MuseScore Studio 4 can be installed and opened side by side on the same OS, see Version 3 and 4 installations side-by-side. Score files are opened by default with the last installed Musescore Studio version, see Change default programs in Windows and Problem with Shortcuts to MuseScore 4 files. You can always choose manually with "Right-click > Open with". Note that MuseScore Studio native format (*.mscz and *.mscx) are backward compatible - MuseScore Studio 4 opens MuseScore Studio 3's *.mscz without error, see Native format compatibility
External Links
Notable forks (wikipedia):
- Musescore 3.7 Evolution
- https://github.com/Jojo-Schmitz/MuseScore/wiki
- Forum discussion End of Life plan for 3.x
- MuseScore3.0dev-PianoTutor
Install on macOS
Install
You will find the DMG (disk image) file on the download page of the MuseScore website. Click on the macOS link to start the download. When the download is complete, double-click the DMG file to mount the disk image.
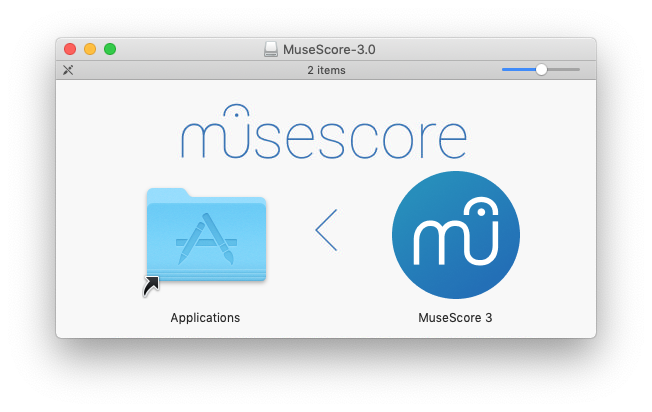
Drag and drop the MuseScore icon to the Applications folder icon.
If you are not logged in as administrator, macOS may ask for a password: click Authenticate and enter your password to proceed.
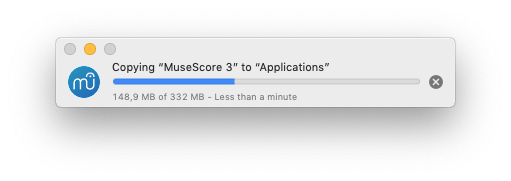
When the application has finished copying, eject the disk image. You can now launch MuseScore from the Applications folder, Spotlight, or Launchpad.
Note: As of macOS 10.15 "Catalina", the system has to be told to permit MuseScore to be allowed to access user parts of the file system. The first time you use it on Catalina, it will ask you if you wish to permit it; of course, answer "yes", but if you bypass this by accident, you can set it via System Preferences > Security and Privacy > Privacy > Files and Folders. Unlock with your Admin credentials, then navigate to MuseScore (whichever version(s) you have and want), add it or them to the list of apps, and select "Documents" and "Downloads" folders, or as you prefer.
Uninstall
Simply delete MuseScore from Applications folder (Admin access will be required to do that, however). Note that this will not remove your scores, templates, extensions and plugins nor your MuseScore settings.
Install with Apple Remote Desktop
You can deploy MuseScore to multiple computers with the "Copy" feature of ARD. Since MuseScore is a self-contained application you can simply copy the application to the '/Application' folder on the target machines. It is also possible to install multiple versions of the application as long as their names differ.
Install on Linux
Distribution packages for various Linux and BSD variants are available. Building from source is another possibility.
Download
Consider your production needs to choose a MuseScore version that best suits you. For example MuseScore 3.6.2 support JACK, which has implications for automation and video synchronization, JACK support is missing from MuseScore 4.0.2.
The Download page contains basic info on how to download, install and use MuseScore.
- Current page contains info for MuseScore 4, its Older and unsupported versions section contains info for MuseScore up to 3.2.3
- Archived page on Internet Archive contains complete info for MuseScore 3.6.2, links on it may not work.
- Working direct download link for MuseScore 3.6.2 stable:
- AppImages: https://ftp.osuosl.org/pub/musescore-nightlies/linux/3x/stable/ (
musescore-$(your system architecture).AppImage, what is my system architecture?)
- AppImages: https://ftp.osuosl.org/pub/musescore-nightlies/linux/3x/stable/ (
More info on AppImage
AppImage is the recommended way to use Musescore. An AppImage is a software that runs on all Linux (see https://appimage.org). It works like a portable app, all the files needed are contained within the AppImage itself.
To run MuseScore AppImage on your system:
Watch the how-to video, or follow these steps:
Step 1: Download a suitable version for your system architecture
AppImages come in different versions. Make sure you download the right one for your system. To check the architecture of your system:
- Open the Terminal.
- Type
arch
or
uname -m
The output will be something like "i686", "x86_64" or "armv7":
i686(or similar) - 32-bit Intel/AMD processor (found on older machines).x86_64(or similar) - 64-bit Intel/AMD processor (modern laptop and desktop computers, most Chromebooks).armv7(or later) - ARM processor (phones & tablets, Raspberry Pi 2/3 running Ubuntu Mate, some Chromebooks, usually 32-bit at present).
Download (jump to) a suitable version.
Step 2: Give the file permission to execute
There are two ways to do this:
From the File Manager:
- Right-click on the AppImage and select "Properties".
- Open the "Permissions" tab.
- Enable the option labelled "Allow executing file as a program".
The process may be slightly different in other file managers.
From the Terminal:
This command works on all Linux systems (Note: The code below assumes that the AppImage is in the Downloads folder. If not the case then amend the file path accordingly):
    cd ~/Downloads
    chmod u+x MuseScore*.AppImage
Step 3: Run the AppImage
- To run the program, just double-click it.
Note: You can move the AppImage to wherever it is most convenient. And to "uninstall" it, just delete it.
Step 4: Install the AppImage
The above procedure allows you to run the MuseScore AppImage but doesn't integrate it with the rest of your system: it doesn't appear in your App menu, and MuseScore files are neither associated with the program nor do they have the correct icon on them.
To remedy this, you need to actually install the program as follows:
- Open the Terminal.
- Type the following (Note: The code below assumes that the AppImage is in the Downloads folder. If not the case then amend the file path accordingly):
    cd ~/Downloads
    ./MuseScore*.AppImage install
Or, alternatively, you can combine the operation into one command:
~/Downloads/MuseScore*.AppImage install
Use the "--help" and "man" options to get more information about the available command line options:
    ./MuseScore*.AppImage --help   # displays a complete list of command line options
    ./MuseScore*.AppImage man      # displays the manual page (explains what the options do)
More info sorted by Linux and BSD
Debian
(Ideally before, otherwise while or after) installing MuseScore itself, you can install one or more soundfont packages (if none is installed, the dependencies will pull in a suitable soundfont automatically):
musescore-general-soundfont-small: the standard MuseScore_General soundfont in SF3 format, as shipped with MuseScore for other operating systemsmusescore-general-soundfont: the MuseScore_General HQ soundfont in SF3 format, as available via the Extensions managermusescore-general-soundfont-lossless: the MuseScore_General HQ soundfont in uncompressed SF2 format: takes up a lot more space on your hard disc, but offers the highest sound quality and extremely fast startup timesfluidr3mono-gm-soundfont: the old soundfont shipped with MuseScore 2.0 (antecessor of MuseScore_General), use only if resources are very tight or you need ittimgm6mb-soundfont: the old soundfont shipped with MuseScore 1.3; cannot substitute the others; use only if you need it; extremely tiny
Note: only the MuseScore_General soundfont (HQ or regular) supports single-note dynamics (SND), and you need at least version 0.1.6 of those soundfonts (from unstable or backports) for SND support!
The command sudo update-alternatives --config MuseScore_General.sf3 can be used at any time to select the default soundfont used by MuseScore if you install more than one (note timgm6mb-soundfont cannot be selected here).
Then, install the musescore3 package for MuseScore 3.x (the current stable version) or musescore for MuseScore 2.x (there’s also musescore-snapshot for the unstable developer preview). The packages are available in the following distributions:
musescore3: sid (unstable), bullseye (testing/Debian 11), buster-backports (stable/Debian 10), stretch-backports-sloppy (oldstable/Debian 9)musescore: buster (stable/Debian 10), stretch-backports (oldstable/Debian 9), jessie-backports-sloppy (oldoldstable/Debian 8)musescore-snapshot: experimental (usable on unstable)
See https://backports.debian.org/Instructions/ for instructions on how to add an official Debian backports repository to your system and install packages from there.
Note: without the appropriate backports, older versions may be available: MuseScore 2.0.3 on stretch, MuseScore 1.3 on jessie. Using the latest 2.3.2 version for 2.x-format scores instead (or conversion to 3.x) is strongly recommended!
KDE neon 20.04 (focal)
Message https://musescore.com/mirabilos if the regular or PPA packages don’t work.
KDE neon 18.04 (bionic)
KDE neon switched from bionic to focal in 2021, so the following should not be necessary any more, but keeping it for now for reference:
The KDE bionic-neon packages are built on a different repository than the normal Ubuntu PPAs, as this is the only way for us to build packages for KDE neon. Due to limitations of the OpenSuSE Buildservice used, this currently only provides amd64 (64-bit PC) packages, no ARM packages (Slimbook or Pinebook remix).
All commands listed below must be entered in a terminal, in one line each.
-
Remove the Ubuntu PPAs (all three of them) from your system if you’ve ever configured it before. This is generally in
/etc/apt/sources.listor one of the files below/etc/apt/sources.list.d/; if you usedadd-apt-repository(the recommended way) to enable the PPA, you can remove them with:sudo rm -f /etc/apt/sources.list.d/mscore-ubuntu-ubuntu-mscore*KDE bionic-neon is not compatible with the Ubuntu PPAs!
-
Install a few standard packages (usually they are already there, but just in case they aren’t) to be able to securely download the repository signature key:
sudo apt-get install wget ca-certificates
- Download (via secure HTTPS connection) and install the repository signing key:
wget -O - https://download.opensuse.org/repositories/home:/mirabile:/mscore/bionic-neon/Release.key | sudo apt-key add -
- Enable the repository:
echo deb https://download.opensuse.org/repositories/home:/mirabile:/mscore/bionic-neon ./ | sudo tee /etc/apt/sources.list.d/mscore.list
- Make the new packages available:
sudo apt-get update
Now, it’s time to install one or more soundfont packages (ideally install the one you want before installing MuseScore):
musescore-general-soundfont-small: the standard MuseScore_General soundfont in SF3 format, as shipped with MuseScore for other operating systemsmusescore-general-soundfont: the MuseScore_General HQ soundfont in SF3 format, as available via the Extensions managermusescore-general-soundfont-lossless: the MuseScore_General HQ soundfont in uncompressed SF2 format: takes up a lot more space on your hard disc, but offers the highest sound quality and extremely fast startup timesfluidr3mono-gm-soundfont: the old soundfont shipped with MuseScore 2.0 (antecessor of MuseScore_General), use only if resources are very tight or you need ittimgm6mb-soundfont: the old soundfont shipped with MuseScore 1.3; cannot substitute the others; use only if you need it; extremely tiny
If you skip this step, a suitable soundfont will be automatically installed when you install MuseScore itself in the final step.
Note: only the MuseScore_General soundfont (HQ or regular) supports single-note dynamics (SND), and you need at least version 0.1.6 of those soundfonts (from our repository) for SND support!
The command sudo update-alternatives --config MuseScore_General.sf3 can be used at any time to select the default soundfont used by MuseScore if you install more than one (note timgm6mb-soundfont cannot be selected here).
Finally, you can install the latest stable version of MuseScore with sudo apt-get install musescore3 and the old 2.x version with sudo apt-get install musescore (the musescore-snapshot package with an instable developer preview is also available).
Ubuntu, Kubuntu, Xubuntu, …
WARNING: these instructions are not for KDE neon 18.04 (bionic) users (see above)! Later versions, such as KDE neon 20.04 (focal), should work though.
MuseScore 2.x (the old version) is available from 18.10 (cosmic) to 19.10 (eoan) out of the box. Older Ubuntu releases carry older versions (18.04 (bionic) has 2.1, 16.04 (xenial) has 2.0, 14.04 (trusty) and 12.04 (precise) have 1.3 and 1.2, respectively). Similar to the Debian instructions, we recommend using the latest 2.3.2 version for old 2.x scores instead, or migrating those scores to MuseScore 3.
Besides the versions supplied by the distribution itself, the MuseScore Debian packager provides newer versions of MuseScore for older Ubuntu releases in official PPAs (package archives).
Please activate the Stable releases of MuseScore 3 repository on your system and then install the musescore3 package, available for all releases from 18.04 (bionic) onwards. (It is not feasible to provide MuseScore 3 for older Ubuntu releases, as those lack the minimum Qt version required by MuseScore 3.)
If you wish to install the older MuseScore 2, activate the Stable releases of MuseScore 2 PPA and install the musescore package, available for 12.04 (precise), 14.04 (trusty), 16.04 (xenial), and 18.04 (bionic) onwards. (Some intermediate releases may have slightly older MuseScore versions still available, but it’s best to update to the next LTS.) On the ancient 12.04 (precise) and 14.04 (trusty) releases, this will upgrade the Qt library in your system, which may break unrelated software (and on 12.04 even the C++ libraries are upgraded), mind you; best to upgrade to a newer LTS.
There’s also a MuseScore Nightly Builds (unstable development builds) PPA, from which the daring can install the musescore-snapshot package, for LTS, that is, 18.04 (bionic) only.
WARNING: these PPAs are only suitable for Ubuntu/Kubuntu/Xubuntu/… but not for Debian or KDE bionic-neon!
As with Debian, you can install one or more soundfont packages (ideally install the one you want before installing MuseScore, but if you don’t, a suitable one will be installed alongside MuseScore):
musescore-general-soundfont-small: the standard MuseScore_General soundfont in SF3 format, as shipped with MuseScore for other operating systemsmusescore-general-soundfont: the MuseScore_General HQ soundfont in SF3 format, as available via the Extensions managermusescore-general-soundfont-lossless: the MuseScore_General HQ soundfont in uncompressed SF2 format: takes up a lot more space on your hard disc, but offers the highest sound quality and extremely fast startup timesfluidr3mono-gm-soundfont: the old soundfont shipped with MuseScore 2.0 (antecessor of MuseScore_General), use only if resources are very tight or you need ittimgm6mb-soundfont: the old soundfont shipped with MuseScore 1.3; cannot substitute the others; use only if you need it; extremely tiny
Note: only the MuseScore_General soundfont (HQ or regular) supports single-note dynamics (SND), and you need at least version 0.1.6 of those soundfonts (possibly from the PPA) for SND support!
The command sudo update-alternatives --config MuseScore_General.sf3 can be used at any time to select the default soundfont used by MuseScore if you install more than one (note timgm6mb-soundfont cannot be selected here).
See also the hints for the various distributions on the download page.
External links
- How to run the MuseScore AppImage on Linux (MuseScore HowTo, video)
Install on Chromebook
Desktop program
MuseScore runs on Chrome OS within a Linux container (also known as Crostini). There is a special procedure you can use to install MuseScore on a Chromebook if you are not already comfortable with running Linux apps. See the article Install MuseScore on Chromebook for more information. You can also get a special build of MuseScore 3 for ARM processors via that link (the official builds are only for Intel).
Alternatively, if you prefer to use the plain Linux commands, follow the steps described in the video linked below:
- Install Linux Virtual Machine called Crostini. Go to Settings > Linux > Turn On
- Download Musescore AppImage package
- Configure AppImage to run. Set
chmod +xfor the AppImage file - Run AppImage with
./followed by the Musescore package file name -
Install required libraries if necessary, e.g.:
sudo apt-get install libvorbisfile3sudo apt-get install libnss3
-
Install AppImage (using the
installcommand line option) to avoid running it from Linux command line each time - Enjoy!
External links
- Watch this interactive video for more details
- Special article on how to Install MuseScore on Chromebook
- How to run MuseScore on ChromeOS (MuseScore HowTo)
Idioma, traduccions i extensions
MuseScore funciona amb la llengua configurada al vostre sistema operatiu o compte.
Canviar de llengua
- Des del menú, selecciona Edita→Preferencies... (Mac: MuseScore→Preferencies...);
- Quan s'obri la finestra, a General, selecciona l'idioma que vulguis de la llista desplegable de la secció Llengua
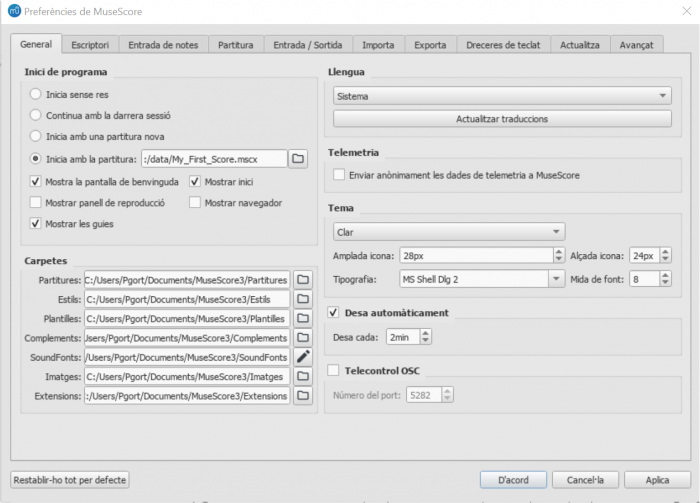
Administrador de recursos
L'Administrador de recursos s'utilitza per instal·lar i desinstal·lar extensions i per gestionar l'actualització de traduccions. Per accedir al menú, utilitza una de les opcions següents:
- Des de la barra de menú, selecciona Ajuda→Administrador de recursos.
-
Des de la barra de menú, seleccionaEdita→Preferencies... (Mac: MuseScore→Preferencies...), obre General i fes clic al botó Actualitza traduccions .
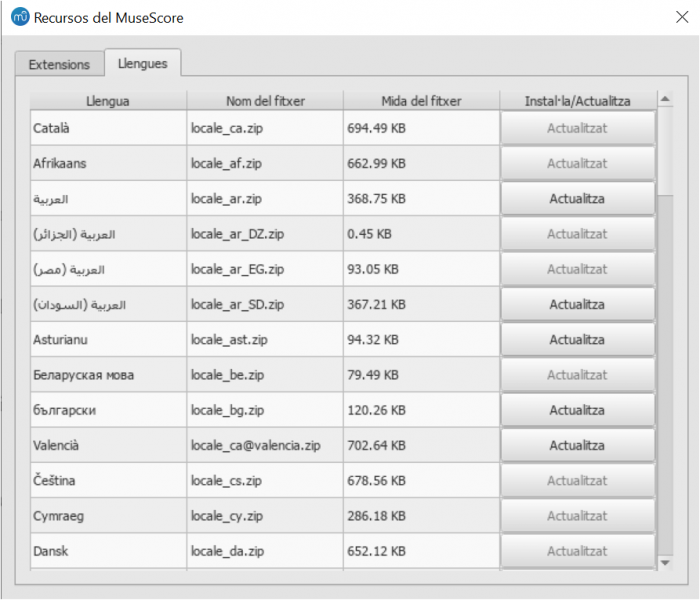
Instal·lar o desinstal·lar extensions
Per Instal·lar o desinstal·lar una extensió:
- Selecciona la pestanya Extensions del Administrador de recursos.
- Selecciona l'extensió que t'interessi.
- Clica el botó Instal·la o Desinstal·la .
Atenció: Les extensions actualment incloses són MuseScore Drumline (MDL) (a partir de la versió 3.0) i la MuseScore General HQ soundfont (des de la versió 3.1).
Actualitzar traduccions
Per tal d'actualitzar traduccions:
- Selecciona la pestanya Languages del Administrador de recursos.
- Fes clic al botó Actualitza de la llengua o llengües que vulguis actualitzar.
Atenció: La majoria dels menús i de textos canviaran o s'actualitzaran automàticament però alguns no ho faran fins que el programa es reiniciï.
Pots veure també
Enllaços externs
Buscar actualitzacions
Atenció: Aquestes opcions només estan disponibles per les versions de Mac i Windows (exceptuant la versió de la Windows Store), ja que només es poden actualitzar directament de MuseScore.org. Les distribucions de Linux (i la de Windows Store) tenen altres mecanismes per oferir les actualitzacions.
Per les versions de MuseScore que poden ser actualitzades directament hi ha dues maneres per comprobar si existeixen actualitzacions.
Comprovació d'actualitzacions automatitzada
- des del menú selecciona Edita→Preferencies... (Mac: MuseScore→Preferencies...);
- Selecciona la pestanya Actaulitza.
-
Mira si la casella "Comprovar si hi ha noves versions de MuseScore" estigui marcada. (Hauria d'estar-ho per defecte):

Si aquesta opció està habilitada, MuseScore comprovarà si hi ha actualitzacions cada vegada que s'iniciï. A Mac i Windows (exceptuant la versió de Windows Store), aquesta opció permet una actualització automàtica la qual et descarrega i t'instal·la la nova versió de MuseScore.
Cerca una actualització{#check-for-update}
- Des del menú, selecciona Ajuda→Cerca actualitzacions:
- S'obrirà una finestra que et dirà l'estat de les actualitzacions. Segueix les indicacions per descarregar-te la nova versió