Erste Schritte
Dieses Kapitel hilft bei der Installation und dem ersten Start von MuseScore. Es stellt Ihnen verschiedene Lern- und Hilfsmittel vor.
MuseScore lernen
MuseScore bietet eine Reihe von Lernressourcen, um dem neuen Benutzer den Einstieg zu erleichtern.
Touren
Wenn Sie MuseScore zum ersten Mal ausführen, erscheint der Startassistent, der Ihnen beim Einrichten einiger grundlegender Funktionen der Software hilft. Eine dieser Funktionen heißt Touren und bietet Ihnen, wie der Name schon sagt, eine geführte Tour durch das Programm.
- Um diese Funktion zu aktivieren, kreuzen Sie auf der Seite Touren des Einrichtungs-Assistenten "Ja" als Antwort auf die Frage "Möchten Sie diese Touren sehen?" an.
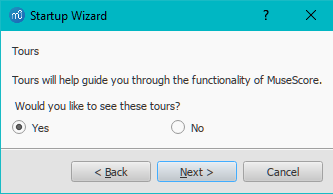
Dadurch wird beim Öffnen des Programms die Tour gestartet, die Sie mit den wichtigsten Funktionen der Benutzeroberfläche vertraut macht.

- Tour beenden: drücken Sie die Schließen Schaltfläche.
- Um Tourenhinweise zu unterbinden, während das Programm startet: Wählen Sie bei der Frage "Would you like to see these tours?" mit "No".
- Um Tourenhinweise wieder anzeigen zu lassen (beim Programmstart): Wählen Sie Hilfe→Touren→Touren anzeigen.
- Um alle Tourenhinweise wieder anzuzeigen (beim Programmstart): Wählen Sie Hilfe→Touren→Touren zurücksetzen.
Derzeit angebotene Touren:
- Einführung in die Benutzeroberfläche.
- Eingeben von Noten und Pausen in einer Partitur.
- Eingabe von Symbolen aus einer Palette.
- Navigieren in der Partitur mit Zeitleiste.
- Navigieren in der Partitur mit der Tastatur.
- Eingabe von Mehrfachpausen.
- Automatische Platzierung von Symbolen.
- Ändern von Eigenschaften mit Inspekteur.
- Auswählen von Elementen.
- Zeilen in der Partitur hinzufügen und bearbeiten.
Neue Partitur beginnen
Die interaktive Partitur Neue Partitur beginnen ist eine praktische Einführung in die Grundlagen der Eingabe einer Partitur. Wenn Sie MuseScore zum ersten Mal öffnen, wird es im Hauptfenster des Menüs Datei Startcenter: klicken Sie einfach, um es zu öffnen. Folgen Sie den blau geschriebenen Anweisungen, und Sie werden durch die grundlegenden Schritte der Partiturerstellung geführt.
Anmerkung: Wenn Sie den Punkt "Erste Schritte" nicht sehen, finden Sie ihn im rechten Bereich des Startcenters. Klicken Sie auf die Pfeile nach rechts oder links, um durch die Optionen zu blättern, bis er angezeigt wird.
Video Anleitungen
MuseScore bietet einen vollständigen Satz von Anleitungsvideos, die jeweils ein bestimmtes Thema behandeln. Sie können auf diese Videos auf verschiedene Arten zugreifen.
*Von der MuseScore-Homepage unter MuseScore.org: Unterstützung/Tutorien
* Im Startcenter: blättern Sie zur Seite Videos im rechten Bereich.
* Verwenden Sie die Liste der Links im Videos Abschnitt (unterhalb).
* Schauen Sie direkt nach, indem Sie nach "MuseScore in Minutes" auf YouTube
Andere Anleitungen
Im Abschnitt Unterstützung -> Tutorien Abschnitt auf musescore.org finden Sie auch Tutorials zu spezielleren Themen (z. B. MuseScore Drumline).
Videos
- Lesson 1- Score setup
- Lesson 2 - Working with MuseScore
- Lesson 3 - Note Input
- Lesson 4 - MIDI keyboard input
- Lesson 5 - More Input Ideas
- Lesson 6 - Text, Lyrics, and Chords
- Lesson 7 - Tablature and Drum Notation
- Lesson 8 - Repeats and Endings, Part 1
- Lesson 9 - Repeats and Endings, Part 2
- Lesson 10 - Articulations, Dynamics and Text
- Lesson 11 - Layout and Parts
Unterstützung erhalten
Wenn Sie bei der Arbeit mit MuseScore auf ein Problem stoßen, gibt es mehrere Möglichkeiten, Hilfe und Unterstützung zu erhalten.
Handbuch
So greifen Sie auf das Handbuch zu:
- Von der MuseScore Webseite: Wählen Sie Unterstützung → Handbuch vom Menü.
- Vom MuseScore Programm: Wählen Sie Hilfe → Online-Handbuch im Menü.
Sie können das Handbuch mit Hilfe der Menüs durchblättern, oder eine Suche.
Situationsabhängige Hilfe
Wenn Sie ein Element in Ihrer Partitur auswählen und die Taste F1 drücken, wird eine Webseite geöffnet, die eine Liste von Links anzeigt, die mit diesem Element im Handbuch vorhanden sind.
Forum
MuseScore bietet eine Reihe von Online-Forum für die Zusammenarbeit der Benutzer. Vielleicht finden Sie hier unter den vorhandenen Beiträgen eine Antwort auf Ihr Problem. Eine Allgemeine Suche der Website wird eine Liste mit relevanten Treffern zu allen Foren und dem Handbuch zurückgegeben.
Wie macht man...
Einige Aufgaben erfordern die Verwendung mehrerer verschiedener Techniken. Für diese kann es schwierig sein, im Handbuch eine Antwort zu finden. Lösungen für diese können Sie im deutschen How To oder besser im englischen How To finden.
Eine Frage stellen
Wenn Sie die Antwort auf Ihr Problem nicht finden, können Sie eine Frage im Forum Allgemeine Fragen und Probleme oder Support and bug reports stellen.
Wenn Sie Ihre Frage stellen:
- Versuchen Sie, so genau wie möglich zu beschreiben, was Sie tun wollen und welche Schritte Sie bereits versucht haben.
- Hängen Sie die Partitur an, die das Problem zeigt. Dadurch wird es für andere viel einfacher, das Problem zu verstehen — verwenden Sie die Option "Dateianhänge" am unteren Rand der Seite, direkt über dem Speichern und der Vorschau Schaltfläche.
- Sie können den Text mit diesen Tipps formatieren.
Einen Fehler melden (Issue tracker)
Wenn Sie auf etwas stoßen, von dem Sie glauben, dass es ein Fehler ist, ist der erste Schritt, es im Forum Allgemeine Fragen und Probleme oder Support and bug reports zu veröffentlichen. Auf diese Weise können andere dabei helfen, zu prüfen, ob es sich um einen echten Fehler handelt (dann kann und sollte ein Eintrag im Issue Tracker erstellt werden, wenn möglich in English), und Ihnen Umgehungslösungen vorschlagen, damit Sie mit dem Schreiben von Partituren fortfahren können.
Weblinks
- How to write a good bug report: step-by-step instructions Isolate bug (MuseScore HowTo)
Installation
MuseScore exists for various different operating systems, including Windows and macOS, as well as many Linux distributions and several BSD variants. All are available from the MuseScore download page.
Installation
When you have downloaded the software, follow the installation instructions for your operating system:
Install on Windows.
Install on macOS.
Install on Linux.
Install on Chromebook.
Initial preferences
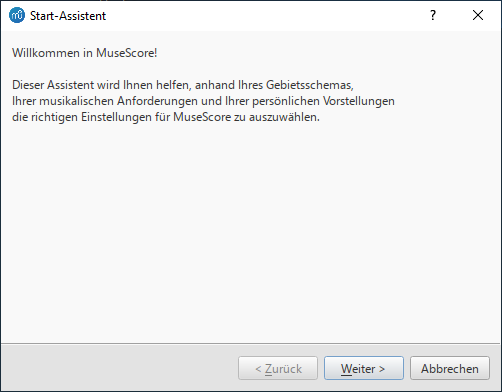
Beim allerersten Start von MuseScore sowie nach jedem Zurücksetzen auf Werkseinstellungen wird der Start Assistent angezeigt (nicht jedoch bei einer Aktialisierung):
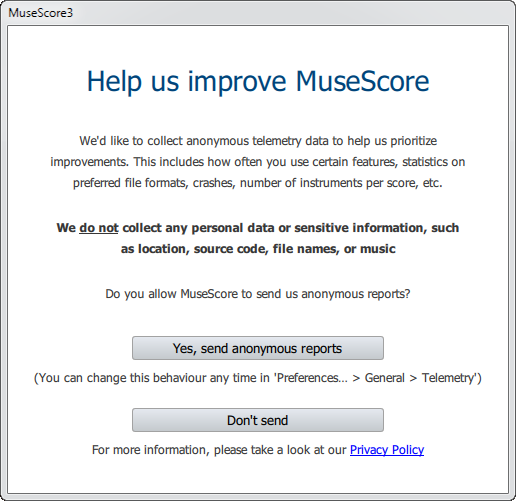
First, you can choose to authorize MuseScore (3.4 or later) to collect usage data, click on Yes, send anonymous reports or Don't send to continue:
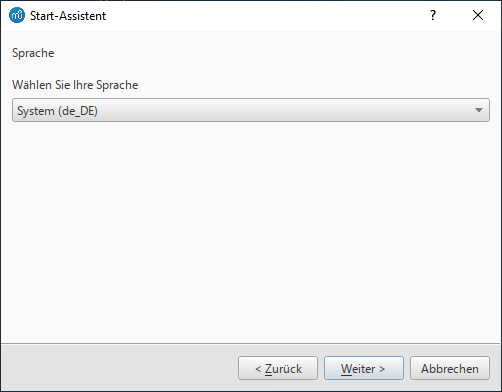
Nun werden Sie zur Auswahl der Programmsprache aufgefordert. Aus der Liste wählen Sie die gewünschte Sprache aus, System (de_DE) wird hier normalerweise vorgeschlagen.
Danach klicken Sie Weiter um fortzusetzen:
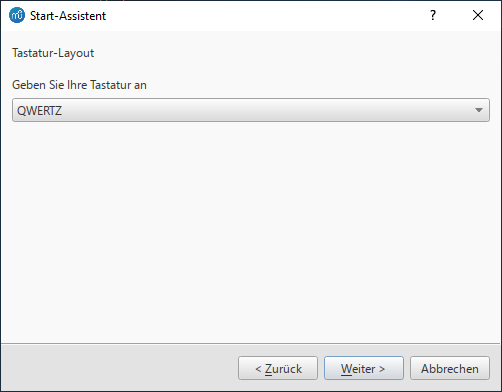
Jetzt werden Sie nach dem Tastaturlayout gefragt. Aus der Liste wählen Sie das passende aus. Danach klicken Sie Weiter um fortzusetzen:
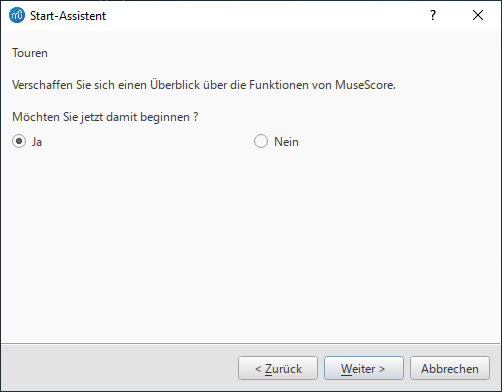
Jetzt können Sie entscheiden ob die "Touren" im Programm angezeigt werden sollen. Ja ist vorausgewählt.
Danach klicken Sie Weiter um fortzusetzen:
Nun kommt der Hinweis, dass das Programm soweit vollständig installiert ist und die entsprechenden Einstellungen gespeichert sind.
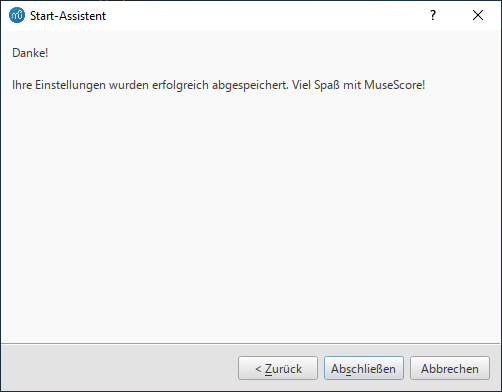
Danach klicken Sie Abschließen um fortzusetzen.
Installation unter Windows
Installation
Wenn Sie mit Windows 10 arbeiten, können Sie eine 32-Bit-Version von MuseScore aus dem Windows Store installieren. Klicken Sie hier wird die Seite von MuseScore in der Store-App geöffnet. Dort müssen Sie nur noch auf Herunterladen > und MuseScore wird heruntergeladen, installiert und anschließend automatisch aktualisiert.
Andernfalls können Sie das Windows-Installationsprogramm von der Download Seite der MuseScore-Website. Klicken Sie auf den Link, um den Download zu starten (wählen Sie zwischen 64-Bit und 32-Bit). Ihr Internet-Browser wird Sie bitten, zu bestätigen, dass Sie diese Datei herunterladen möchten. Klicken Sie auf . Herunterladen für Windows (64-Bit) Die 32-Bit Version kann von weiter unten geladen werden.
Wenn der Download beendet ist, doppelklicken Sie auf die Datei, um die Installation zu starten. Windows fordert Sie möglicherweise mit einem Sicherheitsfenster auf, dies zu bestätigen, bevor Sie die Software ausführen. Klicken Sie auf Weiter um fortzusetzen.
Der Installationsvorgang wird nun gestartet.
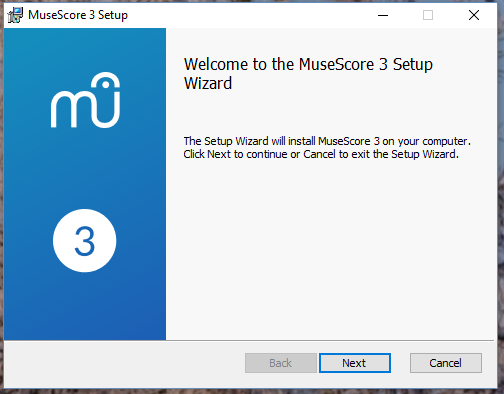
Wenn Sie auf Abbrechen Schaltfläche klicken, hier oder später, sehen Sie:
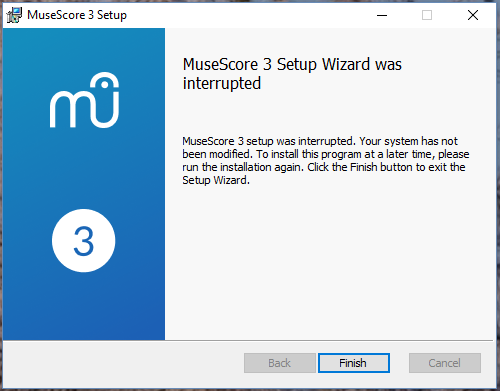
Wenn Sie stattdessen auf Weiter klicken um fortzufahren, zeigt der Setup-Assistent die Bedingungen der freien Softwarelizenz an.
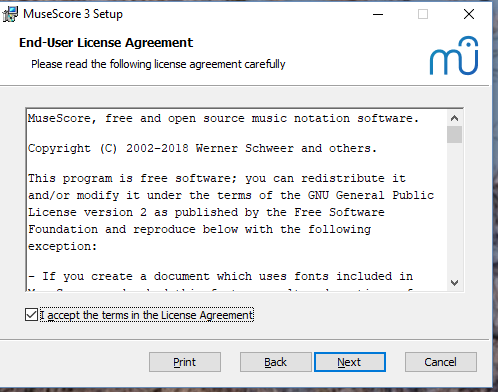
Lesen Sie die Lizenzbedingungen, vergewissern Sie sich, dass das Kästchen neben "Ich akzeptiere die Bedingungen der Lizenzvereinbarung" markiert ist, und klicken Sie auf Weiter um fortzusetzen.
Als Nächstes werden Sie vom Installationsprogramm aufgefordert, den Ort zu bestätigen, an dem MuseScore installiert werden soll.
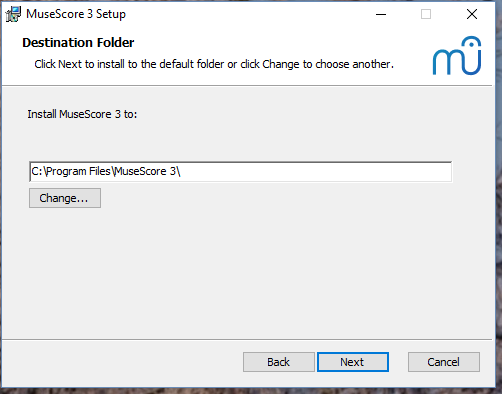
Wenn Sie eine neuere Version von MuseScore installieren, aber die alte Version auf Ihrem Computer behalten möchten, sollten Sie den Ordner ändern (beachten Sie, dass MuseScore 3 mit MuseScore 2 und 1 koexistieren kann, ohne dass Änderungen erforderlich sind). Andernfalls klicken Sie auf Weiter um fortzusetzen.
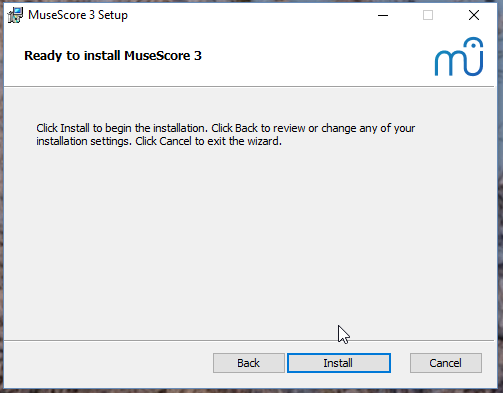
Klicken Sie Installieren um fortzusetzen.
Geben Sie dem Setup-Assistenten ein paar Minuten Zeit, um die erforderlichen Dateien und Konfigurationen zu installieren.
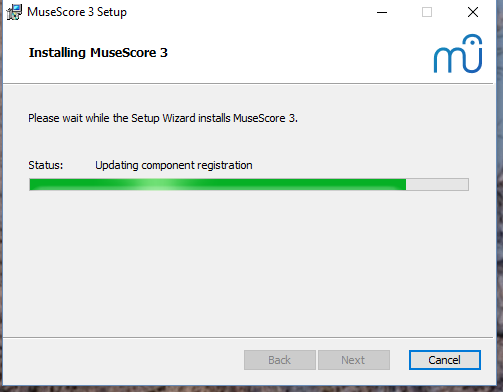
and finally
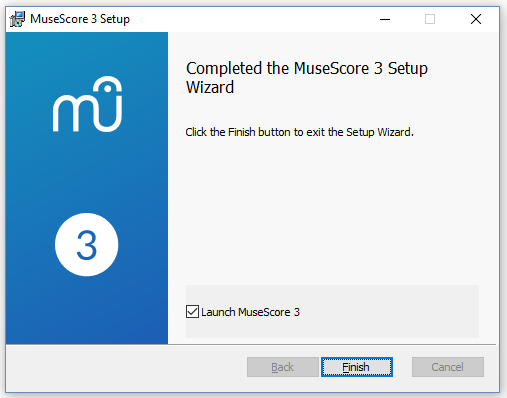
Click Finish to exit the installer. You may delete the installer file you downloaded.
Starten von MuseScore
Um MuseScore zu starten, wählen Sie im Menü Start→Alle Programme→MuseScore 3→MuseScore 3.
Fortgeschrittene Benutzer: Stille oder Benutzereingriffsloses Installieren
-
Sie können MuseScore im Hintergrund mit folgendem Befehl installieren
msiexec /i MuseScore-X.Y.msi /qb-
Hängen Sie ALLUSERS=1 an, wenn Sie es für alle Benutzer des Systems installieren wollen und nicht nur für den aktuellen.
MuseScore deinstallieren
Sie können MuseScore über das Menü deinstallieren, indem Sie Start→Alle Programme→MuseScore 3→Deinstallieren; oder über die Systemsteuerung von Windows. Beachten Sie, dass dadurch weder Ihre Partituren noch Ihre MuseScore-Einstellungen entfernt werden.
Fehlersuche
Das Installationsprogramm wird möglicherweise vom System blockiert. Wenn es Ihnen nicht gelingt, MuseScore zu installieren, klicken Sie mit der rechten Maustaste auf die heruntergeladene Datei und dann auf "Eigenschaften". Wenn die Meldung "Diese Datei stammt von einem anderen Computer und ist möglicherweise blockiert, um diesen Computer zu schützen " angezeigt wird, klicken Sie auf "Entsperren", "OK" und doppelklicken Sie erneut auf die heruntergeladene Datei.
Weblinks
- How to install MuseScore on Windows without administrator rights (MuseScore HowTo)
- How to run MuseScore as Administrator on Windows (MuseScore HowTo)
- How to fix MuseScore installation error on Windows (MuseScore HowTo)
- MSI command-line options
- Standard installer command-line options
MuseScore, MuseScore 3, MuseScore 4
What does this handbook cover
This handbook describes features of MuseScore Studio, the music notation program for Windows, macOS, and Linux supporting a wide variety of file formats and input methods. MuseScore Studio features an easy to use WYSIWYG editor with audio score playback for results that look and sound beautiful, rivaling commercial offerings like Finale and Sibelius. "Musescore Studio" was previously named "MuseScore", see online announcement.
MuseScore Studio is released as a free and open-source software. Musescore Studio 3 is released under the GNU General Public License version 2. Musescore Studio 4 is released under the GNU General Public License version 3. To learn more about the GPL license, visit http://www.gnu.org or http://www.gnu.org/licenses/gpl-faq.html. To download MuseScore Studio 3.6.2, see Installation: Download and installation chapter.
MuseScore Studio is developed and supported by non paid volunteers and managed by Muse Group employees. MuseScore BVBA is a subsidiary of Muse Group. Source: wikipedia, forum discussion.
What is not covered in this handbook
The following items are often referred to as "MuseScore". However, as explained above, this handbook uses "MuseScore" to refer to "MuseScore Studio" only, "MuseScore" is not used to refer to any of the following unless otherwise specified.
- The score viewer and playback mobile apps (Android, iOS), or
- The score viewer and playback interface provided by musescore.com
See How and where to ask for support
Different versions of MuseScore Studio
MuseScore Studio is open-source. Its source code is available at github.
MuseScore Studio 3.6.2 is the last official release of MuseScore Studio 3, see Version information. For forks (wikipedia), see "External Link" section.
MuseScore Studio 4 is a result of continuous development from MuseScore Studio 3.6.2. It has huge playback and countless engraving improvements. After MuseScore Studio 3.6.2 was released, most of the software development moved on to MuseScore Studio 4. Muse Group employees no longer work on bug fixing of Musescore Studio 3.6.2. Due to the substantial change in programming framework and library, some proposed improvements of Musescore Studio 3.6.2 are impossible to be merged into MuseScore Studio 4. Reimplementation of important features is not yet complete, see also discussion1, discussion2, discussion3.
When choosing a MuseScore Studio version to create scores, users should take note of the company's distribution versioning and feature implementation philosophy, and consider production needs. For example MuseScore Studio 3.6.2 Linux supports audio and MIDI routing with JACK, which has implications for automation and video synchronization. Source: https://github.com/orgs/musescore/discussions/13745
MuseScore Studio 3 and MuseScore Studio 4 can be installed and opened side by side on the same OS, see Version 3 and 4 installations side-by-side. Score files are opened by default with the last installed Musescore Studio version, see Change default programs in Windows and Problem with Shortcuts to MuseScore 4 files. You can always choose manually with "Right-click > Open with". Note that MuseScore Studio native format (*.mscz and *.mscx) are backward compatible - MuseScore Studio 4 opens MuseScore Studio 3's *.mscz without error, see Native format compatibility
External Links
Notable forks (wikipedia):
- Musescore 3.7 Evolution
- https://github.com/Jojo-Schmitz/MuseScore/wiki
- Forum discussion End of Life plan for 3.x
- MuseScore3.0dev-PianoTutor
Install on macOS
Install
You will find the DMG (disk image) file on the download page of the MuseScore website. Click on the macOS link to start the download. When the download is complete, double-click the DMG file to mount the disk image.
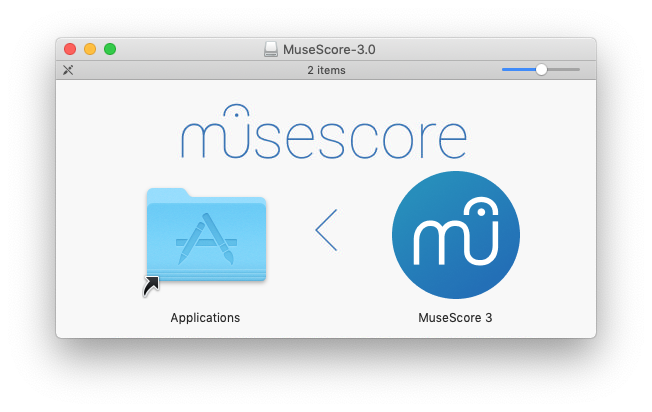
Drag and drop the MuseScore icon to the Applications folder icon.
If you are not logged in as administrator, macOS may ask for a password: click Authenticate and enter your password to proceed.
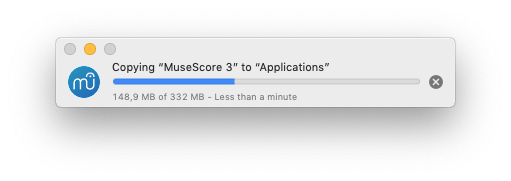
When the application has finished copying, eject the disk image. You can now launch MuseScore from the Applications folder, Spotlight, or Launchpad.
Note: As of macOS 10.15 "Catalina", the system has to be told to permit MuseScore to be allowed to access user parts of the file system. The first time you use it on Catalina, it will ask you if you wish to permit it; of course, answer "yes", but if you bypass this by accident, you can set it via System Preferences > Security and Privacy > Privacy > Files and Folders. Unlock with your Admin credentials, then navigate to MuseScore (whichever version(s) you have and want), add it or them to the list of apps, and select "Documents" and "Downloads" folders, or as you prefer.
Uninstall
Simply delete MuseScore from Applications folder (Admin access will be required to do that, however). Note that this will not remove your scores, templates, extensions and plugins nor your MuseScore settings.
Install with Apple Remote Desktop
You can deploy MuseScore to multiple computers with the "Copy" feature of ARD. Since MuseScore is a self-contained application you can simply copy the application to the '/Application' folder on the target machines. It is also possible to install multiple versions of the application as long as their names differ.
Install on Linux
Distribution packages for various Linux and BSD variants are available. Building from source is another possibility.
Download
Consider your production needs to choose a MuseScore version that best suits you. For example MuseScore 3.6.2 support JACK, which has implications for automation and video synchronization, JACK support is missing from MuseScore 4.0.2.
The Download page contains basic info on how to download, install and use MuseScore.
- Current page contains info for MuseScore 4, its Older and unsupported versions section contains info for MuseScore up to 3.2.3
- Archived page on Internet Archive contains complete info for MuseScore 3.6.2, links on it may not work.
- Working direct download link for MuseScore 3.6.2 stable:
- AppImages: https://ftp.osuosl.org/pub/musescore-nightlies/linux/3x/stable/ (
musescore-$(your system architecture).AppImage, what is my system architecture?)
- AppImages: https://ftp.osuosl.org/pub/musescore-nightlies/linux/3x/stable/ (
More info on AppImage
AppImage is the recommended way to use Musescore. An AppImage is a software that runs on all Linux (see https://appimage.org). It works like a portable app, all the files needed are contained within the AppImage itself.
To run MuseScore AppImage on your system:
Watch the how-to video, or follow these steps:
Step 1: Download a suitable version for your system architecture
AppImages come in different versions. Make sure you download the right one for your system. To check the architecture of your system:
- Open the Terminal.
- Type
arch
or
uname -m
The output will be something like "i686", "x86_64" or "armv7":
i686(or similar) - 32-bit Intel/AMD processor (found on older machines).x86_64(or similar) - 64-bit Intel/AMD processor (modern laptop and desktop computers, most Chromebooks).armv7(or later) - ARM processor (phones & tablets, Raspberry Pi 2/3 running Ubuntu Mate, some Chromebooks, usually 32-bit at present).
Download (jump to) a suitable version.
Step 2: Give the file permission to execute
There are two ways to do this:
From the File Manager:
- Right-click on the AppImage and select "Properties".
- Open the "Permissions" tab.
- Enable the option labelled "Allow executing file as a program".
The process may be slightly different in other file managers.
From the Terminal:
This command works on all Linux systems (Note: The code below assumes that the AppImage is in the Downloads folder. If not the case then amend the file path accordingly):
    cd ~/Downloads
    chmod u+x MuseScore*.AppImage
Step 3: Run the AppImage
- To run the program, just double-click it.
Note: You can move the AppImage to wherever it is most convenient. And to "uninstall" it, just delete it.
Step 4: Install the AppImage
The above procedure allows you to run the MuseScore AppImage but doesn't integrate it with the rest of your system: it doesn't appear in your App menu, and MuseScore files are neither associated with the program nor do they have the correct icon on them.
To remedy this, you need to actually install the program as follows:
- Open the Terminal.
- Type the following (Note: The code below assumes that the AppImage is in the Downloads folder. If not the case then amend the file path accordingly):
    cd ~/Downloads
    ./MuseScore*.AppImage install
Or, alternatively, you can combine the operation into one command:
~/Downloads/MuseScore*.AppImage install
Use the "--help" and "man" options to get more information about the available command line options:
    ./MuseScore*.AppImage --help   # displays a complete list of command line options
    ./MuseScore*.AppImage man      # displays the manual page (explains what the options do)
More info sorted by Linux and BSD
Debian
(Ideally before, otherwise while or after) installing MuseScore itself, you can install one or more soundfont packages (if none is installed, the dependencies will pull in a suitable soundfont automatically):
musescore-general-soundfont-small: the standard MuseScore_General soundfont in SF3 format, as shipped with MuseScore for other operating systemsmusescore-general-soundfont: the MuseScore_General HQ soundfont in SF3 format, as available via the Extensions managermusescore-general-soundfont-lossless: the MuseScore_General HQ soundfont in uncompressed SF2 format: takes up a lot more space on your hard disc, but offers the highest sound quality and extremely fast startup timesfluidr3mono-gm-soundfont: the old soundfont shipped with MuseScore 2.0 (antecessor of MuseScore_General), use only if resources are very tight or you need ittimgm6mb-soundfont: the old soundfont shipped with MuseScore 1.3; cannot substitute the others; use only if you need it; extremely tiny
Note: only the MuseScore_General soundfont (HQ or regular) supports single-note dynamics (SND), and you need at least version 0.1.6 of those soundfonts (from unstable or backports) for SND support!
The command sudo update-alternatives --config MuseScore_General.sf3 can be used at any time to select the default soundfont used by MuseScore if you install more than one (note timgm6mb-soundfont cannot be selected here).
Then, install the musescore3 package for MuseScore 3.x (the current stable version) or musescore for MuseScore 2.x (there’s also musescore-snapshot for the unstable developer preview). The packages are available in the following distributions:
musescore3: sid (unstable), bullseye (testing/Debian 11), buster-backports (stable/Debian 10), stretch-backports-sloppy (oldstable/Debian 9)musescore: buster (stable/Debian 10), stretch-backports (oldstable/Debian 9), jessie-backports-sloppy (oldoldstable/Debian 8)musescore-snapshot: experimental (usable on unstable)
See https://backports.debian.org/Instructions/ for instructions on how to add an official Debian backports repository to your system and install packages from there.
Note: without the appropriate backports, older versions may be available: MuseScore 2.0.3 on stretch, MuseScore 1.3 on jessie. Using the latest 2.3.2 version for 2.x-format scores instead (or conversion to 3.x) is strongly recommended!
KDE neon 20.04 (focal)
Message https://musescore.com/mirabilos if the regular or PPA packages don’t work.
KDE neon 18.04 (bionic)
KDE neon switched from bionic to focal in 2021, so the following should not be necessary any more, but keeping it for now for reference:
The KDE bionic-neon packages are built on a different repository than the normal Ubuntu PPAs, as this is the only way for us to build packages for KDE neon. Due to limitations of the OpenSuSE Buildservice used, this currently only provides amd64 (64-bit PC) packages, no ARM packages (Slimbook or Pinebook remix).
All commands listed below must be entered in a terminal, in one line each.
-
Remove the Ubuntu PPAs (all three of them) from your system if you’ve ever configured it before. This is generally in
/etc/apt/sources.listor one of the files below/etc/apt/sources.list.d/; if you usedadd-apt-repository(the recommended way) to enable the PPA, you can remove them with:sudo rm -f /etc/apt/sources.list.d/mscore-ubuntu-ubuntu-mscore*KDE bionic-neon is not compatible with the Ubuntu PPAs!
-
Install a few standard packages (usually they are already there, but just in case they aren’t) to be able to securely download the repository signature key:
sudo apt-get install wget ca-certificates
- Download (via secure HTTPS connection) and install the repository signing key:
wget -O - https://download.opensuse.org/repositories/home:/mirabile:/mscore/bionic-neon/Release.key | sudo apt-key add -
- Enable the repository:
echo deb https://download.opensuse.org/repositories/home:/mirabile:/mscore/bionic-neon ./ | sudo tee /etc/apt/sources.list.d/mscore.list
- Make the new packages available:
sudo apt-get update
Now, it’s time to install one or more soundfont packages (ideally install the one you want before installing MuseScore):
musescore-general-soundfont-small: the standard MuseScore_General soundfont in SF3 format, as shipped with MuseScore for other operating systemsmusescore-general-soundfont: the MuseScore_General HQ soundfont in SF3 format, as available via the Extensions managermusescore-general-soundfont-lossless: the MuseScore_General HQ soundfont in uncompressed SF2 format: takes up a lot more space on your hard disc, but offers the highest sound quality and extremely fast startup timesfluidr3mono-gm-soundfont: the old soundfont shipped with MuseScore 2.0 (antecessor of MuseScore_General), use only if resources are very tight or you need ittimgm6mb-soundfont: the old soundfont shipped with MuseScore 1.3; cannot substitute the others; use only if you need it; extremely tiny
If you skip this step, a suitable soundfont will be automatically installed when you install MuseScore itself in the final step.
Note: only the MuseScore_General soundfont (HQ or regular) supports single-note dynamics (SND), and you need at least version 0.1.6 of those soundfonts (from our repository) for SND support!
The command sudo update-alternatives --config MuseScore_General.sf3 can be used at any time to select the default soundfont used by MuseScore if you install more than one (note timgm6mb-soundfont cannot be selected here).
Finally, you can install the latest stable version of MuseScore with sudo apt-get install musescore3 and the old 2.x version with sudo apt-get install musescore (the musescore-snapshot package with an instable developer preview is also available).
Ubuntu, Kubuntu, Xubuntu, …
WARNING: these instructions are not for KDE neon 18.04 (bionic) users (see above)! Later versions, such as KDE neon 20.04 (focal), should work though.
MuseScore 2.x (the old version) is available from 18.10 (cosmic) to 19.10 (eoan) out of the box. Older Ubuntu releases carry older versions (18.04 (bionic) has 2.1, 16.04 (xenial) has 2.0, 14.04 (trusty) and 12.04 (precise) have 1.3 and 1.2, respectively). Similar to the Debian instructions, we recommend using the latest 2.3.2 version for old 2.x scores instead, or migrating those scores to MuseScore 3.
Besides the versions supplied by the distribution itself, the MuseScore Debian packager provides newer versions of MuseScore for older Ubuntu releases in official PPAs (package archives).
Please activate the Stable releases of MuseScore 3 repository on your system and then install the musescore3 package, available for all releases from 18.04 (bionic) onwards. (It is not feasible to provide MuseScore 3 for older Ubuntu releases, as those lack the minimum Qt version required by MuseScore 3.)
If you wish to install the older MuseScore 2, activate the Stable releases of MuseScore 2 PPA and install the musescore package, available for 12.04 (precise), 14.04 (trusty), 16.04 (xenial), and 18.04 (bionic) onwards. (Some intermediate releases may have slightly older MuseScore versions still available, but it’s best to update to the next LTS.) On the ancient 12.04 (precise) and 14.04 (trusty) releases, this will upgrade the Qt library in your system, which may break unrelated software (and on 12.04 even the C++ libraries are upgraded), mind you; best to upgrade to a newer LTS.
There’s also a MuseScore Nightly Builds (unstable development builds) PPA, from which the daring can install the musescore-snapshot package, for LTS, that is, 18.04 (bionic) only.
WARNING: these PPAs are only suitable for Ubuntu/Kubuntu/Xubuntu/… but not for Debian or KDE bionic-neon!
As with Debian, you can install one or more soundfont packages (ideally install the one you want before installing MuseScore, but if you don’t, a suitable one will be installed alongside MuseScore):
musescore-general-soundfont-small: the standard MuseScore_General soundfont in SF3 format, as shipped with MuseScore for other operating systemsmusescore-general-soundfont: the MuseScore_General HQ soundfont in SF3 format, as available via the Extensions managermusescore-general-soundfont-lossless: the MuseScore_General HQ soundfont in uncompressed SF2 format: takes up a lot more space on your hard disc, but offers the highest sound quality and extremely fast startup timesfluidr3mono-gm-soundfont: the old soundfont shipped with MuseScore 2.0 (antecessor of MuseScore_General), use only if resources are very tight or you need ittimgm6mb-soundfont: the old soundfont shipped with MuseScore 1.3; cannot substitute the others; use only if you need it; extremely tiny
Note: only the MuseScore_General soundfont (HQ or regular) supports single-note dynamics (SND), and you need at least version 0.1.6 of those soundfonts (possibly from the PPA) for SND support!
The command sudo update-alternatives --config MuseScore_General.sf3 can be used at any time to select the default soundfont used by MuseScore if you install more than one (note timgm6mb-soundfont cannot be selected here).
See also the hints for the various distributions on the download page.
External links
- How to run the MuseScore AppImage on Linux (MuseScore HowTo, video)
Install on Chromebook
Desktop program
MuseScore runs on Chrome OS within a Linux container (also known as Crostini). There is a special procedure you can use to install MuseScore on a Chromebook if you are not already comfortable with running Linux apps. See the article Install MuseScore on Chromebook for more information. You can also get a special build of MuseScore 3 for ARM processors via that link (the official builds are only for Intel).
Alternatively, if you prefer to use the plain Linux commands, follow the steps described in the video linked below:
- Install Linux Virtual Machine called Crostini. Go to Settings > Linux > Turn On
- Download Musescore AppImage package
- Configure AppImage to run. Set
chmod +xfor the AppImage file - Run AppImage with
./followed by the Musescore package file name -
Install required libraries if necessary, e.g.:
sudo apt-get install libvorbisfile3sudo apt-get install libnss3
-
Install AppImage (using the
installcommand line option) to avoid running it from Linux command line each time - Enjoy!
External links
- Watch this interactive video for more details
- Special article on how to Install MuseScore on Chromebook
- How to run MuseScore on ChromeOS (MuseScore HowTo)
Sprache, Übersetzung und Erweiterungen
MuseScore arbeitet mit Ihrer "System"-Sprache (diejenige, die für die meisten Programme verwendet wird, und im Allgemeinen abhängig von Ihrem Land und den Spracheinstellungen des PCs bzw. Kontos).
Sprache ändern
- Wählen Sie im Menü Bearbeiten→Einstellungen... (Mac: MuseScore→Einstellungen...);
-
Im Tab Allgemein, wählen Sie die gewünschte Sprache aus der Dropdown-Liste im Fenster Sprache section:
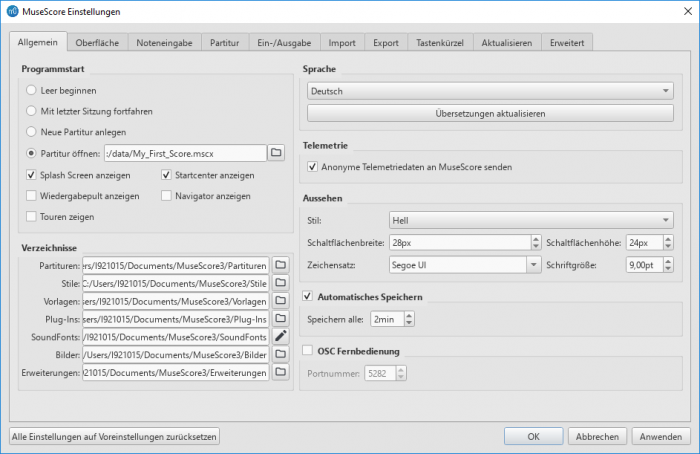
Hilfsmittelverwaltung
Die Hilfsmittelverwaltung dient zur Installation und Deinstallation von Erweiterungen und zur Aktualisierung von Übersetzungen. Um das Menü aufzurufen, verwenden Sie eine der folgenden Optionen:
- Wählen Sie in der Menüleiste Hilfe→Hilfsmittelverwaltung.
-
Wählen Sie in der Menüleiste Bearbeiten→Einstellungen... (Mac: MuseScore→Einstellungen...), klicken Sie in der Registerkarte Allgemein die Schaltfläche Übersetzungen aktualisieren.
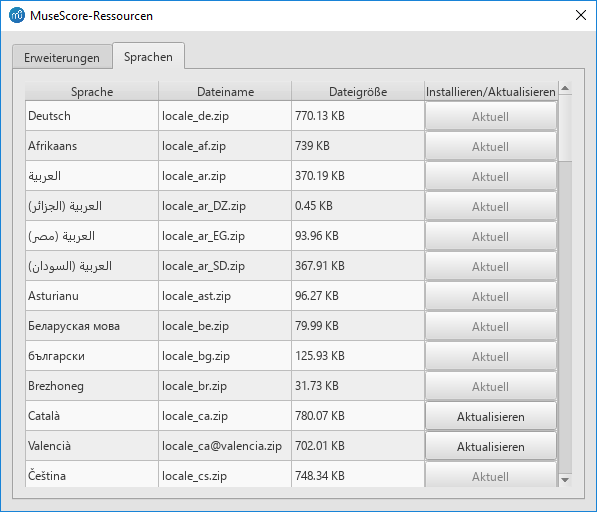
Erweiterung installieren/deinstallieren
So installieren oder deinstallieren Sie eine Erweiterung:
- Wählen Sie die Erweiterungen Tab in der Hilfsmittelverwaltung.
- Wählen Sie die Erweiterung aus.
- Klicken Sie Installieren oder Deinstallieren Schaltfläche.
Anmerkung: Zu den Erweiterungen gehören derzeit die MuseScore Drumline (MDL) (ab Version 3.0) und der MuseScore General HQ Soundfont (ab Version 3.1).
Übersetzungen aktualisieren
So aktualisieren Sie die Übersetzung(en):
- Wählen Sie den Sprachen Tab in der Hilfsmittelverwaltung.
- Klicken Sie auf die Aktualisieren Schaltfläche für die Sprache(n), die Sie aktualisieren möchten.
Anmerkung: Fast alle Menüs und Dialoge schalten sofort auf die geänderten/aktualisierten Übersetzungen um, aber einige verwenden sie erst nach einem Neustart des Programms.
Siehe auch
Weblinks
- How to change the language in MuseScore (MuseScore HowTo)
Auf Aktualisierungen prüfen
Anmerkung: Diese Optionen sind nur für Mac- und Windows-Versionen (ausgenommen die Version aus dem Windows Store) von MuseScore verfügbar, da nur diese direkt per MuseScore.org aktualisiert werden können. Linux Distributionen (und der Windows Store) haben andere Mechanismen um Updates bereitzustellen.
Die direkt aktualisierbaren Versionen von MuseScore bieten zwei Wege um auf neue Updates zu prüfen.
Automatische Update-Benachrichtigung
- Wählen Sie im Menü Bearbeiten→Einstellungen... (Mac: MuseScore→Einstellungen...);
- Wählen Sie den Reiter Aktualisieren.
- Stellen Sie sicher, dass die Checkbox "Nach neuer Version von MuserScore suchen" ausgewählt ist. (Sollte standardmäßig der Fall sein):
Falls diese Option gewählt ist, wird MuseScore bei jedem Start nach neuen Updates suchen. Die Mac und Windows Versionen (ausgenommen die Windows Store Version) aktivieren dann einen Auto-Updater, der Updates automatisch herunterlädt und installiert.
Nach neuen Updates suchen
- Wählen Sie aus dem Menü Hilfe→Auf Aktualisierungen prüfen:
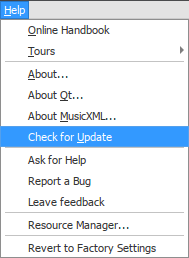
- Ein Dialog erscheint, der über den Update-Zustand informiert. Falls ein Update zur Verfügung steht, kann dies direkt per Link heruntergeladen werden.