入门
本章将帮助您安装和首次运行 MuseScore,还将介绍一些学习和帮助资源。
了解MuseScore
MuseScore提供众多的学习资源可帮助新用户入门。
导览
当您第一次使用MuseScore时,开始向导带您设置软件的基础功能。功能之一叫做导览,正如其名,它将带领您领略程序的特色。
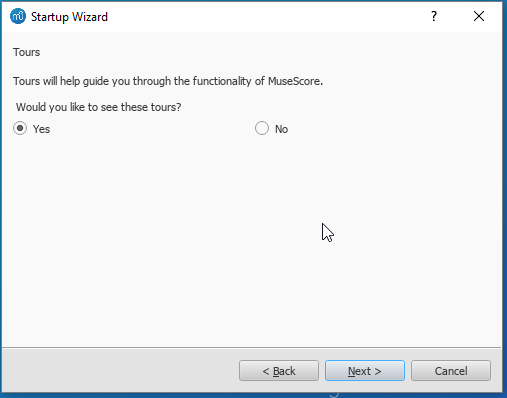
- 要开启这项功能,请在开始向导的导览页面,勾选"是"来回应"您想观看导览吗?"
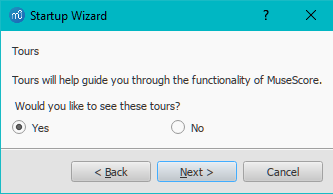
这将会允许导览在程序开启时运行,以向您介绍用户界面的特色功能。
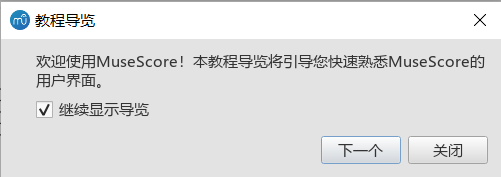
- 要结束导览:请按下关闭按钮。
- 不再显示导览:请取消勾选“继续显示导览”。
- 要再次显示导览(当程序重启时):请选择帮助→导览→显示导览。
- 要从头再看导览 (当程序重启时):请选择帮助→导览→重设导览。
目前提供的导览有:
- 用户界面介绍。
- 音符与休止符输入。
- 符号面板输入。
- 时间轴导览。
- 键盘输入方法导览
- 如何添加多小节休止符
- 符号的自动布局
- 使用检视器来修改属性
- 选取元素
- 在乐谱中加入并编辑线性符号
新手入门乐谱
新手入门是一个实践性的、介绍音符输入基础技能的交互式乐谱。当您首次打开MuseScore,它会显示在启动中心的主窗口上,只需要轻点打开。照着蓝字显示的步骤,您将体验乐谱输入的基础技巧。
提示:若您看不到新手入门乐谱,您可以查看在启动中心的右边栏,点击左/右箭头直到滚动到相关页面。
视频教程
MuseScore提供一整套教学视频,每个视频涵盖了一个主题。你能通过不同方式收看视频。
其他教程
在musescore.org的教程部分你将发现更多特别的话题。(比如MuseScore鼓谱)。
视频
获得帮助
若您在使用MuseScore时遇到问题,有几种途径可以帮到您:
使用手册
要查阅使用手册:
-
在MuseScore官网:从菜单选择 支持 → 使用手册。
-
在MuseScore程序中:选择顶部菜单栏的 帮助 → 在线手册 。
您可以用菜单浏览使用手册,或者搜索一下。
环境帮助
在您选中乐谱中的一个元素后按下F1,会打开使用手册,其中会展示一组和该元素相关的链接。
论坛
MuseScore 提供了一些在线论坛供用户交流。你可以在帖子中找到你遇到问题的可能解决方案。 使用网站的 通用搜索 将会返回帖子和使用手册中的内容。
指南
有些操作需要多个在使用手册中很难发现技巧。这些解决方案可在How To's(英文) 中找到
发布一个问题
如果你找不到你需要的答案,你可以在Support and bug reports(英文) 论坛发布帖子提问。
当您发布问题时:
-
请尽量清晰明确描述您的目的,以及您为了解决问题做了哪些尝试。
-
请附上出问题的谱子,这会使他人更方便地了解问题— 使用页面底部的"选取附件" 选项,然后点击保存 以及 预览按钮。
-
您可以使用这些提示格式化文本。
报告问题
如果您遇到一些您认为是Bug的问题,首当其冲应当将它发表在支持与Bug反馈论坛。这会让他人帮忙检查这是否是个真的Bug,并给出变通办法来让您继续乐曲的创作。详情请阅错误反馈与功能请求。
外部链接
- How to write a good bug report: step-by-step instructions Isolate bug (MuseScore HowTo)
安装说明
MuseScore有适用于不同操作系统的版本,包括Windows、macOS, 以及多种Linux发行版系统和几个BS变种。所有安装包均可从MuseScore下载页获得。
安装说明
当您下载软件后,请按照您所属的操作系统的安装步骤:
在Windows上安装
在macOS上安装
在Linux上安装
在Chromebook上安装
首选项
安装后首次运行MuseScore 时,您将会被问及几个问题来确定你的首选项:
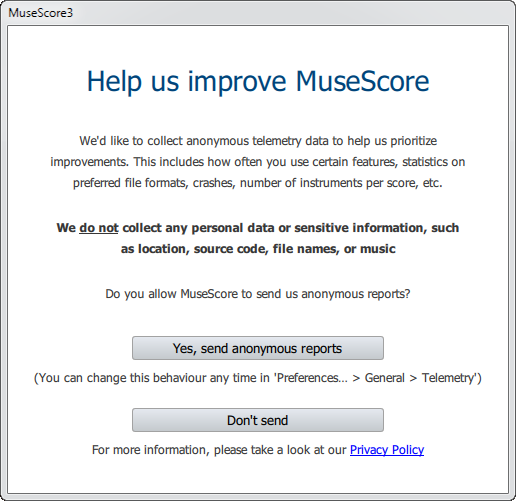
首先,您可以选择授权MuseScore(3.4或更高版本)来收集使用数据,点击 是的,发送匿名报告 或者 不发送 继续:
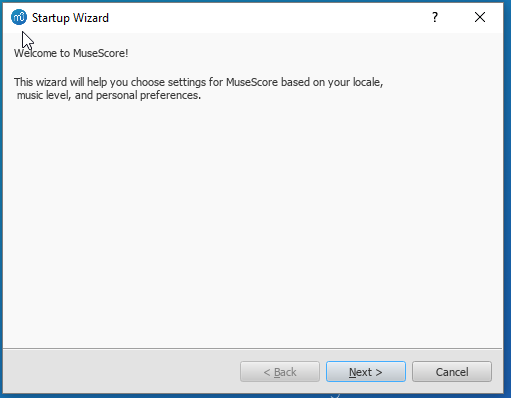
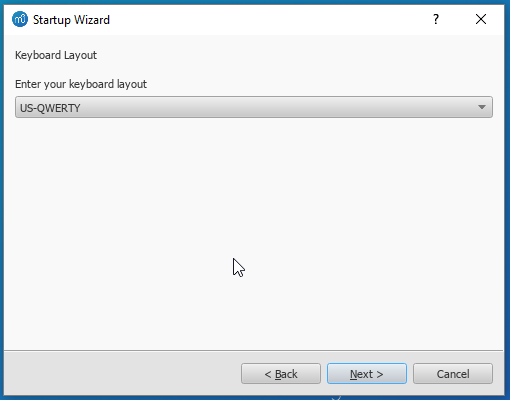
语言设置和键盘输出已在安装时设置好,通常无需更改。只需按下一步来继续:
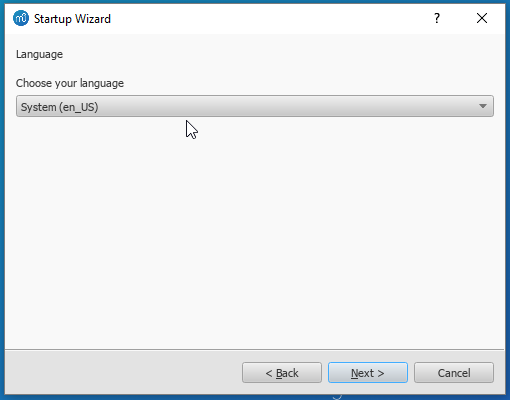
紧接着:
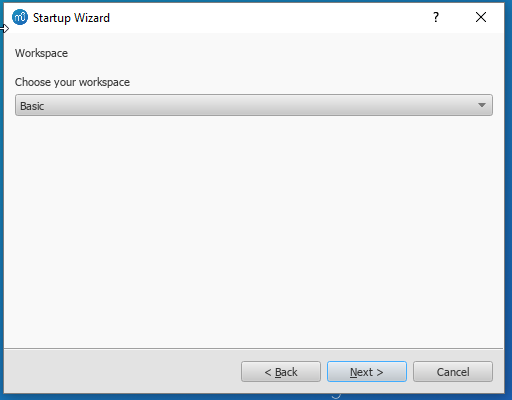
工作区页面让您选定默认工具栏与面板。从下拉列表选择一个选项。然后点击下一步 来继续:
此时软件会问您是否要观看教程导览。若您是新手MuseScore请点击'是' 选项,然后点 下一步来继续:
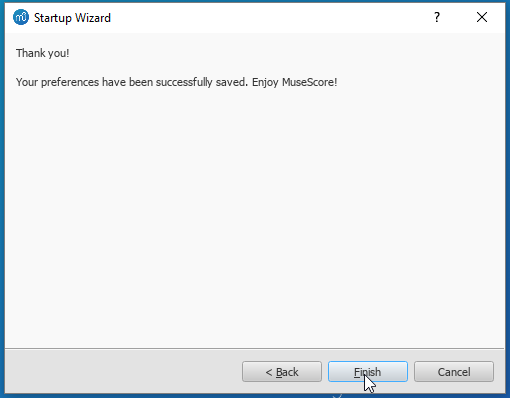
最后点击结束来开始使用Muse Score。
MuseScore, MuseScore 3, MuseScore 4
What does this handbook cover
This handbook describes features of MuseScore Studio, the music notation program for Windows, macOS, and Linux supporting a wide variety of file formats and input methods. MuseScore Studio features an easy to use WYSIWYG editor with audio score playback for results that look and sound beautiful, rivaling commercial offerings like Finale and Sibelius. "Musescore Studio" was previously named "MuseScore", see online announcement.
MuseScore Studio is released as a free and open-source software. Musescore Studio 3 is released under the GNU General Public License version 2. Musescore Studio 4 is released under the GNU General Public License version 3. To learn more about the GPL license, visit http://www.gnu.org or http://www.gnu.org/licenses/gpl-faq.html. To download MuseScore Studio 3.6.2, see Installation: Download and installation chapter.
MuseScore Studio is developed and supported by non paid volunteers and managed by Muse Group employees. MuseScore BVBA is a subsidiary of Muse Group. Source: wikipedia, forum discussion.
What is not covered in this handbook
The following items are often referred to as "MuseScore". However, as explained above, this handbook uses "MuseScore" to refer to "MuseScore Studio" only, "MuseScore" is not used to refer to any of the following unless otherwise specified.
- The score viewer and playback mobile apps (Android, iOS), or
- The score viewer and playback interface provided by musescore.com
See How and where to ask for support
Different versions of MuseScore Studio
MuseScore Studio is open-source. Its source code is available at github.
MuseScore Studio 3.6.2 is the last official release of MuseScore Studio 3, see Version information. For forks (wikipedia), see "External Link" section.
MuseScore Studio 4 is a result of continuous development from MuseScore Studio 3.6.2. It has huge playback and countless engraving improvements. After MuseScore Studio 3.6.2 was released, most of the software development moved on to MuseScore Studio 4. Muse Group employees no longer work on bug fixing of Musescore Studio 3.6.2. Due to the substantial change in programming framework and library, some proposed improvements of Musescore Studio 3.6.2 are impossible to be merged into MuseScore Studio 4. Reimplementation of important features is not yet complete, see also discussion1, discussion2, discussion3.
When choosing a MuseScore Studio version to create scores, users should take note of the company's distribution versioning and feature implementation philosophy, and consider production needs. For example MuseScore Studio 3.6.2 Linux supports audio and MIDI routing with JACK, which has implications for automation and video synchronization. Source: https://github.com/orgs/musescore/discussions/13745
MuseScore Studio 3 and MuseScore Studio 4 can be installed and opened side by side on the same OS, see Version 3 and 4 installations side-by-side. Score files are opened by default with the last installed Musescore Studio version, see Change default programs in Windows and Problem with Shortcuts to MuseScore 4 files. You can always choose manually with "Right-click > Open with". Note that MuseScore Studio native format (*.mscz and *.mscx) are backward compatible - MuseScore Studio 4 opens MuseScore Studio 3's *.mscz without error, see Native format compatibility
External Links
Notable forks (wikipedia):
- Musescore 3.7 Evolution
- https://github.com/Jojo-Schmitz/MuseScore/wiki
- Forum discussion End of Life plan for 3.x
- MuseScore3.0dev-PianoTutor
在Windows上安装
安装
若您的设备运行Windows 10,可以从Windows商店安装32位版本的MuseScore。←点击链接来跳转到商店应用中的Musescore。在那儿,您只需点击获取应用>,MuseScore就会下载并安装,随后自动升级。
此外,您可以从MuseScore官方下载页获取Windows安装包。单击链接来开始下载。(请挑选适合您处理器构架的版本:64位或32位)。您的浏览器会向您确认下载的文件,请点击保存文件.
完成下载后,双击文件开始安装。Windows或许会向您弹出一个安全窗口以在安装之前确认。点击运行以继续。
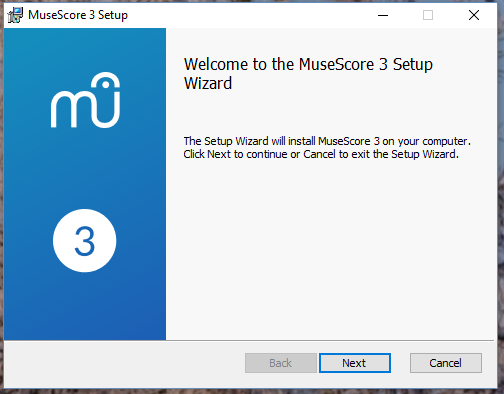
安装现在开始
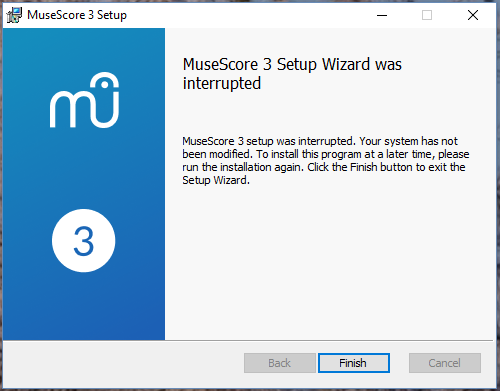
如果您在此时或之后点击取消,您将会看见:
如果您点击的是下一步,安装向导将显示免费软件许可的条款。
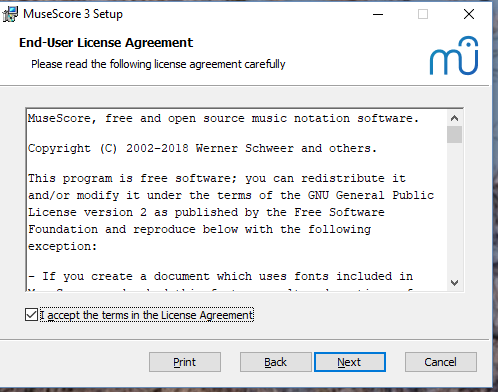
阅读许可条款,请确保勾选了"我接受许可协议中的条款",然后点击下一步以继续。下一步,安装器将要求您确认MuseScore的安装位置。
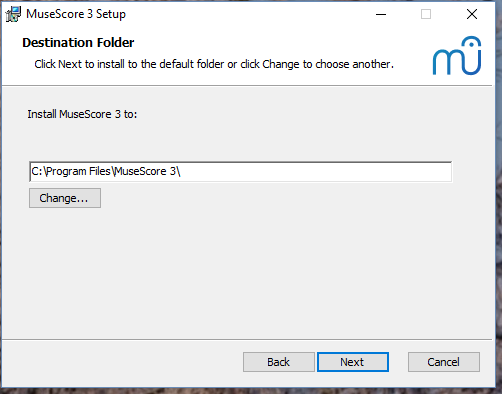
若您正安装一个更新版本的的MuseScore但同时仍想保留旧版本软件,那么 您应当更改安装路径(请注意MuseScore 3 可以与MuseScore 1/2共存且无需任何更改)。否则请点击下一步以继续。
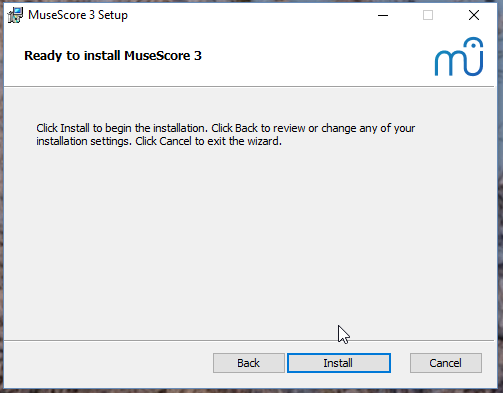
点击安装以继续。
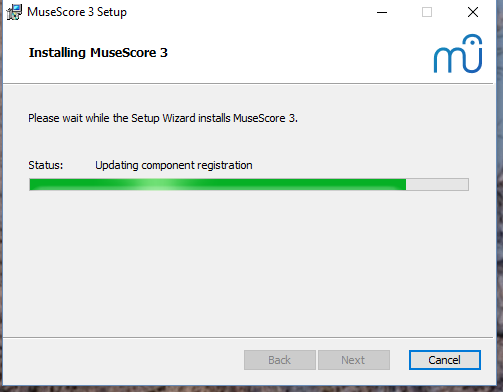
安装向导会花几分钟去安装必需文件与配置。您将看见:
最后
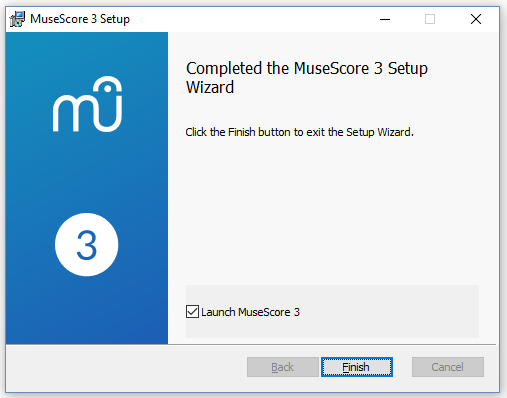
点击结束退出安装器。您可以删除已下载的安装文件。
启动MuseScore
要启动MuseScore,请在菜单中选择开始→所有程序→MuseScore 3→MuseScore 3.
高级用户:静默/无人安装
-
您可以使用下列命令来静默安装MuseScore:
msiexec /i MuseScore-X.Y.msi /qb-
卸载
您可以从开始菜单卸载MuseScore:选择开始→所有程序→MuseScore 3→Uninstall MuseScore,亦可通过控制面板卸载。请注意,这将不会删除您的乐谱和MuseScore配置。
解决问题
在Windows XP和Vista上,安装器可能会被系统屏蔽。若您无法顺利安装MuseScore,请右击已下载的安装文件,并点击“属性”。倘若跳出信息“这个文件来自另一台计算机,它可能会被阻止以保护本机。” 点击"不阻止"、"OK" 并 再次双击安装文件。
外部链接
在macOS上安装
安装
你将在MuseScore下载页找到DMG(磁盘映像)文件。点击macOS下载链接即可开始下载。下载完成后,请双击DMG文件来装载磁盘映像。
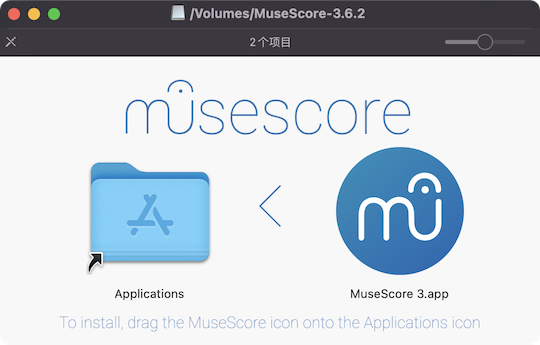
将MuseScore图标拖拽到Applications文件夹图标。
若您未以管理员身份登入,macOS会询问密码:点击 认证并输入密码 以继续。

当应用程序复制完成后,请弹出磁盘映像。此时您可以从应用文件夹、聚焦搜索或启动台启动MuseScore。
注意: 在macOS 10.15 Catalina中,系统会询问您是否允许MuseSocre访问用户部分的文件。当您在Catalina中第一次使用本软件时,系统会向您询问,请点击“好”按钮。如果您意外跳过了这个步骤,您也可以在系统偏好设置 > 安全与隐私 > 文件与文件夹中进行许可。您需要点击左下角小锁图标🔒,输入您的登陆密码,找到MuseScore并将其加入应用程序列表中,勾选“文稿”和“下载”文件夹。
卸载
只需将应用文件夹内的MuseScore删除即可。
在Apple远程桌面安装
您可以利用ARD的复制功能将MuseScore部署到多个计算器。因为MuseScore是一个独立应用,所以您能够轻松把应用复制到目标计算机的 '/Application' 文件夹。只要不同版本的MuseScore的名称不同,您也可以安装。
外部链接
在Linux上安装
您可以在下载页面获取不同Linux发行版的MuseScore软件包,AppImage是其中最简单、适用发行版最广的安装方式。若您有偏爱,当然也可以使用发行版软件包的方式进行安装。从源代码编译也是一种方式。
AppImage
AppImage文件几乎可以运行在所有Linux发行版上:应用及其所需的所有文件全部封装在一个AppImage文件里,如同一个便携版软件。通过以下步骤,可以让MuseScore的AppImage在您的系统中运行。
第一步:下载
AppImages come in different versions. Make sure you download the right one for your system. To check the architecture of your system:
AppImage文件有多种不同架构的版本,请确保您下载的是正确的版本。您可以通过以下步骤来得知系统架构:
- 打开终端;
- 输入
arch
或
uname -m
输出结果会类似于 “i686”, “x86_64” 或者 “armv7”:
i686(或类似的) - 32位 Intel/AMD 处理器(常见于老旧计算机)。x86_64(或类似的) - 64位 Intel/AMD 处理器(现代笔记本、台式机以及大多数Chromebook)。armv7(或更高的版本) - ARM 处理器。(手机,平板电脑,运行Ubuntu Mate的第二、第三代树莓派以及一些Chromebook。 大部分为32位)
现在您可以转到下载 页面找到符合您电脑架构的AppImage。下载的文件将以 “MuseScore-X.Y.Z-$(arch).AppImage”命名(如MuseScore-3.6.2-x86_64.AppImage)。
第二步:给予安装权限
可以使用两种方法:
使用文件管理器:
(以Nautilus为例)
1. 在AppImage上右键后选择“属性”。
2. 打开“权限”选项卡。
3. 打开“允许执行文件”选项。
不同文件管理器的操作方法可能有所出入。
使用终端:
此命令适用于所有Linux系统(提示:此指令预设您下载的AppImage文件在“~/Downloads”目录下。若非如此,请将指令中的路径修改为您文件所在的目录):
    cd ~/Downloads
    chmod u+x MuseScore*.AppImage
第三步:运行
- 双击文件即可运行程序。
Note: You can move the AppImage to wherever it is most convenient. And to "uninstall" it, just delete it.
提示:您可随时移动AppImage文件到您想要的地方,若要“卸载”它,删除文件即可。
安装AppImage
上文所述步骤虽然让您得以运行AppImage,但没有让其真正整合入系统:软件不会出现在应用程序菜单中、MuseScore文件(MSCZ等)没有和软件相关联、MuseScore文件无法显示正确的图标。
因此,您需要真正安装软件,才能解决这些问题:
- 打开终端;
- 输入以下命令(提示:和前文一样,此指令预设您下载的AppImage文件在“~/Downloads”目录下。若非如此,请将指令中的路径修改为您文件所在的目录):
    cd ~/Downloads
    ./MuseScore*.AppImage install
您也可以只使用一条命令:
~/Downloads/MuseScore*.AppImage install
使用"--help"和"man"选项以获取更多可用的命令行选项:
    ./MuseScore*.AppImage --help   # 显示所有命令行选项
    ./MuseScore*.AppImage man      # 显示帮助页(解释选项作用)
发行版安装包
Arch
sudo pacman -Syu musescore
Debian
(Ideally before, otherwise while or after) installing MuseScore itself, you can install one or more soundfont packages (if none is installed, the dependencies will pull in a suitable soundfont automatically):
musescore-general-soundfont-small: the standard MuseScore_General soundfont in SF3 format, as shipped with MuseScore for other operating systemsmusescore-general-soundfont: the MuseScore_General HQ soundfont in SF3 format, as available via the Extensions managermusescore-general-soundfont-lossless: the MuseScore_General HQ soundfont in uncompressed SF2 format: takes up a lot more space on your hard disc, but offers the highest sound quality and extremely fast startup timesfluidr3mono-gm-soundfont: the old soundfont shipped with MuseScore 2.0 (antecessor of MuseScore_General), use only if resources are very tight or you need ittimgm6mb-soundfont: the old soundfont shipped with MuseScore 1.3; cannot substitute the others; use only if you need it; extremely tiny
Note: only the MuseScore_General soundfont (HQ or regular) supports single-note dynamics (SND), and you need at least version 0.1.6 of those soundfonts (from unstable or backports) for SND support!
The command sudo update-alternatives --config MuseScore_General.sf3 can be used at any time to select the default soundfont used by MuseScore if you install more than one (note timgm6mb-soundfont cannot be selected here).
Then, install the musescore3 package for MuseScore 3.x (the current stable version) or musescore for MuseScore 2.x (there’s also musescore-snapshot for the unstable developer preview). The packages are available in the following distributions:
musescore3: sid (unstable), bullseye (testing/Debian 11), buster-backports (stable/Debian 10), stretch-backports-sloppy (oldstable/Debian 9)musescore: buster (stable/Debian 10), stretch-backports (oldstable/Debian 9), jessie-backports-sloppy (oldoldstable/Debian 8)musescore-snapshot: experimental (usable on unstable)
See https://backports.debian.org/Instructions/ for instructions on how to add an official Debian backports repository to your system and install packages from there.
Note: without the appropriate backports, older versions may be available: MuseScore 2.0.3 on stretch, MuseScore 1.3 on jessie. Using the latest 2.3.2 version for 2.x-format scores instead (or conversion to 3.x) is strongly recommended!
Fedora
-
导入GPG密钥:
su
rpm --import http://prereleases.musescore.org/linux/Fedora/RPM-GPG-KEY-Seve
-
到MuseScore的下载页面。点击符合您电脑架构的稳定版Fedora链接。
-
对于不同架构,您有两种方式来安装MuseScore
-
对于 i386架构
    su
yum localinstall musescore-X.Y-1.fc10.i386.rpm
- 对于x86_64架构
    su
yum localinstall musescore-X.Y-1.fc10.x86_64.rpm
如果安装后没有声音,可以查看 Fedora 11的声音问题.
KDE neon 18.04 (bionic)
KDE neon的软件包与一般Ubuntu PPA文件构建在不同软件仓库上,这也是构建KDE neon版本软件包的唯一方法。由于OpenSUSE构建服务的限制,我们只能提供amd64架构(64位PC)的软件包,而没有ARM架构(如Slimbook和Pinebook remix等设备)的软件包。
All commands listed below must be entered in a terminal, in one line each.
-
Remove the Ubuntu PPAs (all three of them) from your system if you’ve ever configured it before. This is generally in
/etc/apt/sources.listor one of the files below/etc/apt/sources.list.d/; if you usedadd-apt-repository(the recommended way) to enable the PPA, you can remove them with:sudo rm -f /etc/apt/sources.list.d/mscore-ubuntu-ubuntu-mscore*KDE neon is not compatible with the Ubuntu PPAs!
-
Install a few standard packages (usually they are already there, but just in case they aren’t) to be able to securely download the repository signature key:
sudo apt-get install wget ca-certificates
- Download (via secure HTTPS connection) and install the repository signing key:
wget -O - https://download.opensuse.org/repositories/home:/mirabile:/mscore/bionic-neon/Release.key | sudo apt-key add -
- Enable the repository:
echo deb https://download.opensuse.org/repositories/home:/mirabile:/mscore/bionic-neon ./ | sudo tee /etc/apt/sources.list.d/mscore.list
- Make the new packages available:
sudo apt-get update
Now, it’s time to install one or more soundfont packages (ideally install the one you want before installing MuseScore):
musescore-general-soundfont-small: the standard MuseScore_General soundfont in SF3 format, as shipped with MuseScore for other operating systemsmusescore-general-soundfont: the MuseScore_General HQ soundfont in SF3 format, as available via the Extensions managermusescore-general-soundfont-lossless: the MuseScore_General HQ soundfont in uncompressed SF2 format: takes up a lot more space on your hard disc, but offers the highest sound quality and extremely fast startup timesfluidr3mono-gm-soundfont: the old soundfont shipped with MuseScore 2.0 (antecessor of MuseScore_General), use only if resources are very tight or you need ittimgm6mb-soundfont: the old soundfont shipped with MuseScore 1.3; cannot substitute the others; use only if you need it; extremely tiny
If you skip this step, a suitable soundfont will be automatically installed when you install MuseScore itself in the final step.
Note: only the MuseScore_General soundfont (HQ or regular) supports single-note dynamics (SND), and you need at least version 0.1.6 of those soundfonts (from our repository) for SND support!
The command sudo update-alternatives --config MuseScore_General.sf3 can be used at any time to select the default soundfont used by MuseScore if you install more than one (note timgm6mb-soundfont cannot be selected here).
Finally, you can install the latest stable version of MuseScore with sudo apt-get install musescore3 and the old 2.x version with sudo apt-get install musescore (the musescore-snapshot package with an instable developer preview is also available).
Ubuntu, Kubuntu, Xubuntu, …
警告:此方法不适用于KDE neon用户(见上文)!
MuseScore 2.x (the old version) is available from 18.10 (cosmic) to 19.10 (eoan) out of the box. Older Ubuntu releases carry older versions (18.04 (bionic) has 2.1, 16.04 (xenial) has 2.0, 14.04 (trusty) and 12.04 (precise) have 1.3 and 1.2, respectively). Similar to the Debian instructions, we recommend using the latest 2.3.2 version for old 2.x scores instead, or migrating those scores to MuseScore 3.
Besides the versions supplied by the distribution itself, the MuseScore Debian packager provides newer versions of MuseScore for older Ubuntu releases in official PPAs (package archives).
Please activate the Stable releases of MuseScore 3 repository on your system and then install the musescore3 package, available for all releases from 18.04 (bionic) onwards. (It is not feasible to provide MuseScore 3 for older Ubuntu releases, as those lack the minimum Qt version required by MuseScore 3.)
If you wish to install the older MuseScore 2, activate the Stable releases of MuseScore 2 PPA and install the musescore package, available for 12.04 (precise), 14.04 (trusty), 16.04 (xenial), and 18.04 (bionic) onwards. (Some intermediate releases may have slightly older MuseScore versions still available, but it’s best to update to the next LTS.) On the ancient 12.04 (precise) and 14.04 (trusty) releases, this will upgrade the Qt library in your system, which may break unrelated software (and on 12.04 even the C++ libraries are upgraded), mind you; best to upgrade to a newer LTS.
There’s also a MuseScore Nightly Builds (unstable development builds) PPA, from which the daring can install the musescore-snapshot package, for LTS, that is, 18.04 (bionic) only.
WARNING: these PPAs are only suitable for Ubuntu/Kubuntu/Xubuntu/… but not for Debian or KDE neon!
As with Debian, you can install one or more soundfont packages (ideally install the one you want before installing MuseScore, but if you don’t, a suitable one will be installed alongside MuseScore):
musescore-general-soundfont-small: the standard MuseScore_General soundfont in SF3 format, as shipped with MuseScore for other operating systemsmusescore-general-soundfont: the MuseScore_General HQ soundfont in SF3 format, as available via the Extensions managermusescore-general-soundfont-lossless: the MuseScore_General HQ soundfont in uncompressed SF2 format: takes up a lot more space on your hard disc, but offers the highest sound quality and extremely fast startup timesfluidr3mono-gm-soundfont: the old soundfont shipped with MuseScore 2.0 (antecessor of MuseScore_General), use only if resources are very tight or you need ittimgm6mb-soundfont: the old soundfont shipped with MuseScore 1.3; cannot substitute the others; use only if you need it; extremely tiny
Note: only the MuseScore_General soundfont (HQ or regular) supports single-note dynamics (SND), and you need at least version 0.1.6 of those soundfonts (possibly from the PPA) for SND support!
The command sudo update-alternatives --config MuseScore_General.sf3 can be used at any time to select the default soundfont used by MuseScore if you install more than one (note timgm6mb-soundfont cannot be selected here).
您也可在下载页面查看所有可用的发行版
外部链接
- How to run the MuseScore AppImage on Linux (MuseScore HowTo, video)
在Chromebook上安装
桌面程序
MuseScore可以运行在Chrome OS的Linux容器(又叫Crostini)里。There is a special procedure you can use to install MuseScore on a Chromebook if you are not already comfortable with running Linux apps. See the article Install MuseScore on Chromebook for more information. You can also get a special build of MuseScore 3 for ARM processors via that link (the official builds are only for Intel).
Alternatively, if you prefer to use the plain Linux commands, follow the steps described in the video linked below:
- Install Linux Virtual Machine called Crostini. Go to Settings > Linux > Turn On
- Download Musescore AppImage package
- Configure AppImage to run. Set
chmod +xfor the AppImage file - Run AppImage with
./followed by the Musescore package file name - Install required libraries if necessary, e.g.:
sudo apt-get install libvorbisfile3sudo apt-get install libnss3
- Install AppImage (using the
installcommand line option) to avoid running it from Linux command line each time - Enjoy!
外链
- Watch this interactive video for more details
- Special article on how to Install MuseScore on Chromebook
- How to run MuseScore on ChromeOS (MuseScore HowTo)
语言、翻译和扩展
MuseScore适用您系统所用的自然语言(日常生活中所使用的,与地区、文化相关联)。
更改语言
1.从顶部菜单栏,选择编辑→偏好设置... (Mac: MuseScore→偏好设置...);
2. 在通用标签页内,从语言栏的下拉列表选择要使用的语言:
资源与翻译中心
资源与翻译中心内可以安装与卸载扩展, 也可以用来更新界面翻译。要访问该界面,请按照以下步骤之一:
- 从顶部菜单栏,选择帮助→资源与翻译中心。
-
从顶部菜单栏选择,选择编辑→偏好设置...(Mac:MuseScore→偏好设置...),打开通用标签页,并单击更新翻译按钮。
安装/卸载扩展
要安装/卸载扩展,请:
- 选择资源与翻译中心内的扩展标签页。
- 找到扩展。
- 单击安装或者 卸载 按钮。
更新翻译
要更新翻译,请:
- 选择资源与翻译中心内的语言标签页。
- 单击有可用更新按钮 来升级语言翻译文件。
注意:菜单和对话框中的文字会立即更改,但检视器必须重启后方能显示更新的语言。
参阅
外部链接
检查更新
注意: 这些选项仅在Mac和Windows版本上的MuseScore可用(不包括从Windows商店下载的版本),因为只有那些平台能通过MuseScore.org直接升级。Linux发行版(及Windows商店版本)有不同的升级机制。
对于那些能够直接升级的版本,有两个方法:
检查自动升级
- 从菜单选择编辑→偏好设置... (Mac: MuseScore→偏好设置...);
- 选择升级 标签页。
- 请确保您已经勾选了"检查MuseScore的更新"。(默认情况下是勾选的):
如果您启用了这个选项,MuseScore会在每次启动前检查更新。在Mac和Windows版本中(不包括Windows商店版本),该选项允许自动升级器自动在后台下载并安装。
检查升级
- 从菜单中选择Help→检查升级:
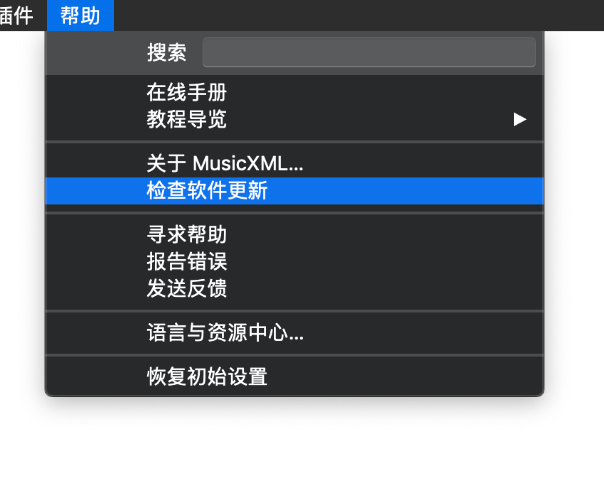
- 一个对话框会跳出来显示当前版本升级状态:“无可用升级”或是“有一个MuseScore更新可用”,点击升级可以自动下载小版本更新,或者(版本号首位变更的情况下,例如2.x→3.x)跳转到下载页面。