Inspector and object properties
For MuseScore 4 users, see Inspector and object properties.
Most score elements have properties that can be edited in one of two ways:
-
Click on any element, and many of its properties can be viewed and changed from the Inspector panel on the right-hand side of your screen.
-
Right-click on an element and select an option with the word Properties in it. This option opens a dialog with advanced properties, only available for certain types of elements.
Inspector
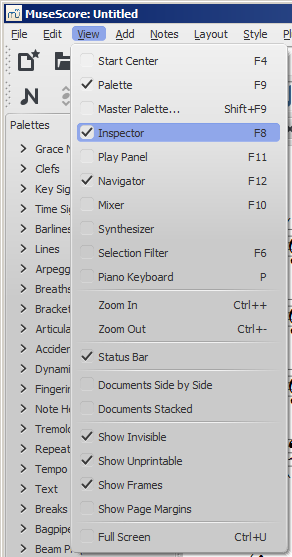
The Inspector is shown by default on the right of your screen. It can be displayed or hidden from the menu: select View and check/uncheck Inspector, or use the shortcut F8 (Mac: fn+F8).
In the Inspector, the properties of any selected object are displayed and can be edited. This applies to virtually every single element in the score window—notes, text, barlines, articulations etc. Multiple elements can also be selected and edited simultaneously, as long as they are of the same type. However, if the selected objects are of different types, then the Inspector restricts you to editing color and visibility only.
The Inspector panel can be un-docked to become a floating panel by clicking the double-chevron symbol or double-clicking the top bar of the panel.

To re-attach the panel double-click on the top bar again. See also: Side panels.
Inspector categories
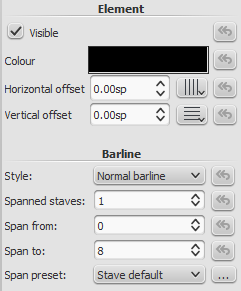
When you select one or more elements of a specific type, the properties which can be edited are conveniently divided into categories in the Inspector. Categories can be identified by their bold, centered lettering. For example, if you select a barline, you will see the following displayed at the top of the Inspector:

For details about how to adjust the properties of various score elements, refer to the relevant sections in the handbook. However, a few general points will be covered here:
Element
All score elements, except frames, breaks and spacers, display this category in the Inspector when selected. The various options are as follows:
-
Visible: Uncheck this box to make selected elements invisible: alternatively, use the shortcut V (toggle). Invisible elements do not appear in the music when printed out or exported as a PDF or image. If you still want them to remain on display in the document window, make sure that the "Show Invisible" option is selected in View → Show Invisible. Invisible elements will then be colored light gray.
-
Color: Click on the rectangle to open a "Color Select" dialog. Adjust the color and opacity of selected elements.
-
Horizontal offset / Vertical offset: Allows you to position selected elements exactly (in terms of space units). A positive number moves the elements right or down; a negative number moves the elements left or up. Snap to grid buttons are also provided.
Element Group
This category is displayed only when you have selected a mixture of different types of elements, and allows editing of color and visibility only.
Segment
This category is used to increase or decrease the space before/after an element in a music staff. Adjusting leading/trailing space here also affects any associated lyric syllables.
Chord
This category is displayed only if notes are selected. Any change to a notehead property under Chord affects the whole chord (i.e. all the notes in one voice) at that location—and not just the selected note. If you want to make changes to the position of just one note in a chord, then use the Element category (above).
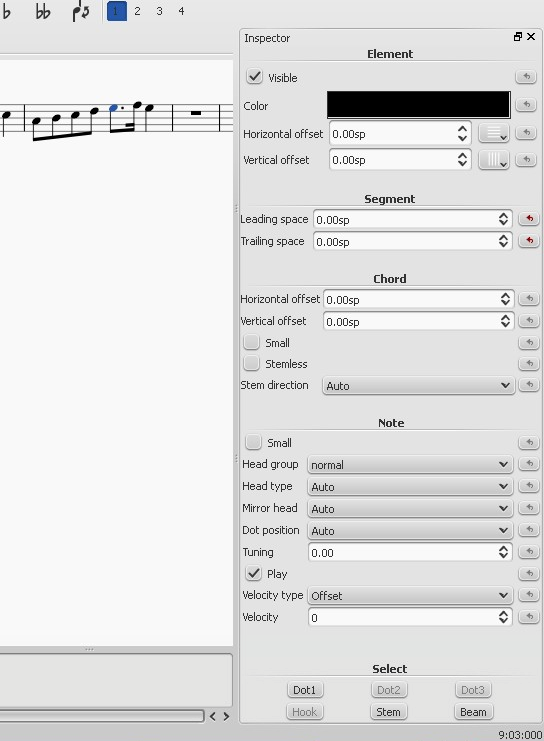
Note
This category allows you to make changes to selected notes (but for note position—see Element). It contains the following properties:
- Small: Make notehead smaller (you can specify the relative size of all small notes from the menu: Style → General… → Sizes…).
- Head group: See Notehead groups.
- Head type: See Notehead types.
- Mirror head: Position notehead to the left or right of the stem (default is "Auto").
- Tuning: Adjust tuning of note to the nearest cent.
- Play: Unticking this box silences the note.
- Velocity type: Sets the MIDI velocity of notes directly. Chose one of two options:
- Offset: Make the value shown in "Velocity" relative to the previous dynamic marking.
- User: Make the value shown in "Velocity" absolute (i.e. the MIDI velocity is unaffected by dynamic markings).
- Velocity: Set the MIDI velocity according to the option displayed in "Velocity type."
- Fix to line: When ticked, the note is fixed to the top line of the standard 5-line staff.
- Line: A positive number moves the "fixed" note down; a negative number moves it upwards.
Select
This category appears differently according to the selection you have made:
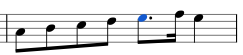
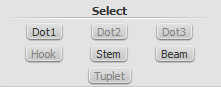
- If you select a notehead, the "Select" category displays buttons which allow you to easily switch the selection to the stem, beam, hook, duration dot (or dots) or tuplet number associated with the notehead (see image below).

- If you select a range of measures, the "Select" category allows you to select either all notes, grace notes (from version 2.1) or rests.
Beam
This section is displayed in the Inspector when you select one or more note beams, and allows you to make fine adjustments to beam position and angle, and also change the spacing of beamed notes. See Adjust beam with the inspector.
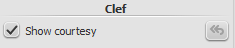
Clef
This section appears when you select a clef: the tick box allows you to turn on/off the display of a preceding courtesy clef.

Properties dialogs
Properties of some objects are accessed by right-clicking on the object and choosing a "Properties" option from the context menu: these are in addition to the object's properties displayed in the Inspector.
(Note: Properties should not be confused with Styles. Changes to properties only affect the single element selected; all style controls apply to the entire score.)
Articulation properties
Right-click on an articulation and select Articulation Properties... See Articulations and ornaments.
Fretboard diagram properties
Right-click on a fretboard diagram and select Fretboard Diagram Properties... Allows you to create custom fretboard diagrams. See Edit fretboard diagram.
Line properties
Right-click on a line and select Line Properties... There are settings for the beginning, end, or continuation of the line. You can add or remove text, adjust the text's placement, and set the length and angle of optional hooks. Click the ... button to access text properties for text included in the line. See Custom lines and line properties.
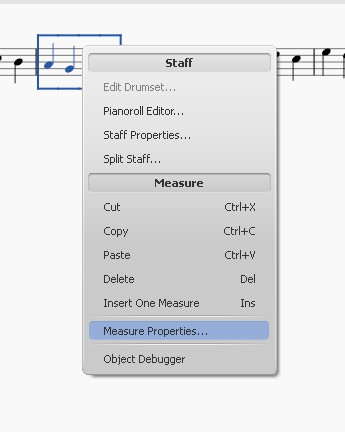
Measure properties
Right-click on an empty part of the measure and select Measure Properties... Adjust visibility, bar duration, repeats, stretch and numbering. See Measure properties.
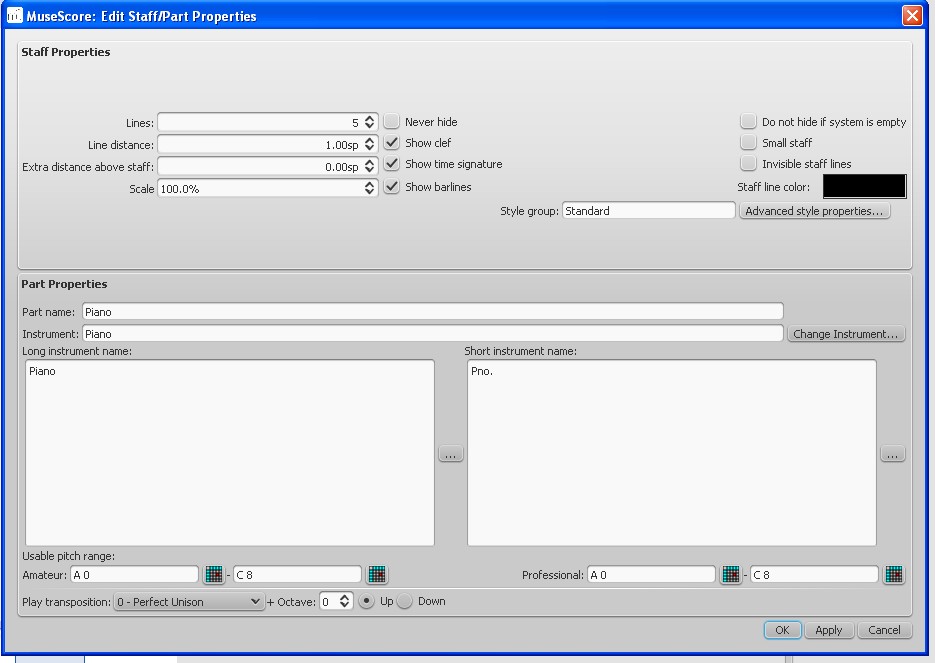
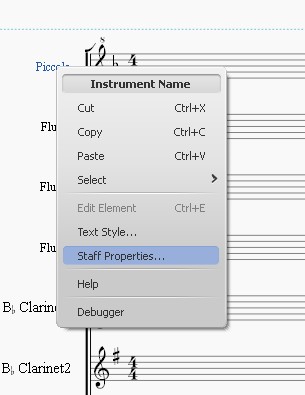
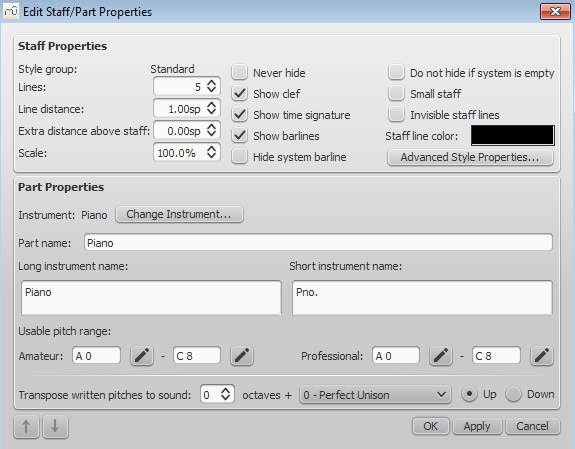
Staff properties
Right-click either an empty part of a measure or the name of an instrument and select Staff Properties... This dialog allows you to adjust attributes of both the single staff and the instrument it is a part of. See Staff properties.
Text properties
Right click on a text-based element and select Text Properties... See Text styles and properties. If the element is a line with text in it, see → above.
Time signature properties
Right-click on a time signature and select Time Signature Properties... Used to adjust appearance of time sig. and beam properties of notes. See Time signatures.
See also
| Aanhangsel | Grootte |
|---|---|
| Note inspector.jpg | 67.14 KB |
| Staffproperties.jpg | 91.41 KB |
| Buttonstaffproperties.jpg | 1.03 KB |
| Staffproperties2ndaccess.jpg | 22.51 KB |
| View_en.png | 25.03 KB |
| Note inspector.png | 133.85 KB |
| Measure Properties 1.png | 53.21 KB |
| notes.png | 2.65 KB |
| inspector_select.png | 3.25 KB |
| Barline inspector.png | 10.85 KB |
| Measure Properties 2.png | 60.54 KB |
| inspector-top-bar.jpg | 3.08 KB |
| Previous_Next_Buttons.png | 7.36 KB |
| Staff_Properties_en.png | 30.14 KB |
| clef_inspector.png | 2.09 KB |