MuseScore 3 Handbook
This page is an administration page intended for the editing community only. Click this link to go to the handbook front page intended for public viewing.
Getting started
This page is an administration page intended for the editing community only. Click this link to go to the handbook front page intended for public viewing.
Learning MuseScore
MuseScore provides a number of learning resources to help the new user get started.
Tours
When you run MuseScore for the first time, the Startup Wizard appears to help you set up some basic features of the software. One of these features is called Tours, and, as the name suggests, gives you a guided tour of the program.
- To activate this feature, on the Tours page of the Startup Wizard, tick "Yes" in response to "Would you like to see these tours?"

This will allow the Tour to run when the program opens, introducing you to the main features of the user interface.

- To end the tour: press the Close button.
- To stop the Tour showing when you open MuseScore: Uncheck "Continue taking Tours".
- To enable the Tour again (when program reopens): Select Help→Tours→Show Tours.
- To see all the Tours again (when program reopens): Select Help→Tours→Reset Tours.
Currently offered tours:
- Introduction to User Interface.
- Entering notes and rests in a score.
- Entering symbols from a palette.
- Navigating the score with Timeline.
- Navigating the score with keyboard.
- Entering multimeasure rests.
- Autoplace positioning of symbols.
- Modify properties with Inspector.
- Selecting elements.
- Add and edit lines in score.
Getting Started score
The interactive Getting Started score is a practical introduction to the basics of entering a score. When you open MuseScore for the first time, it will be displayed in the main window of the Start Center: just click to open it. Follow the instructions written in blue, and you will be led through the basic steps of score writing.
Note: If you don't see the Getting Started score, you can find it in the right hand panel of the Start Center. Click the right or left arrows to browse through the options until it appears.
Written tutorials
In the Tutorials and How-to section you will find tutorials on specific topics (e.g. MuseScore Drumline).
Video tutorials
Musescore 3 video tutorials created by musescore.org on Youtube are broken / unacessable due to private sharing restriction as of Jan 2023
Try the comprehensive Musescore3 tutorial videos on masteringmusescore.com created by Marc Sabatella instead. While Marc Sabatella contributed heavily to MuseScore codebase, his masteringmusescore.com is not affiliated with Muse Group or any of its subsidiary companies.
MuseScore offers a full set of instructions videos, each covering a specific subject. You can access these videos in several ways.
- From the MuseScore homepage at MuseScore.org: Support/Tutorials
- In the Start Center: browse to the Videos page in the right-hand panel.
- Look up directly by searching for "MuseScore in Minutes" on You Tube
-
- Lesson 1- Score setup
- Lesson 2 - Working with MuseScore
- Lesson 3 - Note Input
- Lesson 4 - MIDI keyboard input
- Lesson 5 - More Input Ideas
- Lesson 6 - Text, Lyrics, and Chords
- Lesson 7 - Tablature and Drum Notation
- Lesson 8 - Repeats and Endings, Part 1
- Lesson 9 - Repeats and Endings, Part 2
- Lesson 10 - Articulations, Dynamics and Text
- Lesson 11 - Layout and Parts
Get Support
If you experience a problem while working with MuseScore, there are several ways to get help and support.
Handbook
To access the Handbook:
- From the MuseScore website: select Support → Handbook from the menu.
- From the MuseScore program: select Help → Online Handbook from the menu.
You can browse through the Handbook using the menus, or do a search.
Context help
If you select an element in your score and press F1, a webpage opens displaying a list of links associated with that element in the Handbook.
Forums
MuseScore offers a number of on-line Forums for user collaboration. You may be able to find an answer here to your problem among the existing posts. A general search of the website will return a list of relevant hits to all forums and the Handbook.
How To's
Some tasks require the use of several different techniques. These can be difficult to find an answer for in the Handbook. Solutions for these may be found in the How To's
Post a question
If you cannot find the answer to your problem, you can ask a question in the Support and bug reports forum.
When you post your question:
- Try to be as precise as you can, when you describe what you want to do, and which steps you have already tried.
- Attach the score that shows the problem. This will make it much easier for others to understand the problem — use the "File attachments" option at the bottom of the page, just above the Save and Preview buttons.
- You may format the text using these tips.
Report a bug
If you encounter something you think is a bug, the first step is to post it in the Support and bug reports forum. This will allow others to help check if it is a genuine bug, and to advise workarounds, so you can continue your scorewriting. You will find more details on this in Bug reports and Feature requests.
External links
- How to write a good bug report: step-by-step instructions Isolate bug (MuseScore HowTo)
Download and Installation
MuseScore Studio exists for various different operating systems, including Windows, macOS, Linux distributions and BSD variants. "Musescore Studio" was previously named "MuseScore", see online announcement.
MuseScore, MuseScore 3, MuseScore 4
More on MuseScore and versions so that you can choose one that best suit your needs.
Minimum requirements for Musescore Studio 3.6.2
Windows
Windows 7 or higher.
At least 300MB hard disk space
1024x600 pixel resolution
Mac
macOS 10.10 or higher
1024x600 monitor resolution
Download and Installation
MuseScore Studio is completely free. Users do not need any PRO or PLUS account subscription service to use Musescore Studio. Musescore Studio 3 is released under the GNU General Public License version 2, see details of GPLv2 on http://www.gnu.org.
Additionally, the right to redistribute (the unmodified binary) to friends and students is granted to all - see "you may give any of the versions of MuseScore on musescore.org to other people, or share it internally via a server." on https://musescore.org/en/faq#faq-20204 . To impose an additional service charge or fee legally, read the GPLv2 terms.
- Download and Install on Windows.
- Download and Install on macOS.
- Download and Install on Linux.
- Download and Install on Chromebook.
Initial preferences
The first time you start MuseScore after the installation, you will be asked to confirm your basic preferences:

First, you can choose to authorize MuseScore (3.4 or later) to collect usage data, click on Yes, send anonymous reports or Don't send to continue:

The settings for language is retrieved from your installation, and should normally not need to be changed. Just click Next to continue:

followed by:

Select your keyboard layout in the drop down list, click Next to continue:

You will now be asked if you wish to take the Tours. If you are new to MuseScore keep the 'Yes' option checked, and click Next to continue:

Finally click Finish to start MuseScore.
Install on Windows
Install
If you're on Windows 10, a (rather outdated) 32-bit version of MuseScore can be installed from the Windows Store. Clicking here will open MuseScore's page in the Store app. There you will only have to click Get the app > and MuseScore will be downloaded, installed and subsequently automatically updated.
Otherwise you can get the Windows installer from the download page of the MuseScore website. Click on the link to start the download (pick your choice of 64-bit or 32-bit). Your Internet browser will ask you to confirm that you want to download this file. Click Save File.
When the download finishes, double-click on the file to start the installation. Windows may prompt you with a security window to confirm this before running the software. Click Run to continue.
The installation process will now start

If you click Cancel, here or later, you'll see:

If instead you click Next to continue, the setup wizard displays the terms of the free software license.

Read the terms of the license, make sure the box next to "I accept the terms in the License Agreement" is checked, and click Next to continue. Next the installer will ask you to confirm the location in which to install MuseScore.

If you are installing a newer version of MuseScore but still want to keep the old version on your computer, then you should change the folder (note that MuseScore 3 can coexist with MuseScore 2 and 1 with no changes needed). Otherwise click Next to continue.

Click Install to continue.
Give the setup wizard a few minutes to install the necessary files and configurations. You'll see

and finally

Click Finish to exit the installer. You may delete the installer file you downloaded.
Start MuseScore
To start MuseScore, from the menu, select Start→All Programs→MuseScore 3→MuseScore 3.
Advanced users: Silent or unattended install
-
You can install MuseScore silently with the following command
msiexec /i MuseScore-X.Y.msi /qb-
Append ALLUSERS=1 if you want to install it for all users of the system rather than just the current one.
Uninstall
You can uninstall MuseScore from the menu by selecting Start→All Programs→MuseScore 3→Uninstall MuseScore; or via Windows' Control Panel. Note that this will not remove your scores, templates, extensions and plugins nor your MuseScore settings.
Troubleshooting
The installer might be blocked by the system. If you don't manage to install MuseScore, right-click the downloaded file and click Properties. If there is a message "This file came from another computer and might be blocked to help protect this computer", click on "Unblock", "OK" and double-click on the downloaded file again.
External links
- How to install MuseScore on Windows without administrator rights (MuseScore HowTo)
- How to run MuseScore as Administrator on Windows (MuseScore HowTo)
- How to fix MuseScore installation error on Windows (MuseScore HowTo)
- MSI command-line options
- Standard installer command-line options
MuseScore, MuseScore 3, MuseScore 4
What does this handbook cover
This handbook describes features of MuseScore Studio, the music notation program for Windows, macOS, and Linux supporting a wide variety of file formats and input methods. MuseScore Studio features an easy to use WYSIWYG editor with audio score playback for results that look and sound beautiful, rivaling commercial offerings like Finale and Sibelius. "Musescore Studio" was previously named "MuseScore", see online announcement.
MuseScore Studio is released as a free and open-source software. Musescore Studio 3 is released under the GNU General Public License version 2. Musescore Studio 4 is released under the GNU General Public License version 3. To learn more about the GPL license, visit http://www.gnu.org or http://www.gnu.org/licenses/gpl-faq.html. To download MuseScore Studio 3.6.2, see Installation: Download and installation chapter.
MuseScore Studio is developed and supported by non paid volunteers and managed by Muse Group employees. MuseScore BVBA is a subsidiary of Muse Group. Source: wikipedia, forum discussion.
What is not covered in this handbook
The following items are often referred to as "MuseScore". However, as explained above, this handbook uses "MuseScore" to refer to "MuseScore Studio" only, "MuseScore" is not used to refer to any of the following unless otherwise specified.
- The score viewer and playback mobile apps (Android, iOS), or
- The score viewer and playback interface provided by musescore.com
See How and where to ask for support
Different versions of MuseScore Studio
MuseScore Studio is open-source. Its source code is available at github.
MuseScore Studio 3.6.2 is the last official release of MuseScore Studio 3, see Version information. For forks (wikipedia), see "External Link" section.
MuseScore Studio 4 is a result of continuous development from MuseScore Studio 3.6.2. It has huge playback and countless engraving improvements. After MuseScore Studio 3.6.2 was released, most of the software development moved on to MuseScore Studio 4. Muse Group employees no longer work on bug fixing of Musescore Studio 3.6.2. Due to the substantial change in programming framework and library, some proposed improvements of Musescore Studio 3.6.2 are impossible to be merged into MuseScore Studio 4. Reimplementation of important features is not yet complete, see also discussion1, discussion2, discussion3.
When choosing a MuseScore Studio version to create scores, users should take note of the company's distribution versioning and feature implementation philosophy, and consider production needs. For example MuseScore Studio 3.6.2 Linux supports audio and MIDI routing with JACK, which has implications for automation and video synchronization. Source: https://github.com/orgs/musescore/discussions/13745
MuseScore Studio 3 and MuseScore Studio 4 can be installed and opened side by side on the same OS, see Version 3 and 4 installations side-by-side. Score files are opened by default with the last installed Musescore Studio version, see Change default programs in Windows and Problem with Shortcuts to MuseScore 4 files. You can always choose manually with "Right-click > Open with". Note that MuseScore Studio native format (*.mscz and *.mscx) are backward compatible - MuseScore Studio 4 opens MuseScore Studio 3's *.mscz without error, see Native format compatibility
External Links
Notable forks (wikipedia):
- Musescore 3.7 Evolution
- https://github.com/Jojo-Schmitz/MuseScore/wiki
- Forum discussion End of Life plan for 3.x
- MuseScore3.0dev-PianoTutor
Install on macOS
Install
You will find the DMG (disk image) file on the download page of the MuseScore website. Click on the macOS link to start the download. When the download is complete, double-click the DMG file to mount the disk image.

Drag and drop the MuseScore icon to the Applications folder icon.
If you are not logged in as administrator, macOS may ask for a password: click Authenticate and enter your password to proceed.

When the application has finished copying, eject the disk image. You can now launch MuseScore from the Applications folder, Spotlight, or Launchpad.
Note: As of macOS 10.15 "Catalina", the system has to be told to permit MuseScore to be allowed to access user parts of the file system. The first time you use it on Catalina, it will ask you if you wish to permit it; of course, answer "yes", but if you bypass this by accident, you can set it via System Preferences > Security and Privacy > Privacy > Files and Folders. Unlock with your Admin credentials, then navigate to MuseScore (whichever version(s) you have and want), add it or them to the list of apps, and select "Documents" and "Downloads" folders, or as you prefer.
Uninstall
Simply delete MuseScore from Applications folder (Admin access will be required to do that, however). Note that this will not remove your scores, templates, extensions and plugins nor your MuseScore settings.
Install with Apple Remote Desktop
You can deploy MuseScore to multiple computers with the "Copy" feature of ARD. Since MuseScore is a self-contained application you can simply copy the application to the '/Application' folder on the target machines. It is also possible to install multiple versions of the application as long as their names differ.
Install on Linux
Distribution packages for various Linux and BSD variants are available. Building from source is another possibility.
Download
Consider your production needs to choose a MuseScore version that best suits you. For example MuseScore 3.6.2 support JACK, which has implications for automation and video synchronization, JACK support is missing from MuseScore 4.0.2.
The Download page contains basic info on how to download, install and use MuseScore.
- Current page contains info for MuseScore 4, its Older and unsupported versions section contains info for MuseScore up to 3.2.3
- Archived page on Internet Archive contains complete info for MuseScore 3.6.2, links on it may not work.
- Working direct download link for MuseScore 3.6.2 stable:
- AppImages: https://ftp.osuosl.org/pub/musescore-nightlies/linux/3x/stable/ (
musescore-$(your system architecture).AppImage, what is my system architecture?)
- AppImages: https://ftp.osuosl.org/pub/musescore-nightlies/linux/3x/stable/ (
More info on AppImage
AppImage is the recommended way to use Musescore. An AppImage is a software that runs on all Linux (see https://appimage.org). It works like a portable app, all the files needed are contained within the AppImage itself.
To run MuseScore AppImage on your system:
Watch the how-to video, or follow these steps:
Step 1: Download a suitable version for your system architecture
AppImages come in different versions. Make sure you download the right one for your system. To check the architecture of your system:
- Open the Terminal.
- Type
arch
or
uname -m
The output will be something like "i686", "x86_64" or "armv7":
i686(or similar) - 32-bit Intel/AMD processor (found on older machines).x86_64(or similar) - 64-bit Intel/AMD processor (modern laptop and desktop computers, most Chromebooks).armv7(or later) - ARM processor (phones & tablets, Raspberry Pi 2/3 running Ubuntu Mate, some Chromebooks, usually 32-bit at present).
Download (jump to) a suitable version.
Step 2: Give the file permission to execute
There are two ways to do this:
From the File Manager:
- Right-click on the AppImage and select "Properties".
- Open the "Permissions" tab.
- Enable the option labelled "Allow executing file as a program".
The process may be slightly different in other file managers.
From the Terminal:
This command works on all Linux systems (Note: The code below assumes that the AppImage is in the Downloads folder. If not the case then amend the file path accordingly):
    cd ~/Downloads
    chmod u+x MuseScore*.AppImage
Step 3: Run the AppImage
- To run the program, just double-click it.
Note: You can move the AppImage to wherever it is most convenient. And to "uninstall" it, just delete it.
Step 4: Install the AppImage
The above procedure allows you to run the MuseScore AppImage but doesn't integrate it with the rest of your system: it doesn't appear in your App menu, and MuseScore files are neither associated with the program nor do they have the correct icon on them.
To remedy this, you need to actually install the program as follows:
- Open the Terminal.
- Type the following (Note: The code below assumes that the AppImage is in the Downloads folder. If not the case then amend the file path accordingly):
    cd ~/Downloads
    ./MuseScore*.AppImage install
Or, alternatively, you can combine the operation into one command:
~/Downloads/MuseScore*.AppImage install
Use the "--help" and "man" options to get more information about the available command line options:
    ./MuseScore*.AppImage --help   # displays a complete list of command line options
    ./MuseScore*.AppImage man      # displays the manual page (explains what the options do)
More info sorted by Linux and BSD
Debian
(Ideally before, otherwise while or after) installing MuseScore itself, you can install one or more soundfont packages (if none is installed, the dependencies will pull in a suitable soundfont automatically):
musescore-general-soundfont-small: the standard MuseScore_General soundfont in SF3 format, as shipped with MuseScore for other operating systemsmusescore-general-soundfont: the MuseScore_General HQ soundfont in SF3 format, as available via the Extensions managermusescore-general-soundfont-lossless: the MuseScore_General HQ soundfont in uncompressed SF2 format: takes up a lot more space on your hard disc, but offers the highest sound quality and extremely fast startup timesfluidr3mono-gm-soundfont: the old soundfont shipped with MuseScore 2.0 (antecessor of MuseScore_General), use only if resources are very tight or you need ittimgm6mb-soundfont: the old soundfont shipped with MuseScore 1.3; cannot substitute the others; use only if you need it; extremely tiny
Note: only the MuseScore_General soundfont (HQ or regular) supports single-note dynamics (SND), and you need at least version 0.1.6 of those soundfonts (from unstable or backports) for SND support!
The command sudo update-alternatives --config MuseScore_General.sf3 can be used at any time to select the default soundfont used by MuseScore if you install more than one (note timgm6mb-soundfont cannot be selected here).
Then, install the musescore3 package for MuseScore 3.x (the current stable version) or musescore for MuseScore 2.x (there’s also musescore-snapshot for the unstable developer preview). The packages are available in the following distributions:
musescore3: sid (unstable), bullseye (testing/Debian 11), buster-backports (stable/Debian 10), stretch-backports-sloppy (oldstable/Debian 9)musescore: buster (stable/Debian 10), stretch-backports (oldstable/Debian 9), jessie-backports-sloppy (oldoldstable/Debian 8)musescore-snapshot: experimental (usable on unstable)
See https://backports.debian.org/Instructions/ for instructions on how to add an official Debian backports repository to your system and install packages from there.
Note: without the appropriate backports, older versions may be available: MuseScore 2.0.3 on stretch, MuseScore 1.3 on jessie. Using the latest 2.3.2 version for 2.x-format scores instead (or conversion to 3.x) is strongly recommended!
KDE neon 20.04 (focal)
Message https://musescore.com/mirabilos if the regular or PPA packages don’t work.
KDE neon 18.04 (bionic)
KDE neon switched from bionic to focal in 2021, so the following should not be necessary any more, but keeping it for now for reference:
The KDE bionic-neon packages are built on a different repository than the normal Ubuntu PPAs, as this is the only way for us to build packages for KDE neon. Due to limitations of the OpenSuSE Buildservice used, this currently only provides amd64 (64-bit PC) packages, no ARM packages (Slimbook or Pinebook remix).
All commands listed below must be entered in a terminal, in one line each.
-
Remove the Ubuntu PPAs (all three of them) from your system if you’ve ever configured it before. This is generally in
/etc/apt/sources.listor one of the files below/etc/apt/sources.list.d/; if you usedadd-apt-repository(the recommended way) to enable the PPA, you can remove them with:sudo rm -f /etc/apt/sources.list.d/mscore-ubuntu-ubuntu-mscore*KDE bionic-neon is not compatible with the Ubuntu PPAs!
-
Install a few standard packages (usually they are already there, but just in case they aren’t) to be able to securely download the repository signature key:
sudo apt-get install wget ca-certificates
- Download (via secure HTTPS connection) and install the repository signing key:
wget -O - https://download.opensuse.org/repositories/home:/mirabile:/mscore/bionic-neon/Release.key | sudo apt-key add -
- Enable the repository:
echo deb https://download.opensuse.org/repositories/home:/mirabile:/mscore/bionic-neon ./ | sudo tee /etc/apt/sources.list.d/mscore.list
- Make the new packages available:
sudo apt-get update
Now, it’s time to install one or more soundfont packages (ideally install the one you want before installing MuseScore):
musescore-general-soundfont-small: the standard MuseScore_General soundfont in SF3 format, as shipped with MuseScore for other operating systemsmusescore-general-soundfont: the MuseScore_General HQ soundfont in SF3 format, as available via the Extensions managermusescore-general-soundfont-lossless: the MuseScore_General HQ soundfont in uncompressed SF2 format: takes up a lot more space on your hard disc, but offers the highest sound quality and extremely fast startup timesfluidr3mono-gm-soundfont: the old soundfont shipped with MuseScore 2.0 (antecessor of MuseScore_General), use only if resources are very tight or you need ittimgm6mb-soundfont: the old soundfont shipped with MuseScore 1.3; cannot substitute the others; use only if you need it; extremely tiny
If you skip this step, a suitable soundfont will be automatically installed when you install MuseScore itself in the final step.
Note: only the MuseScore_General soundfont (HQ or regular) supports single-note dynamics (SND), and you need at least version 0.1.6 of those soundfonts (from our repository) for SND support!
The command sudo update-alternatives --config MuseScore_General.sf3 can be used at any time to select the default soundfont used by MuseScore if you install more than one (note timgm6mb-soundfont cannot be selected here).
Finally, you can install the latest stable version of MuseScore with sudo apt-get install musescore3 and the old 2.x version with sudo apt-get install musescore (the musescore-snapshot package with an instable developer preview is also available).
Ubuntu, Kubuntu, Xubuntu, …
WARNING: these instructions are not for KDE neon 18.04 (bionic) users (see above)! Later versions, such as KDE neon 20.04 (focal), should work though.
MuseScore 2.x (the old version) is available from 18.10 (cosmic) to 19.10 (eoan) out of the box. Older Ubuntu releases carry older versions (18.04 (bionic) has 2.1, 16.04 (xenial) has 2.0, 14.04 (trusty) and 12.04 (precise) have 1.3 and 1.2, respectively). Similar to the Debian instructions, we recommend using the latest 2.3.2 version for old 2.x scores instead, or migrating those scores to MuseScore 3.
Besides the versions supplied by the distribution itself, the MuseScore Debian packager provides newer versions of MuseScore for older Ubuntu releases in official PPAs (package archives).
Please activate the Stable releases of MuseScore 3 repository on your system and then install the musescore3 package, available for all releases from 18.04 (bionic) onwards. (It is not feasible to provide MuseScore 3 for older Ubuntu releases, as those lack the minimum Qt version required by MuseScore 3.)
If you wish to install the older MuseScore 2, activate the Stable releases of MuseScore 2 PPA and install the musescore package, available for 12.04 (precise), 14.04 (trusty), 16.04 (xenial), and 18.04 (bionic) onwards. (Some intermediate releases may have slightly older MuseScore versions still available, but it’s best to update to the next LTS.) On the ancient 12.04 (precise) and 14.04 (trusty) releases, this will upgrade the Qt library in your system, which may break unrelated software (and on 12.04 even the C++ libraries are upgraded), mind you; best to upgrade to a newer LTS.
There’s also a MuseScore Nightly Builds (unstable development builds) PPA, from which the daring can install the musescore-snapshot package, for LTS, that is, 18.04 (bionic) only.
WARNING: these PPAs are only suitable for Ubuntu/Kubuntu/Xubuntu/… but not for Debian or KDE bionic-neon!
As with Debian, you can install one or more soundfont packages (ideally install the one you want before installing MuseScore, but if you don’t, a suitable one will be installed alongside MuseScore):
musescore-general-soundfont-small: the standard MuseScore_General soundfont in SF3 format, as shipped with MuseScore for other operating systemsmusescore-general-soundfont: the MuseScore_General HQ soundfont in SF3 format, as available via the Extensions managermusescore-general-soundfont-lossless: the MuseScore_General HQ soundfont in uncompressed SF2 format: takes up a lot more space on your hard disc, but offers the highest sound quality and extremely fast startup timesfluidr3mono-gm-soundfont: the old soundfont shipped with MuseScore 2.0 (antecessor of MuseScore_General), use only if resources are very tight or you need ittimgm6mb-soundfont: the old soundfont shipped with MuseScore 1.3; cannot substitute the others; use only if you need it; extremely tiny
Note: only the MuseScore_General soundfont (HQ or regular) supports single-note dynamics (SND), and you need at least version 0.1.6 of those soundfonts (possibly from the PPA) for SND support!
The command sudo update-alternatives --config MuseScore_General.sf3 can be used at any time to select the default soundfont used by MuseScore if you install more than one (note timgm6mb-soundfont cannot be selected here).
See also the hints for the various distributions on the download page.
External links
- How to run the MuseScore AppImage on Linux (MuseScore HowTo, video)
Install on Chromebook
Desktop program
MuseScore runs on Chrome OS within a Linux container (also known as Crostini). There is a special procedure you can use to install MuseScore on a Chromebook if you are not already comfortable with running Linux apps. See the article Install MuseScore on Chromebook for more information. You can also get a special build of MuseScore 3 for ARM processors via that link (the official builds are only for Intel).
Alternatively, if you prefer to use the plain Linux commands, follow the steps described in the video linked below:
- Install Linux Virtual Machine called Crostini. Go to Settings > Linux > Turn On
- Download Musescore AppImage package
- Configure AppImage to run. Set
chmod +xfor the AppImage file - Run AppImage with
./followed by the Musescore package file name -
Install required libraries if necessary, e.g.:
sudo apt-get install libvorbisfile3sudo apt-get install libnss3
-
Install AppImage (using the
installcommand line option) to avoid running it from Linux command line each time - Enjoy!
External links
- Watch this interactive video for more details
- Special article on how to Install MuseScore on Chromebook
- How to run MuseScore on ChromeOS (MuseScore HowTo)
Language, translations, and extensions
MuseScore works with your "System" language (the one used for most programs, and generally depending on your country and the language settings of the PC, or account).
Change language
- From the menu, select Edit→Preferences... (Mac: MuseScore→Preferences...);
-
In the General tab, select the desired language from the drop-down list in the Language section:

Resource Manager
The Resource Manager is used to install and uninstall extensions, and to handle the update of translations. To access the menu use one of the following options:
- From the menu bar, select Help→Resource Manager.
-
From the menu bar, select Edit→Preferences... (Mac: MuseScore→Preferences...), open the General tab, and click on the Update translations button.

Install/uninstall extension
To install or uninstall an extension:
- Select the Extensions tab in the Resource Manager.
- Select the extension.
- Click the Install or Uninstall button.
Note: Extensions currently include the MuseScore Drumline (MDL) (as of version 3.0) and the MuseScore General HQ soundfont (as of version 3.1).
Update translations
To update translation(s):
- Select the Languages tab in the Resource Manager.
- Click on the Update buttons for the language(s) you want to update.
Note: Almost all menus and dialogs will switch to the changed/updated translations immediately, but some won't use them until the program is restarted.
See also
External links
- How to change the language in MuseScore (MuseScore HowTo)
Checking for updates
Note: These options are only available in the Mac and Windows versions of MuseScore (except the version from the Windows Store), as only those can be updated directly from MuseScore.org. Linux distributions (and the Windows Store) have different mechanisms to make updates available.
For the versions of MuseScore that can be directly updated, there are two ways to check for updates.
Automated update check
- From the menu, select Edit→Preferences... (Mac: MuseScore→Preferences...);
- Select the Update tab.
- Ensure the box marked "Check for new version of MuseScore" is ticked. (It should be ticked by default):

If you enable this option, MuseScore will check for updates on every start. On the Mac and Windows versions (excluding the Windows Store version), this option enables an auto-updater that will download and install updates automatically.
Check for update
- From the menu, select Help→Check for Update:

- A dialog will appear with the update status: either "No Update Available" or "An update for MuseScore is available:" followed by a link to download it.
See also
Synthesizer
Overview
MuseScore's synthesizer creates audio using the sample-based synthesis(wikipedia) and virtual instrument technology. MuseScore 3 comes with the free MuseScore_General.sf3 sound library (sample library) file, see the SoundFonts and SFZ files chapter.
Clicking on top toolbar's play button, or exporting an audio file etc instructs Musescore 3.6.2 to uses the current program session synthesizer settings. The Synthesizer window contains these settings, they include:
- The sound libraries used. To use a custom sound library, it must be installed onto the machine first, see the SoundFonts and SFZ files chapter.
- The post-processing effects such as reverb and compression.
- The master tuning. For note-level tuning, edit a note's Tuning property in the Inspector.
- The overall output volume. For instrument-level controls, see the Mixer chapter.
- The master Midi Continuous Controllers (MIDI CC) setting (versions 3.1 and above). For staff-level override, see the Staff / Part properties chapter.
To display the Synthesizer window, select View→Synthesizer. It has the following tabs:
- Fluid: SF2/SF3 files configuration.
- Zerberus: SFZ files configuration.
- Master Effects: Post-processing effect configuration.
- Tuning: The master tuning configuration.
- Dynamics (versions 3.1 and above): The master MIDI CC configuration.
Synthesizer settings
The Synthesizer window contains settings that Musescore uses during the current program session. Settings can be saved into and loaded from two types of places:
- The operating system, also known as the "default" profile,
- Score files such as *.mscz and *.mscx.
Auto and manual loading
Clicking on top toolbar's play button, or exporting an audio file etc instructs Musescore 3.6.2 to uses these current program session synthesizer settings. The synthesizer settings data existed in the score file (if any) are not used.
The only time any synthesizer settings are automatically loaded is when the user opens the Musescore program. During program startup, the synthesizer settings saved on the operating system (the "default" profile) are loaded.
Opening a score file does not automatically load its synthesizer settings data inside into the current session. Also, in the case of multiple opened score files in one program session, switching to view another score does not automatically update the current session synthesizer settings to those data saved inside the score file.
Auto and manual saving
Changed settings are never automatically saved. User must uses the buttons at the bottom of the Synthesizer window.
Save and load buttons
Use the buttons at the bottom of the Synthesizer window to manage settings under all tabs (see overview):
| Button | Function |
|---|---|
| Set as Default | Saves the current synthesizer settings into the operating system (the "default" profile). The "default" profile will be automatically loaded during MuseScore startup next time. Subsequent changes in the synthesizer window are not automatically saved into the operating system (the "default" profile). |
| Load Default | Loads the last saved synthesizer settings inside the operating system (the "default" profile) into the current session. |
| Save to Score | Saves the current synthesizer settings into the score file that the user is currently viewing only, but not into other opened score files. The score file synthesizer setting data is never automatically loaded or utilized directly. |
| Load from Score | Loads the synthesizer settings data existed inside the score file (if any) into the current session. |
Ordering of the sound libraries
When arranging the sound libraries to the list under Fluid tab or Zerberus tab, keep in mind that the order of sound libraries affects audio generation:
- If the score file is using default Musescore instruments (see the Instruments chapter), Musescore only creates correct audio if the built-in MuseScore_General.sf3 is the 1st ordered item.
- When a new sound library is added into the list, it is inserted as the 1st ordered item, user may need to rearrange the list.
- After manually changing Sound property in the Mixer window and achieving a desired audio output, user should save the current sound library ordering so that it can be retrieved later.
- When the user restarts Musescore, sound libraries ordering may changes or reset, as explained in the "synthesizer settings" session above.
Fluid (SF2/SF3)

The Fluid tab allows users to load, rearrange or disable SF2 and SF3 files for the current session for playback and audio export purpose. By default, the list shown one and only one item, the built-in MuseScore_General.sf3. To use a custom sound library, it must be installed onto the machine first, see the SoundFonts and SFZ files chapter.
Using a new SF2/SF3 in the current session
- Make sure the SF2/SF3 is installed.
- Click on the Add button
- Select the SF2/SF3 file.
Reordering the SF2/SF3s
- Click on an item on the list
- Use the up/down arrows (on the right-hand side) to adjust the order.
- Repeat if required.
- Or use the double up arrow (on the top right-hand side) to move any item to the top of the list.
NOTE: Reordering SF2/SF3 is usually unneccessary, as explained in the "Ordering of the sound libraries" session.
Disabling a SF2/SF3 for the current session
- Click on an item on the list
- Click on the Delete button.
NOTE: Disabling SF2/SF3 is usually unneccessary. Disabling a higher ordered item changes the list's ordering and affects playback of Musescore instruments that utilize lower ordered items, as explained in the "Ordering of the sound libraries" session.
Zerberus (SFZ)
The Zerberus tab allows users to load, rearrange or disable SFZ files for the current session in a similar way to SF2/SF3 in the Fluid tab.
Effects
The Master Effects tab allows user to add and adjust reverb and compression post-processing effect.

Master Effects with Zita1 Reverb and SC4 Compressor.
To turn an effect on or off:
- Select an option from the drop-down list next to Effect A or Effect B (the effects are applied in series, A → B).
To store and load effects configurations, use the buttons at the bottom of the Synthesizer window. See Synthesizer settings (above) for details.
Zita 1 reverb
The Zita 1 stereo reverb module allows you to simulate the ambience of anything from a small room to a large hall. The pre-delay, reverb time and tone of the reverb can be finely tuned using the controls provided:
- Delay: Set a pre-delay for the reverb from 20-100 ms.
- Low RT60 (Low frequency reverb time): Use the grey control to adjust the center frequency (50–1000 Hz) of the low frequency band which you want to affect: the green control adjusts the reverb time (1–8 secs) of this frequency band.
- Mid RT60 (Mid-range reverb time): Adjust the reverb time (1–8 secs) of the mid-range frequency band.
- HF Damping: Adjusts the high frequency component of the reverb. Increasing this value increases the frequency of the cut-off point and makes the reverb appear brighter and longer.
- EQ1: Allows you to cut or boost (-15 to +15) a frequency band (center = 40 Hz - 2 KHz) in the lower part of the spectrum.
- EQ2: Allows you to cut or boost (-15 to +15) a frequency band (center = 160 Hz - 10 KHz) in the higher part of the spectrum.
- Output: Controls the amount of effect applied. "Dry" is no effect. "Wet" indicates 100% reverb. "Mix" is a 50/50 balance of wet/dry signal.
Note: EQ1 and EQ2 affect the tone of the reverb only, not the dry (unprocessed) signal.
To quickly set up an effects patch, set "Output" to "Mix" and adjust the "Mid RT60" control to the desired reverb time. Then fine tune the effect as explained above.
SC4 compressor
The SC4 stereo compressor gives you fine control over the playback's dynamic range, reducing the volume variation between loud and soft sounds. It offers the following controls:
- RMS: Adjusts the balance between RMS (0) and Peak (1) compression. In the former, the compressor responds to averaged-out levels in the signal; in Peak mode, the compressor responds to peak levels.
- Attack: (1.5–400 ms) The length of time it takes for compression to engage fully after the signal exceeds the threshold level.
- Release: (2–800 ms) The time it takes for compression to return to zero after the signal falls below the threshold level.
- Threshold: (in dB) The signal level above which compression starts to take effect. Lowering the threshold increases the amount of signal that is compressed.
- Ratio: The amount of compression applied to the signal above the threshold. The higher the ratio, the greater the compression. Varies between 1:1 and 20:1.
- Knee: Allows you to select a range between "soft knee" and "hard knee". The softer the knee, the more gradual the transition between uncompressed and compressed signal.
- Gain: Compression tends to lower the volume, so use this control to boost the signal as required.
To quickly set-up, try setting RMS = 1, Threshold = -20 db, Ratio = 6. Increase Gain to restore the lost volume. Then fine-tune as explained above.
Tuning

The Tuning tab allows user to adjust the current session's synthesizer master tuning. To use a custom tuning system, see the Tuning systems, microtonal notation system, and playback chapter.
To change the Master tuning:
- Enter a new value in the Master tuning field, then press Change Tuning.
Dynamics (versions 3.1 and above)

Some dynamics symbols have a non-zero "Velocity change" property. When set up properly, it creates an Attack envelope simulation effect on note playback on certain instruments, eg sfz symbol on violins, see Dynamics for more information.
MuseScore also utilizes the same audio creation mechanism to simulate a variation of loudness effect on certain instruments eg crescendo on one violin long note, more info see Hairpins
This mechanism utilizes the MIDI Continuous Controller / Control Change (MIDI CC) Messages (wikipedia) technology
This tab contains settings for this audio creation mechanism. See also Different meanings of SNDs
To ensure all dynamics symbols (eg. sfz) and hairpins create correct audio on a score using the built-in MuseScore_General.sf3, use the default options.
- Dynamics method: Master control
- Default (single-note dynamics and velocity): Use MIDI CC (and redundent MIDI velocity signals) to communicate with sound library if enabled in individual instrument
- Velocity only (no single-note dynamics): Ignore individual instrument's setting, use velocity only, do not use any MIDI CC
- CC events only (constant velocity): Ignore individual instrument's setting, use MIDI CC only
- CC to use:
- The MIDI CC number that Musescore use to communicate with all sound libraries. Match this to the sound libraries loaded. Users cannot edit sound library file's attenuation response inside Musescore, see Edit a Soundfont to use MIDI CC mod instead.
- Available options are CC 1, CC 2 (default), CC 4, CC 11.
- This setting is global.
- Because built-in MuseScore_General.sf3 responds CC 2, setting this to values other than CC 2 breaks playback for some dynamics symbols if the score is using a default Musescore Instrument, eg sfz symbol of default violin. See How to setup Musescore 3.x for correct playback for all dynamics and hairpins.
- Advanced Settings :
- Buttons inside this box are designed for scores using the built-in MuseScore_General.sf3. These buttons change Sound properties of all channels (track strips in the Mixer window) of every Musescore Instrument existing on the score.
- They do not affect instrument's dynamics symbol and hairpins interpretation setting 'Use single note dynamics' in Staff / Part properties
- They do not affect instruments added afterwards.
- Available options :
- To Expressive : switch to the CC 2 responsive version of sounds
- To Non-Expressive : switch to velocity responsive version of sounds
- Reset All : Reset all channels to default sound version defined in instruments.xml
Volume
The slider on the right of the Synthesizer controls the master playback volume (gain). Tread lightly, as the output volume changes dramatically with small adjustment.
See also
External links
- How to setup Musescore 3.x for correct playback for all dynamics and hairpins (MuseScore HowTo)
- Soundfont, MIDI velocity and instruments.xml (Create Musescore 3.x compatable soundfont)
Basics
This page is an administration page intended for the editing community only. Click this link to go to the handbook front page intended for public viewing.
Create a new score
To create a new score, open the New Score Wizard (see Create new score below): this can also be accessed via the Start Center.
Start Center
This is the window that is displayed when you open MuseScore for the very first time:

To open the Start Center (if not already visible), use any of the following options:
- Press F4.
- From the menu bar, select File→Start Center...
To stop the Start Center from showing up when you open MuseScore:
- From the menu bar, select Edit→Preferences... (Mac: MuseScore→Preferences...) and uncheck "Show start center" in the Program Start section of the General tab.
From the Start Center you can:
- Create a new score (by clicking on the icon with the plus sign).
- View thumbnails of previously-opened scores: click on a thumbnail to open it.
- Open a score from your computer's file system: click on Open a score ...
- Open the "Getting Started" tutorial score. Use the arrow buttons in the right-hand pane to access the link.
- Search sheet music on musecore.com.
- Access various other facilities (see right-hand pane).
Create new score
To open the New Score Wizard when the Start Center is not open, use one of the following options:
- Click on the New Score icon in the toolbar on the top left of the window;
- Use keyboard shortcut Ctrl+N (Mac: Cmd+N);
- From the menu, select File→New....
This opens a step-by-step wizard:
- Enter score information
- Choose template file
- Choose instruments (or voice parts)
- Choose key signature (and tempo)
- Choose time signature, tempo, pickup measure, and number of measures
Enter score information

Step 1: Enter score information.
Enter the title, composer or any other information as shown above, then click on Next >. This step is optional: you can also add this information after the score has been created (see Vertical frame).
Choose template file

Step 2: Choose template file.
In the left column is a list of pre-defined solo, ensemble and orchestral templates, divided into categories according to musical styles, and custom template.
To choose a pre-defined score template:
1 Browse or use the Search bar (top left) to find specific templates.
2 Click a score template name to select it.
3 Click either: Next > (or just double-click the score template name in the previous step), or Finish.
To choose a custom score template:
- Choose an option under the "Custom Templates" category. This category is hidden if there is no custom templates on this machine. In Musescore 3, the preview window shows what the template file looks like when opened as a score, it is not the preview of what a new score looks like when created from this template.
To add individual staffs (Musescore instruments):
- On the left, select "Choose Instruments" option under the "General" category, then click Next >; or just double-click the option
- Follow instructions in Instruments, staff setup and templates chapter.
Choose instruments (or voice parts)
- In the "Choose template file" window, on the left, select "Choose Instruments" option under the "General" category, then click Next >; or just double-click the option
- Follow instructions in Instruments, staff setup and templates chapter.
Choose key signature (and tempo)

Step 3: Choose key signature (and tempo).
- Select the desired key signature, then click Next > to continue. Prior to version 3.5, you can also set the tempo here.
Choose time signature, tempo, pickup measure, and number of measures

Step 4: Choose time signature etc.
Here, you can set:
- The initial time signature.
- A pickup measure (anacrusis or upbeat measure), and its duration.
- The initial number of measures in the score (the default is 32, but you can add/remove measures from the score edit window).
- Tempo (prior to version 3.5, this is set on the Choose key signature (and tempo) page instead).
Click Finish to end the wizard and create your new score.
Adjustments to score after creation
All settings you have made when you create a new score can be changed afterwards, browse the handbook, some relevant chapters:
- Score properties
- Create a pickup measure.
- Insert, Append, Delete measures.
- Key signature
- Time signature
- Clef
- Tempo
- Add text.
- Edit text.
Change instrument and staff setup
Adjust score layout and formatting
Note input
This chapter explains music creation on standard staves only, see also tablature and drum notation chapters.
Overview
Musescore supports inputting music via any of four input devices: computer keyboard, mouse, MIDI keyboard, or virtual piano keyboard.
Basic note entry
This chapter explains the default input mode, step-time, where notes and rests are entered one at a time. It is based on the logic that, when a new note or rest is added by the user, the subsequent notes and rests adjust their duration ( note value or length ) automatically without affecting the total number of beats in any measures. See also Note input modes chapter.
After exiting the New Score Wizard, your new score will consist of a series of measures filled with measure rests:

As you enter notes in a measure, the measure rests are changed to appropriate rests to fill the remainder of the measure:

Notes of different durations on the same beat are entered by using voices:

Step 1. Select a starting position
Select a starting position for note input by clicking on a note or rest, or selecting a measure, with the mouse. If you don't select a starting point, the cursor automatically defaults to the beginning of the score when you enter Note Input mode ("Step 2" below).
Step 2. Enter Note Input mode
To enter Note Input mode, use either of the following options:
- Click on the "N" icon (on the extreme left of the Note Input toolbar).
- Press N on your computer keyboard.
To exit Note Input mode, use any of the following options:
- Press N.
- Press Esc.
- Click on the toolbar "N" button.
Step 3. Select a duration
Still in Note Input mode, select a note duration using either of the following:
- Click on a corresponding note icon in the Note Input toolbar (directly above the document window):

- Enter the keyboard shortcut for that duration (see below).
Step 4. Enter the note or rest
- To enter a note pitch from A–G, simply press the corresponding letter on your computer keyboard or place it using your mouse/touchpad (and a 'normal' left-click).
- To enter a rest, press 0 (zero) or right-click your mouse.
This method of entry also works if you are not in Note Input mode—as long as you have a note/rest selected, or the score is newly-created (in which case note entry will default to the beginning).
Select a note/rest duration
The following keyboard shortcuts are used to select note/rest duration in Note Input mode:
- 64th (hemidemisemiquaver): 1
- 32nd (demisemiquaver): 2
- 16th (semiquaver): 3
- Eighth (quaver): 4
- Quarter (crotchet): 5
- Half (minim): 6
- Whole (semibreve): 7
- Double whole (breve): 8
- Longa: 9
- Dot: . (toggles the selection to and from a dotted note/rest)
- "Increase active duration": In note input mode, this shortcut changes the selected duration to the next value above the current one. Set the shortcut in Preferences: Shortcuts.
- "Decrease active duration": In note input mode, this shortcut changes the selected duration to the next value below the current one. .
See also: Tuplets.
Additional durations
- Double, triple and quadruple dots: Apply from the note input toolbar in the advanced workspace or via a custom shortcut.
- 128th note: Ditto.
- 256th, 512th or 1024th durations: First enter a 128th note (or longer), then half it as many times as needed using the shortcut Q or, as of 3.5, via a custom shortcut, or via the corresponding entries on the note input toolbar in a custom workspace.
Input devices
Music notation can be entered by:
- Computer keyboard.
- Mouse.
- MIDI keyboard.
- Virtual Piano Keyboard.
- Any combination of the above.
Computer keyboard
This section expands on "Basic note entry" (see above) and introduces you to the full range of commands available for entering notes or rests from the computer keyboard.
Summary of commands
Here is a list of useful editing shortcuts available in Note input mode:
- 1–9 and . (dot): Set note input duration (as described above).
- A–G: Enter note A to G respectively.
- 0: Enter a rest.
- R: Repeat the last entered note.
- Backspace: Undo last entered note
- ↑ (Up): Raise the pitch of a note by a semitone (uses ♯).
- ↓ (Down): Lower the pitch of a note by a semitone (uses ♭).
- Alt+Shift+↑: Raise the pitch of a note by scale degrees using key signature (assumes Major).
- Alt+Shift+↓: Lower the pitch of a note by a scale degree using key signature (assumes Major).
- J: Change a note up or down to its enharmonic equivalent (e.g. D♯ to E♭). This alters the spelling in both concert pitch and transposed modes. See Accidentals.
- Ctrl+J (Mac Cmd+J): Change a note up or down to its enharmonic equivalent. This alters the spelling only in the current mode. See Accidentals.
- X: Flip direction of note stem (can be reset to Auto position in Inspector)
- Shift+X: Move note head to opposite side of stem (can be reset to Auto position in Inspector)
- Ctrl+Alt+1-4: Switch to corresponding voice
- Q: Halve the duration of the last entered note, and use that duration for future input. This is the default key for "Half Duration" shortcut command. Also see tips below.
- W: Double the duration of the last entered note, and use that duration for future input. This is the default key for "Double Duration" shortcut command. Also see tips below.
- Shift+Q: Decrease duration of the last entered note by a dot (for example, a dotted quarter note/crotchet becomes a quarter note/crotchet and a quarter note/crotchet becomes a dotted eighth note/quaver), and use that duration for the future input. This is the default key for "Decrease duration dotted" shortcut command. Also see tips below.
- Shift+W: Increase duration of the last entered note by a dot (for example an eighth note/quaver becomes a dotted eighth note/quaver and a dotted eighth note/quaver becomes a quarter note/crotchet), and use that duration for the future input. This is the default key for "Increase duration dotted" shortcut command. Also see tips below.
- Ctrl+↑ (Mac: Cmd+↑): Raise the pitch of the last entered note by an octave
- Ctrl+↓ (Mac: Cmd+↓): Lower the pitch of the last entered note by an octave
- Shift+←: Exchange last entered note with the note before it (repeat to keep moving note earlier)
- Shift+→: Exchange note moved with Shift+← with the note that follows it
- Alt+1-9: Add interval (unison to ninth) above current note.
- Shift+A-G: Add note A to G above current note respectively.
Note : (1) Q and W change the duration of the last entered note. The similar shortcuts "Increase active duration" and "Decrease active duration" do not change the last entered note, they are configurable in Preferences window. (2) Shift+Q and Shift+W change the duration of the last entered note by dot. Pressing . (dot) while in Note input mode does not change the last entered note.
Enter notes/rests
You can enter a note by typing the corresponding letter on your keyboard. After entering Note Input mode, type 5 C D E F G A B C to get the following result:

Note: When you enter a note using the keyboard, MuseScore places it closest to the previous note entered (above or below).
To enter a rest, type "0" (zero). To get the following, type 5 C D 0 E after entering Note Input mode.

Note: The duration selected in the toolbar applies to both notes and rests.
If you want to enter a dotted note, press . (period/full stop) after selecting the duration.
For example, after entering Note Input mode, type: 5 . C 4 D E F G A.

If you want to enter a tuplet (such as a triplet): see Tuplets.
If you want to write music with two or more simultaneous lines of independent melody on the same staff, see Voices.
Move notes up/down
To move a note up or down by a semitone:
- Press the ↑ or ↓ arrow.
To move a note up or down diatonically:
- Press Alt+Shift+↑ or Alt+Shift+↓.
To move a note up or down by one octave:
- Press Ctrl+↑ (Mac: Cmd+↑) or Ctrl+↓ (Mac: Cmd+↓).
Add accidentals
When a note is moved up or down with an arrow key (see above), any accidental required is automatically generated by the program. Accidentals can also be added manually—see Accidentals.
Chords
If you want to add a chord note to your previous entry:
- Press and hold Shift, then enter a note from AtoG.
Thus, typing C, D, Shift+F, Shift+A, E, F results in:

To add a note at a specific interval above or below one or more notes:
- Ensure that one or more notes are selected;
- Use one of the following options:
- From the menu, select Add→Intervals and choose an interval from the list;
- Press Alt+1-9 for intervals above (intervals below are also possible by adding relevant shortcuts to the list in Preferences).
Note: To create chords with notes of different durations, you will need to use more than one Voice.
Insert notes
Normally, when you enter music in MuseScore, any existing notes or rests are overwritten. There are, however, several ways to insert notes:
- Insert extra measures into the score.
- Cut and paste a section of the score forward, then enter music into the gap.
- To insert a note, press Ctrl+Shift (Mac: Cmd+Shift) + the note name (AtoG). This will insert a note of the selected duration and move the rest of the notes to the right in the same measure. If the measure exceeds the duration of the time signature, the blue plus will appear above the measure as in Insert Mode.
Delete notes
To delete a single note:
- Select the note and press Del (Mac: Backspace).
To delete a chord:
- Press Esc to ensure that you are in Normal mode.
- Press Shift and click on a note to select the chord.
- Press Del (Mac: Backspace).
The delete command can also be applied to a range of notes/chords.
Mouse
It's easy to enter notes with the mouse, but it is not the fastest way to enter lots of notes.
- Click on the desired note duration symbol in the Note input toolbar.
- Click on the score to add a pitch of the selected duration.
- To add more notes to an existing chord, simply repeat step 2.
- To replace an existing chord (rather than adding to it), press Shift before clicking.
- To add a rest, right-click.
Note: If you hover the cursor over the score in Note Input Mode it will show you a preview of the note or rest you are about to add.
MIDI keyboard
You can also insert pitches using a MIDI keyboard.
- Connect your MIDI keyboard to the computer and switch the former on
- Start MuseScore (this must be done after the keyboard is switched on)
- Create a new score
- Click the rest (selecting it) in measure 1 to indicate where you want note input to begin
- Press N to enter
note input mode - Select a note duration such as 5 for quarter notes (crotchets), as described above
- Press a note on your MIDI keyboard.
The pitch should be added to your score. If the pitch does not appear, either use the toolbar and click 'Toggle MIDI Input' or follow these steps:
- From the menu, select Edit→Preferences... (Mac: MuseScore→Preferences...).
- Click on the Note Input tab and check "Enable MIDI Input".
- Click OK to exit. You will need to restart MuseScore to apply the change.
Note: The default method of entry, Step-time allows you to enter one note at a time. Other note input modes are also available: see Note input modes.
If you have multiple MIDI devices connected to your computer, you may need to inform MuseScore which is the MIDI keyboard:
- From the menu, select Edit→Preferences... (Mac: MuseScore→Preferences...).
- Click on the I/O tab and select your device under the section labeled "MIDI input".
- Click OK to exit. You will need to restart MuseScore to apply the change.
Virtual Piano Keyboard
You can also input notes using the on-screen piano keyboard.
- To toggle the display on and off: Press P (or select View→Piano).
- To resize the keyboard: Position the mouse pointer over the piano keys, hold down Ctrl (Mac: Cmd) and move the mouse scroll wheel up (larger) or down (smaller).
The method of note entry is similar to that for a midi keyboard:
- Ensure that you are in Note Input mode.
- To enter a:
- Single note: Click on the appropriate piano key.
- Chord: Select the note you wish to add to, press and hold Shift, then click on a piano key (in versions before 2.1, use Ctrl (Mac: Cmd). Repeat as required.
Note input modes
See Note Input modes main chapter.
MuseScore offers a variety of note input modes in addition to Step-time. All can be accessed by clicking the small arrow next to the "N" button on the left of the Note Input toolbar:

- Step-time (default): The default mode of note entry. See Basic note entry (above).
- Repitch: Replace pitches without changing rhythms.
- Rhythm: Enter durations with a single click or keypress.
- Real-time (automatic): Perform the piece at a fixed tempo indicated by a metronome beat.
- Real-time (manual): Perform the piece while tapping a key or pedal to set the beat.
- Insert: (Called "Timewise" until version 3.0.2) Insert and delete notes and rests within measures, automatically shifting subsequent music forwards or backwards.
Coloring of notes outside an instrument's range
Depending on the skill of the musician, certain notes are considered beyond the range of a particular instrument. For informational purposes, MuseScore optionally colors notes red if they are outside the range of a "professional" player, and olive green/dark yellow if outside the range of an "early amateur." The colors appear on the computer screen, but not on printed copies.

To enable/disable note coloration and to set "professional" and "amateur" ranges, see Usable pitch range (Staff properties: all staves).
Small notes/small noteheads
- Select the note(s) you want in small size.
- Check the "Small" checkbox in the Inspector. The one in the
Notesection is used to only change the size of the individual notehead; the one in theChordsection will change the note head, stem, beam, and flag sizes all together.
By default, the small size is 70% of the normal size. You can change that setting in Format → Style…→Sizes.
Change notes or rests already entered
Change duration, overwriting subsequent phrases or adding spaces
Version 3.3.3 and above
- Make sure you are in Normal mode (press Esc to exit from Note input modes).
- Select one or more notes/rests, or note-stems/hooks. Apply the desired duration shortcut (listed above), or click on the equivalent duration icon in the toolbar.
Prior to version 3.3.3
- Make sure you are in Normal mode (press Esc to exit from Note input modes).
- Click on a note or rest. Apply the desired duration shortcut (listed above), or click on the equivalent duration icon in the toolbar.
For example, to change three sixteenth rests into a single dotted eighth rest:
- Click on the first sixteenth rest.
- Hit 4 to turn it into an eighth rest.
- Hit . to turn it into a dotted eighth rest.
- As the duration increases, it overwrites the other two sixteenth rests following it.
Note that increasing duration overwrites the notes or rests that follow the selected phrase; decreasing duration adds rests between it and the notes or rests following.
See also Paste half/double duration
Change duration, expanding or shrinking the current measure
- Use the Duration Editor plugin that allows "Melody first, rhythm second" notes entry, or
- (insert only) insert notes or measure as described above.
Change duration of notes in selection only, overwriting rests only
Use the Note duration actions plugin to batch adjust notes length while keeping starting positions intact.
Change pitch
To change the pitch of a single note:
- Make sure that you're not in note input mode and that you have no other notes selected.
- Select the desired note and use any of the following methods:
- Drag the notehead up or down with the mouse;
- Press the keyboard arrows: ↑ (Up) or ↓ (down);
- Type a new note letter name (A…G). Use Ctrl+↓ or Ctrl+↑ to correct the octave, if necessary (Mac: Cmd+↓ or Cmd+↑). This will automatically turn on note input mode.
To change the enharmonic spelling of a note, select it and use the J command. For more information, see Accidentals.
To change the pitches of a passage of music by a constant interval, you can use Transposition.
To change the pitches of a passage of music to a different melody, while keeping the rhythm unchanged, use Re-pitch mode.
If your score contains a lot of misspelled accidentals, you might try the Respell Pitches command (see Accidentals: Respell pitches).
Change voice
To change one or more notes to a different voice, see Voices.
Change rest to note and vice versa
To change a rest to a note of the same duration:
- Make sure you are not in note input mode (press Esc to exit).
- Select the rest.
- Enter the desired pitch by entering a note letter, AtoG.
To change a note to a rest of the same duration:
- Make sure you are not in note input mode (press Esc to exit).
- Select the note.
- Press 0 (Zero).
Note properties
- To adjust the horizontal position of a note/chord: see Offset notes.
- To edit note properties in general (spacing, offset, size, color, notehead direction, playback etc.): see Inspector and object properties.
- To adjust the layout of all notes in the score: see Layout and formatting, especially the sections about notes, accidentals and tuplets.
See also
- Note input modes
- Drum notation
- Tablature
- Tuplet
- Voices
- Shared noteheads
- Preferences (Configure keyboard shortcuts)
External links
- How to enter a chord (MuseScore HowTo)
- How to enter a rest (MuseScore HowTo)
- How to span a stem over two staves (MuseScore HowTo)
- How to add cue notes (MuseScore HowTo)
- Video tutorial: MuseScore in Minutes: Lesson 3 - Note input
- Video tutorial: MuseScore in Minutes: Lesson 4 - MIDI Keyboard Input
- Video tutorial: MuseScore in Minutes: Lesson 5 - More Input Ideas
- Video: Semi-Realtime MIDI Demo Part 1: New note entry modes
- Video tutorial: Musescore Quicktips: Note Entry
Edit mode
Edit mode allows you to perform a wide range of editing operations on individual score elements, such as:
- Adjust the length and shape of slurs, lines, barlines etc.
- Add, delete and format text in text objects.
- Adjust the position of most score elements (but not text).
Enter edit mode
MuseScore versions 3.4 and above
For lines, hairpins, slurs, note-stems, note-beams, and barlines, use one of the following methods:
- Click on an element.
- Right-click on an element and, from the menu, select Edit Element.
For other elements, use one of the following methods:
- Double-click an element.
- Click on an object already selected (text-based objects only).
- Right-click on an element and, from the menu, select Edit Element.
- Click on an element and press Alt+Shift+E.
MuseScore versions prior to 3.4
Use one of the following methods:
- Double-click an element.
- Right-click on an element and, from the menu, select Edit Element.
- Click on an element and press Alt+Shift+E.
Exit edit mode
To exit Edit mode use any of the following:
- Press Esc.
- Click on a blank area of the document window.
Text
For text edit mode, see Text editing.
Lines
See Lines: Change length, and Adjust slur.
Notes
Offset notes
Sometimes it is necessary to shift a note to the right or left—to avoid a collision with another element or to override automatic notehead sharing for example:
- Enter Edit mode on the desired note;
- Press the arrow key in the direction (left or right) that you wish to nudge the note (or use Ctrl+← or Ctrl+→ for larger adjustments);
- Press the Esc key. This will allow the note stem to be redrawn.
Alternatively, you can select the notehead and change the "Horizontal offset" (under "Chord") in the Inspector.
Adjust note stem length
- Enter Edit mode on the desired note stem;
- Use keyboard shortcuts (below) to extend or shorten the stem;
- Exit edit mode.
Alternatively, you can select the stem and change the "Length Offset" (under "Stem") in the Inspector.
To reposition a note stem, you should select it and adjust the "X" or "Y" setting for the "Offset" under "Automatic placement" in the "Element" section of the Inspector.
Keyboard shortcuts
In Edit mode the following keyboard commands can be used to change the position of either (1) a score element (e.g. ornament, accidental etc.) or (2) an adjustment handle (e.g. slur, line etc.):
- ←: Move left 0.1 staff space.
- →: Move right 0.1 staff space
- ↑: Move up 0.1 staff space
- ↓: Move down 0.1 staff space
- Ctrl+← (Mac: Cmd+←): Move left one staff space
- Ctrl+→ (Mac: Cmd+→): Move right one staff space
- Ctrl+↑ (Mac: Cmd+↑): Move up one staff space
- Ctrl+↓ (Mac: Cmd+↓): Moves down one staff space
- Alt+←: Move left 0.01 staff space
- Alt+→: Move right 0.01 staff space
- Alt+↑: Move up 0.01 staff space
- Alt+↓: Move down 0.01 staff space
The following commands only apply to adjustment handles:
- Shift+←: Move end handle's anchor left by one note/rest.
- Shift+→: Move end handle's anchor right by one note/rest.
- Tab: Go to next handle.
To undo all edits, ensure you are not in edit mode and press Ctrl+R.
See also
Palettes

Overview
Using the Palettes Area is the recommended way to apply musical symbols and text to your score, second to keyboard shortcut.
MuseScore is shipped with predefined palettes that organize items by nature, click on hyperlink to jump to their main chapter.
- Visible by default in the built-in MuseScore 3.6.2 Basic workspace profile: Clefs, Key Signatures, Time Signatures, Accidentals, Articulations , Grace Notes, Lines , Barlines, Text, Tempo, Dynamics, Repeats & Jumps, Breaks & Spacers, Beam Properties.
- Visible by default in the built-in MuseScore 3.6.2 Advanced workspace profile, in addition to all of the above palettes: Brackets, Ornaments, Breaths & Pauses, Noteheads, Arpeggios & glissandi, Tremolos, Fingering, Fretboard Diagrams, Frames & Measures.
- Not yet visible in any build-in workspace profile by default: Accordion (see How-to: Accordion notation and playback), Bagpipe Embellishments.
All palettes can be unhide in any workspace (see below (jump to).) The current visibility setting and expand/collapse status palettes are automatically saved to the current in-use workspace profile. No further action is needed.
Palette contents can be edited, you can also create an empty custom palette and populate it, see below (jump to). Visit https://musescore.org/en/node/355834 for palettes shared by other musicians.
Alternative ways to apply musical symbols and text:
- Use Keyboard shortcuts, see also Note input
- Use Toolbar buttons
- Use the Master palette, or
- Use Images.
View / hide the Palette Area
The default position of the Palette Area is to the left of the document window. To view or hide it:
- From the menu, select View → Palettes, or use the keyboard shortcut F9.
To undock the Palette area:
- Click the double-chevron symbol (circled in the image above), or double-click the top bar of the panel.
To re-attach the panel, double-click on the top bar again. See Side panels for more information.
Using palette items
Apply symbols from a palette
Versions 3.4 or above
- Select one or more score elements, then click the desired palette symbol. Or, drag and drop the symbol onto the desired score element in the staff.
Versions prior to 3.4
- Select one or more score elements, then double-click the desired palette symbol. Or, drag and drop the symbol onto the desired score element in the staff.
If you are dragging a symbol to the score and decide you don't want to apply it, press Esc.
Tip: To prevent accidental rearrangement of contents during use, right-click a palette name and uncheck Enable Editing.
Apply the last selected item
MuseScore does not offer keyboard shortcut bindings to palette items, but you can configure a shortcut to apply the same symbol multiple times consecutively to improve efficiency. Some users find this method handy when applying piano pedal marks. (N.B. piano pedal mark symbol is under Lines palette)
- Assign a keyboard shortcut key to "Apply current palette element" in Preferences: Shortcuts.
- Select some score elements.
- Click on a palette item to apply it to the score once.
- Select other elements. TIPS: Use Shift selection Shift+←/→.
- Press the "Apply current palette element" shortcut to apply the same (last applied) item.
- Repeat as required.
See also Dynamics actions, a MuseScore plugin that you can assign keyboard shortcut to add individual dynamics symbol.
Search for symbols
Search by symbol name to locate a symbol without visually searching through palettes. All symbols are searched regardless of palettes' visible / hidden status and expand / collapse status.
Use the Search box at the top of the Palette Area. As you type, symbols and/or palettes with names matching your keystrokes are displayed below, updating continuously as your typed input changes.
To show all palettes, some of which may be temporarily hidden because it does not match the search string, click X in the search box.
Items added to the score can be copied, pasted, and duplicated: see Copy and paste.
Behavior of applied text and lines
If the symbol you are adding to the score from a palette contains or belongs to a Text element (e.g. staff text, dynamic, fingering, volta etc.), then properties such as font type, font size, text color and alignment will adapt according to the following rules:
- Text properties which have not been altered by the user will adopt the relevant text styles.
- Custom text properties—those changed by the user before saving the symbol to a custom palette—remain as customized.
By contrast, the line properties of Lines applied from a palette as is.
Customize the Palette Area
Expand / Collapse a palette
- Either click on the arrow next to the palette name, or double-click the palette name (in versions prior to MuseScore 3.3, click once on either the arrow or the palette name).
Single Palette mode
- To enable automatic collapsing of all other palettes when you expand one palette, click the ... button at the top of the Palettes Area and check the Open only one Palette at a time box.
Reveal a hidden palette
- Click Add Palettes at the top of the palette list and click Add beside the palette name.
Create a new custom palette
- At the top of the Palette Area, click Add Palettes→Create custom palette. Or, right-click any palette and click Insert New Palette.
- Type the name of the new palette in the Create Palette dialog.
- To add symbols, see Customize palettes below (jump to).
Hide a palette
To hide a predefined palette:
- Right-click the name of the palette you want to hide and click Hide Palette.
To hide a custom palette you created:
- Right-click the name of the palette you want to hide, click Hide/Delete Palette, then click Hide in the dialog.
Delete a palette
Only custom palettes can be deleted, you can hide all palettes though.
- Right-click the name of the palette you want to delete, click Hide/Delete Palette, then click Delete permanently in the dialog.
Change the order of palettes
- Drag the name of a palette up or down to any desired position.
Customize palette contents
Symbols may be added or deleted and layouts can be rearranged. (in version prior to 3.3, only new workspace is capable of customizations).
Before customizing a palette:
- Right-click on the palette name and make sure that Enable Editing is checked. It is automatically checked for new palettes you create yourself.
- Make sure the palette is expanded.
Add from an opened score
Score items, when added to a palette, are saved with their custom properties.
- Press and hold Ctrl+Shift (Mac: Cmd+Shift), then drag the score element from the score onto a palette. The score element could be a symbol, line, text, dynamic, fretboard diagram, imported image etc.
Add from the Master Palette
- If the Master Palette is not visible, select View → Master Palette from the menu, or use the keyboard shortcut Shift+F9 (Mac: fn+Shift+F9).
- Drag the symbol from the Master Palette window onto a palette.
Rearrange symbol order
- Drag the symbol to the cell in which you wish to display it. Nearby symbols will automatically move to make space available.
Change the position and size of a symbol in a palette cell
- Right-click the cell and click Properties. The following dialog is displayed:

- Name: Used in search function, also shown as tooltip that appears when you mouse over the cell.
- Content offset X, Y: Adjusts the position of the symbol in the cell.
- Content scale: Makes the symbol appear larger or smaller in the cell.
- Draw staff: Draws the five lines of a musical staff behind the symbol.
Note: Changing these values only affects the appearance of symbols within the palette. It does not change their sizes or offsets on the score page.
Remove a symbol from a palette
- Right-click the symbol and click Delete. Or, select the symbol and click the trash icon to the right of the palette name.
Items removed from predefined palettes are moved under More.
In custom palettes, the More button offers browsing predefined palettes ( Use < and > ) and adding their items ( Use drag-and-drop, or selecting and clicking Add to)
Palette menu
The following menu options may appear either by right-clicking the name of a palette or by clicking the ... to the right of the name:
- Hide Palette: Hide predefined palette into under Add Palettes.
- Hide/Delete Palette: Allows you to either hide or permanently delete a custom palette.
- Insert New Palette: Creates a new empty palette. Identical to Add Palettes→Create custom palette.
- Enable Editing: Allows you to modify the contents and layout of the palette.
- Reset Palette: Discards any customizations made to a palette and restore its default contents and layout. Custom palettes will be emptied.
- Save Palette...: Saves the current palette as an .mpal file.
- Load Palette...: Loads a palette from an .mpal file and reveal it, does not replace current palette, nor any existing palettes.
- Palette Properties...: Displays the following dialog, where you can adjust the appearance of a palette:

- Name: The name of the current palette.
- Cell Size: Width, Height: The dimensions of each individual cell in the palette.
- Element Offset: Adjusts the vertical offset of all symbols in the palette.
- Scale: Makes all symbols in the palette appear larger or smaller.
- Show grid: Draws a border around each palette cell.
See also
External
- https://musescore.org/en/node/355834 custom palettes shared by other musicians.
Workspaces
Workspace is the visual settings, also known as graphical user interface (GUI), of the Musescore program itself. An analogy to the position of the pen, ruler etc on a composer's desk. It includes:
- the toolbars and buttons at the top of the window,
- the side panels, or sidebars, to the left of the window, such as Palette, Inspector, Timeline etc,
- their configuration settings and position information, and
- theme and canvas settings, see Preferences.
Note that the followings do not count as workspace:
- View→ Documents Side by Side, Documents Stacked, Full screen, covered in Viewing and navigation chapter.
- View→ Show visible, Show Invisible, Show Unprintable, Show Frames, Show Page Margins, Mark irregular measures, and toolbar's Concert pitch, Zoom level and Page View/Continuous View/Single Page options : these settings are covered in Viewing and navigation chapter. They are score data. They are saved to and loaded from each score file. Templates contain these settings and will be used when you create a new score from a template, see Instruments, staff setup and templates.
Workspace presets are setting profiles for workspace, user can choose the options a preset contains so that only those options are loaded and saved when the preset is applied. There are two default presets: Basic and Advanced, you can create your own custom workspaces.
Apply a preset
Use either one of the following methods:
- Select a new preset from the drop-down menu to the right of the Note Input Toolbar (in versions prior to 3.3. this is located at the bottom of the workspace panel), or
- From the menu, select View→Workspaces, and click on one of the options.
Create a new preset
To create a new preset:
- Select an existing preset, see Apply a preset,
- Either
- Click the + button next to the dropdown list, or
- Click View→Workspace→New,
- The following dialog is shown:

- Enter a name for the new preset,
- Choose what the preset saves and loads, namely:
- Toolbars: Information about toolbars and toolbar buttons and their order.
- Menu bar: No function, as this is not implemented in MuseScore 3.
- GUI Components: Information about the position of the GUI components and whether they are open or not.
- GUI Preferences: Settings in Preferences such as Theme and Canvas settings.
- Press Save
Edit what settings a preset contains
To change what settings a preset contains, select View→Workspace→Edit. In versions prior to MuseScore 3.3, you must create a new preset and then edit it, you cannot edit the Basic preset or the Advanced preset, see Create new workspace preset.
Changes made to the current workspace are automatically saved to the current preset, no further action is required, see Edit the workspace below.
Edit the workspace
Any changes you make to the current workspace are automatically saved to the current preset, no further action is required.
See the main chapter Viewing and navigation, these are some popular ways:
- To choose which toolbar is displayed, toggle them under View→Toolbars menu.
- To edit toolbar buttons, select View→Toolbars→Customize toolbars, see Viewing and navigation : Toolbars. You cannot add items to a toolbar from the Master palette.
- To choose which sidebar is displayed, toggle them under View menu.
- To dock or undock sidebars, see Viewing and navigation : Side panels.
- To setup different sidebars, refer to their relevant chapters. For example, to set up palette see Palettes and Master palette.
Preset directory
Each preset is saved as a separate file under:
- Windows:
C:\Users\[USERNAME]\AppData\Local\MuseScore\MuseScore3\(actually%LOCALAPPDATA%\MuseScore\MuseScore3) - MacOS:
~/Library/Application\ Support/MuseScore/MuseScore3/. - Linux:
${XDG_DATA_HOME:-~/.local/share}/MuseScore/MuseScore3/.
See also
- Viewing and navigation for setting up toolbar and buttons.
- Palettes
- Master palette
Inspector
Overview
The Inspector shows layout and playback properties of the selected objects.
When the current selection of objects consist of several different object types, the Inspector shows and allows adjustment of color, visibility, and automatic placement, see "Element" section. Press any of Notes, Grace Notes, Rests buttons at the bottom to to narrow to that object type only, as shown in image below. See also "Select all similar" and "Selection Filter" sections in the Selection modes chapter.
When multiple objects are selected, if a single property has diverse values for each object, that particular property is displayed in the color blue.

Displaying the Inspector
The Inspector appears by default on the right. To show or hide it:
- Press shortcut F8 (Mac: fn+F8), or
- From the menu, select View and check or uncheck Inspector.
Docking/undocking the Inspector

Click the double-chevron symbol or double-click the top bar of the panel. To re-attach the panel double-click on the top bar again. See also: Side panels.
"Reset to style default" and "Set to style" buttons
Two buttons may be displayed to the right of a property:
- Reset to style default: removes the specific property, in effect resets the property to the default value.
- Save as style : Does these:
- Assigns the property value to the coresponding one in the style profile used by this object currently, found under Format→Style. See Layout and formatting chapter.
- And then clears the property value specific to this object.
- The result is that this object does not have the specific property anymore, but it uses the value in the style profile, which is the same value, because it is being assigned just now. All objects using that style profile across the score is affected.
Shown below is the Reset to style default button, it looks like an unclosed circular loop with a letter x inside

Shown below is the Set as style button, it looks like a bold capitalized S

Inspector categories
Properties are conveniently listed under bold categories in the Inspector. For example, when barline(s) are selected, the following is displayed at the top:

For details of the various categories and their properties, see below:
Element
All score elements—except frames, breaks and spacers—display this category in the Inspector when selected. The options are as follows:
- Visible: Uncheck this box to make selected elements invisible; alternatively, use the shortcut V (toggle). Invisible elements do not appear in the music when printed out or exported as a PDF or image. If you still want them to remain on display in the document window, make sure that the "Show Invisible" option is selected in View → Show Invisible. Invisible elements will then be colored light gray.
- Color: Click on the rectangle to open a "Color Select" dialog. Adjust the color and opacity of selected elements.
- Automatic placement: See Automatic placement.
- Minimum distance: Minimum distance from other elements when automatic placement is enabled.
- Offset X/Y: Allows you to position selected elements exactly (in terms of space units). A positive number moves the elements right or down; a negative number moves the elements left or up. Snap to grid buttons are also provided.
- Stacking order (Z): See Automatic placement: Stacking order
Element Group
This category is displayed only when you have selected a mixture of different types of elements, and allows editing of color, visibility, and automatic placement only.
Segment
- Leading Space: Use this to increase or decrease the space before an element. This also affects any associated lyric syllables.
Chord

- Offset X/Y: This changes the positon of every note in the same voice as the selected note(s). If you want to make changes to the position of just one note, use the Element category instead).
- Small: Make noteheads and stem small.
- Stemless: Make chord stemless.
- Stem direction: Choice of Auto, Up, or Down.
Note
This category allows you to make changes to selected notes (but for note position—see Element). It contains the following properties:
- Small: Make notehead smaller (you can specify the relative size of all small notes from the menu: Format → Style… → Sizes…).
- Head group: See Notehead groups.
- Head type: See Notehead types.
- Mirror head: Position notehead to the left or right of the stem (default is "Auto").
- Fix to line: When ticked, the note is fixed to the top line of the standard 5-line staff.
- Line: A positive number moves the "fixed" note down; a negative number moves it upwards.
- Play: Unticking this box silences the note.
- Tuning: Adjust tuning of note to the nearest cent.
- Velocity type: Sets the MIDI velocity of notes directly. Choose one of two options:
- Offset: Make the value shown in "Velocity" relative to the previous dynamic marking. The value is taken as a percent offset, i.e. the note’s real MIDI velocity would be ((100 + Velocity) / 100) times what it would have been without this adjustment. Enter negative values to lower the velocity accordingly.
- User: Make the value shown in "Velocity" absolute (i.e. the MIDI velocity is unaffected by dynamic markings).
- Velocity: Set the MIDI velocity according to the option displayed in "Velocity type."
Dynamic
See Dynamics
Text
See Text styles and properties
Tempo text
See Tempo
Fermata
Select
This category appears differently according to the selection you have made:
- If you select a notehead, the "Select" category displays buttons which allow you to easily switch the selection to the stem, beam, hook, duration dot (or dots) or tuplet number associated with the notehead (see image below).

- If you select a range of measures, the "Select" category allows you to select either all notes, grace notes, or rests.
Beam
This section is displayed in the Inspector when you select one or more note beams, and allows you to make fine adjustments to beam position and angle, and also change the spacing of beamed notes.
Clef
This section appears when you select a clef: the tick box allows you to turn on/off the display of a preceding courtesy clef.

Articulation
This category appears when you select an articulation or ornament. The following options are available:
- Direction: Whether the symbol points up or down: only applicable to certain symbols.
- Anchor: The vertical placement of the symbol:
- Play: Turn on/off playback effect.
- Time stretch: Obsolete. Jump to Fermata instead.
- Ornament style: A choice of default or Baroque playback.
Fretboard diagram
See Fretboard diagrams.
Line
This category is displayed when a line is selected. Here, you can set various general properties.
- Visible: Hide or display just the line: any text remains visible.
- Allow diagonal: The default is horizontal (unticked). Tick if you want to edit the line to create a slope.
- Line color/thickness/style: Set various properties of the line.
Text Line Details
This category is displayed when a line is selected. It allows you to set the wording of a line, edit text properties, set line hooks, and align the text in relation to the line.
- Begin hook / Height: At the beginning of the line, specify None, 90° (vertical), 45° (angled), or 90° centered; set hook length.
- End hook / Height: Ditto for the very end of the line.
- Begin Text / Continue Text / End Text: Refers to text at the very beginning of the line; at the beginning of any continuation line; or at the end of the very last line. All have the same properties, as follows:
- Text: Create or edit the text associated with the line.
- Font face / Size / Style: Set the text properties, and/or edit the text style of the line.
- Align: Set the horizontal and vertical alignment of the text in relation to the line.
- Placement: Place the text on (Above/Below), or to the left of the line.
- Offset X / Y: Adjust the x and y offsets for exact positioning.
Properties dialogs
Some object types have additional properties. These are accessed by right-clicking on the object and choosing a "... properties" option from the context menu. The settings available in these dialogs are explained in the description of the object type in Notation or Advanced topics.
See:
- Articulations and ornaments
- Time signatures
- Staff and system text
- Measure operations
- Staff/Part properties
See also
Instruments, staff setup and templates
This chapter discuss real world instruments and vocals, Musescore Instruments, score instrument setup and score template files.
Instruments
An instrument in Musescore is an abstraction that contains the tablature(s) or staff(s) (the most useful aspect, see Layout and formatting), notation styles (clefs, noteheads etc), the musical behaviors (transposition, playable range) and settings related to playback audio created by the Musescore synthesizer.
An Musescore instrument contains staff(s) that can represent a single or multiple real world instrument(s), for example in Beethoven's Symphony No.3, Op.55 First edition published by Cianchettini & Sperati, n.d.[1809] London, the third staff Corni 1 & 2 in Eb represents two French horn players:

To transcribe this, you should add one Musescore instrument "Horn in Eb", and rename it, playback is not affected by naming.

Real world instrument, instrument section, vocals, and choir, are supported in Musescore in several ways:
- A Musescore Instrument that has the same name such as "Piano", "Violin", "Violins", "Strings", "Soprano", "Voice", "Women" and some percussions such as "Timpani", "Concert Bass Drum", "Cymbal" (concert). Similar items might have different playback.
- "Drumset" Musescore instrument "Standard", a single item containing "Snare", "Bass Drum", "Ride Cymbal" etc. There is no seperate MuseScore Instrument for these. This is the option "Drumset" when you change instrument setup.
- "Drumset" Musescore instrument "Standard 1" and other variations, (same for "Room", "Power", "Jazz" and theirs), use them by changing Mixer: Sound dropbox. They are different in playback only.
- "Drumset" Musescore instrument "Brush" and variations, use them by changing Mixer: Sound dropbox. The brush snare is the "Electric Snare" item in Drum notation, only creates short brush playback. There is no seperate MuseScore Instrument for brush snare.
You can manage instruments and staffs individually in any score, or use pre-configured template when you create a new score.
Instruments supported by Musescore 3.6.2 (archived https://musescore.org/en/instruments page December 2022). To suggest adding a missing instrument, see https://musescore.org/en/contribute
Choose instruments

Two ways to open this window to manage setup:
- File New Score Wizard window: Choose Instruments when you create a new score, or
- In a score, use the keyboard shortcut I; or select from the menu Edit→Instruments....
The Choose Instruments window contains the following items:
- The search box at the top left filters items to be shown underneath. Clear it out to show all available instruments.
- The type filtering dropdown box under the search box filters items to be shown in the space underneath. "Common" is selected by default, which filters out some uncommon instruments or voice parts. Select "All instruments" to show all available instruments.
- The left column space shows a list of instruments or voice parts you can add to the current score. They are grouped by the instrument families they belong to. Click on a family name subheading to expand or collapse that group.
- The Ordering dropdown box at the top right shows the current system of instrument ordering. 'Orchestral' is the default preset. Instruments added to the score will be inserted into a correct position according to ordering. The ordering setting contains the position for soloist instruments.
- You cannot create custom or edit existing ordering system presets inside Musescore, but you can create a score with desired setup and save as a reusable template.
- The right column space shows currect score setup, the vertical order represents the real instrument vertical order on score. Empty column means the score contains no staffs.
The main actions available in this window are :
- Add a new instrument to the score: This is the essential and most common action. This adds a new instrument, along with all of its editable staff(s), to the current score. Each instrument has its own playback settings, see Mixer.
- Add a staff to an existing instrument: This inserts an extra editable staff to an existing instrument on the current score, so that you can create your own custom instrument.
- For example, to create a piano that use three staffs rather than normally two staffs.
- This action is rarely used because its limitation on playback. In Musescore, playback setting is instrument based - those three piano staffs cannot be configured to use two different sounds, nor can they be muted individually (To do these you should create multiple instruments instead) .
- Add a linked staff to an existing instrument: This inserts an non-editable, ready-only staff to an existing instrument on the current score, it automatically shows the same content of the staff it is linked to.
- The only real purpose is to allow you to have two staffs for a guitar (or similar instruments) where one staff is the standard notation, the other is the tab notation, and everything you enter onto the standard staff is automatically reflected an tab.
- Make an existing instrument soloist: This reorders an existing instrument on the score (all its staffs) to the soloist position, add "solo" to their name. Soloist instruments will be numbered separately from non-solo instruments, where relevant.
- The soloist position is defined in the instrument ordering setting chosen in Ordering dropdown box. For example, in an 'Orchestral' ordering system, soloists are above the strings. You can designate multiple soloist instruments.
- You can rearrange order manually.
- The soloist designation is a score layout feature only and has no impact on playback.
Add instrument
Understand the main actions available first.
To manage instruments of "Drumset" Musescore instrument, see Drum notation
To add a new Musescore instrument to the score, use any of the following options:
- Select one or more instruments in the left column, and then click Add to score in the middle of the window, or
- Double-click an instrument in the left column.
The instrument names, and their associated staff lines, now appear in the list of instruments in the right column.
Add Staff
Understand the main actions available first.
To add an editable staff to an existing instrument in the score:
- Select a staff of the instrument in the score list on the right-hand side
- Click Add Staff at the top.
- Adjust the Staff type, if applicable.
Add Linked Staff
Understand the main actions available first.
To add a non-editable ready-only staff to an existing instrument in the score:
- Select a staff to be linked in the score list on the right-hand side.
- Click Add Linked Staff at the top.
- Adjust the Staff type, if applicable.
See also, Combine pitched staff with tablature.
Make / undo soloist
Function of this button is explained in Choose instruments window above.
To make an existing instrument soloist, or to undo it:
- Select an instrument name subheading in the score list on the right-hand side.
- Click Make soloist or Undo soloist at the top.
Change order of instruments or staffs on a score
- Click either an instrument name or a staff in the right-hand column, and click the arrow buttons.
Delete an instrument or staff
- Select an instrument (all of its staffs) or a staff in the right-hand column and click Remove from score in the middle.
Change instrument and staff setup
- To change instrument setup of a score: In a score, use the keyboard shortcut I; or select from the menu Edit→Instruments... to open the Instruments window.
- To change instrument setup of a Musescore Part: See Parts.
- To change instrument setup of a the "drumset" Musescore Instrument: See Drum notation: edit drumset.
- To change the Musescore Instrument used by staff on score: See Staff / Part properties: Change instrument.
- To change staff size: It is recommended to use Page settings to change all staffs everywhere on a score , before changing each staff's Staff / Part properties.
- To change staff layout:
- To change staff type and staff layout everywhere on a score (change number of lines, hide etc): See Staff / Part properties, and Tablature
- To hide a staff under certain conditions : See Style window: Score settings.
- To create ossia: See Staff / Part properties: external links
- See also other global style settings in Layout and formatting.
Templates
Not to be confused with Staff / Part properties : staff type template
Score template can be used to quickly set up a new score. A template contains:
- instrument setup,
- Staff / Part properties of all instruments of the 'Full score' only (but not any of the Musescore Parts),
- the level 2 layout and formatting information (see Layout and formatting) of the 'Full score' only (but not any of the Musescore Parts),
- the View→ Show visible, Show Invisible, Show Unprintable, Show Frames, Show Page Margins, Mark irregular measures, and toolbar's Concert pitch, Zoom level and Page View/Continuous View/Single Page options (see Viewing and navigation) of the 'Full score' only (but not any of the Musescore Parts), and
- the setup (only) of every Musescore Part.
Everything else are not re-used (Title frames, all text, or any layout and formatting information of any of its Parts).
A template file is a score file under certain directory that Musescore uses. You can create a score from scratch and save it as template, or copy any existing .mscz file to that directory to use it as template. There are two kinds of templates:
- Pre-defined System templates shipped with MuseScore, sorted into categories in Choose template file window when you create a new score.
- User templates: Custom templates must be stored inside the user templates folder. They are in Choose template file window : Custom Templates when you create a new score.
Check out the Score from Template plugin by parkingb which improves template function.
Save a score as a custom template
Click File > Save as and save the score file as .mscz format into the template directory Musescore uses. File name is used as the template name.
Creating a score from a custom template
- Make sure the custom template file is in the correct folder.
- Choose a custom template when you create a new score. In Musescore 3, the preview window shows what the template file looks like when opened as a score, it is not the preview of what a new score looks like when created from this template.
System templates folder
Not recommended to use this folder for custom templates
This folder contains the pre-defined templates. It can be found in the following directory:
- Windows: Usually at
C:\Program Files\MuseScore 3\templatesorC:\Program Files (x86)\MuseScore 3\templates(Actually%ProgramFiles%\MuseScore 3\templatesor%ProgramFiles(x86)%\MuseScore 3\templates, respectively) . - Linux: Under
/usr/share/mscore-xxxif you installed from the package manager. If you compiled MuseScore on Linux yourself, then look under/usr/local/share/mscore-xxx(withxxxbeing the version you are using). - MacOS: Under
/Applications/MuseScore 3.app/Contents/Resources/templates.
Custom templates folder
Custom template files must be stored here. The default directory of the custom templates folder is as follows (The folder name "Templates" varies with the language version of Musescore installed):
- Windows:
%HOMEPATH%\Documents\MuseScore3\Templates. - MacOS and Linux:
~/Documents/MuseScore3/Templates.
To configure the directory of custom templates folder: From the menu, select Edit→Preferences...→General.
External links
- Instruments supported by Musescore 3.6.2 (archived https://musescore.org/en/instruments page December 2022)
- Instruments supported by latest Musescore
Measure operations
Note: To ensure that inserted or appended measures display correctly, multimeasure rests should be set to off (toggle M).
Select
Single measure
- To select a single measure, click on a space within the measure.
Range of measures
- To select a continuous range of measures, see Shift + click selection and Shift selection.
Insert
Insert an empty measure into the score
Use one of the following options:
- Select a measure or a frame, then press Ins (Mac: Shift+I).
- Select a measure or a frame, then choose from the menu: Add→Measures→Insert Measure.
Insert multiple measures
Use one of the following options:
- Select a measure or a frame, then press Ctrl+Ins (Mac: Shift+Del+I); fill in the "Number of measures to insert" field and press OK.
- Select a measure or a frame, then choose from the menu: Add→Measures→Insert Measures...; fill in the "Number of measures to insert" field and press OK.
Append
Append an empty measure to the end of a score
Use one of the following options:
- Press Ctrl+B (Mac: Cmd+B).
- Select from the menu: Add→Measures→Append One Measure.
Append multiple measures to the end of a score
Use one of the following options:
- Press Alt+Shift+B; fill in the "Number of measures to append" field and press OK.
- Select from the menu: Add→Measures→Append Measures...; fill in the "Number of measures to append" field and press OK.
Remove
Remove a single measure
- Select the measure
- Press Ctrl+Del (Mac: Cmd+Del).
Remove a range of measures
- Select a range of measures;
- Press Ctrl+Del (Mac: Cmd+Del).
Note: In multistaff scores, measure deletion also removes all corresponding measures in the other staves of the system;
Remove empty trailing measures
To automatically remove any blank measures from the end of the score:
- From the menu, select Tools→Remove empty trailing measures.
Delete measure contents
To delete only the measure contents (and not the measure itself):
- Select one or more measures;
- Press Del.
Properties
To edit the properties of a measure, right-click an empty part of the measure and select Measure Properties...:

You can use the  buttons, at the bottom left of the dialog, to navigate to the previous or next measure.
Staves
- Visible: Check/uncheck to show/hide notes and staff lines for the selected measure.
- Stemless: Check/Uncheck to show/hide all note stems for the selected measure.
Measure duration
This section of the dialog allows you to adjust the duration of a single measure independently of the displayed time signature. Use it to create a pickup measure (also known as anacrusis or upbeat), cadenza, ad lib section etc.

- Nominal is the apparent time signature and cannot be edited.
- Actual can be set to anything you like regardless of the nominal time signature.
Example: In the image below, the quarter note pickup measure has a nominal time signature of 4/4, but an actual time sig. of 1/4. The measures in the middle are in normal 4/4 time. The complementary measure at the end of the staff, with a dotted half note, has an actual time sig. of 3/4.

Note: A small - or + sign appears above the measure when its duration is different than indicated by the time signature (see image below). This does not appear in any printed or PDF copy. You can turn off these marks by unchecking "Mark Irregular Measures" in the View menu.
Pressing Ctrl+Del on a note or pause also reduces the duration of the measure, while via insert mode you can increase the duration of the measure.

Other
Exclude from measure count
- Exclude from measure count: Tick to exclude the selected measure from measure numbering (e.g. a pickup measure).
Break multimeasure rests
- Break multimeasure rests: Tick to prevent a multimeasure rest at the start of the selected measure. This option should be checked before turning on "Create multimeasure rests" in Format→Style...→Score. The default program setting for scores is OFF; for parts is ON.
Note: Multimeasure rests are broken, by default, at important breaks—such as rehearsal marks, time signature changes, double barlines, irregular measures, etc.
Measure number mode
This allows you to control whether and how measure numbers display on the selected measure:
- Auto: Follows the setting in Format→Style...→Measure Numbers.
- Always Show: Forces display of number.
- Always Hide: Hides number.
Layout stretch
- Layout stretch: Controls the amount of horizontal space between score elements (notes, rests, etc.).
This setting allows a more precise degree of control than offered by the Increase/Decrease Stretch ({ and }) commands.
Add to measure number
- Add to measure number": Enter a positive or negative number to change the number of the selected measure, and subsequent meaures. A value of "-1" has the same effect as marking a measure to be excluded from measure count.
Play Count
- Play count: If a measure precedes an end repeat barline, this value controls the number of times that the entire repeat section plays back: see also, Repeats and jumps.
Vertical alignment
See Barlines:Vertical alignment
Numbering
By default, MuseScore numbers the first measure of each System (except for the first measure in a section), but other numbering options are available: see Format→Style...→Measure Numbers.
Split and join
To make a measure longer or shorter in duration—without changing the time signature—you can adjust its Measure Properties (above). But it is also possible to join or split measures.
Join measures
Method A. To join two measures only:
- Select the barline between the two measures and press Ctrl+Del.
Method B. To join any number of measures:
- Select the measures you want to join;
- From the menu bar, select Tools→Measure→Join Selected Measures.
Notes: (1) If you select measures on only one staff in a score with multiple staves, the same measures will be joined in each staff of the system. (2) Beaming may be automatically modified. (3) If you have generated parts already, this option is disabled.
Split a measure
Choose one of the following methods:
- Select a note; then hold Ctrl and click a barline in a palette (double-click in versions prior to 3.4).
- Hold Ctrl and drag a barline (from a palette) to the note that starts the next measure.
- Select a note; then, from the menu bar, select Tools→Measure→Split Measure Before Selected Note/Rest.
Note: If you select only one note from one staff, each staff of the system will be split at the same place.
See also
External links
- How to span a measure over multiple systems (MuseScore HowTo, 1.x)
- How to split a measure (MuseScore HowTo, 1.x)
- How to delete measures (MuseScore HowTo)
- How to get scores without time signature (and clef) (MuseScore HowTo)
Voices
Not to be confused with MuseScore Parts feature, see also Glossary: Part
Daily usage of the term voice refers to a musical line or part which can have its own rhythm. Musescore Voices is different, it refers to the software feature that provides automatic stem direction function, allows individual stem direction within a chord, and allows easier playback control. It has nothing to do with pitch range. Voices is also known as "layers" in other notation software.
For each staff that contains a clef symbol, Musescore offers exactly 4 Voices for composers to assign notes to.
To demonstrate the Voice feature better, this article use:
- Voices 1, Voice 2, Voice 3, Voice 4 (the word Voice with captial letter V) to indicate MuseScore Voice,
- S (Soprano), A (Alto), T (Tenor), B (Bass) to indicate four voices in any four-part harmony composition (wikipedia).
Read on to learn about this feature, or jump to section below to see tips on writing SATB scores and common pitfalls.
How Voices are displayed
Selecting a section of the score highlights each Voice in a different color: Voice 1 blue, Voice 2 green, Voice 3 orange and Voice 4 purple.

Why do you need to use Voices
- You have multiple musical lines that have different rhythm, that is, notes of different note lengths playing at the same time. A common case is a chord composed of notes of varying duration.
- You want to write polyphonic music easily with the automatic stem direction function.
- You plan to generate and print separate scores for voice singers using the MuseScore Parts function. Also see Separate chords into Voices below (jump to).
- You plan to convert SATB open score to and from short score easily. See Manipulations below (jump to).
- You need stems pointing in opposite directions within a chord, on a single staff. See also Glossary: Shared note head.
- You need to mute musical line separately in the Mixer.
- You need to use a plugin such as Check for parallel fifths and octaves.
If you are not sure, use Voice 1 only.
Why you may not need Voices
- You simply want to write notes with one fixed stem direction. For example, when you are creating a single line cantus firmus (wikipedia) in a part-writing exercise only. In this situation, you should use Voice 1 only and use Inspector: Chord: Stem direction instead, choose the direction as requied and press the S symbol to set as default.
Limitations of Voices
- You cannot apply dynamics symbols to individual Voice.
- You cannot change volume of individual Voice with a slider in the Mixer, you can mute though.
How to enter notes in different Voices
The following instructions show you how to notate a passage of music using Voice 1 and Voice 2:
-
Enter Voice 1 notes first: Make sure you are in note input mode : the Voice 1 button becomes highlighted in blue in the toolbar.
 Always enter lower numbered Voice first, in this example Voice 1. On inputting, some notes may have down-stems, but these will flip automatically when the Voice 2 is added.
The following excerpt shows a treble staff with just the Voice 1 notes entered:

-
Move cursor back to start of section: When you have finished entering a section of Voice 1 notes, press the ← key repeatedly to move the cursor, note-by-note, back to the first note of the section; or alternatively use Ctrl+← (Mac:Cmd+←) to move the cursor back one measure at a time. Or else you can simply exit note input mode (press Esc) and click directly on the first note.
-
Enter Voice 2 notes: Make sure you are in note-input mode and that the Voice 1 note at the beginning of the section is selected. Click on the "Voice 2" button
 (on the right of the toolbar), or use the shortcut Ctrl+Alt+2 (Mac: Cmd+Alt+2). Enter all the lower Voice notes (down-stem).
The following image shows the above example after the addition of Voice 2 notes:

Features of MuseScore Voices
Automatic stem direction

- Notes in Voice 1 and Voice 3 have upward stem ; Voice 2 and Voice 4 have downward stem. Use this function to write polyphonic music easily. This feature will not activate in any measure where Voice 1 is used but Voice 2 is missing.
- You can always override and set each note's stem direction directly using Stem direction property under Chord section in Inspector, or press X.
- If you do not want this function at all, use only Voice 1 in each staff whenever you can.
- Beginner's error: for a Close/Closed score SATB, beginners often use Voice 1 for B (bass), this will not activate the automatic stem direction function, jump to tips
Automatic rests
Rests are automatically added to Voices of lower number if they contains no notes. It may come as unfavorable sometimes, you should consider adjusting your usage of MuseScore Voices:
- Your composition may not need Voices at all.
- Your composition may not need as many Voices as you think,
- Avoid automatic rests by using lowest Voice number possible in each staff,
- Beginner's error: for a Close/Closed score SATB, beginners often use Voice 3 for T (tenor) or Voice 4 for B (bass), this will create unwanted rest symbols. jump to tips.
- If your composition requires more than one Voice,
Deleting and hiding rests
All rests can be made invisible, if required: select the desired rest(s) and press V, or uncheck the "Visible" checkbox in the Inspector. Rests in Voices 2, 3 or 4 (but not Voice 1) can also be deleted (by selecting them and pressing Delete) but it is not recommended: make them invisible instead.
A Voice 1 rest can only be deleted by removing that part of the measure from the score as well: see Remove selected range; or Delete measure(s).
Restoring deleted rests
If a rest has been deleted in Voices 2-4, you will need to restore it before you can enter a note on that beat in that Voice (the problem may arise, for example, in imported XML or MIDI files). The easiest way to fix such a measure is to exchange that Voice with Voice 1 twice. For the exact method, see Exchange Voices of notes (below).
Manipulations on Voices
Exchange Voices of notes
To swap the notes between any two Voices:
- Select one or more continuous measures (or a range of notes);
- From the Menu bar, select Tools → Voices;
- Select the option for the two Voices you want to exchange.
Notes: (a) The selection can encompass content of any Voice, but only two will be processed at once. (b) If you select a partial measure the operation will still apply to the whole measure.
Move notes to another Voice (change notes' Voice but not swap)
You can also move notes from one Voice to another (without note-swapping):
- Ensure you are not in note input mode.
- Select one or more noteheads (in any Voice).
- Click on the destination Voice in the Note Input toolbar or use the shortcut Ctrl+Alt+1–4 (Mac: Cmd+Alt+1-4).
Note: For a successful move, the following conditions need to be met:
- The chord in the destination Voice must be the same duration as the note to be moved there.
- Alternatively, if the destination Voice is occupied by a rest, it must be of sufficient duration to accommodate the moved note.
- Notes should not be tied.
Navigate between Voices
To select a note in a higher-numbered Voice than the current one:
- Use Alt + ↓, to move the selection to the bottommost note in the current Voice;
- Press Alt + ↓, to move to the higher-numbered Voice;
- Repeat any of the above steps, as necessary, until the desired note is selected.
To select a note in a lower-numbered Voice than the current one:
- Use Alt + ↑, to move the selection to the topmost note in the current Voice;
- Press Alt + ↑, to move to the lower-numbered Voice.
- Repeat any of the above steps, as necessary, until the desired note is selected.
Separate chords into Voices
- Either:
- Manually select a continuous range of notes or a discontinuous list of notes, or
- Select notes using the Chord Level Selector plugin.
- Press the toolbar button to assign Voice to selected notes as required.
To further separate into staffs, see Tools: Explode
Merge Voices into chords
Chord inside Musescore has a stricter definition than in daily usage, constituent notes of a chord must have the same duration. You cannot merge Voices of varying duration into one chord (of one Voice).
See Tools: Implode
Assign different sounds to Voices
Sound in Musescore 3 is instrument channel based, see Instrument channel (an abstraction). Use Mid-staff sound (channel) change to assign a sound to a Voice.
Alternatively, use Explode to separate Voices into staffs, then sound by Staff / Part properties: Change instrument, edit "Instrument Name" as requied.
Tips for writing SATB scores
- In Open score SATB (where four staves are used for the four voices separately), use Voice 1 in each staff.
- In Close/Closed score SATB (where two staves are used for the four voices, e.g., as in hymnals),
- use Voice 1 and Voice 2 only, for both upper and lower staves: in the upper staff use Voice 1 for S (soprano) and Voice 2 for A (alto) ; in the lower staff use Voice 1 for T (tenor) Voice 2 for B (bass)
- Beginner's error: use Voice 3 for T (tenor) or Voice 4 for B (bass), this will create unwanted rest symbols, jump to automatic rests.
- Beginner's error: use Voice 1 for B (bass), this will not activate the automatic stem direction function.
- There is usually no need to use Voice 3 and Voice 4, jump to Why do you use voices
See also
- Keyboard shortcuts: Voices
- Tools (Implode, Explode)
- Glossary: Shared note head
- Noteheads: Shared noteheads
External links
- How to merge/combine/implode two staves in one with two voices (MuseScore HowTo)
- How to input multiple notes on a staff with different durations (MuseScore HowTo)
Selecting elements
Not to be confused with the note input cursor explained in Note input chapter
Select elements on a score for further action such as duplication. Elements currently selected on the score are shown colorized with the Voice each element belongs to, otherwise black by default. Voice 1 blue, Voice 2 green, Voice 3 orange and Voice 4 purple. The color can be changed under Edit→Preferences : Advanced, see Preferences chapter.
The current selection status is shown on the bottom left status bar, it changes whenever the selection is updated by the user. There are four selection status:
- "nothing is selected" status, the status bar shows blank. Press Esc to deselect all, furiously spam the button just to be safe, like all professional accountants do to calculators.
- "single item selection" status, the status bar shows the element's type.
- List Selection status, where multiple individual objects are selected.
- Range Selection status, where Musescore automatically selects useful elements between given beginning and ending time positions across a given set of staves. These elements includes all of the notes, rests, Musescore Texts such as dynamics symbols, Musescore Lines such as pedal etc. System-wide elements such as Tempo, Time signatures, Repeats, Layout breaks are not included in the automatic selection. A blue rectangle surrounding the selection is visible on the score in this status, as shown in image below.
Many common operations such as Copy and Paste requires a Range Selection.
Shown below are "single item selection" of a Voice 1 item (top) and "Range Selection" and its status bar (bottom).


Selecting a single element
To select a single element with the mouse, simply click it. Clicking on an element always select it only, except for the measure element. Clicking on the blank space of a measure (inside the measure's five staff lines) to select it also automatically selects multiple objects inside that measure, the result is a Range Selection.
To select a single element with the keyboard, use the cursor keys to navigate to the element, see all navigation keyboard keys in Viewing and navigation chapter. In Normal mode (press keyboard Esc to use this mode), the left and right cursor keys ← → navigate through a randomly selected note or rest at each time moment only. Use Alt + cursor keys to navigate through all elements at each time moment, including all notes, articulation, dynamics, and other markings.
Overlapping elements
When multiple objects occupy the same position on a score and fully overlap each other, such as two notes having same pitch but in different Voices, Ctrl + click on it repeatedly to cycle through the set, until the desired element is selected.
Different ways of a single note
To use pitch only Copy and paste commands, select the notehead of a note. To copy and paste everything, including duration etc, create a Range Selection of the note, see "Creating a Range Selection" section. Pitch only feature is removed in Musescore 4.
Selecting individual element inside a note
Most commands that operate on a single note requires selecting the notehead, for example, changing the note's pitch. A note is also a collection of elements including notehead, stem, flag, dot, accidental, etc. Each of these items can be selected individually for purpose like fine tuning its layout position.
Different ways of selecting notes in a chord

Multiple notes of a single chord can be selected one by one to create a List Selection. A single chord can also be selected with the time positions it starts and ends at to create a Range Selection.
Many commonly used commands, including Copy and paste, that can be used on a single chord requires a Range Selection of it, as shown in the image above. Besides the method explained in "Creating a Range Selection" section, there is a special quick way to do it for a single chord. First make sure nothing is currently selected (press Esc to be sure) and then Shift+click on any one of the notehead of the chord.
As Range Selection automatically selects base on time positions, notes in other voices may be included unless explicitly excluded, see "Excluding elements from Range Selection" section.
The repeat selection command (R) works on a single chord, either on a Range Selection of it, and when exactly one note of that chord is selected. See Copy and paste: Repeating a selection chapter.
Creating a List Selection

Create a List Selection manually by using mouse clicks, drag select, or by using commands.
Selecting multiple elements manually
(All Musescore 3 versions)
Elements positioned outside of the area of any staff lines and does not overlap with other elements, can be selected together using mouse drag select. Shift + click on any blank space (outside of staff lines) and drag the cursor to create a selection box. This creates a List Selection only if no notes or rests are included, otherwise a Range selection using the "starting and end time position method" is created.
(Requires Musescore 3.5 version or later)
To add an object to the selection, or remove one, Ctrl (Mac: Cmd) + click on the object. This converts the selection to List Selection. Measure does not support the addition/removal method. Adding and removing element from a Range Selection also converts it into a List Selection.
Selecting similar elements automatically
To select all elements of a given type in the entire score or in a given staff:
- Right-click one such element
- In the resulting menu, click Select→All Similar Elements or Select→All Similar Elements in Same Staff as appropriate
To select all elements of a given type between two time positions:
(Requires Musescore 3.5 version or later)
- Click the first such element
- Shift+click the last such element
—OR—
(All Musescore 3 versions)
- Create a Range selection
- Right-click one such element
- In the resulting menu, click Select→All Similar Elements in Range Selection
To create more complex selections of similar elements:
- (Optional) Create a Range selection
- Right-click one such element
- In the resulting menu, click Select→More
- Check the desired boxes within the resulting dialog (see below)
The options available in the select dialog will depend on the type of element you right-clicked.

The selection options specific to notes are:
- Same notehead: see Noteheads chapter.
- Same pitch: notes with the same pitch name, accidental, and octave
- Same string: notes with the on the same string (tablature only)
- Same type: notes of the same type (normal, acciaccatura, appoggiatura)
- Same note type: notes of the same duration, not considering presence of dots or tuplets
- Same duration: notes of the same actual duration
- Same note name: notes with the same pitch name and accidental, not considering octave
- Same staff: notes in the same staff
- Same voice: notes in the same voice
- Same beat: based on time signature only, not beaming
- In selection: notes within the current selection
- Same system: notes in the same system (layout concept), see Layout and formatting.
- Same measure: notes in the same measure
In addition to the type-specific selection options, there are action options at the bottom of the dialog that are common to all element types. These control what happens to the selected elements, and only one of these can be chosen at a time:
- Replace selection: if checked, this action selection replaces an existing selection
- Add to selection: if checked, this action adds elements to an existing selection
- Search in selection: if checked, this action applies only to elements within an existing selection
- Subtract from selection: if checked, this action removes elements from an existing selection
Creating a Range Selection
A Range selection instructs Musescore to automatically select useful elements between a given beginning and ending time position across a given set of staves.
Range Selection by dragging
Suitable for selections that fit on one screen. Shift + click on any blank space (outside of staff lines) and drag the cursor to create a selection box. Include at least one note or rests to create a Range selection.
Range Selection by clicking
Suitable for selections that span several pages.
- Click a note or rest that marks a starting / end time position.
- (Optional) Reposition the score using command explained in Viewing and navigation chapter.
- Shift+click another note or rest that marks the other time position.
Range Selection using the keyboard
Using the keyboard alone or primarily:
- Select the first note or rest using keyboard navigation or by clicking
- Hold Shift while using keyboard navigation to extend the selection as you navigate
The available commands include:
- Shift+Left and Shift+Right to extend the selection one chord at a time
- Shift+Ctrl+Left and Shift+Ctrl+Right to extend the selection one measure at a time (Mac: use Cmd instead of Ctrl)
- Shift+Up and Shift+Down to extend the selection one staff at a time
- Shift+Home and Shift+End to extend to the beginning or end of the system (layout concept), see Layout and formatting.
- Shift+Ctrl+Home and Shift+Ctrl+End to extend to the beginning or end of the score (Mac: use Cmd instead of Ctrl)
Special Range Selections
MuseScore includes some special commands to make command selections:
- Edit→Select all or Ctrl+A (Mac: Cmd+A) to select the entire score
- Edit→Select section to select the current section of the score, that is everything between the previous and next section break, see Breaks and spacers chapter.
Excluding elements from a Range Selection
Before executing actions on a Range Selection, it is possible to exclude elements by type. For example, leaving out the lyrics when duplicating notes, rest etc of a phrase; or deleting everything not in voice 1 in a multiple voices passage. To exclude elements of a given type:
- Open the Selection Filter with View→Selection filter or press F6 (Mac: Fn+F6);
- Remove the checkmarks next to any element types you want excluded from the selection

Note that if you exclude voice 1, you will not be able to select any measures that lack content in other voices. So be sure to restore voice 1 after performing the operation for which you are excluding voice 1. For example, if you wish to copy and paste only voice 2, make your range selection, use the Selection Filter to exclude voice 1, use Edit→Copy or Ctrl+C, then restore the checkbox next to voice 1 before attempting to select the destination to paste.
Example: Suppose you want to copy measures 1 and 2 in the following passage (see image), to give measures 3 and 4:

- Make sure the Selection Filter is displayed (see above);
- Uncheck the "Articulations & Ornaments" and "Slurs" tickboxes;
- Copy and paste the desired measures (in this example, 1-2 into 3-4).
Undo and redo
MuseScore remembers an unlimited number of undo/redo actions.
The standard shortcuts are:
| Action | Windows & Linux | Mac |
|---|---|---|
| Undo | Ctrl+Z | Cmd+Z |
| Redo | Ctrl+Shift+Z or Ctrl+Y | Cmd+Shift+Z |
Or use the toolbar buttons: 
Viewing and navigation
This chapter describes the options available in the View Menu, and in the Zoom and Page View/Continuous View menus (located in the toolbar above the score). It also details the various navigation commands and functions.
View menu
Show sidebars/panels
- Palettes: F9
- Master palette: Shift+F9 (Mac: Fn+Shift+F9)
- Inspector: F8 (Mac: Fn+F8)
- Play Panel: F11 (Mac: Fn+F11)
- Navigator
- Timeline: F12
- Mixer: F10 (Mac: Fn+F10)
- Synthesizer
- Selection filter: F6 (Mac: Fn+F6)
- Piano keyboard: P
- Score comparison tool
Zoom in/out
There are several ways to zoom the score in or out:
-
Keyboard shortcut:
- Zoom In: Ctrl++ (Mac: Cmd ++)
- Zoom Out: Ctrl +- (Mac: Cmd +-).
-
View menu:
- Zoom In: View→Zoom In
- Zoom Out: View→Zoom Out.
-
Mouse
- Zoom In: Scroll up with the mouse wheel while holding down Ctrl (Mac: Cmd)
- Zoom Out: Scroll down with the mouse wheel while holding down Ctrl (Mac: Cmd).
-
Drop-down menu: To set a specific zoom, use the dropdown menu in the standard toolbar to set the view magnification of the score (25–1600 %) or display it using the options "Page Width", "Whole Page", or "Two Pages".

You may type a custom zoom % into the dropdown field if your desired zoom level isn't available by default. -
To return to 100% zoom: Use the shortcut Ctrl+0 (Mac: Cmd+0).
Toolbars
The Toolbar area is located between the Menu bar and the document window.

It contains the following toolbars:
- File Operations: New score, Load score, Save, Print, Undo, Redo.
- Zoom/Page View.
- Playback controls: Enable MIDI, Rewind, Play/Stop, Loop, Play Repeats, Metronome.
- Concert Pitch: Displays score in written or concert (sounding) pitch.
- Image Capture: Allows you to take a snapshot of part of the score.
- Note Input: Note entry mode, Duration, Tie, Rest, Accidentals, Flip stem direction, Voice (1, 2, 3, 4).
Show/hide toolbars
To show or hide certain toolbars:
- Select View→Toolbars, and tick/untick the options as required.
- Alternatively, right-click on an empty space in the toolbar area, or the title bar of the Inspector, and, from the menu, check or uncheck the required options.
Note: This option also allows you to show or hide the Timeline, Score Comparison Tool, Script Recorder, Piano Keyboard, Selection Filter, and Drumset Tools.
Customize toolbar area
-
Select View→Toolbars, and click on "Customize Toolbars…"

The dialog shows the toolbars that can be customized on the left, the current tool buttons for the selected toolbar in the middle, and the buttons that can be added on the right. When you have selected a toolbar in the left panel, you can do any of the following actions:
- Remove a toolbutton: Select the button in the middle panel, and press →.
- Add a toolbutton: Select the button in the right panel, and press ←.
- Move a toolbutton: Select the button in the middle panel, and move it up or down using ↑ or ↓.
Note: The toolbar cannot be customized unless a custom workspace is selected (see below).
Workspaces
Select this option to create a custom workspace or to edit an existing workspace.
Show Status bar
The Status bar, at the bottom of the screen, gives information about selected score elements. Tick/untick this option to display or hide.
Split display
It is possible to split the document display so as to view two documents at once, or to view two different parts of the same document. Tabs allow you to choose which document to display in each view. You can drag the barrier separating the two scores to adjust the amount of space in the window devoted to each:
- Documents Side by Side: Divides the window vertically into two score views.
- Documents Stacked: Divides the window horizontally into two score views, one above the other.

Visibility options
This section allows you to display or hide various non-printing elements:
- Show Invisible: View/hide elements that have been made invisible for printing and export. If this option is ticked, invisible elements are shown in the score window as light gray.
- Show Unprintable: View/hide breaks and spacer symbols.
- Show Frames: View/hide the dotted outlines of frames.
- Show Page Margins: View/hide Page Margins.
Mark irregular measures
A plus sign or minus sign at the top right of a measure indicates that its duration differs from that set by the time signature.

Full screen
Full Screen mode expands MuseScore to fill your screen so more content is visible.
Page/Continuous View
You can switch between different views of the score using the drop-down list in the toolbar area:

To scroll the score:
- Vertically: Move the mouse wheel up or down.
- Horizontally: Press Shift and move the mouse wheel up or down.
Page View
In Page View, the score is formatted as it will appear when printed or exported as a PDF or image file: that is, page by page, with margins. MuseScore applies system (line) and page breaks automatically, according to the settings made in Page settings and Style…. In addition, you can apply your own system (line), page or section breaks.
To choose between horizontal or vertical page scrolling, see Preferences: Canvas (Scroll pages).
Continuous View
In Continuous View, the score is shown as one unbroken system. Even if the starting point is not in view, measure numbers, instrument names, clefs, time and key signatures will always be displayed on the left of the window.
Note: Because the layout is simpler, MuseScore may perform faster in Continuous View than Page View.
Single Page View
In Single Page View the score is shown as a single page with a header but no margins, and with an infinite page height. System (line) breaks are added automatically, according to the settings made in Page settings and Style…. In addition, you can apply your own system (line) or section breaks.
Side panels
The workspaces, Inspector and Selection filter are conveniently displayed as side panels to the left and right of the score window. To undock a side panel use one of the following methods:
- Drag the panel;
- Click on the double chevron at the top of the panel;
- Double-click in the title area at the top of the panel.
To dock a panel use one of the following procedures:
- Drag the panel to the top/bottom of an existing side panel and it will stack vertically above/below that panel.
- Drag the panel to the middle of an existing side panel and it will overlay that panel. Both panels can then be accessed by tabs.
Alternatively, double-clicking the title bar of the panel will restore it to its previously docked position.
Navigation
Commands
Various commands are available to help you navigate more easily through the score. These are listed under Keyboard shortcuts: Navigation.
Navigator
The Navigator is an optional panel which displays page thumbnails of the score at the bottom or to the right of the document window.
- To view or hide the Navigator, select View→Navigator; or use a customized shortcut.

The Navigator appears at the bottom of the document window if scrolling pages horizontally; or on the right if scrolling pages vertically (see Preferences: Canvas).
The blue box represents the area of the score that is currently visible in the document window: drag the box, or click directly on the navigator panel to bring another part of the score into view. You can also drag the scrollbar.
Timeline
The Timeline panel provides a detailed overview of the score, with expanded possibilities for navigation and interaction.
- To display the Timeline, press F12; or select View→Timeline.
For details, see Timeline.
Find / Go to
The Find / Go to function allows you to speedily navigate to a specific measure, rehearsal mark or page number in the score:
- Press Ctrl+F (Mac: Cmd+F), or select Edit→Find. This opens the Find (or Go to) bar at the bottom of the workspace.
-
Use one of the following options:
- To go to a numbered measure: enter the measure number (counting every measure, starting with 1, irrespective of pickup measures, section breaks or manual changes to measure number offsets).
- To go to a numbered page: enter the page number using the format pXX (where XX is the page number).
- To go to a numerical rehearsal mark: enter the number using the format rXX (where XX is the name of the rehearsal mark).
- To go to a rehearsal mark starting with a letter: enter the name of the rehearsal mark (the search is case insensitive).
N.B.: It is best to avoid naming rehearsal marks with the single letters "R", "r", "P", "p", or one of these letters with an integer (e.g. "R1" or "p3"), as this can confuse the search algorithm.
Note: The "Pan score automatically" toolbar button must be enabled for the Find command to be able to reposition the score view to the correct location.
See also
Concert pitch
You can choose to display the score in either written or concert (sounding) pitch. Written pitch displays the score as it should look when printed for musicians to read. However, during preparation you may prefer the convenience of seeing the transposing instruments notated as they sound, without transposition. In this case you should select the "Concert pitch" option.
To toggle the score display between written or concert pitch:
- Press the Concert Pitch button (located in the top right of the toolbar area). When this button is highlighted the score is in concert pitch.
Before printing the score, exporting it to PDF or saving it online, you should ensure that the Concert Pitch button is off, and that the individual parts are correctly transposed.
See also
External links
- Concert pitch (Wikipedia article)
- Transposing Instrument (Wikipedia article)
- Concert pitch or not? (MuseScore forum discussion)
Copy and paste
The cut, copy, and paste commands can be used to reproduce entire passages of music, to move music earlier or later, to copy text or other markings between staves, to exchange the content in different measures, and more.
Accessing the commands
In all cases, the first step is to create a selection of element(s), see Selecting elements chapter.
As with other programs that support cut, copy, and paste, you can access these commands from the Edit menu, from a context menu that appears upon right-click or related gesture (e.g., Ctrl+click, or two-finger tap), or via the standard keyboard shortcuts.
| Command | Shortcut (Windows) | Shortcut (Mac) | Context menu | Main menu |
|---|---|---|---|---|
| Cut | Ctrl+X | Cmd+X | Cut | Edit→Cut |
| Copy | Ctrl+C | Cmd+C | Copy | Edit→Copy |
| Paste | Ctrl+V | Cmd+V | Paste | Edit→Paste |
| Swap with clipboard | Ctrl+Shift+X | Cmd+Shift+X | Swap with Clipboard | Edit→Swap with clipboard |
| Paste half duration | Ctrl+Shift+Q | Cmd+Shift+Q | N/A | Edit→Paste half duration |
| Paste double duration | Ctrl+Shift+W | Cmd+Shift+W | N/A | Edit→Paste double duration |
Note: (1) When using the context menu, take care to always right-click on a selected item; if you right-click on an empty space by mistake your selection will be lost! (2) Paste half/double duration requires Musescore 3.1 version or later.
Copying a Range Selection
As explained in the Selecting Elements chapter, in a Range selection, Musescore automatically selects useful elements between given beginning and ending time positions across a given set of staves. These elements includes all of the notes, rests, Musescore Texts such as dynamics symbols, Musescore Lines such as pedal etc. System-wide elements such as Tempo, Time signatures, Repeats, Layout breaks are not included in the automatic selection, thus are not copied.
Upon pasting onto a destination time position, the copied music replaces all of its existing content, except for its original measure rhythm structure and system-wide elements.
- Create a Range Selection.
- (Optional) Use the Selection Filter to exclude other elements of a given type.
- Use the Copy command from the menu or press Ctrl+C (Mac: Cmd+C)
- Select the first note or rest of the destination
- Use the Paste command from the menu or press Ctrl+V (Mac: Cmd+V)
Copying a single element or a List Selection
(Copying a List Selection requires Musescore 3.5 version or later)
MuseScore also allows copying a single element, or a List Selection of multiple lyrics, chord symbols, dynamics, articulation, or other markings from one place to another, while keeping the content such as notes in the destination intact.
If a single note selected by notehead, upon copying only the pitch is copyed into the destination note. To copy and paste everything, including duration etc, create a Range Selection of the note first, see Selecting Elements chapter. Pitch only feature is removed in Musescore 4.
Multiple notes List Selection cannot be copied.
MuseScore preserves the relative time positions of the markings based on literal note value distance if possible, measure rhythm is not taken into account. This includes case of copying chord symbols and dynamics. Valid note or rest anchors are required at the destination music when pasting lyrics and articulations.
- Select a single element (except Measure), or create a List Selection , see Selecting Elements chapter.
- Use the Copy command from the menu or press Ctrl+C (Mac: Cmd+C)
- Select the first note or rest of the destination
- Use the Paste command from the menu or press Ctrl+V (Mac: Cmd+V)
Moving elements
Cut and paste commands can be used to
- move a passage to another staff, such as music on flute to clarinet, or
- shift a passage earlier or later. This method is especially useful as a way to insert or delete a note or rest and also shifts existing notes and rests to create or trim silence.
Measures (their rhythmic structure) cannot be moved, but see Measure operations and Time signatures chapters. When moving List Selection, its elements' relative positions are preserved if possible, see "Copying a List Selection" section.
To move a selection:
- Select what you want to move
- Use the Cut command from the menu or press Ctrl+X (Mac: Cmd+X)
- Select the first note or rest of the destination
- Use the Paste command from the menu or press Ctrl+V (Mac: Cmd+V)
Swapping a selection with the clipboard
The swap with clipboard command combines two operations into one: (1) First it overwrites a selected part of the score with the contents of the clipboard, just like the paste command; (2) Second, it transfers the overwritten part of the score back to the clipboard, just like the copy command.
It can be used, for example, to swap two equal-length sections of a score, A and B:
- Select section A
- Apply the cut command
- Select section B
- Apply the swap with clipboard command to paste A over the contents of B while moving the contents of B to the clipboard
- Select section A again (or just the first note, rest, or measure)
- Apply the paste command
Like the other commands discussed here, you can access the swap with clipboard command from the menu or via a keyboard shortcut—in this case, it is Ctrl+Shift+X (Mac: Cmd+Shift+X).
Repeating a selection
A common use for copy and paste is to duplicate a given passage (including notes, chords etc) immediately after the original. Use the special repeat selection command to simplify this process.
- Select a single element on the score, or create a Range Selection, see Selecting Elements chapter.
- Press R
This does not work on List Selection. It works on a single chord, either on a Range Selection of it, and when exactly one note of that chord is selected. See Selecting Elements chapter. In note input mode, this command repeats the entire chord that contains the current note. This is useful for creating a series of repeated chords.
Copying a Range Selection to multiple staves
If you wish to copy a passage to multiple staves—for instance, to double music of flute with oboes and clarinets&mdash:
- Select the passage you wish to copy
- Extend the selection to include the staves below (e.g., by pressing Shift+↓)
- Use Tools→Explode
This copies the original selection, assuming it contains only single notes—no chords and no multiple voices. If there are chords or multiple voices, then these are distributed among the remaining staves. For more on Explode command, see Tools chapter.
Paste half/double duration
Requires Musescore 3.1 version or later.
If you have entered a passage using mostly eighth notes but wish to halve the entire passage to using mostly sixteenth notes, or double it to quarter notes, MuseScore provides a pair of special commands to accomplish this. You can either modify the durations of a selection in place or create a separate copy of the passage with the modified durations. To halve or double the duration of a passage:
- Create a Range Selection
- Use the copy command
- If you wish to create a separate copy of the passage with the modified durations, select the destination
- Use the paste half duration or paste double duration command Ctrl+Shift+Q/W ( Cmd+Shift+Q/W)
Duplicating individual elements
Individual elements—even those that are not selected automatically in a Range Selection, like time signatures or voltas—can be selected and then duplicated using a mouse.
- While pressing Ctrl+Shift (Mac: Cmd+Shift), and click and hold on an element
- Drag it anywhere in the score
- When you release the mouse button, the selected element is copied to the new location
See also
- To change notes without altering the rhythm, use Note input mode, select Re-pitch mode, then use copy and paste commands. See Note input modes chapter.
Open/Save/Export/Print
Native format compatibility

MuseScore native format (*.mscz and *.mscx) are backward compatible: MuseScore 4 opens MuseScore 3's *.mscz without error.
MuseScore native format has never been forward compatible, see forum discussion. Although partial data retrieval is still possible as of MuseScore 4.0.2, you should not rely on it for score data integrity. Some features present in MuseScore 3 have not (yet) been included in MuseScore 4, and internal data conversion occurs when you open a older version file with a newer version program and then overwrite the file using the save function.
Some users find it useful to keep all data intact by creating seperate folders to store score files designated for editing on different Musescore versions, it is recommended to duplicate files before opening them as required.
File menu
In the File menu you can find options for opening, saving, exporting and printing your file:

Open
Apart from native format files (*.mscz and *.mscx), MuseScore can also open MusicXML, compressed MusicXML and MIDI files, as well as a variety of files in other formats.
To open any supported file:
- Choose one of the following options:
- Press Ctrl+O.
- Click on the "Load score" icon on the left side of the toolbar area.
- From the menu bar, select File→Open....
- Select a file and click Open; or simply double-click a file.
Open recent allows you to choose from a list of recently-opened scores.
Save
Save, Save As…, Save a Copy… and Save Selection… allow you to save native MuseScore files (.mscz and .mscx).
- Save: Save current score to file.
- Save As...: Save current score to new file.
- Save a Copy...: Save current score to new file, but continue to edit original file.
- Save Selection...: Save selected measures to new file.
- Save Online...: To save and share your scores on the web at MuseScore.com. For details, see Share scores online.
Export
Export... allows you to create non-MuseScore files, such as PDF, MusicXML, MIDI, and various audio and image formats. In the Export dialog, you can choose which format to export to.
- Export...: Export current score to format of your choice.

Here you can also select whether to export parts and which
MuseScore remembers which format you picked the last time and makes that the default for the next time.
Print... allows to print your MuseScore file directly to a printer from MuseScore. Depending on your printer you will have different options, but generally you can define the page range, number of copies and collation.
If you have a PDF printer installed, you could also "export" to PDF using Print, but it's usually better to use the native PDF option under Export for more accurate rendition. Note: For this to work properly with Adobe PDF, make sure to uncheck "Rely on system fonts only, do not use document fonts" in Printer properties.
See also
Share scores online
Musescore.com allows you to:
- View and listen to scores from a large repository created by the MuseScore community.
- Download any score in a variety of formats—MuseScore, MusicXML, PDF, MIDI, MP3.
- Upload your own scores: control whether to share them publicly or privately (via a secret link).
- Synchronize your score with a YouTube video ("Videoscores").
Note: A MuseScore Pro account is required for all scores not marked as PD (Public Domain) or "Original" work, the latter must also have the approval of the score owner.
Create an account
- Visit MuseScore.com and click on "Create new account". Pick a username and enter a valid email and press "Create New Account".
- Wait a few minutes for an email from MuseScore.com support. If no email arrives, check your spam folder.
- Click the link in the email and visit your user profile to change your password.
Share a score directly from MuseScore
To save a score online:
- Make sure that the Concert Pitch button is off, and that the individual parts are correctly transposed.
-
From the menu, select File→Save Online.... The "Log in to MuseScore" dialog will appear:

-
Enter your email address or MuseScore username, and password, then click OK. Note: If you don't have a MuseScore account yet, create one first by clicking on the "Create an account" link. That will open your browser app and bring you to musescore.com/user/register.
-
Upon successfully logging in and if the score already exists online, it will be updated automatically. Uncheck Update the existing score to save online as a new score.

-
If you are using a different SoundFont than the default one and if you are able to export MP3 files (may not be the case on some Linux versions), a checkbox Upload score audio will be visible:

If the checkbox is checked, MuseScore will render the audio of the score using the current synthesizer settings and upload the audio to MuseScore.com. -
Now you'll be able to enter your score information.

- Make the score private: If selected, the score can only be viewed via a private link. If set to public, the score is visible to all.
- Ensemble type: A list of possible values
- Genre: A list of possible values
- Title: The title of the score.
- Description: The descriptive text that will appear next to it.
- Copyright and download settings: Choose an appropriate copyright license from the drop-down list.
Note: Creative Commons license, allows people to use your scores under certain restrictions.
Here you also can restrict the ability of others to download your score (requires a Pro membership on MuseScore.com).
Upload a score on MuseScore.com
You can also upload a score on MuseScore.com directly:
- Click the Upload link on MuseScore.com.
- You have the same options as with the Save Online menu, except for uploading score audio.
Edit a score on MuseScore.com
If you want to make changes to one of your scores on MuseScore.com, edit the MuseScore file on your own computer, save it, and then do the following:
- If you originally shared the score directly from within MuseScore, simply go to File→Save Online... again to update the online score.
- If you originally uploaded the score via the Upload page on MuseScore.com, then you must follow these steps to update the online score:
- Go to the score page on MuseScore.com.
- Click the three dots menu ⋮ on the right and choose "Update this score".
- In the form, you can upload a replacement score file as well as change the accompanying information and privacy settings.
Switch to the direct method of updating an online score
It is much more convenient to update online scores from directly within MuseScore than by updating the score manually from the score page. Follow these steps if you originally uploaded the score via the Upload page and now want to switch to the direct method:
- Go to the score page on MuseScore.com and copy the URL.
- Open the score file on your computer with MuseScore.
- From the menu, select File→Score Properties... and paste the URL into the "Source" field.
Now whenever you want to update the online score simply go to File→Save Online....
Note: The URL should be follow the format of https://musescore.com/XXXXXXXX/scores/XXXXXXXX and should not contain 'Nice Link's.
External links
Notation
This page is an administration page intended for the editing community only. Click this link to go to the handbook front page intended for public viewing.
Barlines
A range of barline symbols for most ordinary purposes can be found in the Barlines palette (Basic workspace); repeat barlines, only, are also available in the Repeats & Jumps palette (Basic and Advanced). Additional symbols can be found in the Barlines palette of the Advanced workspace. It is also possible to create your own custom barlines (see below).

Change barline type
To change an existing barline, use one of the following:
- Select a barline, or measure, in the score, then click an icon in the Barlines palette (double-click in versions prior to 3.4).
- Drag an icon from the Barlines palette onto a barline, or measure, in the score.
- Select an existing barline in the score, then adjust "Style" in the "Barline" section of the Inspector.
To change a non-single to a single barline:
- Select the barline and press Del.
To hide a barline:
- Select the line and press V, or uncheck Visible in the Inspector.
Insert barline
To insert a new barline between existing ones, either:
- Drag an icon from the Barlines palette onto a note or rest.
- Select a note or rest, then click an icon in the Barlines palette (double-click in versions prior to 3.4).
Split a measure
You can insert a barline in order split a measure into two separate ones. Use one of the following methods:
- Press Ctrl (Mac Cmd) and drag the line from the Barline palette to the first note of the new measure.
- Select the first note of the new measure and press Ctrl (Mac Cmd) while you click a barline in the Barline palette (double-click in versions prior to 3.4).
- If the first two methods cause crashes in Musescore 3.6.2 on Windows, select the first note of the new measure and press Alt while you double-click a barline in the Barline.
Note: As of version 3.1 (or earlier), all barlines entered this way are entered as Normal Barlines. See also Split a measure.
Custom barlines
It is possible to create custom barlines by selecting one or more barlines, and adjusting the properties in the "Barlines" section of the Inspector:
- Style: Choose from a range of preset barlines.
- Span to next staff: joins the selected barline to the barline in the staff below.
- Span from: Sets the position of the top of the barline. "0" is the top staff line. Positive numbers start lower down the staff, negative numbers above.
- Span to: Sets the position of the bottom of the barline (see "Span from").
- Span presets: Use the buttons to apply preset customized barlines.
See also Mensurstrich.
Changes to color and horizontal/vertical offset can also be made in the Inspector.
Connect barlines
Barlines may extend over multiple staves, as in the grand staff of a piano, or in an orchestral score to join instruments in the same section. To join barlines:
-
Enter Edit mode on a barline.

-
Click on the lower blue handle and drag it down to the staff you wish to connect to. The handle snaps into position so there is no need to position it exactly.
-
Press Esc to exit edit mode. This will update all other relevant barlines as well.

Vertical alignment
Vertical alignment is absent because barlines are layout automatically according to content. A workaround for vertical alignment is to insert invisible short rests of same length at another voice, or Anchors for Dynamics and Hairpins plugin to automate the process.
See also
- Measure operations (Measure Properties dialog)
- Measure (Layout and formatting style)
- Repeats and jumps for information on repeat barlines
- Add fermata to barline
Clefs
Commonly used Clefs (Treble, Bass, Alto, Tenor) can be found in the Clefs palette in the Basic workspace. For a more complete range, see the Clefs palette in the Advanced workspace (see image below).
")
Add a clef
Add/change clef at the beginning of a measure
- Select a measure or an existing clef and click a clef symbol in the palette (double-click in versions prior to 3.4).
- Drag a clef from the palette onto a measure or an existing clef.
Add/change a mid-measure clef
- Select a note or rest, then click a clef in the palette (double-click in versions prior to 3.4).
- Drag a clef from the palette onto a note or rest
- If a mid-measure clef is already present you can also:
- Select the clef and click a clef in the palette (double-click in versions prior to 3.4).
- Drag a new clef from the palette onto the clef.
Note: "Mid-staff" clefs are always smaller than the main system clef.
Example: In the following image, the top staff starts with a treble clef and switches immediately to bass clef, then after a note and a rest, changes back to treble clef.

Note: Changing a clef does not change the pitch of any note. Instead, the notes move to preserve pitch. If you want, you can use Transposition in conjunction with a clef change.
Remove a clef
- Select a clef and press Del.
Courtesy clefs
When a clef change occurs at the beginning of a system, a courtesy clef will be generated at the end of the previous system.
To show or hide all courtesy clefs:
- From the menu, select Format→Style...→Page;
- Check/uncheck "Create courtesy clefs."
It is also possible to show/hide courtesy clefs on a case-by-case basis:
- "Create courtesy clefs" should already be ticked in the "General" menu (see above);
- Select a clef and tick/untick "Show courtesy" in the Inspector.
Hide clefs
Display clef only in the first measure (for all staves)
- From the menu, select Format→Style...→ Page;
- Uncheck "Create clef for all systems."
Display clef only in the first measure (for a particular staff)
- Right-click on the staff (Mac: Ctrl-click) , select Staff properties... and uncheck "Show clef;"
- Open the master palette and select the "Symbols" section;
- Drag and drop a clef from the master palette onto the first measure of the staff; OR select the first note and click a clef in the master palette (double-click in versions prior to 3.4).
Note: This option may be useful to TAB users who do not want the clef to repeat on every subsequent line.
Hide all clefs in a particular staff
- Right-click on the staff (Mac: Ctrl-click) , and select Staff properties...;
- Uncheck "Show clef."
Key signatures
Standard key signatures are available in the Key Signatures palette in the Basic or Advanced workspaces. It is also possible to create custom key signatures (below).
")
Note that key signatures are always defined relative to concert pitch. If you are adding a key signature to a staff for a transposing instrument you should add the relevant concert pitch key signature. The correctly transposed key signature will show on the staff (unless you are viewing in concert pitch mode).
Add a new key signature
Add new key signature to all staves
Use any of the following methods:
- Select a measure and click a key signature in the palette (double-click in versions prior to 3.4).
- Select a note or rest and click a key signature in a palette (double-click in versions prior to 3.4).
- Drag a key signature from the palette onto an empty part of a measure or a note or rest.
Add new key signature to one staff only
If you wish to change the key signature of only one staff line, leaving others unchanged:
- Press Ctrl (Mac: Cmd) and hold while you drag a key signature from a palette onto a measure.
Replace an existing key signature
Replace key signature for all staves
Use any of the following methods:
- Select the key signature to be replaced, and click a new key signature in a palette (double-click in versions prior to 3.4).
- Drag a key signature from the palette onto the key signature to be replaced (or onto the measure containing the key signature).
Replace key signature for one staff only
If you wish to replace the key signature of only one staff, leaving others unchanged:
- Press Ctrl (Mac: Cmd) and hold while you drag a key signature from a palette onto the key signature to be replaced (or onto the measure containing the key signature).
Remove a key signature
Use any of the following methods:
- Click on an existing key signature and press Del.
- Drag the empty key signature ("open/atonal") from the palette (in the advanced workspace) onto the measure.
Naturals on key signature changes
By default, MuseScore only shows cancelling naturals when the key signature changes to that of C Major/A minor (no sharps or flats). In all other cases, it simply shows the new key signature without cancellations:

However, you can opt to display cancelling naturals for all key signature changes:
-
From the menu, select Format → Style... → Accidentals. You'll see the options:

-
Select one of the three options.
- If you are in a part and want the new option to apply to all parts, click on Apply to all parts.
- Click OK to exit.
For example, selecting the option "Before key signature if changing to fewer ♯ or ♭" gives:

And the option "After key signature if changing to fewer ♯ or ♭. Before if changing between ♯ and ♭" gives:

Key signature changes and multimeasure rests
Multimeasure rests are interrupted if there is change of key signature:

Courtesy key signatures
To turn off the display of a particular courtesy key signature:
- Select the relevant key signature and untick "Show courtesy" in the "Key Signature" section of the Inspector.
To turn off the display of all courtesy key signatures:
- From the menu, select Format → Style... → Page, and untick "Create courtesy key signatures."
Note: Courtesy key signatures are not displayed at section breaks.
Custom key signatures
To create a custom key signature:
-
Press Shift+K to display the Key signatures section of the Master palette.

-
In the Create Key signature panel, drag accidentals from the palette onto the staff above to create the desired key signature. Note: The treble clef is only decorative—custom key signatures for any type of staff can be created here.
- Use the Clear button, if required, to remove all accidentals from the "staff."
- To move the new key signature into the library (center panel), press Add. To delete a key signature from the library, right-click it (Mac: Ctrl-click) and, in the drop-down menu, select Delete.
Note: A limitation of custom key signatures is that they cannot be transposed in the usual way. If a transposition is needed, or where there is a clef change, you will need to create a new custom key signature.
To move a key signature from the Master palette to a custom palette:
- Drag and drop the key signature onto a palette.
To apply a key signature to the score directly from the Master palette, use one of the following methods:
- Select a measure and click a key signature in the Master palette (double-click in versions prior to 3.4).
- Drag a key signature from the Master palette onto a measure; alternatively, to apply to one staff only, hold Ctrl (Mac: Cmd) while dragging.
External links
- How to change enharmonic key signatures for transposing instruments (MuseScore HowTo, video)
Accidentals
An accidental is a sign appearing in front of a note that raises or lowers its pitch. Musescore creates playback for common accidentals only, they includes 7 accidentals: b (flat), ♮ (natural), # (sharp), x (double sharp), bb (double flat), #x (triple sharp), bbb (triple flat). To create microtonal accidentals such as quarter tone, see Tuning systems, microtonal notation system, and playback Chapter.
Accidentals affect all notes on the same staff position only for the remainder of the measure in which they occur, but they can be canceled by another accidental. In notes tied across a barline, the accidental continues across the barline to the tied note, but not to later untied notes on the same staff position in that measure.
")
Add or remove an accidental and brackets
Accidentals are automatically added, replaced or removed when note's pitch changes:
- Change note pitch:
- ↑: Increase the pitch of a note by one semitone (favors sharps).
- ↓: Decrease the pitch of a note by one semitone (favors flats)
- And then change the enharmonic spelling
To add directly either (i) a bb double flat or x double sharp, (ii) a courtesy (also known as cautionary or reminder) accidental, or (iii) a non-standard accidental, use one of the following options:
- Select a note and click on an accidental in the Toolbar above the score, or
- Use the Accidentals Palettes, either
- Select a note and click an accidental (double-click in versions prior to 3.4), or
- Drag an accidental on to a note; or
-
Add from Accidentals category of the Master palette using the select and click or drag and drop method. Do not add from Symbols category, they are non-functional visual symbols, see Notation types.

In the above diagram, the second accidental is added from Symbols category of the Master palette, it does not use automatic layout and the note pitch does not change (C instead of C#).
To add brackets (only available for courtesy/cautionary/reminder accidental), use one of the following:
- Select the accidental in the score and click the parentheses symbol in the Accidentals palette (double-click in versions prior to 3.4), or
- Drag the parentheses symbol from the palette onto the accidental, or
- Select the accidental and choose from the Bracket type dropdown in the Inspector.
Delete an accidental directly by selecting it and pressing Del, note pitch corrects automatically.
Change enharmonic spelling
To change the enharmonic spelling of a note, or notes, in both written and concert pitch views:
- Select a note, or group of notes;
- Press J;
- Continue pressing J to cycle through the enharmonic equivalents.
To change the enharmonic spelling in the written pitch view, without affecting the concert pitch view, or vice versa:
- Select a note, or group of notes;
- Press Ctrl+J (Mac: Cmd+J);
- Continue pressing the same combination of keys to cycle through the enharmonic equivalents.
Note: If the pitches of selected notes are not all the same, the effect may be unpredictable.
Respell pitches
- From the menu, select Tools→Respell Pitches.
See also
External links
- Accidental at Wikipedia
- Enharmonic at Wikipedia
Time signatures
Time signatures can be found in a Palette of the same name in both the Basic and Advanced workspaces.

Note: Whether or not a time signature is actually shown depends on the staff properties, by default it is not shown for tablature.
Add or replace a time signature
Use any of the following methods:
- Select a time signature, measure, note or rest, and click a time signature in a palette (double-click in versions prior to 3.4).
- Drag and drop a time signature from a palette onto a space in a measure, or onto an existing time signature.
Delete a time signature
- To delete a time signature in the score, select it and press Del.
Create a time signature
If the time signature you require is not available in any of the existing palettes, it can be created using one of the following methods:
From the Time Signatures palette
Available as of version 3.3.
- In the Time Signatures palette, click on "More", then, in the supplementary palette, click on the "Create Time Signature" button;
- In the top line, enter the Numerator, Denominator, and Text (the latter is optional where you need the display to be different from the actual time signature).
- Adjust the note beaming in the Note Groups section.
- Press the "Add" button to transfer the newly-created time signature to the Time Signatures palette.
From the Master palette
- Press Shift+T to display the Time signatures section of the Master Palette;
- Select a time signature to edit in the center panel;
- In the top line of the Create Time Signature panel, enter the Numerator, Denominator, and Text (the latter is optional where you need the display to be different from the actual time signature).
- Adjust the note beaming in the "Note group" section".
- Press Add to add the newly-created time signature to the center panel. To delete a time signature from the center panel, right-click (Mac: Ctrl-click) on it and select Clear.
- Drag and drop the time signature from the Master Palette to the Time Signatures palette. You can also drag the time signature direct to the score, if desired.
Fractional time signatures
Starting in version 3.5.1 there is limited support for fractional time signatures. Only ½ and ¼ are supported at this time. If your keyboard does not have the characters on them you can enter them using Alt+0189 for ½ and Alt+0188 for ¼ on some operating systems. You can also copy/paste from here.
Time signature properties
To edit properties of particular time signature object(s) on a score, use the Time Signature Properties dialog. Do either one of the following:
- Select the time signature, then click on "Properties" in the "Time Signature" section of the Inspector, or
- Right-click (Mac: Ctrl-click) on a time signature and select Time Signature Properties….

- Global value: Shows the data used by Musescore to create metronome tick audio, see Tempo chapter. Not modifiable. It is also shown in the status bar.
- Actual value: Shows the data used by Musescore to create local time signature, see "Local time signatures" section. Not modifiable.
- Appearance: Specify a displayed text for engraving purpose, it does not affect the score. See "Additive meters" section.
- Note Groups: Controls beaming of notes. See Beams chapter.
Additive (composite) meters
Additive (or composite) time signatures are sometimes used to clarify the division of beats within a measure. To use an additive time signature:
- Create a new custom time signature, see above, or
- Modify an existing time signature on the score:
- Right-click (Mac: Ctrl-click) on a time signature in the score and select Time Signature properties…;
- In the Appearance section, adjust the "Text" property as required;
- Adjust note beaming in the Note Groups section if required.
Local time signatures
In certain cases a score may show staves with different time signatures running at the same time. For example, in Bach's 26. Goldberg Variation:

In the above example, the global time signature is 3/4, but the time signature of the upper staff has been set independently to 18/16.
To set a local time signature for just one staff:
- Hold down Ctrl (Mac: Cmd) and drag and drop a time signature from a palette onto an empty measure.
Resize time signature
- Select one or more time signatures and, in the "Time Signature" section of the Inspector, adjust the "Scale X" (width) and "Scale Y" (height) values.
Pickup measures and cadenzas
Occasionally you will need to decrease or increase the duration of a measure without changing the time signature—for example, in a pickup measure (anacrusis) or in a cadenza etc. See Measure operations: Measure duration.
Time signature changes and breaks
Multimeasure rests are interrupted when a time signature change occurs. Also, a section break will prevent a courtesy time signature being shown at the end of the previous measure.
See also
External links
- How To Using Polyrhythm, mixed meters and local time signatures in MuseScore (MuseScore HowTo)
- Additive meters at Wikipedia.
Arpeggios and glissandi
Arpeggio, strum arrow, glissando (slide), portamento (glide), brass or wind instrument articulation (Fall, Doit, Plop and Scoop) and guitar slide in or slide out symbols are usually added from the "Arpeggios & Glissandi" palette.

Add symbol
To add to the score, use one of the following methods:
- Select one or more notes, then click a symbol in a palette (double-click in versions prior to 3.4).
- Drag a symbol from a palette onto a note.
Adjust dimensions
To adjust the length and height of a symbol:
- Enter Edit mode for the symbol, and adjust the handles using keyboard shortcuts.
Change appearance and playback
After selecting a symbol, various useful properties can be adjusted in the "Glissando" or "Arpeggio" section of the Inspector.
Inspector:Glissando section
- Type: Choose between a straight or wavy line;
- Show text: Tick this box if you want the symbol to display text. Then set the wording, font-face, font-size and font-style underneath. Note: If there isn't enough room between notes, the text is not displayed;
- Play: Check/uncheck the box to turn playback on or off.
- Play style: Choose how the glissando plays back. There are five options: Chromatic, White keys, Black keys, Diatonic, Portamento (this option creates a portamento between two notes, see portamento);
Inspector:Arpeggio section
- Stretch: Increase this to lengthen the duration of the arpeggio.
- Play: Untick if you don't want the symbol to affect playback.
If needed for future use, you can save the result in a custom palette.
Arpeggios and strum arrows
When an arpeggio or strum arrow is added to the score, it initially spans only one voice. To change the height, see Adjust dimensions (above). Playback of the symbol can be turned on or off in the Inspector.
Adjust vertical range of an arpeggio
Add the arpeggio to the top staff, select it and use Shift+↓ to extend it downwards to the next stave without it affecting distance between those staves.

Note: For this to work the notes in the 2 staves need to be in the same voice. And it won't affect playback.
Portamento
To add a slide or "portamento" between two notes, add a glissando symbol and change its appearance and playback.
To add a slide or portamento before or after a note before a note (a string instrument or guitar technique), add either one of the four wind instrument articulation symbols (Fall, Doit, Plop and Scoop) or a slide in/slide out. Alternative wavy symbols are found in the Symbols category in Master palette window. All of these do not affect playback, but you can mimic to an extent with a hidden Bends (found in Articulations Palette).
To control piano and vocal portamento playback, try Articulations and ornaments and Piano Roll Editor.
Glissandi or "portamento" between two notes
A Glissando or slide may be wavy or straight, and be with or without text. E.g.:


Adjust start and end points
To move an end handle vertically or horizontally, from one note to the next:
- Enter edit mode on the symbol;
- Click on the start or end handle:
- Use Shift+↑↓ to move the handle up or down, from note to note.
- Use Shift+←→ moves the handle horizontally, from note to note.
This method change length and anchors together.
Simultaneous glissandi between chords and Cross-staff glissando
Use adjustment method (repeatedly) to create one.
Brass or wind instrument articulations
Fall, Doit, Plop and Scoop symbols are provided. To change the length and curvature, select the symbol, enter edit mode and adjust the handles as described in Slurs: method 1. Do not affect playback.
Slide in/out
Slide in and Slide out lines for guitar. To edit the length and angle of a line, double-click on it and drag the handle (or use the Inspector or keyboard arrows for finer adjustment). Do not affect playback.
External links
Articulations and ornaments
A comprehensive set of symbols can be found in the Articulations palette in the Advanced workspace:

and the Ornaments palette (Advanced workspace):

There is also an abbreviated version of Articulations palette in the Basic workspace.

To add verbal articulation objects available in the Text palette (pizz. , arco etc) to a score, see Staff Text and System Text chapter. Guitar bend is covered in Bends chapter. Brass or woodwind articulation (Fall, Doit, Plop, Scoop) is covered in Arpeggios and glissandi.
Articulations
Articulations are the symbols added to the score to show how a note or chord is to be played. The principal symbols in this group are:
- Fermatas
- Accents (>)
- Staccato and variations—including mezzo-staccato (portato), staccatissimo.
- Tenuto
- Marcato (^)
Specialist articulations are also included for bowed and plucked strings, wind instruments etc.
Ornaments
Ornaments include:
- Mordents, Inverted Mordents, Pralltrills
- Trills
- Turns
- Bends
Note: Appoggiaturas and acciaccaturas can be found in the Grace Notes palette.
Add articulation/ornament
Use either of the following methods:
- Select a note or a range of notes, then click a symbol in a palette (double-click in versions prior to 3.4).
- Drag a symbol from a palette onto a notehead.
Add accidental to an ornament
To apply an accidental to an existing ornament, such as a trill:
- Select the note to which the ornament is attached;
- Open the Symbols section of the Master palette;
- Search for and apply the desired accidental to the score (small accidentals can be found using the search term "figured bass");
- Drag the accidental into position (or reposition using keyboard shortcuts or the Inspector).
Add fermata to a barline
Use one of the following methods:
- Select a barline, then click a fermata symbol in a palette (double-click in versions prior to 3.4).
- Drag a fermata symbol from a palette onto a barline in the score.
Note: This does not affect playback.
Keyboard shortcuts
- Toggle Staccato: Shift+S
- Toggle Tenuto(─): Shift+N
- Toggle Accent(>): Shift+V
- Toggle Marcato(^): Shift+O
- Add Acciaccatura (grace note): /
Keyboard shortcuts can be customized in MuseScore's Preferences.
Adjust position
Immediately after adding an articulation or ornament from a palette, the symbol is automatically selected: It can then be moved up or down from the keyboard as follows:
- Press up/down arrow keys for fine positioning (0.1 sp at a time);
- Press Ctrl+↑ or Ctrl+↓ (Mac: Cmd+↑ or Cmd+↓) for larger vertical adjustments (1 sp at a time).
- To flip a symbol to the other side of the note (where applicable), select it and press X.
To enable adjustments in all directions from the keyboard:
- Enter Edit mode on the symbol;
- Press arrow keys for fine positioning (0.1 sp at a time); or press Ctrl+Arrow (Mac: Cmd+Arrow) for larger adjustments (1 sp at a time).
You can also change the horizontal and vertical offset values in the Inspector. To position more than one symbol at a time, select the desired symbols and adjust the offset values in the Inspector.
Note: The symbol can also be repositioned by clicking and dragging, but for more precise control, use the methods above.
Articulation and ornament properties
Fermata is covered in Tempo chapter.
Edit selected object(s)' properties on a score with the Inspector. Under the Articulation heading:
- Placement: Above or below the staff.
- Direction: Auto / Up / Down.
- Anchor: Adjust the vertical placement of the symbol.
- Time stretch: Obsolete. Use Fermatas section of Inspector instead
- Ornament style: Default or Baroque.
- Play: Turn playback on or off.
Edit global style settings in Format→Style→Articulations, Ornaments, see Layout and formatting chapter.
Playback
Playback of note affected by articulation symbols varies among instruments, the general effect:
- Staccato : shorter
- Tenuto(─): longer (no effect on Strings eg violins)
- Marcato (^) : louder and shorter
- Accent (>) : louder (louder than using a Marcato) and longer (no duration extension effect on Strings eg violins)
To find out the effect of each instrument, save your score as .mscx, open it as plaintext, find <Articulation> and its <velocity> and <gateTime> values. see <Articulation name="sforzato"> for accent (>) symbol
To achieve your desired playback, either:
- inside Musescore: add multiple symbols, toggle their Play and Visible properties. You can also set the note itself's Velocity and Velocity type properties, or
- edit per instrument settings in your saved file: save your score as .mscx, open it as plaintext and edit the instrument articulation definitions. These modifications do not affect new instruments added later, or
- edit default settings in instrument.xml affecting new instruments.
See this battle between jazz and classical musicians on the forum for more details.
See also
- Grace notes
- Fermatas in Tempo
- Dynamics (sfz symbol)
External links
- How to create trills and ornaments with accidentals (and playback) (MuseScore HowTo)
- Ornaments at Wikipedia
Bends
Bends, of various kinds, can be created with the Bend Tool  . You can find this in the Articulations palette of the Advanced workspace. Any bend applied to the score can be customized in the Bend section of the Inspector.
Apply a bend
To apply one or more bends to the score, use one of the following options:
- Select one or more notes and double-click a bend symbol in the palette.
- Drag a bend symbol from the palette on to a note.
Edit bend
Text and line properties
- Select the bend.
- Adjust the following properties in the Bend section of the Inspector:
- Line thickness.
- Font, Size, Style: Properties of the text.
- Play (checkbox): Whether the bend affects playback or not.
Global text and line properties for all bends in the score can be edited in Format→Style...→Bend.
Bend shape and width
Versions 3.4 and above:
- Make sure that the bend is selected.
- In the "Bend" section of the Inspector use the Bend type dropdown to choose from a range of presets. "Bend" is the default option.
- Make adjustments, as required, to the graphical display of the bend in the Inspector: see Edit graphical display (below).
Versions prior to 3.4:
- Select the bend and click on Properties in the Inspector; Alternatively, right-click on the bend and select "Bend Properties".

- Choose from a range of presets under Bend type. "Bend" is the default option.
- Make adjustments, as required, to the graphical display of the bend: see Edit graphical display (below).
Edit graphical display
The bend is represented by a graph consisting of gray lines connected by square, blue nodes (see image above). The slope of the line indicates the type of bend:
- Up-slope = Up-bend
- Down-slope = Down-bend
- Horizontal line = Hold
The vertical axis of the graph represents the amount by which the pitch is bent up or down: one unit equals a quarter-tone: 2 units a semitone, 4 units a whole-tone, and so on. The horizontal axis of the graph indicates the length of the bend: each gray line segment extends for 1 space (sp) in the score.
A bend is modified by adding or deleting nodes in the graph:
- To add a node, click on an empty intersection.
- To delete a node, click on it.
Adding a node lengthens the bend by 1 sp; deleting a node shortens the bend by 1 sp. The Start and End points of the bend can be moved up and down only.
Adjust height
The height of the bend symbol is automatically adjusted so that the text appears just above the staff. This height can be adjusted, if necessary, with a workaround:
- Create another note vertically above the note (shortening the line) or below the note (extending the line) at which you want the bend to start.
- Apply the bend to the created note.
- To adjust the height of the bend move this created note vertically so that the bend symbol gets the desired height.
- Drag the bend symbol to the correct position (to the original note).
- Mark the created note invisible and silent (using the Inspector).
Adjust position
To adjust position use one of the following:
- Drag the bend symbol with a mouse.
- Click on the symbol and adjust the horizontal and vertical offsets in the Inspector.
- Double-click on the symbol; or click on it and press Ctrl+E (Mac: Cmd+E); or right-click on the symbol and select "Edit element." Then use the arrow keys for fine positioning (0.1 sp at a time); or Ctrl+Arrow (Mac: Cmd+Arrow) for larger adjustments (1 sp at a time).
Custom bends
After a bend has been created in the score it can be saved for future use by dragging and dropping the symbol to a palette while holding down Ctrl+Shift (Mac: Cmd+Shift). See Custom Workspace.
External links
- Bending at Wikipedia
Beams
Overview
A beam is a line connecting consecutive notes to indicate rhythmic grouping of eighth or shorter notes (Wikipedia). You can change control the presence or absence of beams between notes as well as their appearance.
Controlling which notes are beamed
The default beaming of notes is determined by properties of the time signature. You can edit those defaults and thus affect the beaming of all notes within that time signature, and you can also override the beaming of individual notes to differ from the time signature defaults.
Setting the default beaming for a time signature
See the main chapter Time signatures.
Each time signature has a set of beaming defaults that control the beaming of all notes in that time signature. Since you will normally want the beaming consistent throughout the score, this is usually the place to start when altering the beaming. To edit the defaults for a given time signature, use the Time signature properties dialog.
Accessing Time signature properties
- Select a time signature within the score
- Click the Time signature properties button in the Inspector
- Edit the Note Groups section as explained below
You can also access this dialog by right-clicking a time signature.
Note: the settings made in this dialog are per score and also per staff. To apply changes to other staves within the same score, you can Ctrl+Shift+drag the time signature to another staff, which acts similarly to adding it from the palette. To make a customized time signature available to other scores, Ctrl+Shift+drag it back to the palette.
Note Groups

To change the beaming of a note of a given duration on a given beat, click the corresponding note in the Note Groups section to toggle the beam into that note on or off. That is, if you click a note that is currently beamed to the previous note, that will break the beam, and if you click a note that is not currently beamed to the previous note, that will join them. You can also drag one of the Beam selector icons to any given note to set its beaming as explained further below.
If you select the Also change shorter notes option, then changes made to any given note will affect notes on the same beat of shorter durations as well.
Click Reset to remove all changes made since this dialog was opened. Note that this button does not reset settings back to the original defaults from the palette. To revert all changes made since the time signature was added, use the palette to replace the time signature.
Overriding the default beaming for a specific note
The time signature properties control the default beaming for notes in your score, but you can override those defaults on a note-by-note basis, such as to have one measure beamed differently from another. This can be useful when writing certain rhythms that might be more readable beamed in a non-standard manner, or in cases where the options available in Time signature properties are insufficient to create the defaults you want. It is also the only way to create beams over rests.
Beam properties are set on the notes themselves. To change the beam between two notes, you will normally start by selecting the second of the two notes, as most of the beam properties control the beam into a note. Note that some of these properties are available in both the Time signature properties window and the Beam properties palette, but this discussion will focus on the latter.
To change the beaming of a given note, either
- Select note(s) or rest symbol(s) and click an item in the palette (double-click in Musescore versions 3.4 and below); or
-
Drag and drop an item from the palette onto a note or rest.

From left to right, the available properties are:
- Auto: resets the beaming of the note to the time signature default behavior
- No beam: breaks any beams into or out of the selected note
- Beam start: breaks any beam into the selected note
- Beam 16th sub: breaks all but one beam into the selected note (for notes that would otherwise have two or more beams)
- Beam 32nd sub: breaks all but two beams into the selected note (for notes that would otherwise have three or more beams)
- Beam middle: joins a beam from the previous note into the selected note (unless the previous note is set to No beam)
To restore to default beaming of time signature:
- Select the section of the score you want to reset. If nothing is selected, the operation will apply to the whole score;
- Select Format→Reset Beams.
Beaming over rests

To extend a beam over a rest:
- Select the rest
- Apply the Beam middle or Beam start property
Beaming over barlines

To extend a beam across a barline:
- Select the first note or rest after the barline
- Apply the Beam middle property
Controlling the appearance of beams
While breaking and joining beams is a function of the individual notes, the actual appearance of the beam can be controlled by selecting either the beam itself (but not any notes).
Feathered beams

There are two items under the Beam properties palette that can be applied to a beam to indicate gradual slowing down or speeding up of the joined notes (note this is not supported in playback). These options only apply to 16th and shorter durations using multiple beams.

- Feathered beam, slower: feather the beams to fan inward to indicate a gradual slowing down
- Feathered beam, faster: feather the beams to fan outward to indicate a gradual speeding up
To remove feathered beam, reset Grow left and Grow right properties.
Beam angle

The angle of a beam can be edited directly by selecting it and moving the handles by dragging or using the cursor keys, user can also make fine adjustments in the Inspector. To switch handle selection, use Shift+Tab key. In Musescore version 3.4 and below, it is required to select the left handle before making adjustment using mouse cursor dragging.
- Position X and Position Y correspond to the left and right handles on the beam and allow you to set the height of either side of the beam independently.
- Grow left and Grow right correspond to the height of the subbeams on the either side, they are designed for adjusting feathered beams.
- Enabling the Force horizontal property force a beam to be horizontal. It is only available when Custom position is disabled. There is also a global setting available, see the Layout and formatting : Beams chapter.
Flip note beam
To reposition a beam to the other side of the notes:
- Select any note and then press the X key; or
- Select beam(s) and then
- Press the X key;
- Press the "Flip direction" icon,
 , in the toolbar; or
 - Edit the Inspector : Direction option (under the "Beam" section).
Using independent note spacing on a staff with Local relayout
MuseScore spaces and aligns notes within the same system (a layout concept, see Layout and formatting chapter), which may result in undesirable irregular spacing. To specify that notes of one particular staff should use independent note spacing,
- Select beam(s),
- Tick Inspector : Local relayout checkbox (under the "Beam" section).
Shown below is the distribution improvement before and after applying local relayout to the top staff.


Beam style
Global properties of beams can be set from Format→Style→Beams. See the Layout and formatting : Beams chapter.
See also
External links
- How beams work (MuseScore Tutorial)
- How to add a beam over a rest (MuseScore HowTo)
- How to place a beam between notes (MuseScore HowTo)
- Traditional Vocal Beaming (MuseScore Plugin)
- ReBeamer (MuseScore Plugin)
- French Beams (MuseScore Plugin)
Brackets
MuseScore provides brackets and a curly brace in the Brackets palette (Advanced workspace).

When a new score is created using a template, MuseScore automatically sets the correct brackets.
Add
To add a bracket or brace to systems, use one of two methods:
- Select a measure on the staff where you want the bracket/brace to start, and click the desired icon in a palette (double-click in versions prior to 3.4).
- Drag a bracket/brace icon from a palette on to the staff where you want the bracket/brace to start.
Delete
- Select the bracket and press Del.
Change
- Drag the desired icon from a palette onto an existing bracket/brace in the score.
Edit
When you first apply a bracket it only spans one staff. To extend to other staves:
- Enter Edit mode.
- Drag the handle downwards to span the required staves. The handle snaps into position, so exact placement is not required.
Style
The default thickness and distance from the system of brackets and braces can be adjusted in Format→ Style... → System.

In the System Brackets section, you can set the properties for the brackets in the two boxes on the left, and the properties for the braces in the two boxes on the right.
Notation types
There are two fundamentally distinct types of notational functionality in Musescore, designed and implemented from the beginning for different purposes:
- Functional symbols and text that when added to a score, optionally,
- automatically use a desirable Layout and formatting,
- affect the score semantically in a way that is most useful or makes most sense (the consensus after careful discussions among Musescore BVBA admins)
- is automatically replaced when you add another symbol or text so that the score makes sense, for example adding an accidental sharp # removes the existing flat b , and
- provide an expected playback effect created by Synthesizer.
- Non-functional symbols and text that when added to a score,
- serves visual purpose only, and does not affect the score semantics, because either
- the sheer amount of notations and the rare usage of most of them makes implementation impractical, or
- the digital resource itself is not created or maintained by Musescore dev team, for example items inside the Bravura font by Steinberg (Github) and the SMuFL codepoint - glyph definitions (wikipedia), or
- there is no consensus on its musical interpretation yet, or
- it is a visual marking popularly used on a score but has minimal musical effect,
- can be attached to a symbol or text on the score in a way that isn't normally supported,
- does not affect Synthesizer playback, and
- is not removed unless you deliberately do so.
- serves visual purpose only, and does not affect the score semantics, because either
Musescore usually create a functional item when you do common editing such as pressing a keyboard shortcuts, clicking a toolbar button, or adding an item from the palette, as it is the most common expectation. Musescore uses different classes of elements internally, their usage are not interchangeable: They have distinct property fields that serves different purpose besides engraving or visual display. For example, if you add a Staff Text and type a #, it can never be configured to change a note's pitch, you must create a new accidental. See also Text types.
Musescore is shipped with non-functional symbols and text not interpreted by Musescore (yet), such as historical clefs under the SMUFLs of Bravura font, Musescore also provides non-functional versions of most functional items. These can be found under the Symbols category in the Master palette. Use a non-functional symbol or text when:
- you do not want it interpreted by Musescore,
- you want to attach it in a way that isn't normally supported, like attaching an accidental to a barline,
- for example, the non-functional verions of the sharp # symbol does not provide automatic layout and does not change a note's pitch, see the example in the Accidentals chapter.
Alternatively, insert Images onto a score.
Resizing
A specific non-functional symbol or text on a score can sometimes be achieved by the two approaches different in resizing capability:
- Add the symbol directly from the Symbols category of the Master palette:
- it has a fixed size that scales with the score properly, but
- you cannot assign a custom "Font Size" setting in the Inspector.
- Add a Text, and then add the symbol as a unicode glyph using Text editing: Insert a special character:
- the number of unicode musical glyphs are limited,
- you can assign a custom "Font Size" setting, and other settings such as "Font Family", in the Inspector,
- the symbol-text sizing and alignment is tricky.
Images inserted onto a score are resizable, .svg files enlarges without blurring, see Images.
See also
External links
Breaths and pauses
Breath and pause markings are available in the Breaths & Pauses palette (Advanced workspace).

Add symbol
To add a breath, or pause (aka caesura / "tram lines" / "railroad tracks") to the score, use one of the following options:
- Select a note or rest and click a breath or pause symbol in a palette (double-click in versions prior to 3.4).
- Drag a breath or pause symbol from a palette onto a note or rest in the score.
The symbol is placed after the note. Its position can be adjusted by editing the X and Y offsets in the Inspector, or, in edit mode, using the arrow keys.
Adjust pause length
You can adjust the pause length (in seconds) of the added symbol in the Inspector.
Grace notes
A grace note is a type of musical ornament, usually printed smaller than regular notes. The Short grace note, or Acciaccatura, appears as a small note with a stroke through the stem. The Long grace note, or Appoggiatura, has no stroke.
Create grace notes
Grace notes can be found in the "Grace notes" palette in the Basic or Advanced workspace.
")
Add a grace note
Use one of the following methods:
- Select a regular note and click a grace note in a palette (double-click in versions prior to 3.4).
- Drag a grace note symbol from a palette onto a regular note.
- Select a note and press / to create an acciaccatura only.
This will add a grace note of the same pitch as the regular note. To add a sequence of grace notes to a regular note, simply repeat the above actions as many times as required. See also, Change pitch (below).
Note: When a grace note is added to the score, a slur is not automatically created with it, so the latter needs to be added separately. See Slurs.
Add a chord of grace notes
Grace note chords are built up just like regular chords:
- Enter the first note of the chord as shown above
- Select this first grace note and enter subsequent notes as you would for any other regular chord (i.e. Shift+A...G).
You can also create a grace note chord by using the add interval shortcut in step 2: Alt+1...9 for intervals from a unison to a ninth above.
Change pitch
The pitch of a grace note can be adjusted just like a regular one:
- Select one or more grace notes
- Adjust pitch using the keyboard arrow commands, namely:
- ↑ or ↓ to increase or decrease the pitch by a semitone;
- Alt+Shift+↑ or Alt+Shift+↓ to increase or decrease the pitch one step at a time, according to the key signature.
Change duration
- Select the grace note and either click a duration icon on the toolbar, or apply the duration with the appropriate keyboard shortcut: i.e. 1...9 (see Note input).
Manual adjustment
Horizontal position
To adjust the horizontal space between a grace note and its regular parent note, use one of the following:
- Go into edit mode on the grace note, then use the left/right arrow keys to reposition as desired.
- Select the grace note and change the X-offset value in the Chord section of the Inspector.
Other adjustments
Various other properties of the grace note can be adjusted in the Inspector (see "Element," "Chord", and "Note" sections)—such as vertical position, size, stem properties etc. The exception is "Leading space" which only applies to standard notes.
External links
- Grace note at Wikipedia
- Appoggiatura at Wikipedia
- Acciaccatura at Wikipedia
Hairpins
Hairpins are symbols used to indicate gradual changes in volume in the score. There are two kinds: crescendo (getting louder) and decrescendo (getting quieter).

Add a hairpin
- Select a range of notes or measures;
- Use one of the following shortcuts:
- <: to create a crescendo hairpin.
- >: to create a diminuendo hairpin (decrescendo).
Alternatively, use one of the following options:
- Select a range of notes or measures, and click a hairpin in a palette (double-click in versions prior to 3.4).
- Drag and drop a hairpin from a palette onto a staff line.
NOTE: Placing hairpins on different voices of the same staff at the same time does not create desired playback, it is a limitation of Musescore, because the minimal area of effect on playback loudness (Dynamic Range property) is staff, not voice. If playback is priority, try splitting voices into individual instruments.
Adjust length and height
A hairpins is a type of Line with playback properties, and its length is adjusted similarly:
-
Enter edit mode on the hairpin. Then click on the end handle that you want to move:

-
Use one of the following shortcuts:
- Shift+→ to move the end handle, and its anchor, right by one note or rest.
- Shift+← to move the end handle, and its anchor, left by one note or rest;
- and then Tab once to select the start handle, then Shift+→ and Shift+← to adjust it.
This method of extending or shortening the hairpin maintains playback integrity and allows it to cross line breaks:

-
To fine-tune the horizontal position of an end-handle (without changing playback), use the following shortcuts:
- → to move the handle right by 0.1 sp.
- ← to move the handle left 0.1 sp.
- Ctrl+→ (Mac: Cmd+→) to move the handle right one sp.
- Ctrl+← (Mac: Cmd+→) to move the handle left one sp.
To change the height of a hairpin:
- Adjust Height property, or
- Adjust the lower handle at the mouth of the hairpin (e.g. the blue square below):

Cresc. and dim. lines
In addition to hairpins, there are cresc. _ _ _ and dim. _ _ _ lines with the same function in the Lines palette. Edit the text in the Text Line Details property.
To turn a hairpin into its equivalent text line:
Pick an option in the Type property.
Copy hairpins
From version 3.1, a hairpin can be cut, copied and pasted just like a text element: see Summary of cut / copy / paste commands.
For versions prior to 3.1, you can only duplicate a hairpin: see Copying lines.
Edit hairpin properties
Properties of the hairpin can be edited in the Inspector:
- Under Element Section: Edit the Y offset to change the height of the hairpin above or below the staff.
- Under Line Section: Edit line properties such as color, line style and thickness.
- Under Text Line Details Section: Add text and set text properties.
- Under Hairpin Section:
- Type: 4 options of hairpins (Arrow symbol, or expression text with a dashed line).
- Circled tip: Additional circle symbol at the narrower end.
- Height: The width at the wider end.
- Continue height: The width of the hairpin at the end of a system on a page, before it continues to the next system.
- Placement: Position on page, above or below staff. Press X to flip.
- Dynamic range: Area of effect of the symbol:
- System: Every instrument in the score.
- Part: One instrument (all of its staffs), default.
- Staff: One staff (eg one hand in piano) regardless of voices. As of MuseScore 3.6.2, this option is incompatible with the Staff / Part properties: single note dynamics playback mechanism, see forum discussion.
- Velocity change:
- 0 to 127. Magnitude of change in playback loudness across the span of the hairpin.
- Choose an appropiate Type for desired direction of change.
- The end MIDI velocity calculated by adding this value to (or subtracting this value from) the starting note's MIDI velocity (see Dynamics (symbol): loudness of a note), without any other mathematical conversion (it is not a percentage change).
- For examples, a crescendo of Velocity change = 15 placed on a phrase with a starting note of MIDI velocity = 49 affects playback loudness of the phrase by assigning MIDI velocity from 49 up to 64 to the phrase across its timespan.
- Use single note dynamics: (Version 3.1 and above) Enable playback loudness variation across the timespan of each of the note itself. Affects instrument supporting Single Note Dynamics only.
- Dynamic Mode: (Version 3.1 and above) Rate of transition: Linear (default), Ease-in and out, Ease-in, Ease-out, or Exponential.
Playback of hairpins
MuseScore development focuses on engraving support, rather than playback support. Using hairpins without dynamics symbols are perfectly acceptable in real life scoring, but do not create desired playback inside Musescore.
To create playback loudness variation across a hairpin, either:
- create a note loudness difference (see "To create desired loudness" below) between the two ends of the hairpin, and make sure the difference does not contradict with the meaning of the hairpin, or
- use a non-zero "Velocity change" value, see above.
To create desired loudness:
- One popular way is to place Dynamics symbols and, optionally, make them invisible in the Inspector. eg p crescendos f .
- Note loudness is mainly determined by MIDI velocity, which is most commonly assigned by Dynamics symbols placed onto a score, a dynamics symbol affects playback from the parent note onward until the next dynamics symbol. Final barlines or rests do not reset the loudness to default. Notes which do not have loudness affected by any dynamics symbol can be considered to be in mf (mezzoforte), and has MIDI velocity 80.
To create desired timing, create anchor points for hairpin to adjust its length upon:
- Split a note and add a tie, or
- Add short rests to an unused voice and make them invisible in the Inspector, or
- Use the Anchors for Dynamics and Hairpins plugin to automate this process.
Complex notations are handled this way:
- Only the first hairpin affects playback loudness in case of redundant hairpins, such as two crescendos between p and f.
- Only the last placed hairpin affects playback loudness in case of redundant hairpins affecting the same note (overlapped Dynamic range settings).
Incorrect hairpins do not affect playback: eg f crescendo p.
For all instruments, each individual note under a hairpin can have its playback loudness affected by presence of hairpins at the moment of note start.
MuseScore 3.1 and above
For instruments supporting Single Note Dynamics (e.g. strings, brass etc.), loudness variation can also occur across the span of the note, and across a series of tied notes . This can be switched off individually with the Use single note dynamics checkbox property.
See also
Lines
Overview
This chapter focuses on Musescore Lines, a type of objects capable of attaching (anchoring) to a horizontal continuous range of more than two notes or rests, or vertical collection of notes (chord). A Musescore Line object contains a length of string or arc, and optionally a text. These objects can functionally affect the score, and share similar configurable properties.
Musescore Line objects include these subtypes, follow the hyperlink on text to read their dedicated main chapters, or "jump to section" on this chapter:
- Line (a simple general purpose, straight line) (jump to section)
- Slurs
- Staff text lines and System text lines (jump to section)
- Hairpins and crescendo, decrescendo lines
- Volta brackets (repeat section brackets on top)
- Octave lines (ottava, 8ve etc)
- Pedal markings (jump to section)
- (Long) Trill lines and upprall, downprall, prallprall are interchangeable by adjusting properties. They affect playback. Accidentals (not affecting playback) can be added.
- Arpeggios
- Glissandi (slides) and portamento between two notes
- Guitar Barre line (jump to section)
- "let ring" line, affects playback
- vibrato line, affects playback
- vibrato sawtooth, tremolo sawtooth, affects playback
- P.M. --- (guitar palm mute), does not affect playback
- Early music features: Ambitus
These markings contain length of string or arc, but do not belong to Musescore Line objects because they cannot attach (anchor) to a continuous range:
- Bends (brass or guitar articulation)
- Ties
- Tremolo
- Single note Articulations and ornaments such as turns, (short) trills and mordent
- (Staff) Brackets
- Barlines
- Staff line (To change global staff line thickness, see Measure and horizontal spacing chapter. Other related settings see Staff / Part properties chapter.)
Standard lines
Standard line or plain line is a simple general purpose, straight line. It can be adjusted to be diagonal or vertical.
Text lines
A text line has text embedded. Examples of this subtype are Staff text lines, ornament lines, pedal, Volta, Octave lines etc.
When you apply a text line to the score from a palette, the line properties always remain unchanged, but the text properties may, under certain circumstances, assume those of the current style for text lines. For details, see Behavior of applied text and lines.
Staff text lines and System text lines
General purpose text-lines. Staff text lines, when attached to a single staff will appear in Parts that feature that staff or tablature. System text lines, appearing in all Parts.
Adding accidentals to an ornament line
To add an accidental to an ornament line (e.g. a trill line) and pralls, select the line and click on a symbol in the Accidentals palette (double-click in versions prior to 3.4), toolbar buttons will not work. Does not affect playback.
Guitar barre line
To add a guitar barre line, use either:
- a Staff text line or System text line, or
- a barre object existed in previous Musescore versions but was since removed, they are the same.
Piano Pedal
This section focuses on the types of piano pedal engraving available, for knowledge of various piano pedals see wikipedia article.
Types of pedal markings
In terms of visual representation
Supported engravings including:
- Line at either or both ends, have no hook or hooks at angles of either 45 or 90 degrees, or "T" end;
- Ped. followed by such a line, or a rosette symbol (*) : The line from the built-in Ped. * palette item is invisible and non-printing. Adjust on-screen display with View menu > Show > Show invisible setting accordingly, see Viewing and navigation: visibility options. To convert the line to visible in printing, or style it as dashed, change properties.;

- Sost. (sostenuto pedal) marking and other related symbols and pictogram can be found under Symbols category in Master palette window.

- Create custom sim. or pedal ad lib marking with Staff text.
- Full pedal is implied for playback, embed images to add pedal strength symbols for engraving need.
In terms of function inside Musescore
There are three different subtypes:
Type 1 includes:

- Line with 45 degree angled End hook or no End hook, with or without Ped. beginning text.
- Ped. followed by a rosette symbol (*)
Visually, the line or symbol only extends horizontally to the notehead attached to the end anchor.
Functionally, if that note is attached to another marking's start anchor, the following marking will automatically connect and make a shape resembling "-^-", which is indicative of the piano technique "pedal released and pressed again without releasing this note".

shown above is the auto connect, their playback are also in line with the piano technique
Sustain (MIDI CC 64) is created by the synthesizer. When consecutive type 1 markings create a "-^-", playback matches the piano technique, the first marking is interpreted by synthesizer as released at the note attached to the end anchor. Single or trailing type 1 markings creates playback like type 2: sustain until the note attached to the end anchor ends.

The last two type 1 markings shown above are single or trailing, they create the same playback as type 2
Type 2 includes:

- Line other than described in Type 1, with or without Ped. beginning text.
Visually, the line extends horizontally to an aprpopiate length spanning the full duration of note attached to the end anchor.
Functionally, sustain (MIDI CC 64) is created by the synthesizer. Type 2 always sustain until the note attached to the end anchor ends.
Type 1 and 2 are interchangable by adjusting properties.
Type 3 includes marking added from Symbols category in Master palette window such as sostenuto pedal marking, custom Staff Text markings, and embedded images, they are for engraving purpose only and are non-functional.
Adding pedal markings to your score

shown above a type 2 marking on score
Add pedal markings from Lines palette, see "Applying lines to the score" (jump to). If you add marking to a single note, end anchor is attached to end of its measure.
Adjust with Shift+←/→, switch handle with Tab, see "Line anchors and playback properties" (jump to).
Unfortunately, you might need to make compromise with engraving style or not notate at all if you must create a desired playback, because of the functional limitation of Type 1 and Type 2 explained. Musescore 3 pedal marking always create sustain playback only (cannot be turned off), making it impossible to use "add redundant symbol, make it invisible" trick.
To create shape resembling "-^-" with consecutive Type 1 markings, make sure the end anchor is attached correctly, which is usually to the first note of the next measure instead of the last note of the previous measure. This big picture shows the correct end anchor result.

MuseScore does not offer keyboard shortcut bindings to palette items, but you can configure a shortcut to apply the same (last used) times consecutively to improve efficiency, see Palettes: Apply the last selected item
Pedal properties
Per symbol settings see "Inspector properties of Lines" (jump to). Global settings see Layout and formatting: Pedal, and Layout and formatting: Text-line .
Applying lines to the score
The commonest way to add a new Musescore Line is to use either:
- a predefined keyboard shortcut, for example S to add slurs (see the respective chapter above),
- the Lines palette (see screenshot below), or
- assign and use the keyboard shortcut "Apply current palette element" (jump to section).

A Line, except Slurs, Volta brackets and Ambitus, can be applied from a palette in the following ways:
To apply a line to just one note
- Click on a note, then Ctrl+Click on the next note;
- In a palette, click on a line (double-click in versions prior to 3.4).
To apply a line across a range of notes
To apply a line from a note to the end of that measure
Use any of the following methods:
- Click on a note, then, in a palette, click on a line (double-click the latter in versions prior to 3.4).
- Drag and drop a line onto the score.
To apply a line across a range of measures
- Select one or more measures;
- In a palette, click on a line (double-click in versions prior to 3.4).
To repeatedly apply the same line
To efficiently apply the same item again, such as adding end to end pedal marks to a piano phrase, setup and use a keyboard shortcut, see Palettes.
Inspector properties of Lines
Any line in the score can be customized by adjusting its properties in the Inspector, as follows:
- Select the line;
- If line hooks are needed, make a selection from Begin hook, End hook and Height (in the Text Line Core section);
- To add text, tick Begin Text, Continue Text or End Text, then type in the "Text" box:
- Begin: Text added here appears at the beginning of the line;
- Continue: Text added here appears at the beginning of the next system if any;
- End: Text added here appears at the end of the line;
- Edit text properties and alignment as required;
- Edit Placement: "Above" or "Below" sets the text so that it is on the line. "Left" places the text to the left of the line;
- Toggle line printing and exporting visibility with "Line visible" checkbox in the Line section.
- Make adjustments to the line color, thickness and style (solid, dashed etc.) in the Line section. The Diagonal option allows you to create a diagonal line by dragging the end handles;
- To save the result for future use, see Custom palettes.
Adjust vertical position
In Normal mode, apply one of the following methods:
- Click on one or more lines and change the vertical offset in the Inspector;
- Click on a line, press and hold Shift and drag it up/down with a mouse.
Note: You can also adjust the vertical position in Edit mode.
Line anchors and playback properties
Some lines, such as Hairpins, Voltas, Ottavas etc. affect playback. The start handle and end handle are connected by a pink dotted line to their respective anchors on the staff, which are visible in Edit mode only. These anchors indicate the extent of the playback effect.
Change length and anchors together
Note: The following two methods adjust the length of the line engraving and the anchors affecting playback together. This ensures that correct playback of the score is maintained (if applicable), and that the line can be extended between systems if required.
Using keyboard shortcuts
- Enter Edit mode, the end handle is automatically selected, if not, click to select it;
- Apply one of the following shortcuts:
- Shift+→ to move the end handle, and its anchor, to the right by one note (or, in the case of Voltas, one measure)
- Shift+← to move the end handle, and its anchor, to the left by one note (or, in the case of Voltas, one measure);
- If you wish to adjust the starting anchor position, Tab once to select the start handle, then Shift+→ and Shift+← to adjust it.
By dragging (as of version 3.5)
- Click on a handle of a line and drag it with the mouse.
Fine adjustment
To make fine adjustments to the position of the line end (without changing the position of the anchor):
- Enter Edit mode and click on an end handle;
- Apply one of the following shortcuts:
- → to move the handle right by 0.1 sp (1 sp = one staff space = the distance between two staff lines).
- ← to move the handle left 0.1 sp.
- Ctrl+→ (Mac: Cmd+→) to move the handle right one sp.
- Ctrl+← (Mac: Cmd+→) to move the handle left one sp.
Copying lines
Once applied to the score, lines cannot be copied using the usual copy and paste procedures. However, you can duplicate lines within a score:
- Press and hold Ctrl+Shift (Mac: Cmd+Shift), click on the line and drag it to the desired location.
External links
- Piano pedal marks at Wikipedia
- Guitar Barre at Wikipedia
Measure rests
Full measure rest
A whole rest, centered within a measure (shown below), is used to indicate that an entire measure (or a voice within a measure) is silent, regardless of time signature.

To create one or more full measure rests
Use the following method if all selected measures are "standard"—i.e. with no custom durations:
1 Select a measure, or range of measures.
2. Press Del (Mac: Backspace).
If one or more of the measures contains a custom duration, use the following method instead:
To create a full measure rest in a particular voice
- In the appropriate voice, enter a rest that extends for the full measure.
- Make sure the rest is selected, then press Ctrl+Shift+Del (Mac: Cmd+Shift+Backspace).
If the voice contains only rests you can select the first rest and invoke the conversion keystroke.
Multimeasure rest
A Multimeasure rest indicates a period of silence for an instrument: the number of measures is shown by the number above the staff.

Multimeasure rests are automatically interrupted at important points, such as double barlines, rehearsal marks, key- or time signature changes, section breaks etc. and also at measures that are set to break multimeasure rests.
To display multimeasure rests
To turn multimeasure rests on or off:
- Press M on your keyboard.
Alternatively:
- From the menu, choose Format→Style….
- Click on the "Score" tab, if it is not already selected;
- Tick/untick "Create multimeasure rests". Here you can also set the minimum of empty measures to combine into a multimeasure rest (see also Layout and formatting: Score).
Note: It is recommended that you enter all notes in the score first before enabling multimeasure rests.
Break multimeasure rest
You may want to have a multimeasure rest divided into two multimeasure rests:
- Ensure that the option to display multimeasure rests in the score is off (see above).
- Right-click on the measure where you want the second multimeasure rest to start;
- From the menu, choose Measure Properties and tick "Break multimeasure rest."
- Enable multimeasure rests again
See also: Measure operations: Break multimeasure rest.
Octave lines
Octave (Ottava) lines are used to indicate that a section of music is to be played one or more octaves above or below written pitch: The line may be dotted or solid. Ottavas are available in the Lines palette of the Basic and Advanced workspaces.
8─────┐or 8va─────┐: Play one octave above written pitch
8─────┘or 8va─────┘: Play one octave below written pitch
8va alta/bassa lines are particularly common in piano scores, though they are sometimes used in other instrumental music.1 15ma alta (2 octaves above) and 15ma bassa (2 octaves below) are also occasionally used.

MuseScore automatically adjusts playback of the score under the ottava to the correct pitch.
Apply an octave line
See Applying lines to the score.
And to adjust the vertical position, see Lines: Adjust vertical position.
Change length
See Lines: Change length.
Custom lines
Ottavas can be customized just like any other line. See Custom lines and line properties.
Properties unique to Octave lines can be adjusted in the Ottava section of the Inspector:
- Type: Change the Ottava line text.
- Placement: Set to "Above" or "Below" the staff.
- Numbers only: Untick for both number and text (e.g. "8va"). Tick for a number only (e.g. "8").
External links
- Octave at Wikipedia
-
Gerou/Lusk. Essential Dictionary of Music Notation (Internet Archive). ↩︎
Slurs
A slur is a curved line between two or more notes indicating that they are to be played legato—smoothly and without separation. Not to be confused with Ties, which join two notes of the same pitch.
There are a number of ways to add a slur to a score, and all may be useful depending on the context (adding a slur from the lines palette is also possible but not recommended).
Add slur in note-input mode
- While in Note input mode, type in the first note in the slurred section;
- Press S to begin the slurred section;
- Type in the remaining notes in the slurred section;
- Press S again to end the slurred section.
Add slur in Normal mode
Method 1
- Make sure you are in Normal mode;
-
Select the note where you want the slur to start:

-
Press S to add a slur extending to the next note:

-
(Optional) Hold Shift and press → (right arrow key) to extend the slur to the next note. Repeat as required:

-
(Optional) Press X to flip the slur direction:

-
Press Esc to exit edit mode:

Method 2
- Make sure you are in Normal mode;
- Select the note where you want the slur to start;
- Choose one of the following options:
- To add a slur to one voice only: Hold down Ctrl (Mac: Cmd) and select the last note that you want the slur to cover.
- To add slurs to all voices: Hold down Shift (Mac: Cmd) and select the last note that you want the slurs to cover.
- Press S.
Adjust slur
If you only want to adjust the position of a slur:
- Select the slur;
- Use any of the following methods:
- Drag the slur.
- Adjust the horizontal and vertical offset values in the Inspector.
To adjust all the properties of a slur (length, shape and position):
- Make sure you are not in note input mode;
- Go into Edit mode on the slur;
- Click on a handle to select it, or use Tab to cycle through the handles;
- To move the left and right handles from note to note, use the following shortcuts:
- Shift+→: Move to next note.
- Shift+←: Move to previous note.
- Shift+↑: Move to lower voice (voice 2 to voice 1 etc.).
- Shift+↓: Move to higher voice (voice 1 to voice 2 etc.).
- To adjust the position of any handle, use any of the following methods:
- Press Esc to exit edit mode.
Note: The two outer handles adjust the start and end of the slur, whilst the three handles on the curve adjust the contour. The middle handle on the straight line is used to move the whole slur up/down/left/right.
Extended slurs
A slur can span several systems and pages. The start and end of a slur is anchored to a note/chord or rest. If the notes are repositioned due to changes in the layout, stretch or style, the slur also moves and adjusts in size.
This example shows a slur spanning from the bass to the treble clef. Using the mouse, select the first note of the slur, hold down Ctrl (Mac: Cmd) and select the last note for the slur, and press S to add the slur.

X flips the direction of a selected slur.
Dotted/dashed slurs
Dotted slurs are sometimes used in songs where the presence of a slur varies between stanzas. Dotted slurs are also used to indicate an editor's suggestion (as opposed to the composer's original markings). To change an existing slur into a dotted or dashed slur, select it and then in Inspector (F8) change Line type from Continuous to Dotted or Dashed.
See also
Ties
A tie is a curved line between two notes of the same pitch, indicating that they are to be played as one combined note (see external links below). Ties are normally created between adjacent notes in the same voice, but MuseScore also supports ties between non-adjacent notes and between notes in different voices.
In note-input mode, if you specify a tie immediately after entering a note or chord, the program automatically generates the correct destination notes to go with the ties. Or, you can simply create ties "after the fact," between existing notes.
Note: Ties, which join notes of the same pitch, should not be confused with slurs, which join notes of different pitches and indicate legato articulation.
Add ties in Note Input mode
The following command adds an identical tied chord to the selected chord.
- Ensure that a note is selected (i.e. highlighted). This can be a single note on its own or part of a chord.
- Select a new note duration for the following note(s), if required (but see "Note" below).
- Press + or the tie button,
 .
.
Note: This shortcut works, as described above, only if there is no chord following the selected note. If there is, then the duration is ignored and the tied note is added instead to the following chord.
Add ties in Normal mode
Method 1
-
Select one or more noteheads in the "start" chord.

-
Press +, or the toolbar tie button,
: .
.
Ties will be created between the selected note(s) and the next available note(s) of the same pitch.
To remove ties, as of MuseScore 3.3.3, use the same command (toggle)
Method 2
This method ties all notes in the "start" chord (where possible):
- Select the stem of the "start" chord;
- Press +, or click on the toolbar tie button .
Ties will be created between all the notes in the selected chord and the following notes of the same pitches.
To remove ties, as of MuseScore 3.3.3, use the same command (toggle).
Add extra tied notes to a previously tied chord
Occasionally you may need to return to an existing tied chord in order to add one or more extra tied notes. In this case a different command is used. For example:

- Add the extra notes to the first chord. e.g.

- In Note input mode, and with any of the notes in the first chord selected, press Alt++. Corresponding notes are added to the following chord and the extra notes are tied:

Add ties to unison notes
A workaround is required to create ties between unison notes:
- Create the first note as usual;
- Any additional unison notes should be added at an interval other than unison: e.g. 2nd, 3rd, 4th etc.
- Create a tied chord (as shown above): e.g.

- Move the unison note(s) into position: e.g.

Flip a tie
X flips the direction of a selected tie, from above the note to below the note, or vice-versa.
See also
External links
- How to create ties leading into a 2nd ending (MuseScore HowTo)
- Ties (music) at Wikipedia
Tremolo
Tremolo is the rapid repetition of one note or chord, or a rapid alternation between two notes or chords. One-note and two-note tremolo symbols can be found in the Tremolo palette in the advanced workspace, trem. text marking see Articulation Text (Mid-staff sound change)

A one-note or one-chord tremolo is indicated by strokes through the stem of the note or chord (or above/below if a whole note). E.g.

In a two-note or two-chord tremolo, bars are drawn between the notes. E.g.

Tremolo symbols are also used to notate drum rolls.
Add a Tremolo
Single note/chord tremolo
- If a single note, select that note; if a chord, select any note in the chord;
- Click the desired symbol in the Tremolo palette (double-click in versions prior to 3.4).
Alternatively, you can drag the tremolo symbol onto the applicable note.
Two note/chord tremolo
- Input the notes at half the desired final duration;
- If a single note, select the first note of the pair; if a chord, select any note from the first chord;
- Click the desired symbol in the Tremolo palette (double-click in versions prior to 3.4).
Alternatively, you can drag the tremolo symbol onto the applicable note.
Example: To enter a two-note tremolo with the duration of a half note (minim), enter two normal quarter notes (crotchets). After applying a tremolo symbol to the first note, the note values automatically double to half notes.
External links
- Tremolo (Wikipedia)
- How to create 'old style' and other special tremolos? (MuseScore HowTo)
Repeats and jumps
Simple repeats
You can create a simple repeat by placing a start and an end repeat barline at the beginning and end of a passage. These can be applied from the Barlines or Repeats & Jumps palette.

Note: If the start of a repeat coincides with the beginning of a piece or section, the start repeat barline can be omitted if desired. Similarly, an end repeat barline can be omitted at the end of a score or section.

1st and 2nd endings
First create a simple repeat (as shown above), then apply the first and second time endings—see Voltas.
Playback
Turn repeat playback on/off
- Toggle the "Play Repeats"
 button on the toolbar.
Adjust repeat section playback
Simple repeats, such as the ones illustrated above, or "1, 2" volta sections, usually play back correctly first time. More complex repeats may need further adjustment as follows:
- Ensure that the start and end barlines are correctly positioned. For a volta section, ensure that each volta, except the last one, terminates with an end repeat barline.
- In the case of a simple repeat, where more than one repeat is needed, right-click on the measure containing the end repeat barline and select Measure properties. Adjust Play count so that it is equal to the number of times you want the section to play back.
- In the case of a complex volta section, such as the following:

Make sure that the volta "Repeat list" is set up correctly—see Volta properties. Right-click on the measure containing the end repeat barline and select Measure properties. Adjust Play count so that it is one greater than the number of measures listed in the Volta "Repeat list." In this case, since 5 measures are listed, the "Play count" needs to be set to 6.
Repeat symbols and text
Text and symbols related to repeats are located in the "Repeats & Jumps" palette (in the Basic and Advanced workspaces). This palette contains:
- Symbols for measure repeat, Segno, Segno Variation (Serpent), Coda, and Coda Variation (Codetta)
- D.S., D.C., al Coda, al Fine, To Coda, and Fine text
- Repeat barlines

To add a repeat symbol to the score use either of the following:
- Select a measure, then click the desired repeat symbol in the palette (double-click in versions prior to 3.4).
- Drag and drop a repeat symbol from the palette onto (not above!) the desired measure (so the measure changes color).
Jumps
Jumps are symbols in the score which tell the musician to skip to a named marker (see below). Jumps include the various kinds of D.C. (Da Capo) and D.S. (Dal Segno) text.
To set correct playback of jumps:
- Make sure that the "Play Repeats" button on the toolbar is selected. This is a toggle, so you can turn off playback by clicking the same button.
-
After the jump, and following established convention, only the last round of any simple repeat section is played back. If you want playback to take these repeats in full:
- Select the applicable jump symbol;
- In the "Jump" section of the Inspector, check "Play Repeats".
Note: Jumps are taken only after all simple repeats in the section are played through.
If you click on a jump, some text boxes and a checkbox are displayed in the Jump section of the Inspector. These have the following effects on playback:
- Jump to: Playback jumps to the marker whose "Label" is the same as the "Jump to" tag.
- Play until: Playback continues until it reaches a marker whose "Label" is the same as the "Play until" tag.
- Continue at: Playback jumps to the next marker whose "Label" is the same as the "Continue" tag.
-
Play repeats: Ticking this box tells MuseScore to play repeats after D.C. (Da Capo) or D.S. (Dal Segno) jumps. If this option is not ticked then simple Repeats are not taken after jumps and playback works as if it were the last repeat.
Note: The tags start and end, referring to the beginning and end of a score or section, are implicit and don't need to be added by the user.
Markers
Markers are the places referred to by the jumps. A list of markers (in addition to the implicit "start" and "end") follows:
 : Segno (tag: segno)
 : Segno Variation (tag: varsegno)
 : Coda (tag: codab)
 : Coda Variation (tag: varcoda)
- Fine: (tag: fine)
- To Coda: (tag: coda)
If you click on a marker, the following properties appears in the Marker section of the Inspector:
- Marker type: This can be changed from the dropdown list, if required.
- Label: This is the (identifier) tag associated with the marker. See also, Jumps (above).
Examples of jumps
- Da Capo (D.C.): At the "D.C." sign, playback jumps to the start (i.e. to the implicit start tag) and plays the entire score or section again (i.e. up to the implicit end tag).
- Da Capo (D.C.) al Fine: At the "D.C. al Fine" sign, playback jumps to the start (i.e. to the implicit start tag) and plays the score up to the Fine (i.e. the fine tag).
- Dal Segno (D.S.) al Fine: At the "D.S. al Fine" sign, playback jumps to the Segno symbol (i.e. the segno tag) and then plays up to the Fine (i.e. the fine tag)
- Dal Segno (D.S.) al Coda: At the "D.S. al Coda" sign, playback jumps to the Segno symbol (i.e. the segno tag) and then plays up to the To Coda (i.e. the coda tag). Playback then continues at the Coda symbol (i.e. the codab tag).
Note: The properties (i.e. the tag names) of jumps and markers can be set via the Inspector.

You need to modify them if using multiple jumps and markers.
See also
External links
- MuseScore in Minutes: Repeats and Endings, part 2 (video tutorial)
- How to separate a coda from the rest of the score (MuseScore HowTo)
- How to create a 2-measure repeat sign with playback (MuseScore HowTo)
- How to use Jumps and Repeats (MuseScore HowTo with examples)
Tuplets
Tuplets are used to write rhythms beyond the beat divisions usually permitted by the time signature. For example, a triplet consists of three notes in the time of two:

And a duplet consists of two notes in the time of three:

Create a tuplet
The exact method of tuplet entry depends on whether you are starting off in Note input mode or Normal mode. We'll start off with a simple example: the creation of an eighth note triplet.
Create a triplet in normal mode
-
Select a note or rest that specifies the full duration of the desired triplet group. In the case of an eighth note triplet, you will need to select a quarter note or rest—as in the example below:

-
Press the keyboard shortcut for a triplet, Ctrl+3 (Mac: Cmd+3); alternatively use the menu, Add→Tuplets→Triplet. This will give the following result:

-
The program automatically changes to note-input mode and selects the most appropriate duration—in this example an eighth note. Now enter the desired series of notes/rests. For example:

Alternatively, use the Duration Editor to switch between tuplet and non-tuplet.
Create a triplet in note input mode
- Ensure you are in note input mode (press N).
- Navigate to the note/rest (or blank measure) where you want the triplet to start (use the left/right arrow keys as required).
- Select a final duration for the whole triplet group. In the case of an eighth note triplet, click on the quarter note in the note input toolbar (or press 5 on the keyboard).
- Press the keyboard shortcut for a tuplet, Ctrl+3 (Mac: Cmd+3); alternatively, use the menu, Add→Tuplets→Triplet. This creates a triplet number/bracket and appropriately divides the original note/rest (see image above).
- The program automatically selects the most appropriate duration—in this example an eighth note—allowing you to immediately start entering the desired series of notes/rests.
Create other tuplets
To create other tuplets substitute one of the following commands at the relevant step above:
- Press Ctrl+2–9 (Mac: Cmd+2–9). 2 for a duplet, 3 for a triplet etc.
- From the menu, select Add→Tuplets, then click on the desired option.
For more complex cases, see below.
Custom tuplets
To create other tuplets than the default options (e.g. 13 sixteenth notes in the space of one quarter note):
- In Note input mode, select a note duration equaling the total duration of the tuplet; or, if in Normal mode, select a note or rest of the desired overall duration;
- Open the Create Tuplet dialog from the menu: Add→Tuplets→Other...;
-
Select the desired number ratio (e.g. 13/4 for thirteen sixteenth notes in the space of a quarter note) under "Relation" in the "Type" section. Specify "Number" and "Bracket" using the radio buttons in the "Format" section;

-
Click OK to close the dialog:

-
Enter the desired series of notes/rests.
Triplet examples

Delete a tuplet
Use either of the following:
- Select the number or bracket and press Del.
- Select any element of the tuplet, then in the Note section of the Inspector press the "Tuplet" button (bottom right), and press Del.
- Select the entire tuplet, using the shift + click method, then press Del.
- Use the Duration Editor to switch between tuplet and non-tuplet.
Change display of tuplets
Using the Inspector
To change the display properties of tuplets in the score, select the tuplet numbers/brackets, and adjust the desired properties in the "Tuplet" section of the Inspector:

- Direction: 'Auto' places the bracket/number in the default position. 'Up' always places the bracket above the note heads; 'Down' always places the bracket below the note heads.
- Number type: Choice of 'Number', 'Ratio', or 'Nothing'.
- Bracket type: 'Automatic' hides the bracket for beamed notes and shows the bracket if the tuplet includes unbeamed notes or rests. 'Bracket' displays the bracket. 'None' hides the bracket.
Using the Tuplets Style dialog
To make fine adjustments to the way that all tuplets in the score are displayed: from the menu, select Format → Style...→Tuplets.
The legend below illustrates some of the properties that can be adjusted in the Tuplets style dialog:

(2) Vertical distance from stem.
(3) Vertical distance from note head.
(5) Distance before stem of first note.
(6) Distance after stem of last note.
External links
- How to create triplets and other tuplets (MuseScore HowTo)
- How to create nonstandard tuplets (MuseScore HowTo)
- How To create triplets and other tuplets across measures (MuseScore HowTo)
- Tuplet at Wikipedia
- The User Guide to Tuplets in MuseScore [video]
Voltas
Volta brackets, or first and second ending brackets, are lines used to mark different endings for a simple repeat. Score playback automatically follows the repeat indications.

To add a volta to the score
Use one of the following methods:
- Select a measure, or range of measures and click a Volta icon in the Lines palette (double-click in versions prior to 3.4).
- Drag-and-drop a volta from the Lines palette, then adjust the length as required (see below).
To change the number of measures that a volta covers
- Go into Edit mode on the volta. The end handle is automatically selected.
- Press Shift+→ to move the end handle forward one measure. Press Shift+← to move the handle backward one measure. Repeat as required.
Note: When you select a start or end handle, a dashed line appears connecting it to an anchor point on the staff (see diagram, below). This anchor shows the position of the playback start/end points of the Volta. The Shift commands change the anchor point so playback always remains in sync with the visual start/end points. To make fine adjustments to the visual start or end points, without affecting playback, use other keyboard arrow commands, or drag the handles with a mouse.

Volta properties
To make changes to Volta text:
-
Select the volta, and edit the properties in the Text Line Core section of the Inspector.

To specify the order of repeats:
- Select the volta, and in "Repeat list" (Volta section of the Inspector) type in a number, or sequence of numbers separated by commas, to indicate the repeat(s) in which the volta is to be played.

For example, a first ending shows the number "1"; a second ending, the number "2" and so on. More complex repeats are also possible: e.g. a "Repeat list" displaying "1, 2, 4, 5, 7" indicates that the volta is to be played during repeats 1, 2, 4, 5, and 7, and so on.
Note: Each volta section, except the final one, should end with an end repeat barline.
Note: Keep in mind that the repeat is always referenced in comparison to it's starting point (either the most recent start repeat barline or the start of the current section).
Playback
Sometimes a repeat plays more than two times. If you want to change the number of times MuseScore plays a repeat, go to the measure containing the end repeat barline and change its "Play count". See Measure operations: Other properties and the note on playback for voltas in Repeats and jumps.
Play count
The play count of the measure with the end repeat barline must be set (at least) one higher than the number of times you want the measure to play (this is usually equal to the number of entries in that volta repeat list + 1).
Take the following score:
 m3 | m4 :| (volta 2,5) m5 | m6 :| (volta 6) m7 | m8 | m9 ||")
Measure 4 should have play count set to 4
Measure 6 should have play count set to 3
External links
- MuseScore in Minutes, Lesson 8: Repeats and Endings, Part 1 (Video tutorial for MuseScore 2)
- How to create ties leading into a 2nd ending (MuseScore HowTo)
Transposition
Transposition is the act of raising or lowering the pitch of a selection of notes by the same interval. You can choose to transpose notes either manually or by using the Transpose dialog.
Manual transposition
- Select the notes that you wish to transpose;
- Use any of the following options:
- To transpose chromatically (i.e. one semitone at a time): Press ↑ or ↓. Repeat as required.
- To transpose diatonically (i.e. one scale degree at a time): Press Alt+Shift+↑ or ↓. Repeat as required.
- To transpose by an octave: Press Ctrl+↑ or ↓ (Mac: Cmd+↑ or ↓).
Automatic transposition
MuseScore's Transpose dialog gives you more options for transposing notes.

Note: By default this dialog opens from the Tools menu, but you can also choose to open it using a keyboard shortcut (see Preferences).
Transpose Chromatically
To Key
To transpose notes up or down to the desired key:
- Select the notes you want to transpose; no selection equals "select all.".
- From the menu bar, choose Tools → Transpose….
- Tick "Transpose Chromatically" and "To key".
- Tick/untick "Transpose key signature" and "Transpose chord symbols" if required
- Tick one of "Closest", "Up" or "Down" and select a destination key signature from the drop-down menu.
- Click OK.
By Interval
To transpose selected notes up or down in semitone increments:
- Select the notes you want to transpose; no selection equals "select all".
- From the menu bar, choose Tools → Transpose….
- Tick "Transpose Chromatically" and "By Interval".
- Tick/untick "Transpose key signature" and "Transpose chord symbols" if required.
- Tick "Up" or "Down"; and select a transposition interval from the drop-down menu.
- Click OK.
Transpose Diatonically
To transpose selected notes up or down by a diatonic interval:
- Select the notes you want to transpose; no selection equals "select all".
- From the menu bar, choose Tools → Transpose….
- Tick "Transpose Diatonically".
- Tick/untick "Keep degree alteration" and "Transpose chord symbols" if required.
- Tick "Up" or "Down;" and select a transposition interval from the drop-down menu.
- Click OK.
Options
Two options are available for both Chromatic and Diatonic transposition mode in the options area:
- Transpose chord symbols, if required.
- And the choice of Use Double ♯ and ♭ or Single ♯ and ♭ Only
Transposing instruments
Transposing instruments, such as the B-flat trumpet or E-flat alto sax, sound lower, or higher than their written pitch. MuseScore has a number of features to facilitate the scoring of these instruments.
Concert pitch
MuseScore's default viewing mode shows the musical notation in written pitch, but you can choose to display the score in concert pitch instead. In the latter mode, the musical notation of all instruments matches the actual pitches that you hear on playback.
- To change the view to concert pitch: Press the Concert Pitch button to highlight it.
You should ensure that the Concert pitch button is OFF before printing the main score or any parts.
Change staff transposition
Instrument transpositions are already set up in MuseScore. However, if you want a rare instrument or transposition that is not available in MuseScore, you may need to edit the instrument transposition manually.
- Right-click an empty part of the instrument staff and select Staff/Part Properties….
- At the bottom of the window, select the interval of transposition, any octave shifts, and whether the interval is "Up" (sounds higher than written) or "Down" (sounds lower than written).
You can also use the Change Instrument… button in the Staff/Part Properties window to automatically change the transposition to that of a different standard instrument.
External links
- How to transpose (MuseScore How-To)
- Concert pitch or not? (forum discussion)
- How to change enharmonic key signatures for transposing instruments (MuseScore How-To)
Entering and editing percussion notation
This chapter explains music creation on percussion notation staff only, see also the Instruments, staff setup and templates, the standard notation Note input , and the tablature chapters.
The free MuseScore Drumline (MDL) extension offers even more options to write percussion notation. To download and install it, see the Language, translations, and extensions chapter.
Overview

Percussion notation (wikipedia) is a type of musical notation indicating notes to be played by percussion instruments.
Musescore Instruments (see the Instruments chapter) that use percussion notation are under "Percussion - Unpitched", "Percussion - Marching", and "Percussion - Body" groups.
Some Musescore Instruments under "Percussion - Pitched" contain "Drums" in their name, but do not use percussion notation : "Steel Drums", "Soprano Steel Drums", "Alto Steel Drums", "Guitar Steel Drums", "Tenor Steel Drums", "Cello Steel Drums", "Bass Steel Drums". They use standard notation staff, see Note input chapter.
Even though voice (the conventional music concept) usually do not apply to percussion notation, Musescore uses Musescore Voice (a software feature also known as layer) to create collection of notes of different note lengths that begin at the same time. See Musescore Voices chapter.
Percussion staff templates
MuseScore Studio automatically uses a staff template (percussion staff types, eg. 5-line, 3-line, or 1-line staff) that best suits the Musescore Instrument. To change a staff's setting, see Staff / Part properties) chapter.
Real world instruments (sound samples) in a Musescore Instrument
This chapter uses the wording "real world instrument" and "sound sample" interchangably.
A percussion Musescore Instrument usually contains several real world instruments (sound samples). Popular Musescore Instruments that use percussion notation include,
- "Drumset" under "Percussion - Unpitched". This is a single item that contains "Snare", "Bass Drum", "Ride Cymbal" etc sounds. There is no seperate MuseScore Instrument for each of these. Its default notation is covered under the "Note staff space" section.
- "Concert Bass Drum" under "Percussion - Unpitched" contains several sounds, it is not the "Drumset" 's "Bass Drum", and
- "Bass Drum" under "Percussion - Marching" contains several sounds, it is not the "Drumset"'s "Bass Drum",
- etc
Several sound samples are only accessible using the Mixer window:
- "Drumset" Musescore instrument "Standard 1" and other variations, (same for "Room", "Power", "Jazz" and theirs), use them by changing Mixer: Sound dropbox. They are different in playback only.
- "Drumset" Musescore instrument "Brush" and variations, use them by changing Mixer: Sound dropbox. The brush snare is the "Electric Snare" item in Drum notation, only creates short brush playback. There is no seperate MuseScore Instrument for brush snare.
Music entered for a percussion Musescore Instrument is specific to it. "Determine the audio desired before entering notes".
Musescore Instrument data cannot be edited inside Musescore Studio 3.6.2 - there is no interface to change which sound samples a Musescore Instrument contains, or edit any sound data inside.
Determine the audio desired before entering notes
It is advisable to determine the audio (sound samples) desired before entering rhythmic patterns.
It is a misconception that the data in "Drumset" Musescore Instrument are stored as rhythmic pattern data independent of pitch. Internally, notes written for different sound samples are stored as separate pitches. Musescore Studio 3.6.2 does not have user interface for switching sound within the same Musescore Instrument, such as in the case where the user has already written notes for "Hi-hat" sound on a "Drumset" Musescore Instrument staff and wants to switch to use "Ride Cymbal" sound.
Alternatively, the Musescore Instrument can be changed as a whole if desired, but doing so may create undesirable result because notes entered for a percussion Musescore Instrument are specific to it.
Note input
There are several ways to enter music on a percussion staff.
- Using a Mouse (and the Drum Input Palette).
- Via keyboard shortcuts.
- Using an external MIDI controller.
- Using the virtual piano.
There are two kinds of time positions that the user can enter notes and rests on to:
- the current note input cursor position (see Note input mode: note input cursor position chapter), and
- the Available time positions, which are slots where a note can be added by left-click. These positions includes
- places that have existing notes or rests, and
- the beginning (first beat) of each measure.
To create more available time positions, truncate long rests by adding short rests (right click, or use shortcut 0 (zero), see below).
Mouse entry using the Drum input palette
To add a new note at the current note input cursor position:
- Select a starting note or rest, or a measure.
- Enter note input mode (shortcut N). The Drum input palette now appears at the bottom of the screen (see "Drum input palette" section). The Musescore Voices of the note to be added is indicated by note color in Drum input palette : blue for Voice 1, green for Voice 2. Note: The Musescore Voice setting chosen on the top toolbar is not used.
- Select the note duration of new note at the top Toolbar.
- Double-click an item in the Drum input palette. Notes and rests using the same Musescore Voice at the current note input cursor position are overwritten.
- The note input cursor position proceeds forward.
To add a new note or rest at any available time positions:
- Select any note, rest or measure of the staff.
- Enter note input mode (shortcut N). The Drum input palette now appears at the bottom of the screen (see "Drum input palette" section). The Musescore Voices of the note to be added is indicated by note color in Drum input palette : blue for Voice 1, green for Voice 2. Note: The Musescore Voice setting chosen on the top toolbar is not used.
- Depending on the result desired, select an appropiate note duration of new note at the top Toolbar and item in the Drum input palette:
- Rests are always overwritten by notes.
- Any existing notes are retained if the new note's value / duration is equal to that of the existing. A notation similar to a chord is created.
- Otherwise the new note overwrites (or truncates) the existing note.
- Notes and rests of different Musescore Voices do not affect each other. - Left click on a desired available time position on the score to add a note. Right click to add a rest.
Using keyboard shortcuts
Keyboard shortcuts assignment is explained under "Drum input palette" section. To add a note at the current note input cursor position:
- Select a starting note or rest.
- Enter note input mode (shortcut N). The Drum Input palette now appears at the bottom of the screen.
- Select the note duration of new note at the top Toolbar.
- To enter a new note, press the shortcut key (A–G) displayed in the Drum Input palette. The new note uses the Musescore Voices indicated by note color in Drum input palette : blue for Voice 1, green for Voice 2. The Musescore Voice setting chosen on the top toolbar is not used. Notes and rests using the same Musescore Voice at the current note input cursor position are overwritten.
- To enter another note using the same Musescore Voice at the same time position, hold Shift (press Shift+[A–G]). This note uses the Musescore Voices the last note is using, but not the setting indicated in Drum input palette.
- To enter a rest of the selected duration, press 0 (zero).
- The note input cursor position proceeds forward.
MIDI controller
To add a new note at the current note input cursor position:
- Ensure that the MIDI controller is connected and functioning correctly.
- Select a starting note or rest.
- Enter note input mode (shortcut N).
- Select the Musescore Voice and the note duration of new note at the top Toolbar. (The new note does not use the Musescore Voices indicated on Drum input palette.)
- To enter a new note, press a MIDI controller key.
- To add another note at the same position, keep the first key held down while pressing the second key.
Virtual piano keyboard
To add a new note at the current note input cursor position:
- Ensure that the Piano keyboard is displayed. Press P (or select it from the menu, View → Piano Keyboard).
- Select a starting note or rest.
- Enter note input mode (shortcut N).
- Select the Musescore Voice and the note duration of new note at the top Toolbar. (The new note does not use the Musescore Voices indicated on Drum input palette.)
- To enter a new note, click a virtual piano key.
- To add another note to the same time position, press Shift and hold it while pressing the new note (in versions before 2.1, use Ctrl (Mac: Cmd)).
Docking and undocking the virtual piano keyboard
By default, the piano keyboard is docked at the bottom of the screen—to the left of the Drum input palette.
To undock the panel, drag the title bar.
To dock the panel:
- Drag the panel downwards to the center and it will overlay the Drum input palette, full length. Both panels can then be accessed by Tabs.
- Drag the panel downwards to the right/left and it will dock to the right/left of the Drum input palette.
Drum input palette

Drum input palette is displayed at the bottom of the screen when,
- a percussion staff is selected, and
- it is currently in note input mode (shortcut N).
The palette items are used to enter new notes with mouse or keyboard shortcuts.
Each item (note) in the palette represents a percussion sound sample, position the mouse pointer over it to view its name. The letters A–G shown on items are keyboard shortcuts. They do not refer to note pitches. Keyboard shortcuts can be changed using the Edit Drumset window.
The Edit Drumset window

Do not be confused by the wording "Edit Drumset". It is not possible to edit data inside Musescore Instrument (such as changing the sound samples inside a "Drumset" Musescore Instrument) inside Musescore Studio 3.6.2 (see "sound samples in a Musescore Instrument" section).
To open the "Edit Drumset" window, use one of the following options:
- Click on the Edit Drumset button at the left of the Drum input palette.
- Right-click on a percussion staff and select "Edit Drumset...".
Most settings inside this window affect "Drum input palette" items, which are used to enter new notes with mouse or keyboard shortcuts, except for the Staff line and the Notehead group settings which also affect all notations on the selected staff.
The left pane lists the instrument (sound samples) available in the current Musescore Instrument (see "Overview").
- No.: the MIDI pitch data utilized internally, reference of sound sample used to create audio.
- Note: the MIDI pitch data utilized internally, reference of sound sample used to create audio.
- Shortcut: see below.
- Name: see below.
The right pane displays details of the sound sample selected on the left pane, these settings are used to display notes on the score. Any changes made here are automatically saved in the parent MuseScore file.
- Name: for display on Drum input palette only. Leave empty to remove this note from the Drum input palette.
- Notehead group: the staff-wide notehead shape setting. Affects all notes of the currently selected staff. See also the "Notehead shape" section
- Edit Noteheads and sub-settings inside the box: Check the box to use a overriding custom notehead shape setting. Affects all notes of the currently selected staff. See also the "Notehead shape" section.
- Default voice: See Musescore Voices. Does not affect input from a MIDI controller or the virtual piano keyboard. Affects palette item only, but not any existing notes on the score.
- Staff line: The staff line/space on which the note is displayed. "0" means that the note is displayed on the top line of the 5-line staff. Negative numbers move the note upwards step by step, while positive numbers move it downwards in the same way. Affects all notes of the currently selected staff.
- Shortcut: the computer keyboard shortcuts for entry, see "Using keyboard shortcuts" section.
- Stem Direction: See "Note stem direction" section
The settings in this window can be saved as an independent .drm file by pressing Save As.... To import a settings use the Load... button. See files under External links.
Drum map and Test out sound samples
Refer to a General MIDI Level 2 (GM2) percussion key map (drum map) for each sound sample's corresponding key (pitch). Some keyboards (e.g., Casio) display percussion symbols next to the keys as an aid to the user.
Outside the note input mode (press ESC), pressing an external MIDI controller key, or a vitual piano keyboard key demo the sound only, it does not create any note on a staff.

Note stem direction
Stem direction in percussion notation has been used by musicians to convey several distinct meanings. For example, the "hands up, feet down" and other rules explained in Better drumset notation (with focus on stem direction) forum discussion, the "pulse and rhythm" rule explained in https://www.onlinedrummer.com/blogs/drum-lessons/introduction-to-voicin….
In Musescore Studio, note stem direction in percussion notation is determined by,
- Musescore Voice
- specified by the Drum input palette item that was chosen by the user, if the note was entered the note using a mouse, or computer keyboard shortcuts only. See the "Note input methods" and "Drum input palette" sections, and
- specified by the Toolbar voice button that was selected by the user, if the note was entered using an external MIDI controller, or the virtual piano keyboard only. See the "Note input methods" section, and - note property that can be changed using the Inspector, see the Inspector chapter.
Users should be aware Musescore Voice feature (see the Musescore Voices chapter) dictates that notes in the same Musescore Voice (layer) share the same note duration and therefore should not assign Musescore Voice to notes and Drum input palette items solely based on the stem direction desired.
Note staff space
In percussion notation, a note's staff line / space / vertical position usually denotes the instrument (sound sample) used.
To change all notes of the currently selected staff, edit the Staff line explained in "Edit Drumset" section.
Shown below is the default definition of the "Drumset" MuseScore Instrument.

drumsetdefaultdef3.mscz
Notehead shape
In percussion notation, a note's shape usually denotes pitch.
To change selected staff's setting, edit Notehead group and Edit Noteheads as explained in "Edit Drumset" section. Use this method to use "cross", also known as "ghost note or dead note" by musicians.
To add brackets (parentheses, dead note or ghost note) to individual notes, use the Noteheads palette item. To add additional "open circle" symbols, apply the Articulation palette item. They do not affect playback inside Musescore.
Other notations
Sticking
To enter sticking symbols (R, L):
- Select a start note;
- From the menu, select Add→Text→Sticking. Alternatively, set up a keyboard shortcut to do the same thing in Preferences;
- Input the symbol just as you would normal text. To move forward or backwards to the next note, use the same keyboard shortcuts as for chord symbols.
- To exit, press Esc, or click on a blank section of the score.
Add drum roll
To create a drum roll, use a Tremolo.
External links
- How to create jazz drum notation [MuseScore How-To]
- Video tutorial: MuseScore in Minutes: Lesson 7 - Tablature and Drum Notation
- Drum Parts [video]
- Editing the Drum Palette in MuseScore 1.1 [video]
- Saving Drumset Changes in MuseScore 1.1 [video]
- Notation standards
- Drum magazine reference chart (June 2007) http://musescore.org/sites/musescore.org/files/Drum_Notation_Chart.jpg
- Sibelius http://musescore.org/sites/musescore.org/files/notation_drumset_en.png , based on the recommendations of the Percussive Arts Society found in Norman Weinberg’s Guide To Standardized Drumset Notation (2002, ISBN 0-9664928-1-1)
- A french drumset, Nicolas http://musescore.com/nicolas/scores/35344 , based on discussion http://musescore.org/fr/node/14340#comment-49750 and loosy based on the Dante-Agostini method https://musescore.org/sites/musescore.org/files/Image%2010.png
- Guide to Drum and Percussion Notation
- Drm files
- https://musescore.org/fr/node/14340
- https://musescore.org/en/node/81636
- Weinberg's Standardized Drumset Notation in Musescore, @RunasSudo, Apache Licence 2.0. https://yingtongli.me/blog/2020/06/24/weinberg-musescore.html
Tablature
Music for fretted, stringed instruments is commonly notated using tablature, also known as tab, which provides a visual representation of the strings and fret numbers:

Tablature can also be combined with traditional staff notation:

Create a new tablature staff
If you wish to create tablature as part of a new score, use the New Score Wizard. If you want to add tablature to an existing score, use the Instruments dialog. Or, alternatively, you can convert an existing standard staff. See below for details.
With the New Score wizard
To create tablature in a new score (for combined staff/tablature systems see → below):
- Open the New Score wizard.
- Enter the score details (optional). Click Next.
- On the Choose template file page, click on Choose Instruments under "General".
- On the Instruments page, select the desired tablature in the "Strings – plucked" category, in the left-hand column. Then click Add.
- Complete the rest of the New Score Wizard.
Note: If the desired tablature is not available in the Choose Instrument list, add a tablature staff anyway at step 4 (above). Then edit the tablature to your exact requirements using the Staff/Part properties dialog.
With the Instruments dialog
To add a single tablature staff to an existing score (for combined staff/tab system see below):
- Open the instruments dialog (press I; or from the menu bar, select Edit → Instruments…).
- Click on the staff to which you want to add another (linked or not).
- Add the tab staff as described in Add instruments ("Create a new score").
By changing staff type
To convert an existing standard staff to tablature, or tablature to a standard staff:
- Right-click into an empty spot of the staff and select Staff/Part Properties…. If "Instrument" is already set to a plucked-strings type, then go to step 3.
- If "Instrument" is not a plucked-strings type, click on Change instrument and select an appropriate instrument from "Strings – Plucked."
- Click on Advanced Style properties, select the appropriate tablature option from "Template", then press < Reset to Template. You can fine tune the display if necessary using the "Fret Marks" and "Note Values" tabs.
- Click OK twice to exit.
Edit string data
Change tuning
Note: If you only want to view (rather than change) the instrument tuning, follow steps 1 and 2 only.
-
Right-click on the staff and select Staff/Part Properties….

-
Press the Edit String Data… button at the bottom of the dialog box. The String Data dialog opens:

-
Click on a string pitch and select Edit String…. Or, alternatively, just double-click the string pitch.
- Select a new pitch in the Note Selection box and click OK. Or, alternatively, just double-click the new pitch.
- Click OK to close the "String Data" dialog box. Then click OK to close the "Staff/Part Properties" dialog.
Notes: (1) If tuning is changed when the tablature for that instrument already contains some notes, fret marks will be adjusted automatically (if possible); (2) Any change of tuning to a particular instrument applies only to the score at hand, and does not change any program default settings.
Add a string
- Right-click on the staff, select Staff/Part Properties…, then press Edit String Data.
- Click on a string pitch and select New String....
- Select the new pitch and press OK—or, alternatively, just double-click the new pitch. The new string is inserted below the selected string.
Note: After adding a tablature string you will need to adjust the number of lines in the Staff/Part properties dialog.
Delete a string
- Right-click on the staff, select Staff/Part Properties…, then press Edit String Data.
- Click on a string pitch and select Delete String.
Note: After deleting a tablature string you will need to adjust the number of lines in the Staff/Part properties dialog.
Mark unfretted string "open"
This feature is used to mark a (bass) course as unstopped (i.e. like a harp string, only played in the open position): as on a Baroque lute or Theorbo etc. This means that only "0" (zero) or "a" is accepted as a fret mark: any other fret mark will be converted to 0/a.
- Right-click on the staff, select Staff/Part Properties…, then press Edit String Data.
- Check one or more boxes in the "Open" column.
Change number of instrument frets
This property defines the maximum fret number which can be entered on a tablature staff.
- Right-click on the staff, select Staff/Part Properties…, then press Edit String Data.
- Select or enter a new number in the "Number of frets" spin box.
Change tablature display
From Staff / Part Properties
To access the full range of tablature display options, use the Staff / Parts Properties dialog:
- Right-click on the staff and select Staff/Part Properties….
- Click on the Advanced Style Properties… button.
From the Instruments dialog
Some basic tablature display options are available from the Instruments dialogue:
- Press the keyboard shortcut I; or from the menu bar, select Edit → Instruments….
- Select a tablature type from the drop-down list under "Staff Type" in the right-hand pane:
- Simple: Displays fretmarks only. Best for staff/tablature systems.
- Common: Displays fretmarks, note stems and beams.
- Full: Displays fretmarks, enhanced note stems, beams, and rests.
- Italian/French: Historical tablature options for the lute.
The same options are available from the Choose Instruments page of the New Score Wizard.
Combine pitched staff with tablature
Plucked-string instruments—such as the guitar—are commonly notated using both a music staff and tablature (TAB) together. MuseScore gives you the option of having the two staves either unlinked or linked:
-
Unlinked Staves: The advantage of using this option is that each staff can be edited independently. To transfer music notation from one staff to the other, select the desired range and copy and paste it onto the other staff.
-
Linked Staves: The staves are "mutually updating": i.e. any change you make to the notation in one staff is immediately applied to the other staff as well.
A note on fret mark conflicts: When the same note is entered in two different voices, MuseScore tries to ensure that the fret marks do not overlap on the same string. Any overlaps which do occur are marked with red squares: these appear only in the document window and not on any printed copy. In almost all cases (e.g. frets 0 to 4 on the 6th string), overlapping is the desired result and no further adjustment is required. You can hide the red marks by selecting "View" and unticking "Show Unprintable."
Create a new staff/tablature pair with the New Score Wizard
- Open the New Score wizard.
- Enter the score details (optional). Click Next.
- On the Choose template file page, click on Choose Instruments under "General".
- Select a music staff (not tab) in the "Strings – Plucked" section of the left-hand column. Then click Add.
- In the right-hand column, click on the newly-created line, labelled "Staff 1". This reveals the "Add Staff/Linked Staff" options in the centre column:
- Click Add Staff to create an unlinked staff/tab pair.
- Click Add Linked Staff to create a linked staff/tab pair.
- In the Staff type column, click on the dropdown list for the newly-created staff and select a tablature option (this can be modified later, if required, on the score page—see Staff/Part Properties).
- Change the staff order using the ↑ button if needed.
- Complete the rest of the New Score Wizard, or click Finish.
Note: To create unlinked staves with separate mixer channels, instead of step "5" (above), select a Tablature staff in the left-hand column and click Add. Then continue with steps 6 and 7.
Create a new staff/tablature pair in an existing score
- Open the Instruments editor (press I, or from the menu bar, select Edit → Instruments…).
- Then follow steps 4–8 above.
Create a staff/tablature pair from an existing staff
To add tablature to a plucked-string staff in the score (or vice versa):
- Open the Instruments editor (press I, or from the menu bar, select Edit → Instruments…).
- In the right-hand column, select the staff you want to create the staff/tab pair from, then follow one of the options shown in step 5 above.
- Continue with steps 6–8 above.
Enter notes in tablature
Using a computer keyboard
- In Normal mode, select the measure or existing note from which you want to begin note entry.
- Switch to note input mode (N): a short 'blue rectangle' appears around one tablature string: this is the current string.
- Select the duration of the note or rest that you wish to enter (see below).
- Press the up/down arrow keys to move the cursor to the desired string. Use the left/right arrow keys to navigate through the score.
-
Press 0 to 9 to enter a fret mark from 0 to 9 on the current string; to enter numbers with several digits press each digit in sequence. Keys A to H and K can also be used: convenient when working in French tablature. For L , M, N, use the alphanumeric keyboard and type respectively 10, 11, 12... (Note: You cannot enter a number higher than the "Number of frets" value set in the Edit String Data dialog).
Press ; (semicolon) to enter a rest of the selected duration.
-
You can enter notes in different voices if required—just as you would in a standard staff.
See also, Edit notes (below).
Historical tablature
Period notation for bass strings (lutes and sim.) is supported:
-
French tablature: letters with prefixed slash-like strokes right under the tab body: i.e. 7th string: "a", 8th string: "/a", 9th string: "//a" and so on, all in the first position below the tab body.
-
Italian tablature: numbers with 'ledger line'- like segment of string above the tab body: i.e. 7th string: "0" one position above the tab body with one 'ledger line'; 8th string: "0" two positions above the tab body with two 'ledger lines' and so on.
Input of fretmarks is via computer keyboard only: by moving the note entry cursor below (French) or above (Italian) the tab body, 'shadow' slashes or ledger lines will indicate the target string to which the fret mark will be applied; pressing one of the fret keys, will enter (and lay out) the note on that string.
Using a mouse
To enter notes into tablature with a mouse:
- Enter note input mode and select the note or rest duration (see below).
- Click on a string to create a note there. Notes are initially created on fret 0 (or a for French tablatures): to correct, type in the right number from the keyboard.
- You can also increase/decrease the fret mark using Alt+Shift+↑ or Alt+Shift+↓.
- You can enter notes in different voices if required—just as you would in a standard staff.
See also, Edit notes (below).
Select note duration
In note input mode, you can use any of the following methods to set note duration in tablature:
- Press Shift+1 to Shift+9: Sets duration from a 128th to a longa (availability of these shortcuts may depend on the platform and/or keyboard layout);
- Press NumPad1 to NumPad9: Sets duration from a 128th to a longa (if a numeric keypad exists and NumLock is on);
- Click on a note duration icon in the Note Input toolbar above the document window;
- Press Q to decrease the selected duration and W to increase it.
Edit notes
Change fret number
In Note input mode:
- Position the cursor above the fret mark and retype the desired number.
- Increment or decrement the fret mark using Alt+Shift+↑ or Alt+Shift+↓ (The fret mark automatically changes strings, if necessary, to achieve the lowest possible fret position).
In Normal mode:
- Select one or more fret marks.
- Use any of the following commands:
- To increment or decrement, without changing the string: Press ↑/↓.
- To increment or decrement, changing strings, when possible, to minimize the fret number: Press Alt+Shift+↑/↓
Note: The fret mark cannot be higher than the "Number of frets" value set in the Edit String Data dialog.
Change string number
To move the fret mark to an adjacent string without changing the pitch (if the string is free and can produce that note):
In Note input mode:
- Position the cursor over a fret mark, and press Ctrl+↑/↓ (Mac: Cmd+↑/↓).
In Normal mode:
- Select one or more fret marks, and press Ctrl+↑/↓ (Mac: Cmd+↑/↓).
- Drag a fret mark up or down to an adjacent string.
Crosshead notes
To change a fret mark to a crosshead note:
- Select one or more fret marks (in non-note-input mode).
- Press Shift+X to toggles ghost noteheads on/off.
Summary of keyboard commands
Note input mode
| Type: | to get: |
|---|---|
| ↑ | Select above string as current. |
| ↓ | Select below string as current. |
| Shift+1 to Shift+9 | Select a duration (128th to a longa) |
| NumPad1 to NumPad9 | Select a duration (128th to a longa) |
| Q | Decrease current input duration. |
| W | Increase current input duration. |
| 0 to 9 | Enter a fret digit / letter. |
| A to H, K | Enter a fret letter / digit. |
| Alt+Shift+↑ | Increase current fret mark. |
| Alt+Shift+↓ | Decrease current fret mark. |
| ; (semicolon) | Enter a rest |
Normal mode
| Type: | to get: |
|---|---|
| 0 | Change note to rest |
| 1 to 9 | Change duration of selected note or rest (128th to longa) |
| Alt+Shift+↑ | Increase the pitch of the selected note (MuseScore chooses the string). |
| ↑ | Increase the pitch without changing string. |
| Alt+Shift+↓ | Decrease the pitch of the selected note (MuseScore chooses the string). |
| ↓ | Decrease the pitch without changing string. |
| Ctrl+↑ (Mac: Cmd+↑) | Move note to above string, keeping the pitch. |
| Ctrl+↓ (Mac: Cmd+↓) | Move note to below string, keeping the pitch. |
| Shift+X | Toggle the ghost notehead on/off. |
External links
| Vedlegg | Størrelse |
|---|---|
| freight_train_tab.png | 10.3 KB |
| Note selection_en.png | 68.4 KB |
| LAS MUJERES LO BAILAN BIEN BANDA - Trumpet in Bb 2_240923_181258.pdf | 69.8 KB |
Sound and playback
This page is an administration page intended for the editing community only. Click this link to go to the handbook front page intended for public viewing.
Mid-staff instrument changes
To add a new instrument to a score and manage instruments setup, use Instruments dialog instead.
To switch an instrument and change its staffs everywhere on a score, use Staff / Part properties instead.
To switch to another sound sample (switch channel) (e.g. pizz., con sordino) inside an instrument, use Staff Text instead
Change Instrument Text
When a musician is required to double up on a different instrument for a section of a piece, an instruction to switch instruments is generally placed above the staff at the beginning of that section. A return to the primary instrument is handled in the same manner.
MuseScore uses a special class of text called Change Instrument text for this purpose. This allows you to change the instrument for that staff at a chosen point in the score, and have this reflected in playback.
Add change instrument text
- Select the start point for the change by clicking on a note or rest;
- In the Add menu, choose Text, then choose Instrument Change.
- Type any character/text so you don't end up with an empty text element
- Right click on the just typed text and in the context menu choose Select Instrument.
This opens the Change instrument dialog: the top box shows the current instrument, the bottom the list of selectable instruments;

- Choose the instrument, then click OK. Text indicating which instrument the player will use appears in the score.
- Insert a new key signature, if required, at the change, for the staff in question.
Warning: While the "Change Instr." text is also available from the Text Palette, it contains a bug in MuseScore 3.x where transposition for the new instrument might break. Use the Change Instrument Text from the menu instead to prevent this bug.
How Instrument change text affects the score
An instrument in Musescore is a concept including score settings, behaviors (transposition, playable range), sound etc. More info.
Sound setting changes using a Change Instrument text can be observed:
- The sound played on that track in the score will be changed to that of the new instrument from that point onward. The Mixer display mixer changes to add one or more new sub-channels. It is these new sub-channels that can be edited to a new sound.
For example, here is a Mixer display showing the "Tuba" track (first track) among many others. Notice that the small arrow at the top of the Tuba track is dimmed. No new instruments have been added to it.

Now, to the Tuba stave in the score, a "Change Instrument" text has been added to the score, inserting an "Oboe". Notice now that the top arrow on the Tuba track in the Mixer menu has darkened.

Now, if that arrow in the Mixer menu is clicked, a sub-menu opens, showing the sounds of the Tuba are still there (1st two sub-channels), but a new "Oboe" sub-channel has been added. By clicking on this sub-channel, you can assign a sound to the Oboe from the "Sound" tab on the Mixer menu (see below):

- Subsequent notes are automatically adjusted to indicate the correct written pitch for the new instrument (but the new key signature still needs to be added manually—see below).
To change the track back to its original instrument, just insert a new "Change Instrument" text into the stave after the first one, and name the original instrument. For example, in this example, the Tuba stave has been returned back to Tuba. Notice that in the Mixer menu, a new "Tuba" sub-channel has been added after the "Oboe" sub-channel.

- The new instrument name will be displayed in front of the following systems.
Mixer

The Mixer contains controls for adjustments of in-app playback (sound, volume and panning), and MIDI out settings. It contains the Details Area on the top and the Control strips Area below. In between the two is a wide button with a tiny triangle. Clicking on it toggles the visibility of the details area. It uses the Preferences > Score > "Show MIDI controls in the Mixer" as default setting.
Opening the Mixer
To display/hide the mixer, use one of the following:
- Press F10 (Mac: Fn+F10).
- From the main menu, select View→Mixer.
Control strips Area

Expanded parent control, showing child controls in pink.
Displays the Master Gain on the left, and columns of controls on the right. It is important to know the difference between channel and sound track (Musescore Voice):
- Every staff on a score belongs to its MuseScore Instrument. For example when a piano is added to a score, the two staffs created, the treble clef staff and the bass clef staff, belong to the same piano instrument.
Each instrument has one or more channel depending on its playback capability inside Musescore. A channel represents a specific type of sound, similar to the concept of playing technique (e.g. a violin which can play in arco, tremolo or pizzicato, legato, vibrato), or articulation sample in commercial sound libraries. Each control strip in the Mixer represents one channel of the score.
When an instrument on a score contains more than one channel. A parent control strip is shown in the Mixer, it has an arrow button on the top left corner. Click the arrow to show or hide all channels. Parent control shadows the first child control, modifying values on parent control modifies all children values. - For each staff (that can contain a clef symbol) in a score, MuseScore creates exactly four sound tracks. They correspond to the four Musescore Voices. To instruct individual sound track (Voice) to use a channel (sound), use a Staff Text as explained below. Contrary to the concept of sound track and mixer in popular DAWs, Musescore 3 Mixer has nothing to do with sound tracks (Voices) except the ability to mute (jump to).
Note: (a) In Musescore 3.6.2, the Mixer does not response to selection on the score screen area, a control in the Mixer must be selected with a mouse click first, before any adjustment is made. (b) It is not possible to add or remove channel inside a instrument on a score inside Musescore. To add or remove a channel, or set default values, a custom instrument must be created utilizing a instruments.xml. The topic is covered in the developers' handbook. (c) Parent control strip is formerly referred to as "part track".
Master Gain
The Master Gain controls the overall output volume. To adjust it, click and drag the slider handle or enter a value in the box underneath.
Channel display arrow
When an instrument on a score contains more than one channel. A parent control strip is shown in the Mixer, it has an arrow button on the top left corner. Click the arrow to show or hide all channels. Parent control shadows the first child control, modifying values on parent control modifies all children values.
Mute and Solo
At the top a green S Solo button and a red M Mute button: click to toggle on and off. If any Solo button is checked, unSolo channels are muted regardless of their Mute status. These modify a channel, not voices.. To mute a voice, jump to Mute Voice
Pan
The dial below the mute button controls panning left and right. You can click and drag. Note that value 64, not 50, is center pan.
Volume
The slider controls the playback volume. This is a final post process output volume. The data size 127 is an arbitrary number not related to MIDI velocity, default 100 value is 90% sound sample volume, more info.
Control strip name
Not to be confused with Long instrument name and Short instrument name in Staff / Part properties.
Display Instrument name or Channel name. Does not affect score visually.
Details Area
The details area displays and provides finer control of the currently selected channel.

Play part only
Playback option to be used with Musescore Parts feature.
Name
Not to be confused with Long instrument name and Short instrument name in Staff / Part properties.
Text for display within Mixer only, also known as Part name in Staff / Part properties. Does not affect score visually. Does not affect sound.
Channel
Channel name cannot be modified inside Musescore, use custom instruments.xml instead, more info
Drumset
Affects the whole instrument:
- notation settings. Must be checked to use Drum notation and Drum input palette.
- interpretation of soundfont data. Check or uncheck this box base on the layout of the sound.
Changing without understanding will mess up your score audio.
Sound
Understand difference of channel and voice first, you may not want to edit this field. Consider these alternatives first:
- To add a new instrument to a score and manage instruments setup, use Instruments dialog instead. You should use Instruments dialog if you are not sure, it is the preferred way to setup a score. Doing this ensures written symbols affect sound correctly eg violin tremolo text symbol, bass guitar pizz symbol.
- To switch an instrument and change its staffs everywhere on a score, use Staff / Part properties instead. Doing this also ensures written symbols affect sound correctly.
- To switch the instrument used by one staff at a chosen point in the score, use 'Change Instrument' Text instead. Use this to instruct your musician to dump an instrument and pick up another mid stream.
- To switch to another sound sample (switch channel) (e.g. pizz.) inside an instrument, jump to Mid-staff sound(channel) change or use a custom Staff Text instead. Similar to keyswitches / articulation-switching in commercial sound libraries. You can do this to each voice separately.
If none of the above options fit, read on to edit sound.
The sound option is the sound data that an instrument channel use for playback. The data reference method depends on the order of soundfonts in the Synthesizer, pay attention to Synthesizer setting before you close and restart Musescore.
Correct audio won't be produced unless you setup Drumset correctly, you must understand the sound's layout.
The drop-down menu lists every sound from SoundFont loaded in the Synthesizer. They are ordered as the order of soundfont files in the Synthesizer: SF2/SF3 by MIDI Bank first, then SFZs. It is not an alphabetical order. To jump to the sound you desire quickly, while the list is open press on your keyboard (once or more) the first letter of the name.
Sound is formerly named Patch.
Volume
Same as volume slider on control strip
Pan
Same as panning slider on control strip
Track (Control strip) color
Color for display in Mixer only, does not affect score visually. Affects whole instrument. To change, click the colored rectangle to pick from the color palette.
MIDI controls
Port and Channel
The output MIDI port and MIDI channel. As of Musescore 3.6.2, MIDI output driver of the program only use 1 port and 16 channels on the operation system.
Reverb and Chorus
The reverb and chorus value sent to MIDI out. Sent to MIDI devices only. Does not affect MuseScore's built in audio playback.
Mute Voice
Mute individual Voice. Each row represents one staff of the instrument. So pressing '2' on the top row will mute the second voice of the first staff of the instrument. This field is different from all others as it affects voice instead of channel.
Mid-staff sound (channel) change (pizz., con sordino, etc.)
Understand the concept of channels. You can also do these instead:
- To add a new instrument to a score and manage instruments setup, use Instruments dialog instead.
- To switch an instrument and change its staffs everywhere on a score, use Staff / Part properties instead.
- To switch the instrument used by one staff at a chosen point in the score, use 'Change Instrument' Text instead.
Some instruments come with multiple channels that you can switch audio playback to and from. For example, the build-in string instrument (violin, viola, cello etc.) has three channels: "arco" (or "normal"), "pizzicato" and "tremolo." The build-in trumpet has two channels "open" (or "normal") and "mute".
To switch channel, add a pre-configured Staff Text or add a plain one and edit it, as explained below. All subsequent notes of affected Voice(s) will switch to play the sound assigned to that channel, unless instructed to do otherwise with another Staff Text object. For example, all notes after a 'pizz.' Staff Text use the "pizzicato" channel, to return to arco (use sound of "normal" channel), a new 'arco' text must be added.
Pre-defined Staff Text

The 5 build-in pre-configured Staff Text in the Text palette (pizz., arco, tremolo, mute, open) instruct all four Voices of a staff to use respective channel. They affect one particular staff, but not the other staffs of the same instrument.

The 4 build-in pre-configured Staff Text in the Text palette (S/A, T/B, T/L, B/B). They only work on:
- any of these Musescore Instruments:
- Men
- Women
- or a score created with any of these templates:
- SATB Closed Score
- SATB Closed Score + Organ
- SATB Closed Score + Piano
- Barbershop Quartet (Men)
- Barbershop Quartet (Women)
They affect one particular staff, but not the other staffs of the same instrument.
- the S/A object: instructs Voice 1 and Voice 3 notes to use the Soprano channel, Voice 2 and Voice 4 notes to use the Alto channel
- the T/B object: instructs Voice 1 and Voice 3 notes to use the Tenor channel, Voice 2 and Voice 4 notes to use the Bass channel
- the T/L object: instructs Voice 1 and Voice 3 notes to use the Tenor channel, Voice 2 and Voice 4 notes to use the Lead channel
- the B/B object: instructs Voice 1 and Voice 3 notes to use the Baritone channel, Voice 2 and Voice 4 notes to use the Bass channel
Custom Staff Text

To use a custom Staff Text :
- Select a note;
- From the main menu, choose Add→Text→Staff Text or use the shortcut Ctrl+T;
- Enter the text. it does not affect playback;
- Right-click on the applied staff text and select Staff Text Properties…;
- Open the "Change Channel" tab of the "Staff Text Properties" dialog. Each row represents one instruction.
- Under "Voices:" subheading on the left, select Voice(s) by pressing on buttons. When a Voice button appears dented and colorized, it indicates that it has been selected.
- Under "Channel" subheading" on the right, select the channel that the selected Voice(s) should use from here after.
- A row that has no Voice selected does not affect the score.
See also
External links
- Mute, unmute and solo actions: Setup keyboard shortcut keys.
- Mixer Minimalistic Style: Vertical minimalistic mixer similar to the Track Control Panel in a DAW.
- How to change instrument sound (e.g. pizz., con sordino) midway through score (MuseScore HowTo, same instruction as above)
Piano Roll Editor
The Piano Roll Editor allows you edit individual notes and tweak aspects of their playback.
The unofficial Musescore post-3.6.2 version (see End of Life plan for 3.x ?) provides "let ring" capability beyond 2000 limit so that better audio output is possible.
Opening the Piano Roll Editor
To open the Piano Roll Editor (PRE), right-click on a measure (the spaces within the five lines if it is a five line staff. Not: the space between two piano staffs, nor right-click on a note / rest) in the score and choose the Piano Roll Editor option from the context menu. The Piano Roll Editor will open showing the staff and measure where you clicked. If the Piano Roll Editor is already open, it will be updated to show the new staff and measure you clicked on.

Overview

The Piano Roll Editor is divided into several sections. At the very top is a row of buttons and controls that affect playback and can modify notes. The name of the part being edited is at the top right.
The central portion contains the Note Display Area which allows you to view and edit notes. Each note is displayed as a block, with yellow blocks representing selected notes, and darker green blocks representing unselected notes (these colors can be changes in the Preferences). Given sufficient space, each block will display its pitch on the left and the voice it is assigned to on the right. Changing the size of the note blocks is covered in the navigation section.
To the left of the Note Display Area is the Keyboard. By clicking on a key in the Keyboard, you can hear a sample of that note playing. As you move the mouse in either the Node Display Area or the Keyboard, a key on the keyboard will light, corresponding to the pitch you are over. You can also hover your mouse over a particular key to get more information about that pitch. If you are using a Drumkit, the keys of the keyboard will show the name of the drum assigned to that particular pitch. For instruments that are not concert C, the keyboard will be adjusted so that the C of the keyboard matches the C of the instrument.

Along the top of the Note Display Area is the Measure Ruler which displays the current position of the playback head, as well as the current looping range if it set.
The bottom of the editor contains the Levels Display Area. It is a bar graph showing extra data values assigned to each note, such as its velocity or cutoff time. To the left of the Levels Display Area is a dropdown menu allowing you to select the type of data you wish to see displayed or edited.
Navigation
There are several ways to move about in the Piano Roll Editor. First of all, you can click and drag on the scroll bars on the edges of the Note Display Area.
The mouse wheel can also be used to pan and zoom as follows:
- Scroll vertically: Mouse wheel.
- Scroll horizontally: Shift + mouse wheel.
- Zoom vertically: Ctrl + mouse wheel.
- Zoom horizontally: Ctrl+Shift + mouse wheel.
To jump to a particular measure, switch back to score view and find the measure you wish to see. Then right-click on the measure and select Piano Roll Editor. The Piano Roll Editor will scroll to center on the measure you clicked.
Selecting Notes
In the Note Display Area, you can click on single notes or click and drag to select a group of notes. Holding down the modifier keys will affect how your selection changes:
- Shift: Invert existing selection: i.e. notes that were previously selected are deselected, and notes which were not selected are selected. Useful for toggling a note between selected and not selected.
- Ctrl: Add notes to selection.
- Ctrl+Shift: Subtract notes from selection.
Editing Notes
To change the pitch of a selection of notes: Drag a selected note up or down to a new pitch; or press the ↑ or ↓ arrows. Note: Dragging the note horizontally to change the start time is not supported at the moment.
To delete a selection of notes: Press the Del key.
To move a note selection to another voice: Click the desired voice number button at the top of the editor.
To add notes:
Notes can be inserted by clicking in the Piano Note Area with the modifier keys held. These edit operations will use the beat or subbeat line to the left of the spot where you click as the point where a note is altered:
-
Ctrl: A note of the current insert note duration will be added at the subbeat and pitch where you clicked. The note insert length is the same as the one you use to add notes in note entry mode in the score. If you wish to change the duration, you will need to select this in the Score View as the Piano Roll Editor does not currently have these buttons. If notes already exist in this location, a chunk will be cut out of them to make room for the note you are inserting, unless they happen to have the same start time and duration of the note you're adding, in which case the new note will simply be appended to the existing chord. Tuplets are currently not supported, and so will be ignored.

-
Shift: Looks for a chord that already spans this subbeat line. If it finds one, appends a new pitch to the existing chord. Otherwise, this is a rest and the rest will be replaced with a note of equal start time and duration to the existing rest.
-
Ctrl+Shift: Looks for a chord or rest that spans this subbeat. This chord will be cut in two at this subbeat line. Tuplets are currently not supported, and so will be ignored.
To edit note event data:
Note event data can be changed in the Levels Display Area. To edit event data such as velocity or cutoff time, first select the notes you wish to edit in the note area. Then click in the Levels Display Area on the corresponding bar; the value of the level will changed to correspond to the point where you clicked. You can also click and drag in this area to change the levels of several notes with a single gesture. If you want the levels to all be set to the same value, hold Shift while dragging. Only selected notes will have their value changed - this is to prevent you from accidentally changing the values of other notes.
The Levels area can display the same data in multiple ways. For example, velocity data can be displayed both as absolute (i.e., relative to the output midi volume) and relative (i.e., as an offset to the dynamics value). You can switch between these display modes as you see fit.

Controls
From left to right the controls have these functions;
First Row
- Undo
- Undoes the last action
- Redo
- Redoes the last action
- MIDI Toggle
- Toggles MIDI input
- Rewind
- Rewind to start of score.
- Play
- Starts/stops playback.
- Loop Playback
- Sets the range of and toggles looping playback.
- Play Repeats
- Toggles whether repeats are played.
- Pan Roll During Playback
- If set, the window will automatically scroll to center on the playback head during playback.
- Metronome
- Toggle metronome.
- Wave
- Currently does nothing.
- Voice Numbers
- Moves selected notes to chosen voice.
- Part
- Name of part currently being viewed/edited.
Second Row
- Cursor
- Provides feedback on the current measure and pitch of the position of the mouse within the Note Display Area.
- Subdiv
-
Subdivides the beat by adding extra divisions to the Note Display Area. The value indicated the number of time the beat will be subdivided. So for 4/4 time, a division of 2 will draw grid lines at every eighth note; a division of 3 at every sixteenth note, and so on. Setting the subdivision is necessary for some editing operations if you wish to place notes off the beat.
For larger numbers of subdivisions, you may need to be zoomed in to see the extra grid lines since grid lines are not drawn below a certain density. Combines with the tuplet control which also affects grid line placement.
- Tuplet
-
Adds additional grid lines, subdividing the beat to show the rhythmic placement of tuplets. For example, setting tuplets to 3 will show the beat subdivided into three parts. Combines with the subdiv control to show subdivisions of the tuplet. For example, setting tuplets to 3 and subdiv to 2 will draw grid lines showing the tuplet beats subdivided into two parts - i.e., the beat will be subdivided into 6.
Selecting a tuplet mode other than 1 will disable some of the note insertion tools for the Piano Roll Editor. For larger numbers of subdivisions, you may need to be zoomed in to see the extra grid lines since grid lines are not drawn below a certain density.

- Stripe pattern
- Changes the pattern of stripes shown behind the notes in the Note Display Area. By default the pitches of C major are highlighted, but you can change this to highlight the pitches of a different key, or even scales such as the diminished or whole tone.
- Velocity
-
Shows the velocity of the currently selected note (only one note may be selected). Indicates the loudness of the note. This can be expressed as 'Offset' or 'User':
- Offset: Value is treated as a multiplier for the velocity already set by the dynamics.
- User: This is the raw value being sent to MIDI and overrides the dynamics value. Values are between 0 and 127, where 64 is "middle, neither loud nor soft".
When you switch from User to Offset or vice versa, the value will be recalculated to best match the value in the other system. This way you could, for example, switch to User mode to set the value as you would like it to sound in MIDI output and then switch to Offset so that this value respects the dynamic marking instead of overriding it. At the moment you switch back, the offset value will be recalculated to match the User value in loudness but will no longer act as an override so you may later change the dynamic.
- Pitch
- Shows the pitch and octave of the selected note in text format (i.e. f#4).
The pitch will change if the note is dragged Up or down to a new pitch. Currently cannot be edited. - OnTime
- Shifts the start of the note in time, which can be used to modify the playing style. Negative values will make the note sound earlier, positive will make it sound later. The duration of the note corresponds to a value of 1000 (e.g. setting the value to 250 will make the note sound 1/4 of its duration later).
- Length
- Set the time that the note is sounding, which may be used to modify the degree of "legato". Lower values will make the note sound more staccato, higher values will make it sound more legato. The duration of the note corresponds to a length of 1000, but the value can be set higher. 950 is usually considered "non-legato".
Keyboard
Some keys are hooked up to perform special actions:
- ↑: Move selected notes up one semitone
- ↓: Move selected notes down one semitone
- Del: Delete selected notes
- Space: Start/stop playback
Customization
The Piano Roll Editor will display in both normal mode and dark mode. If you wish to change the colors the Piano Roll Editor uses to display in these modes, they can be adjusted in the Preferences under the Advanced tab. All the Piano Roll Editor related properties begin with ui/pianoroll/light for light mode and ui/pianoroll/dark for dark mode.
Play mode
Playback toolbar
Basic playback functions are accessed from the Play toolbar located above the document window:

From left to right, the icons are:
- Toggle 'Midi input':
- Rewind to start position: Playback returns to the beginning of the score, or to the start of the loop (if one is set).
- Start or stop playback: See Start/stop playback.
- Toggle loop playback: See Loop playback.
- Play repeats: Turn off if you want playback to ignore repeats.
- Pan score during playback: Turn off if you want the score to remain stationary.
- Play metronome: Toggles metronome ON and OFF.
Playback commands
Start/stop playback
To start playback:
- Click on a note, rest or the blank part of a measure to establish the starting point. Note: If no selection is made, playback returns to the place it left off; or, if no previous playback, to the start of the score.
- Press the Play button; or press Space.
During playback you can jump to a specific note or rest in the score by simply clicking on it.
To stop playback:
- Press the Play button; or press Space.
During playback
Once playback has started, the following commands are available:
- Go back to previous chord: ←
- Advance to next chord: →
- Go back to start of previous measure: Ctrl+← (Mac: Cmd+←)
- Advance to start of next measure: Ctrl+→ (Mac: Cmd+→)
- Rewind to start of score: Home (Mac: Cmd+Home); or press the Rewind button (playback toolbar).
During playback you can still use keyboard shortcuts to open and close panels, such as Play, Synthesizer, Mixer etc.
Loop playback
- Playback should be off, and the "Loop playback button" on.
- Select the desired region of the score for loop playback.
- Press the playback button.
Playback will now cycle within the region marked by the blue flags.
- Use the "Loop playback" button to toggle the loop on or off.
See also: Play Panel (below).
Play panel
To open the Play Panel use one of the following options:
- Press F11 (Mac: Fn+F11).
-
From the menu bar, select View → Play Panel.

The Play Panel allows you to make temporary changes to tempo and volume, to loop playback between specified points etc.
- Loop playback: Select a start note and click on the Loop in button; select an end note and click on the Loop out button. Press Play to hear the loop. The controls also work during playback.
- Rewind, Play: Playback controls.
- Metronome: Toggle metronome playback ON or OFF. Note about beat subdivision: the metronome adds 'beat subdivision ticks' for sufficiently slow tempo of the piece (see Tempo), but they are not added when the % Tempo is slowed down in the playback panel (it is necessary to edit the piece's tempo to achieve them).
- Count in: (Conductor icon) Adds a count-in when you start playback at the start of a measure. Extra beats are added if you start mid-measure. Toggles ON and OFF.
- Tempo: Make temporary change to tempo. See Tempo : Changing monitoring playback tempo in Play Panel chapter.
- Volume: Make temporary change to volume (resets when program is reopened). Note: To change the default playback volume of the score, see Synthesizer.
Playback: Chord symbols / Nashville numbers
Overview
Musescore, as of 3.5, understands and creates playback for chord symbols and Nashville numbers, but not roman numerals. This chapter discusses the playback settings available. They also affect functionalities other than playback including:
- Audio and MIDI files exported, see the Export chapter, and
- how Musescore lays out notes when the command "Realize Chord Symbols" is used, see Chord symbols: Realize Chord Symbols.
Available settings
The playback behavior of each chord symbol and Nashville number on a score is determined by two levels, see also Layout and formatting chapter.
- Level 1: Properties of each individual object. By default, objects do not have any specific properties. When properties are assigned in the Inspector, they will always be used. To assigned properties to selected object(s):
- Select object(s). To select multiple objects, use Shift+click, or Right-click → Select all similar elements in selected range, see Selection modes chapter.
- Make changes in the Inspector.
- Level 2: The "Style for Chord symbols" (style profile). Every object use it. Its Play option is enabled by default only in score created with MuseScore 3.5 and later. The values inside can be edited in two ways.
- Edited directly in Format → Style… → Chord Symbols window (see Layout and formatting chapter); or
- Assigned with the values of a selected object, by clicking the Inspector : Set as style (bold S) button to the right of Voicing (see Inspector chapter).
On top of settings explained, all these objects attached to one particular instrument (any of its staff(s)) use that instrument's specialized harmony channel. Its control strip is only visible inside Mixer when there is at least one such object. The control strip may be hidden under a parent control strip, in that case click the arrow on the top left corner to show all child strips, see Mixer chapter. Ways to change sound (virtual instrument) used and the volume / muting / soloing are covered in their respective sections.
Every score file has a "Full Score" layout. It also contains "Parts" when the Musescore Part feature is utilized to generate different versions of the same score. Each "Part" and the "Full Score" has their own separate complete set of settings explained above.
Additionally, there are adjustable specific playback settings of Musescore software for these objects. See "Changing settings of Musescore software" section.
Enabling / disabling playback completely
Use combination of the following settings to toggle playback.
- Toggle selected object(s)' Inspector : Chord Symbol : Play property, see overview.
- (requires Musescore 3.5.1 and later) Toggle Play setting of "Style for Chord symbols", see overview.
- Mute/unmute instrument harmony channel(s). See "Changing the volume, muting or soloing a harmony channel" section.
- Change settings of Musescore software. See "Changing settings of Musescore software" section.
Interpretation and voicing settings
- Interpretation
- Literal
- Jazz: Adds color tones (e.g. the major 9th) but may also omit certain notes—this depends on both the chord itself and the context (the next chord in particular)
- Voicing. All voicings include a bass note, 2 octaves below the root note of the chord.
- Auto
- Root only : Just the bass note
- Close : Arranges the notes within the span of an octave
- Drop 2 : Lowers the second highest note of the chord by one octave
- Six Note
- Four Note : 3rd, 5th, 7th and 9th intervals
- Three Note
- Duration
- Until next chord symbol
- Until measure end
- Chord/rest duration
Shown below are different settings used on a CM7 (Cmaj7) chord, and notes demonstrating the resultant playback. The "Close" and "Auto" create identical result. It is not necessarily so for other chords, so it is advisable to use "Close" explicitly when it is the case.

Changing the sound of a harmony channel
Harmony channel use "Grand Piano" sound by default regardless of instrument, except where a score created in Musescore 3.5.1 and later using the Guitar solo template, the "Nylon String Guitar" sound is used by default.
To change the sound:
- Open the Mixer (shortcut: F10, Mac: Fn+F10)
- Inside the Control strips Area, locate the instrument's control strip.
- Click the "Channel display arrow" (the arrow button on the top left corner) to show all child strips.
- Locate the strip that shows in its Name property "harmony" or "Chord syms." (may be truncated).
- Change Sound property.
Note: The exeception that Sound settings of an instrument are shared among Musescore Parts.
Changing the volume, muting or soloing a harmony channel
- Open the Mixer (shortcut: F10, Mac: Fn+F10)
- Inside the Control strips Area, locate the instrument's control strip.
- Click the "Channel display arrow" (the arrow button on the top left corner) to show all child strips.
- Locate the strip that shows in its Name property "harmony" or "Chord syms." (may be truncated).
- Adjust the volume, mute or solo.
Note: In a score file containing multiple Musescore Parts, separate adjustments are needed in each individual Part for the same instrument, as harmony channel volume and mute settings are saved in the Part, but not shared among them.
Changing settings of Musescore software
Requires Musescore 3.5.1 and later
To change the playback function of Musescore software on chord symbols and Nashville numbers, when playing back a score:
- Open Edit (Mac: MuseScore) → Preferences… → Advanced tab.
- Edit options:
score/harmony/play/disableNew: Only affects scores created with Musescore 3.5 and later. The default status is unchecked (playback function enabled). Check it to disable the playback function of MuseScore software.score/harmony/play/disableCompatibility: Only affects scores created with Musescore 3.4.2 and earlier. default is checked (playback function disabled). Uncheck it to enable the playback function of MuseScore software.
To change playback of a chord symbol or Nashville number when it is first added onto a score:
- Open Edit (Mac: MuseScore) → Preferences… → Note input tab.
- Check/Uncheck the Play chord symbol when editing option.
SoundFonts and SFZ files
MuseScore 4.0's Sound and playback support:
- SoundFont (.sf2/.sf3): supported directly, no need to click load in the synthesizer anymore. Setup per instrument in the Mixer. Cannot select preset/bank in the mixer directly (yet). See SoundFonts.
- SFZ (.sfz): supported indirectly through 3rd party VST. See SoundFonts.
- VST, VSTi: supported VST3, some VSTs are reported not working properly. See Working with VSTi
- MuseSounds: free high quality proprietary sounds from MuseGroup, installable thru MuseHub.
The following describes MuseScore 3 only, it contains instructions that do not work on Musescore 4.
Jump to a curated list of free files downloadable, feel free to add to the list.
Overview
All pre-defined instruments added onto a score is capable of creating audio playback without further setup. MuseScore creates audio playback by using the Synthesizer and the virtual instrument technology. MuseScore 3 comes with the free MuseScore_General.sf3 which contains the virtual instrument and human voice sounds, drum/percussion kits sounds, and sound effects needed.
To use custom sounds, install a custom virtual instrument file, enable it inside Musescore, then configure a score to use a sound inside the custom file. The two sample-based MIDI synthesizing virtual instrument technologies supported by Musescore 3 are SoundFont (.sf2/.sf3) and SFZ (.sfz).
Creation of audio playback starts with processing of score notation into MIDI data. MIDI exchange utilized includes sound preset/patch/program, MIDI velocity, MIDI CC etc. To edit sound preset usage, see Mixer chapter. To choose whether Musescore use MIDI velocity or MIDI CC or both, and the MIDI CC number used (CC2 by default), see Synthesizer chapter. These data are used together with SF2/SF3/SFZ data.
SF2/SF3/SFZ data consists of sound samples in (PCM (WAV), OGG, or FLAC format / container) and algorithms that handle MIDI data provided by Musescore (sound volume response / attenuation modulator). MuseScore does not offer functionality to edit any data inside SF2/SF3/SFZ, including the MIDI handling algorithm. How MIDI data such as MIDI velocity affect sound volume is determined by the file but not Musescore, it is solely engineered by the creator of SF2/SF3/SFZ file. The free Polyphone editor can be used to edit them, it can also convert SF2/SF3 into SFZ and vice versa, but with some definition data loss. The SFZ definition files can be edited with any plain text editor.
Install a custom file by copying it into the custom virtual instrument directory, which is configurable in Edit → Preferences: General tab, see Preferences chapter, it is by default:
- Windows:
%HOMEPATH%\Documents\MuseScore3\Soundfonts - macOS and Linux:
~/Documents/MuseScore3/Soundfonts
Then enable the custom file by setting up Synthesizer window. Scores refer to virtual instrument files by their ordering in the list in the Synthesizer window. Scores do not create correct playback, unless the ordering is identical to the ordering used last time. To save and load the ordering setting, see Synthesizer chapter.
Lastly, configure a score to use a sound inside the custom file.
Musescore creates playback audio in real-time, it does not use or save cache. A score using a custom virtual instrument will not create identical playback on another machine unless the custom virtual instrument is also installed on that machine. To export audio as an independent file, see Export chapter.
SoundFonts
SoundFonts (.sf2/.sf3) are virtual instrument files. The SF2 format is invented by a now defunt company, but a copy of the format specification can be viewed online, see Soundfont, MIDI velocity and instruments.xml: Online Resources. SF3 offers sound data compression, see Glossary. One soundfont file is capable of embedding (packaging) all data required for multiple Musescore Instrument sound generation, see the Instruments, staff setup and templates and Mixer chapters.
- GM SoundFonts: Conforms to GM (General MIDI) program / preset numbering standard that Musescore use. If the pre-installed SF3 in Synthesizer is replaced with a custom GM soundfont as 1st ordered item , staffs create correct playback without further tweaking and picking in the Mixer.
- SND SoundFonts: Contains sounds that response to MIDI CC 2 signals created by Musescore 3's SND mechanisms, see Glossary: SND.
Musescore need time to process soundfonts at startup, especially SF3 files. Removing unused files from the list in the Synthesizer can speed up program startup.
Installing SF2/SF3
- Unzip if required
- Double click on a sf2/sf3 file
- A dialog appears asking if you want to install the SoundFont. If not, right-click or Ctrl-click on the file, select to "open with ... MuseScore"
- Click "Yes" to place a copy of the SoundFont file in MuseScore's SoundFonts directory.
- Setup Musescore
- Use it on a score
If you're having problem, move / copy the file manually to the custom virtual instrument directory.
Disabling and uninstalling SF2/SF3
To disable a virtual instrument, remove the file from the list inside Synthesizer.
To uninstall a virtual instrument, remove the file from the directory. This may change the virtual instrument ordering in Synthesizer, which affects all scores previously created with this Musescore program because the order of soundfonts affects playback. Score may play an incorrect sound even if it does not use the virtual instrument you just uninstalled. When Musescore cannot locate particular data, a staff's playback falls back to use the first sound of the first file, that is usually the "Grand Piano" sound of the pre-installed SF3.
Internal structure of SF2/SF3
a simplified illustration
- one SF2/SF3 file, embedding all the following data
- instrument 1 sound 1 (eg guitar normal)
- sound samples (various pitches)
- instrument 1 sound 2 (eg guitar open string)
- sound samples
- instrument 2 sound 1 (eg piano)
- sound samples
- instrument 3 sound 1 (eg violin arco)
- sound samples
- instrument 3 sound 2 (eg violin pizz)
- sound samples
- instrument 3 sound 3 (eg violin tremolo)
- sound samples
- etc
- instrument 1 sound 1 (eg guitar normal)
SFZ
SFZ is a free virtual instrument format not related to sf2/sf3, see https://sfzformat.com . SFZ files do not embed (package) audio sample. Musescore 3 understand and uses each SFZ for one articulation sound of one instrument only, see the Mixer chapter.
Installing SFZ
- Unzip if required
- Move / copy SFZ files and the folders containing audio samples manually to the custom virtual instrument directory. Leave the sub-directories and their contents as they are.
- Setup Musescore
- Use it on a score
Disabling and uninstalling SFZ
Folder structure of SFZ and audio samples
SFZ files do not embed audio data. Audio files (WAV or FLAC format) are usually located in folder(s) next to SFZ file(s):
- SFZ definition file 1 (eg guitar normal)
- SFZ definition file 2 (eg guitar open string)
- SFZ definition file 3 (eg piano)
- etc
- folder(s) next to the SFZs contains all samples
Setting up Musescore to use a custom SF2/SF3 or SFZ
Once the files has been installed, they also need to be enabled inside the synthesizer window, see Synthesizer.
Using a custom sound on a score
If the sound needed is shipped with Musescore, use it by adding instruments onto a score instead, their sounds are already configured properly.
To add a custom sound, choose and add an instrument that use a staff style similar to the custom sound would relate to, then change its sound in the Mixer.
Advanced users could create custom instruments, see developers' handbook instruments.xml chpater. That chapter has info on how to make a soundfont more compatible with MuseScore 3 such as adding sound change text (eg pizz.) support, adding MIDI CC response etc.
List of downloadable SoundFonts and SFZ
The list below are different from other sf2/sf3/sfz online depositories, in that these virtual instruments contains at least one Musescore 3 compatible attenuation modulator. That is, they are engineered to at least responds to one volume-affecting MIDI data exchange practice used by Musescore 3, such as MIDI velocity. Community handbook editors updating this list should be mindful of the distribution aspect of the SoundFonts or SFZ's license (wikipedia)
All sounds
- GeneralUser GS
- Direct download from schristiancollins.com (29.8 MB uncompressed)
- Courtesy of S. Christian Collins
- Magic Sound Font, version 2.0 (67.8 MB uncompressed)
- Arachno SoundFont, version 1.0 (148 MB uncompressed)
- Courtesy of Maxime Abbey
- TimGM6mb:
- The free default soundfont that comes with MuseScore 1
- Direct download from sourceforge (5.7 MB uncompressed):
- License: GNU GPL, version 2
- Courtesy of Tim Brechbill
- FluidR3Mono_GM:
- The free default soundfont that comes with MuseScore 2 (up to version 2.1).
SF3 Direct download from github(13.8 MB).- License: MIT license
- MuseScore_General and MuseScore_General_HQ:
- MuseScore_General.sf3 is the free default soundfont that comes with MuseScore 3 and MuseScore 2 (2.2 and above).
SF3 Direct download from osuosl.org(35.9 MB)SF2 Direct download from osuosl.org(208 MB)
- MuseScore_General_HQ.sf3 is the pre scale-down version of MuseScore_General. You can download and install it inside Musescore 3 as an extension, see Language, translations, and extensions: install extension.
- Changelog.
- License: MIT license
- Courtesy of S. Christian Collins
- MuseScore_General.sf3 is the free default soundfont that comes with MuseScore 3 and MuseScore 2 (2.2 and above).
- MS Basic:
- MS Basic.sf3 is the free default soundfont that comes with MuseScore 4
- More info see notes inside your computer's Musescore 4
MuseScore\instruments\instruments.xml - Bank and program (work in progress) details on google sheets
- Development folder on github
- Timbres of Heaven, version 4.0:
- Direct download from google drive (429 MB uncompressed)
- Direct download from jeetee.net
- Courtesy of Don Allen
- Soundfonts4U (12 MB up to 1 GB, depending on which package you choose)
- Collection of beautifully sounding acoustic guitars as well as pianos, basses, strings, harps and many more.
Orchestral sounds
File that contains common instrument sounds of the four families:
- Sonatina Symphonic Orchestra (503 MB uncompressed)
Downloads: SoundFont | SFZ format
License: Creative Commons Sampling Plus 1.0 - Aegean Symphonic Orchestra
Courtesy of Ziya Mete Demircan (352 MB uncompressed)
Piano sounds
SF2 Pianos
- Acoustic grand piano, release 2016-08-04
Description: Yamaha Disklavier Pro Grand Piano, sf2 format, 36 MB compressed, 113 MB uncompressed, 121 samples, 5 velocity layers
More information: https://freepats.zenvoid.org/ including other soundfonts.
License: Creative Commons Attribution 3.0
Courtesy of Roberto Gordo Saez - Salamander C5 Light
Courtesy of Ziya Mete Demircan (24.5 MB uncompressed)
SFZ Pianos
- Salamander Grand Piano
Downloads: version 2 | version 3
Description: Yamaha C5, 48kHz, 24bit, 16 velocity layers, between 80 MB and 1.9 GB uncompressed
License: Creative Commons Attribution 3.0
Courtesy of Alexander Holm - Detuned Piano (244 MB uncompressed)
License: Creative Commons Attribution-ShareAlike 3.0 - Plucked Piano Strings
Description: 44.1kHz, 16bit, stereo, 168 MB uncompressed
License: Creative Commons Attribution-ShareAlike 3.0 - The City Piano
Description: Baldwin Baby Grand, 4 velocity layers, 696 MB uncompressed
License: Public domain
Courtesy of Big Cat Instruments - Kawai Upright Piano, release 2017-01-28
Description: 68 samples, 44KHz, 24bit, stereo, 2 velocity layers, 58 MB uncompressed
License: GNU General Public License version 3 or later, with a special exception
Courtesy of Gonzalo and Roberto
Drumset SFZs
- The free MuseScore Drumline (MDL) extension contains a collection of drumset sounds, to download and install see Language, translations, and extensions: install extension
Troubleshooting
Tips on extracting downloaded files:
- ZIP (*.zip) is standard compression format supported by most operating systems.
- sfArk (*.sfArk) is a compression format designed especially for compressing SoundFont files. To decompress it, use Polyphone (cross-platform software); or this online service: https://cloudconvert.com/sfark-to-sf2
- .tar.gz (*.tar.gz) is a popular compression format for Linux. Windows users can use 7-Zip; Mac users can use The Unarchiver, or macOS' built-in Archive Utility. Note that if using 7-Zip, you will need to apply decompression twice—once for GZip and once for TAR.
If the toolbar play panel is greyed out, or not visible, follow the instructions below to get your sound working again:
- Right-click on the menu bar and make sure there is a check mark next to the Playback Controls menu item. If this step does not solve your problem, go to Step 2.
- If the play panel disappears after changing the SoundFont, go to Edit → Preferences... → I/O tab and click OK without making any changes. After restarting MuseScore, the play panel should reappear.
If you are setting up a SoundFont for the first time, please use one of the recommended SoundFonts listed above.
If playback stutters, then your computer may not be able to handle the SoundFont being used. The following advice may help:
- Reduce the amount of RAM (memory) used by MuseScore by using a smaller SoundFont. See the list above for suggestions.
- Increase the amount of RAM available for MuseScore by quitting all applications except MuseScore. If you still have problems and a large SoundFont is important to you, consider more RAM for your computer.
Drum notation and Unpitched layout sound requires MIDI Bank number set to 128
The pre-installed SF3
MuseScore 3 comes with the free MuseScore_General.sf3. It is located in the directory shown below. This directory should not be used for installing custom files, the custom virtual instrument directory should be used instead.
- Windows x86 (32-bit) / MuseScore x86:
%ProgramFiles%\MuseScore 3\sound\MuseScore_General.sf3 - Windows x64 (64-bit) / MuseScore x86:
%ProgramFiles(x86)%\MuseScore 3\sound\MuseScore_General.sf3 - Windows x64 (64-bit) / MuseScore x86_64:
%ProgramFiles%\MuseScore 3\sound\MuseScore_General.sf3 - macOS:
/Applications/MuseScore 3.app/Contents/Resources/sound/MuseScore_General.sf3 - Linux (Ubuntu):
/usr/share/mscore-xxx/sounds/MuseScore_General.sf3(withxxxbeing the MuseScore version)
See also
External links
- How to edit a SoundFont (list of softwares)
- The SFZ Format (for details about the sfz specification)
- Soundfont, MIDI velocity and instruments.xml (A guide on how to create and edit a soundfont and its MIDI CC response)
- How to change the SoundFont or add another (MuseScore HowTo)
Swing
MuseScore's swing feature allows you to change the playback of your score from a straight to a swing rhythm. Swing can be applied globally or only to a section of the score, and is fully variable.
Apply swing to a score section
To apply swing to all staves in a system:
- Click on the note where you want swing to start;
-
Click Swing in the Text palette (double-click in versions prior to 3.4);
This inserts a System Text object which affects all staves in the system with a default swing percentage of 60%. -
Edit the Swing text as required;
-
If you need to vary swing from the default setting, right-click the Swing text and select System text properties... Click on the "Swing Settings" tab and adjust note duration and "Swing ratio" as required.

To apply swing only to specific staves in a system:
- Click on the note where you want swing to start;
- Add Staff text;
- Edit the appearance of the text as required;
- Right-click on the text, select Staff Text Properties..., and click on the "Swing settings" tab. Modify as required;
- Repeat steps 1–4 for other staves if needed.
Swing text can be edited and formatted just like any other text object.
Triplet in tempo marking
Often this notation is used to indicate swing:

MuseScore does not have a way to include a triplet in text as a tempo marking, but there is an easy workaround:
- Add Swing text as described above and make it invisible (shortcut V, or untick "Visible" in the Inspector);
- Add an appropriate Image of the required tempo marking to the score. These can be downloaded from the bottom of the "How To" page: How to create a visual swing marking.
- Resize and reposition the image as required.
Return to straight rhythm
If you want playback to return to straight time after a swing section, use one of the following options:
From version 3.4:
- Add Straight text from the "More" field of the Workspace's text palette to the first note or rest of the "straight" section (see above).
Prior to version 3.4:
- Add Swing text to the first note or rest of the "straight" section (see above).
- Edit the text to indicate a return to straight time: e.g. "Straight."
- Right-click on the text and select System Text Properties…. Click on the "Swing Settings" tab and set "Swing to "Off."
Apply swing globally
If you wish to apply swing to the whole score, you can do so from the menu:
- Select Format → Style... → Score.
-
In the "Swing Settings" section, set the desired note value and "swing ratio."

External links
- How to create a visual swing marking (MuseScore HowTo)
- Swing (jazz performance style) (Wikipedia)
Tempo
This page provides information on tempo markings, fermata symbols, their playback details, changing monitoring playback tempo and adding metronome tick sound. To add markings such as ♬ = ♪ 𝅘𝅥𝅯 see Swing chapter.
Tempo marking
Overview
The musical terminology tempo means the speed or pace of a composition. Musicians use tempo markings/marks to indicate tempo. Supported tempo markings include:
- Metronome marks: Consists of a note, an equals sign, and a whole number. For example (crotchet) ♩ = 80
- Verbal tempo indications: Andante, Allegro etc.
- Metric modulations: ♩ = ♪ (crotchet = quaver)
Musescore's synthesizer paces based on two settings:
- The real, written tempo of score. It is only determined by tempo markings on the score. Section breaks and barlines do not reset anything. If no tempo marking is present on a score, it plays as if ♩ = 120 is used (120 crotchets or quarter notes in one minute).
- The control slider that change pace temporarily, intended for monitoring purpose. See "Changing monitoring playback tempo in Play Panel" section.
The manual / overriding playback setting inside selected object(s)' inspector uses a special unit "BPM". "BPM" is the amount of quarter notes would have been within one minute in decimal number. It is not related to the musical beat. It is not the whole number used in metronome marks conventionally, or on the score. This unit is also used in Play panel.
Musicians use tempo markings to indicate the value of one beat, but Musescore does not use the beat information inside tempo markings. Beat information is obtained from Time signatures only.
Tempo markings are Musescore Text, see Text chapter. They behave like System Text.
Using Metronome marks and Metric modulations
Playback follows written content by default. Editing the number changes playback too. This behavior is changable, see "Changing playback" section. Musescore's playback ignores text, Andante ♩ = 75 and Moderato ♩ = 75 are both interpreted as ♩ = 75. If the note and augmentation dot is accidentally removed or another note value is required, professional glyphs must be used, see "Changing appearance" section.
Using Verbal tempo indications
Musescore does not understand the written content. They have pre-defined tempo setting, the setting is changable, see "Changing playback" section.
Adding tempo marking
All markings are found in the Tempo palette, see Palette chapter. New tempo markings are positioned at the top of system(a layout term, see Layout and formatting chapter), they behave like "System Text", see Staff Text and System Text chapter.
To add a Metronome mark, Verbal tempo indication, or Metric modulation onto the score, use one of the following methods:
- Select a note/rest and click an item in a palette (double-click in versions prior to 3.4).
- Drag the item from a palette onto a note/rest.
- From the menu bar, select Add→Text, and click on Tempo marking.
- Edit more intuitively with Tap tempo plugin.
To add a Metronome mark that use a suitable note value by using the beat information from the time signature:
- Select a note/rest and press the keyboard shortcut Alt+Shift+T.
Changing appearance
Playback can be configured to follow written content of Metronome mark and Metric modulation. Musescore only understand note and augmentation dot professional glyphs. The augmentation dot is not a "Full stop / period" on the computer keyboard. Do not copy from other programs or the internet, as they are not exactly raw unicode characters.
Other characters and numbers are plain characters, entered using (typing on) a computer keyboard. They have different formatting behaviors, for example changing the Inspector :Font does not affect glyphs, see Fonts chapter. See also Text editing chapter.
Adding plain characters
- Select an object.
- Enter edit mode (double click)
- Type text.
Adding profession glyphs
- Select an object.
- Enter edit mode (double click).
- Use Special characters window: Common symbols tab, one way to open the window is F2
Changing playback
To assign a manual / overriding tempo setting:
- Select object(s)
- Under Inspector Tempo section, uncheck Follow text to ignore written content on the score
- Enter a value in Tempo, this value use the special BPM unit, it is not related to musical beat, see Overview.
Repeating tempo markings on other staves
Tempo markings behave like "System Text", see Staff Text and System Text: Repeating System Text on other staves chapter.
Inspector properties
Selected tempo markings(s) on a score can be edited with Inspector Tempo text section. Text related settings are covered in the Text, the Text editing and the Text styles and properties chpaters.

- Follow text: Toggle Musescore's metronome marking interpretation function
- Tempo: Tempo for playback. Uses the special BPM unit, it is not related to musical beat, see Overview. Ignored if Follow text is checked.
- Style: Profile to use, see Text styles and properties chapter.
- Placement: Position, above or below staff
The Inspector: Font property affects plain characters, but not the professional glyphs. Professional glyphs use "Musical symbols font", see Fonts chapter.
To edit the score-wide settings, see Layout and formatting chapter.
Creating ritardando and accelerando
Musescore does not understand and does not create playback for any tempo expression text, including ritardando ("rit.") and accelerando ("accel."), and thus cannot create correct playback for these.
To create ritardando ("rit.") and accelerando ("accel.") marking and proper playback:
- Add multiple tempo markings for playback. Make tempo markings invisible as required, visibility does not affect playback. Use the TempoChanges plugin to automate this process.
- Add Staff/System Text for printing and reading.
In the example illustrated below, the tempo was originally 110 crotchets per minute. At the ritardando, the value decreases by 10 on the first note of each measure. Each tempo change is made invisible by unchecking the Visible checkbox in the Inspector (Keyboard Shortcut V), so that only the ritardando shows on the printed score:

Changing monitoring playback tempo in Play Panel

Use Play Panel to change playback tempo temporarily:
- Display the play panel: View→Play Panel or F11 (Mac: Fn+F11):
- Move the tempo slider up or down as required. Double-click the tempo slider to reset it. BPM is a special unit used by Musescore, it is not related to musical beat. see overview.
Fermata
Fermata are available in the Articulations and Ornaments palette.
In playback on a score with multiple instruments, if a note or rest of one instrument is extended with a fermata symbol, every notes sounding the same moment as that note will continue to sound until the extended note ends. Fermatas applied to barlines has no effect
Inspector properties
Select a Fermata symbol, edit its property in Fermata in the Inspector:
Placement: Above or below note
Time stretch: Multiplication of normal time duration to play back the current element. Value 1.00 is meaningless as it means no time extension.
Metronome
Musescore can automatically add metronome ticks sound to playback if desired, use the Playback toolbar or Play Panel, see the Play mode chapter.
How many ticks are added onto each measure is determined by the time signature and tempo. It does not depend on the note value (duration) used on metronome markings (both crotchet ♩ = 60 and quaver ♪ = 120 markings create identical result).
There are two tick sound clips, strong ticks and weak ticks. Which one is added is determined by the beat and written tempo (not affected by the adjustment settings on the Play Panel, but see comments on a related feature request #304412). Beat is dictated by the time signature only, but not affected by the beaming style, or the note value (duration) used on metronome markings.
- For simple meters, the top number of the time signature is the number of beats in each measure. 2 = duple, 3 = triple, 4 = quadruple. Strong ticks are created on each beat. No weak ticks are created.
- For compound meters (6/8, 9/8, etc), the top number of the time signature divided by three, is the number of beats in each measure. 6 = duple, 9 = triple, 12 = quadruple. Strong ticks are created on each beat. Weak ticks (two weaks following one strong) are created only if it is below 60 beats per minute. For example, onto measure using 6/8, both dotted crotchet ♩ . = 59 and quaver ♪ = 179 markings create the result of two strong ticks and four weak ticks in each measure.
These ticks are not added to any exported audio files. If you want to include these ticks to exported audio, try these:
- Add a percussion staff, fill the first measure with the desired rhythm and the rest with measure repeats, then hide that staff, source,
- Metronome SoundFont (CC0) provided by mirabilos,
- Add metronome part plugin by sal.vador.
See also
External links
Dynamics
Dynamics are symbols indicating the relative loudness of a note or phrase of music. They can be found in the Dynamics palette in either the Basic or Advanced workspace.
")
Additional dynamics are available in the Master Palette (Shift+F9).
Adding a dynamic to the score
To create a crescendo or decrescendo, see Hairpin instead.
To apply a dynamic to the score, use one of the following methods:
- Select a note and click a dynamic symbol in a palette (double-click in versions prior to 3.4).
- Drag a dynamic symbol from a palette onto a note.
- Set up and use keyboard shortcuts with the Dynamics actions plugin
NOTE:
- Applying from the palette does not replace exisiting symbol, you can delete the existing one manually first, or use the plugin mentioned above.
- Placing dynamics symbols on different voices of the same staff at the same time does not create desired playback, it is a limitation of Musescore, because the minimal area of effect on playback loudness (Dynamic Range property) is staff, not voice. If playback is priority, try splitting voices into individual instruments.
Creating a custom dynamic
Editing text
Playback is unaffected by the displayed content. Use the Velocity property to change loudness.
Dynamics symbols are Text, double-click on a symbol to edit its text, see Text editing.
Professional glyphs for engraving
Musescore is shipped with professional glyphs. They include for example the florin sign (the curvy hooked f, ƒ), which is different from an italic plain character f. These glyphs, like any other characters, are used for engraving purpose, they do not affect playback. Unlike plain characters, they use the font setting defined in Format → Style → Score : Musical text font . Shown below are the results of different text content and formatting settings. See also Fonts.


To add them, make sure the app is currently in Text editing mode, use the special characters palette or one of the following shortcuts:
| Dynamic | Windows & Linux Shortcut | Mac Shortcut |
|---|---|---|
| Piano p | Ctrl+Shift+P | Cmd+Shift+P |
| Forte f | Ctrl+Shift+F | Cmd+Shift+F |
| Mezzo m | Ctrl+Shift+M | Cmd+Shift+M |
| Rinforzando r | Ctrl+Shift+R | Cmd+Shift+R |
| Sforzando s | Ctrl+Shift+S | |
| Niente n | Ctrl+Shift+N | Cmd+Shift+N |
| Z z | Ctrl+Shift+Z | Cmd+Shift+Z |
Inspector properties of dynamics
You can edit the properties of a selection of dynamics in the Dynamic section of the Inspector. To apply a previously-edited property to all dynamics in the score, click on the "Set as Style" button (the small S on the right of the property)
Note: For more about selecting objects of a specific type, see Selection modes.
The following is a list of properties in the Dynamic section of the Inspector:
- Dynamic range: Area of effect of the symbol:
- System: every instrument in the score.
- Part: one instrument (all of its staffs), default.
- Staff: one staff (eg one hand in piano) regardless of voices. As of MuseScore 3.6.2, this option is incompatible with the Staff / Part properties: single note dynamics playback mechanism, see forum discussion.
- Velocity: 0 to 127. Use a higher number to make notes sound louder, use lower number to make notes sound softer. For more info, see Loudness of a note.
- Velocity change: -127 to 127. The change in Velocity from the dynamic's parent note to the following one. It is ignored by some instruments. For more information, see SND.
- Change speed: Slow, Normal, Fast. The speed of the change indicated by Velocity change, in real time. This is unaffected by the current Tempo. The default value is Normal.
- Style: Text style to use; default is Dynamics.
- Placement: Position on score, above or below staff. Press X to flip.
Reusing custom symbol
To save and reuse a custom symbol, see Add an existing score element to a palette.
Loudness of a note
IMPORTANT: When a dynamics symbol is added to the score, it affects playback from the parent note onward until the next dynamic symbol. Final barlines or rests do not reset the loudness to default.
The Synthesizer creates audio for each note based on its assigned MIDI velocity value, ranging from 0 (softest) to 127 (loudest). The possible range of actual loudness is determined by the soundfont creator. A dynamics symbol uses its Velocity property to assign a basic MIDI velocity to the current note, and all following notes, until another symbol is added. In Musescore 3, Velocity to MIDI velocity assignment is exact assignment without conversion. Check this table for default values of Velocity of popular dynamics symbols in Musescore.
If you do not specify any dynamics symbol, the whole score is in mf (mezzoforte). This is because Musescore assigns MIDI velocity 80 to notes that are not affected by any dynamics symbol, 80 is the also the default Velocity of mf .
Note's playback is not affected by dynamics symbols if the note itself's Velocity type property is set to 'User'. This is common in scores imported from .MID files. To fix the problem, see How to restore correct playback of dynamics and hairpins in an imported MIDI file.
MIDI velocity is also affected by each note's Velocity and Velocity type properties, Articulations (eg Accent >, Marcato ^) and Hairpins
The above describe loudness per note, you can also adjust volume broadly. The following sliders affect volume but have nothing to do with MIDI velocity:
- changing the volume of individual instrument (and per instrument playing technique) in Mixer.
- changing the overall volume of whole score, volume slider in the Play Panel, or in Synthesizer.
You cannot adjust default volume of voices, but you can batch adjust existing notes' Velocity properties based on their voice with the Voice Velocity plugin (notes added afterwards will not be affected, you need to run the plugin again)
If you want notes to remain loud for a longer period of time, eg a tom drum hit sound to linger longer, try adding a reverb effect in Synthesizer instead.
Single Note Dynamics (SND)
(After Musescore 3.1)
A dynamic symbol with a non-zero Velocity change property can simulate Attack envelope effect (wikipedia) if the Instrument, Synthesizer and Soundfont is setup correctly, such symbol is called Single Note Dynamics (SND), SND also has several different meanings due to continuous software development. SNDs also use Change speed property.
sfz (sforzando) and fp (fortepiano) are designed to work on certain instruments only; e.g. sfz symbol's effect on the violin does not exist on piano.
For more information, see How to setup Musescore for correct playback for all dynamics and hairpins.
See Also
- Text (Overview of all text types)
- How to setup Musescore 3.x for correct playback for all dynamics and hairpins
External links
- Dynamics (Wikipedia)
- Add Dynamics by keyboard shortcut directly (Plugin)
Capo playback
MuseScore allows you to transpose the playback of a staff, without affecting the music notation. This simulates the effect of a capo (Wikipedia) on the instrument.
Add capo to a single staff
- Add staff text to the note/rest from which you want capo playback to start;
- Click on "Properties" in the "Staff Text" section of the Inspector, or right-click on the staff text and select Staff Text Properties...; then click on the Capo Settings tab;
- Check the "Capo Settings" checkbox, and set Capo fret to the fret number you wish to apply the capo at (each fret increases the pitch by a semitone);
- Click Ok to apply your changes;
- Edit the wording of the text as desired.
Add capo to linked staff/tablature
- Same method as above, but in step 1, add the staff text to the music staff only.
Add capo to unlinked staff/tablature
- Same method as above, but apply the staff text to both staff and tablature.
Note: Capo playback will apply from the note that the staff text is attached to, until either the next staff text with "Capo Settings" enabled, or until the end of the score.
Remove capo
To remove capo playback from a staff, returning the instrument to its normal tuning:
- Add staff text with a "Capo fret" setting of "No capo".
Text
This page is an administration page intended for the editing community only. Click this link to go to the handbook front page intended for public viewing.
(Content moved to Text types for clearer handbook hierarchy and browsing)
Text types
A Musescore Text object is an object that contains individual characters that can be entered and removed by using (typing on) a computer keyboard, it can be functional. Text may also be found incorporated into Musescore Lines object.
For general engraving or visual display purpose, it is recommended to use Staff text and System text.
Different types of text-based objects are not interchangeable: They have distinct property fields that serves different purpose besides engraving or visual display. For example, a mp using Staff Text can never be configured to change playback loudness because it does not have the Velocity property, you must create a new Dynamics text which has the Velocity property if want the text to affect playback loudness.
Use the following chart to decide which type you need.
To check the type: select a text, its type is displayed on the status bar.

The word "playback" used below means in-program audio created by Synthesizer.
The following types are explored in this chapter. Read on to know how to create, format and edit them:
| Text type | Uses | |
|---|---|---|
| Staff text | General purpose text, when attached to a single staff will appear in Parts that feature that staff. Can be setup to change playback sound samples, change playback to use capo transposition, or change playback to use Swing. | |
| System text | General purpose text appearing in all Parts. Offer same function as Staff Text | |
| Chord symbols | Display the chords associated with a melody: usually above the staff, provides chord playback (notes automatically decided). | |
| Fingering | Numbers or letters attached to notes showing which fingers to use. | |
| Lyrics | Create lyrics attached to a melody. Correctly engraved Melisma that automatically follow notes. | |
| Rehearsal marks | Facilitate rehearsals, divide score into sections, bookmark passages etc. |
These types are explored in their respective chapters:
| Text type | Uses | |
|---|---|---|
| Expression button on the Text Palette | It is a styled Staff text, same function (and limitation) as such. | |
| Tempo marks | Change the playback tempo. Apply metronome and/or expression marks. | |
| Dynamics | Change the playback loudness of a note or phrase. | |
| Mid-staff sound (channel) change text | For example the pizz. button on the Text Palette. It is a pre-configured Staff Text that change playback sound samples. | |
| Instrument text | Not to be confused with Mid-staff sound (channel) change text. Instrument text indicate that the musician should change instrument. Can be setup to change Instrument (MuseScore abstraction), or change playback sound samples. | |
| Figured bass | Period notation for keyboarders. | |
| Frame text | Title/composer/lyricist details at the start of a score; songsheet lyrics etc. | |
| Headers/Footers | Page numbers, copyright info etc. at the top/bottom of a page. | |
| Repeats and jumps | Da Capo, Dal segno, Fine etc. | |
| Roman Numeral Analysis (RNA) | A chord analysis system. | |
| Sticking | Letters (L and R) attached to (drum) notes showing which hand or foot to use. | |
| Swing text | Change from straight to swing time, and vice versa. | |
| Text-lines | Voltas, ottavas, pedal lines, guitar barre lines etc. |
See also
Text basics
Add text
Decide which object type you need before adding a text, visit Text types. For general-purpose "text boxes" attached to staves, use Staff and system text, they are good if you simply want a text for visual purpose.
To add a Text object or object containing Text to a score, use one of the following general methods:
- Keyboard shortcut: For example, press Ctrl+Tto enter Staff text , Ctrl+L to enter Lyrics, and so on.
- Palette (Workspace):
- Select a note and click an icon in one of the palettes (double-click in versions prior to 3.4); or,
- Drag a symbol from a palette onto the staff. E.g. Swing text, Tempo text etc.
- Menu command: Add→Text allows you to choose from a range of text-based elements.
- Plugin: such as Expression Dictionary
Notes: The exact method depends on the type of text you are adding, visit and follow links on Text.
Basic formatting

The basic formatting options recommended for beginners are:
- edit object properties with the Inspector, and
- edit individual character's formatting with Text Toolbar, see Text editing chapter.
Options in the Inspector:
- Font: The name of the font (e.g. Times New Roman, Arial etc.), also see Fonts.
- Size and Font style icons: Font style includes e.g. Italic, Bold or Underline.
- Line Spacing and Follow staff size: "Follow staff size" option determines whether text size changes proportionally, see Layout and formatting chapter.
- Alignment icons: Horizontal (left, center, right) and Vertical.
- Frame: Choose to have a circular or square frame around the text.
- Remove Custom Formatting: Removes all individual characters' formatting previously applied with Text toolbar, see level of formatting in Text styles and properties chapter.
To revert changes press the "Reset to style default" (the circular shape) button on the right.
See Text styles and properties for everything on text formatting.
Adjust position of text objects
To position a text object, use any of the following methods:
- Drag the object.
- Select the object and adjust the X or Y offset values in the Inspector.
- Select the object and apply any of the following keyboard shortcuts:
- ←: Move text left 0.1 staff space.
- →: Move text right 0.1 staff space.
- ↑: Move text up 0.1 staff space.
- ↓: Move text down 0.1 staff space.
- Ctrl+← (Mac: Cmd+←): Move text left one staff space.
- Ctrl+→ (Mac: Cmd+→): Move text right one staff space.
- Ctrl+↑ (Mac: Cmd+↑): Move text up one staff space.
- Ctrl+↓ (Mac: Cmd+↓): Moves text down one staff space.
Text anchors
When you apply a text element to the score, its anchor position will depend on the type:
- Title, Subtitle, Composer, Poet: Anchored to a frame.
- Tempo: Anchored to a note.
- Dynamics: Anchored to a note.
- Fingering: Anchored to note heads.
- Lyrics: Anchored to a time position.
- Chord symbol: Anchored to a time position.
- Staff text: Anchored to a time position.
- System text: Anchored to a time position.
- Sticking: Anchored to a time position.
Text editing
Text edit mode allows you to add or delete text, and apply formatting (e.g. bold, italic, underline etc.) to individual characters.

Enter/exit text edit mode
To enter Text edit mode use one of the following methods:
- Double-click a text object.
- Click on an already selected text object.
- Right-click on a text object and select Edit element.
- Click on a text object and press Alt+Shift+E.
Note: Creating a new text object (see Text basics) also puts the program into text edit mode.
The Text toolbar appears at the bottom of the window, you can use it to apply formatting to individual characters

To exit Text edit mode use one of the following:
- Press Esc.
- Click on a part of the score outside the edit window.
Keyboard shortcuts
In Text edit mode, the following keyboard shortcuts are available:
| Function | Windows & Linux | Mac |
|---|---|---|
| Toggles bold face. | Ctrl+B | Cmd+B |
| Toggles italic. | Ctrl+I | Cmd+I |
| Toggles underline. | Ctrl+U | Cmd+U |
| Moves cursor. | Home, End, ←, →, ↑, ↓ | (Alt+) ←, →, ↑, ↓ |
| Removes character to the left of the cursor. | Backspace | Delete |
| Removes character to the right of the cursor. | Del | → Delete or Fn+Del |
| Starts new line. | ↵ | return |
| Inserts special characters (see below). | F2 | Fn+F2 |
Symbols and special characters
You can use the Special Characters window to insert quarter notes, fractions, and many other kinds of special symbols or characters into your text. A few symbols can also be accessed by shortcut (see below).
Some symbols and special characters are treated specially and use Style window > Score : "Musical symbol font" (6 options), see Fonts.
, or special characters (e.g. copyright symbol, ©)")
To open Special Characters, use any of the following methods:
- Click on the
 icon in the text toolbar (below the score window).
 - Press F2 (Mac: Fn+F2).
Note: (1) This only works in Text edit mode; (2) The Special Characters dialog should not be confused with the menu item of the same name in the macOS version of MuseScore.
The dialog is divided into 3 tabs: Common symbols, musical symbols and unicode symbols. The musical and unicode tabs are further subdivided into alphabetically-arranged categories.
Double-clicking an item in the Special Characters dialog immediately adds it to the text where the cursor is positioned. Multiple items can be applied without closing the dialog box, and the user can even continue to type normally, delete characters, enter numerical character codes etc., with it open.
Special character shortcuts
In Text edit mode the following keyboard shortcuts can be used to access certain special characters:
| Character | Windows & Linux | Mac | Note |
|---|---|---|---|
| Sharp ♯ | Ctrl+Shift+# | Cmd+Shift+# | May not work on some keyboard layout |
| Flat ♭ | Ctrl+Shift+B | Cmd+Shift+B | |
| Natural ♮ | Ctrl+Shift+H | Cmd+Shift+H | |
| Piano p | Ctrl+Shift+P | Cmd+Shift+P | |
| Forte f | Ctrl+Shift+F | Cmd+Shift+F | |
| Mezzo m | Ctrl+Shift+M | Cmd+Shift+M | |
| Rinforzando r | Ctrl+Shift+R | Cmd+Shift+R | |
| Sforzando s | Ctrl+Shift+S | Cmd+Shift+S | |
| Niente n | Ctrl+Shift+N | Cmd+Shift+N | |
| Z z | Ctrl+Shift+Z | Cmd+Shift+Z | |
| Elision ‿ | Ctrl+Alt+- | Cmd+Alt+- |
See also
Text styles and properties
Overview
Layout and formatting in Musescore has 2 main levels, read Layout and formatting first. Text objects have finer levels:
- Level 1: Properties of each individual text object in a score file:
- Formatting of individual characters within a text object;
- Formatting of the object that contains all the characters.
- Level 2
- "style for certain type of object": you can change their values in 'Style' window: left pane
- "style for text inside certain type of object": you can change their values inside items under 'Style' window: left pane 'Text style'
The final visual and function of most object in a score file is determined by:
- Characters do not have any specific formatting. When formatting are added to them, they will always be used. See Text editing: Text edit mode chapter.
- Text objects do not have any specific properties. When properties are assigned in the Inspector, they will always be used except for characters that already have their own formatting. see details in "Text properties" below.
- functional settings: all object on a score uses values in "style for certain type of object", this behavior cannot be changed, but you can edit values in them.
- visual settings:
- an object on a score uses values in appropriate "style for text inside certain type of object", such as "Style for text inside Chord symbols", "Style for text inside Lyrics Odd Lines" automatically. This behavior can be changed with the Style property in the Inspector. You can also utilize the 12 custom style.
- "Style for text inside Staff Text" is special. Every Text-related object on a score uses its values unless overridden, this behavior cannot be changed, but you can edit values in "Style for Staff Text".
- A subset of characters always use font settings in Style window > Score : "Musical symbol font" (6 options): musical glyphs such as Segno, Coda, ottavas, dynamics glyphs such as mf and some Symbols and special characters. See Fonts
Text properties

Concept of formatting is explained in the overview. To assign properties to a particular Text object or object containing Text on a score use the Inspector, covered in Text basics chapter.
Styles

Concept of formatting is explained in the overview. To change values inside a style (profile), either:
- use the 'Style' window, or
- edit properties in the Inspector, and click the Set as style.
Contains these options
- Name : Editable in User-1 to User-12 only.
- Font and Size: The name of the font (e.g. Times New Roman, Arial etc.) and its size in points, also see Fonts.
- Line Spacing
- Follow staff size: determines whether text size changes proportionally, see Layout and formatting chapter.
- Font style: The font style to use, e.g. Italic, Bold or Underline.
- Align: Horizontal (left, center, right) and Vertical.
- Color: Color and opacity of the text. Opacity is set by the parameter "Alpha channel" in the "Select Color" dialog: a value between 0, transparent, and 255, opaque.
- Offset X/Y: Horizontal and vertical offsets in sp. units.
- Frame: Choose to have a circular or square frame around the text.
- Border: Color and opacity of the frame border.
- Highlight: Color of the background within the frame.
- Thickness: Thickness of the line of the frame in space units.
- Margin: Inner frame margin in space units.
- Corner radius: For box frame, radius of rounded corner.
Custom style for text inside object


Concept of formatting is explained in the overview.
- Assign visual settings values to a custom style: "User-1" to "User-12"
- Change an object on a score: in the Inspector Style property
See also
Staff Text and System Text
Overview
Different types of text-based objects are not interchangeable, see Text types. Staff Text object and System Text object are used for purposes not covered by other text types only. Including:
- Capo playback for guitarists (Staff Text only).
- Applying swing and straight time (Staff Text and System Text).
- Applying score and movement titles.
- Musical expressions and performance indications not supported Musescore yet (even then, you should try to add and customize an Text type that is similar functionally instead of a Staff Text object and a System Text object),
- Other general purpose.
"Expression" is a Staff Text object using "Style for text inside Expression text". See "Style" section below.
Similarity and difference in behavior and function
Both of them attaches to a note or rest in a Musescore Instrument.
Both of them can be set-up to have effect on audio created by Musescore's Synthesizer, a Staff Text affects only the playback of that Musescore Instrument is affected, a System Text affects all Musescore Instrument on a score.
Staff Texts are hidden along with "Hide empty staves within systems" option (and the sub-option "Don't hide empty staves in first system") under "Style" window : "Score" , see Layout and formatting.
A Staff Text only appears in the Musescore Part(s) that features the Musescore Instrument. A System Text appears on all Musescore Parts.
New System Text is positioned above the top staff of each system (layout concept).
Adding to a score
To add one onto a score:
- Do either one of:
- Select a note or rest; then for Staff Text, press Ctrl+T; or for System Text, press Shift+Ctrl+T, or
- Select a note or rest; then select the desired option from Add→Text, or
- Select a note or rest, then click the desired text from Palettes (double-click in versions prior to 3.4), or
- Drag the desired text from a palette onto a note or rest.
- Start entering text.
- Press Esc or click on an empty space outside of the box to exit.
Repeating System Text on other staves
New System Text is positioned above the top staff of each system (layout concept). If you need a similar indication on a lower staff, add it to that staff using Staff Text.
Properties
Fomatting of a Staff Text object or System Text object on a score is edited in the Inspector, covered in Text basics chapter.
The playback settings are edited in "Staff Text properties" and "System Text properties" window
Staff Text contains settings that affect playback. Only the section after the attached note or rest is affect. When a Staff Text is duplicated, or reused through customized palette, the playback settings are reused.
"Staff Text properties" window
The playback settings can be accessed in two ways:
- Select the Staff Text, and click on "Properties" in the "Staff Text" section of the Inspector.
- Right-click on the text and choose "Staff Text Properties," then click on the relevant tab.
The four tabs on top are:
- Change Channel : Change the channel used by each Musescore Voices independently, understand channel by reading Mixer chapter first. This only works with Musescore Instrument that has more than one channel.
- Swing Settings: Use "straight" or "swing" rhythm. To change rthythm of this instrument everywhere in the score or all instruments, see Swing: global chapter for more info.
- Capo Settings: For stringed instruments you can apply a "capo", transposing the playback up by a number of frets/halftone steps. See Capo playback chapter for more info.
- MIDI Action: For advanced users only, send a MIDI Continuous Controller / Control Change (MIDI CC) Message. You must setup a custom instrument using a instruments.xml and declare MIDI Actions for of its channel first. You cannot edit instruments.xml inside Musescore. More info see https://github.com/lminiero/musescore-vpo-midi-actions#musescore-tool-t….
"System Text properties" window
Works like "Staff Text properties", but only has "Capo Settings" and "MIDI Action" tabs.
Style
"Style for text inside Staff Text" is special, see Text styles and properties.
Values of the "Style for Staff Text" can be edited in Format→Style→Staff Text.
Values of the "Style for text inside Staff Text" can be edited in Format→Style→Text styles→Staff
Values of the "Style for text inside Expression" can be edited in Format→Style→Text styles→Expression
Values of the "Style for text inside System Text" can be edited in Format→Style→Text styles→System
See also
External links
Chord notation systems
A chord notation is an abbreviated way of representing musical chord and harmony

Note: To fill measures with slashes, see Fill with slashes or Toggle rhythmic slash notation.
MuseScore supports:
- Chord symbol: A-G alphabetical chord name plus chord quality eg
Am(wikipedia), and - Nashville Number System (NNS) (MuseScore 3.3 and above): arabic numeral plus chord quality eg
6m(wikipedia), and - Roman Numeral Analysis (RNA) (MuseScore 3.3 and above): roman numeral plus chord quality eg
vi(wikipedia).
Chord symbol
A-G alphabetical chord name plus chord quality
Adding a chord symbol
- Select a start note or a slash;
- Press Ctrl+K (Mac: Cmd+K);
- The cursor is now positioned above the staff ready for input. Enter the chord symbol just like normal text, as follows:
- Root note: A, B, C, D, E, F, G.
- Sharp: # (hash symbol, Alt+3 on a UK keyboard).
- Flat: b (small letter "b").
- Double sharp: x (small letter "x") or ## (two hash symbols).
- Double flat: bb (small letter "b" twice).
- Natural: Ctrl+Shift+H. Note that these don't transpose nor play back (other than the root note), nor export to MusicXML properly.
- For other symbols, see Chord symbol syntax (below).
- Move the cursor forward or backwards to continue entering or editing chord symbols (see below);
- Exit chord symbol mode by pressing Esc.
After you exit Edit Mode, the characters entered will automatically assume the correct format: by default a root note typed in lower case will turn into upper case (for alternative options, see Automatic Capitalization)
Entering accidentals
Entered accidentals will be converted into a professional glyphs automatically, for example "#" (hash character) is automatically converted into a sharp sign (♯).
Do not input or copy and paste unicode character U+266F(sharp sign, ♯), U+266D (flat sign, ♭) etc, as MuseScore does not interpret them in chord notation properly.
Keyboard commands for navigation
The following commands are available during chord symbol entry:
- Space move Cursor to next note, rest, or beat
- Shift+Space move cursor to previous note, rest, or beat
- Ctrl+Space (Mac: Alt+Space) add a space to the chord name
- ; move cursor to next beat
- : move cursor to previous beat
- Tab move cursor to next measure
- Shift+Tab move cursor to previous measure
- Ctrl (Mac: Cmd) plus number (1-9) move Cursor by duration corresponding to number (e.g.; half note for 6)
- Esc exit.
Chord symbol syntax
MuseScore understands most of the abbreviations used in chord symbols:
- Major: M, Ma, Maj, ma, maj, Δ (type t or ˆ for the triangle, the latter doesn't seem to work on Windows though)
- Minor: m, mi, min, -
- Diminished: dim, ° (entered with lowercase letter o, shows as ° if using the Jazz style, as o, the Greek omicron, otherwise)
- Half-diminished: ø (entered with 0, number zero, shows as ø if using the Jazz style, as 0 (zero) otherwise). Alternatively, you can, of course, choose abbreviations such as mi7b5 etc.
- Augmented: aug, +
- The following abbreviations are also valid: extensions and alterations like b9 or #5, sus, alt, and no3; inversions and slash chords, such as C7/E; commas; parentheses, which can enclose part, or even all, of a chord symbol.
Editing a chord symbol
Chord symbols are Text. Double-click on a chord symbol to enter Edit Mode, see Text editing. Use methods described above to create special characters. After you exit Edit Mode, they are automatically converted to the correct formatting.
Appearance and function
See also the main chapter Layout and formatting in Musescore.
The final visual and function of most object in a score file is determined by:
- Properties of each individual chord symbol on a score, By default, objects do not have any specific properties. When properties are assigned in the Inspector, they will always be used; and
- The global profiles (per each Musescore Part and the "Full Score"). The two used by default are the "Style for Chord symbol" defined in Format → Style → Chord Symbols , and the "Style for text inside Chord symbol" defined in Format → Style → Text Styles → Chord Symbol.
All chord symbols on a score (the currently editing Musescore Part or "Full Score") use "Style for Chord symbol", this behavior cannot be changed.
Chord symbols use "Style for text inside Chord symbol" by default, this behavior can be changed in each individual chord symbol's Inspector: Style dropbox option. For example, you can switch to use the profile "Style for text inside Chord symbol (Alternate)" defined in Format → Style → Text Styles → Chord Symbol (Alternate), or any other profile.
Shown below are results of different Font face and Rendering style settings 


Font face
Font face is not to be confused with Rendering style. See also Fonts.
You can assign a specific font face and formatting to each individual chord symbol on a score in the Inspector. You can also assign a specific font face to the global style profiles "style for text inside certain type". Font face setting is ignored when the Jazz rendering style is used.
Rendering style
Rendering style is not to be confused with font face option.
Rendering style is the MuseScore feature that uses extra formatting to improve engraving. It is defined in the global style profile "Style for Chord Symbol" in Format → Style → Chord Symbols . All Chord symbols are affected by the chosen rendering style, there is no individual property option. An appropriate default setting is used automatically, based on the template selected to create the score. For Jazz templates the Jazz rendering style is used, for other templates the Standard rendering style is used. The three options available are:
- Standard rendering style: chords are rendered simply with the font face, no extra formatting is used.
- Jazz rendering style: MuseJazz font face is used for a handwritten look, with distinctive superscript and other formatting characteristics.
- Custom rendering style: allows you to customize the look of chord symbols (and also ensures compatibility with older scores) with a Chord symbols style file (*.xml) . These files are found under installation's "styles" folder. In Windows 10, that would be C:\Program Files\MuseScore 3\styles\ . Documentation can be found in the same folder. This is for advanced users only, see musescore 4 handbook Chord symbols : External links.
Musescore uses the following terminology:

Extension part and modifier part can use extra formatting:
- Extension scaling and Modifier scaling: This affects the size of the chord extension or of the modifier.
- Extension vertical offset and Modified vertical offset: This affects the vertical position of the chord symbol extension or of the modifier.
Note spelling
It is defined in the global style profile "Style for Chord Symbol" in Format → Style → Chord Symbols.
By default, MuseScore uses letter names for chord symbols. For users in regions where other note naming schemes are used, MuseScore provides the following controls:
- Standard: A, B♭, B, C, C♯,...
- German: A, B♭, H, C, C♯,...
- Full German: A, B, H, C, Cis,...
- Solfeggio: Do, Do♯, Re♭, Re,...
- French: Do, Do♯, Ré♭, Ré,...
Automatic Capitalization
It is defined in the global style profile "Style for Chord Symbol" in Format → Style → Chord Symbols.
By default, MuseScore automatically capitalizes all note names on exit, regardless of whether you entered them in upper or lower case. However, you can also choose other automatic capitalization options:
- Lower case minor chords: c, cm, cm7,...
- Lower case bass notes: C/e,...
- All caps note names: DO, RE, MI,...
You can also turn off the automatic capitalization completely, in which case note names are simply rendered the way you type them.
Positioning
Default layout is defined in the global style profile "Style for Chord Symbol" in Format → Style → Chord Symbols: Positioning.
- Distance to fretboard diagram: If a fretboard diagram is present, this value is the height at which the chord symbol is applied above the diagram (negative values can be used).
- Minimum chord spacing: The space to leave between chord symbols.
- Maximum barline distance: Changes the size of the gap between the last chord symbol in the measure and the following barline. You only need to adjust this value if there is a continuous problem in the score with overlap between the last symbol in one measure and the first symbol in the next.
In addition to the layout settings described above, the position of new chord symbols is also determined by the global style profiles "style for text inside certain type" used. The default style used is "Style for text inside Chord symbol" defined in Format → Style → Text Styles → Chord Symbol. The effect is cumulative.
You can also adjust positioning properties of each individual chord symbol on a score in the Inspector.
Automatically create extra chord symbols with capo
You can enable the feature to automatically create extra chord symbols with capo, in the global style profile "Style for Chord Symbol" in Format → Style → Chord Symbols: Capo fret position. Assign the capo position for the appended extra chord symbol, Musescore will append an extra bracketed chord symbol to each chord symbol on the score. The bracketed symbol, when played using that capo, sounds identical to the unbracketed one. Default value 0 does not create extra chord symbols.
Convert chord symbols into notes
To lay down chord notes onto a score, as heard in playback configured in Playback: Chord symbols / Nashville numbers:
- Select one or more measures
- From the menu, select Tools→Realize Chord Symbols.
Note: The triangle symbol Δ in Musescore creates a Major triad only.
Change chord quality afterwrads
Use a plugin such as:
- Chord Level Selector
- PruneStack
- Next inversion: replaces all chord(s) in (keyboard) selection with their next inversion
Transpose chord symbols
Chord symbols are automatically transposed by default if you apply the menu Transpose command to the containing measures. If this is not required, you can untick the "Transpose chord symbols" option in the same dialog.
Playback of Chord symbols
(MuseScore 3.3 and above)
See Playback: Chord symbols / Nashville numbers.
Note: The triangle symbol Δ in Musescore creates a Major triad only.
Nashville Number System
(MuseScore 3.3 and above)
The Nashville Number System is a shorthand way of representing chords based on scale degrees rather than chord letters. This allows an accompaniment to be played in any key from the same chord chart.
To start entering Nashville notation:
- Select a start note;
- From the menu, select Add→Text→Nashville Number.
Just as with standard chord symbols, you can type Nashville notation normally and MuseScore will do its best to recognize and format the symbols appropriately. The same shortcuts used for navigation when entering standard chord symbols (e.g. Space, see above) are available for Nashville notation as well.

Convert Nashville into notes
Same as chord symbol, see "Convert chord symbols into notes" section
Playback of Nashville
(MuseScore 3.3 and above)
See Playback: Chord symbols / Nashville numbers.
Roman Numeral Analysis
Not to be confused with Figured bass.
(MuseScore 3.3 and above)
The Roman Numeral Analysis system is a type of musical analysis where chords are represented by upper and lower case Roman numerals (I, ii, III, iv etc.), superscripts, subscripts and other modifying symbols.
Enter RNA
- Select a start note;
- From the menu, select Add→Text→Roman Numeral Analysis. Alternatively, set up a keyboard shortcut to do the same thing in Preferences;
- Input the RNA symbols for the chord just like normal text, as follows;
- Major chord: Upper case roman numerals
- Minor chord: Lower case roman numerals
- Diminished chord: o (lower case)
- Half-diminished chord: 0 (zero)
- Augmented chord: +
- Chord inversions: Enter up to 3 single-digit numbers, top note first
- Accidentals: enter hash character (#) for a sharp, small letter b for a flat and h for natural, see entering accidentals above (jump to).
- If you wish, instead, to show the plaintext character but not the automatically converted professional glyph or superscript, prefix the character with a backslash, "\". For example, "\h" adds a literal letter "h" instead of a natural symbol.
- Inversion notation using alphabet a,b,c,d can be created with the method described above.
- Inversion notation using vertically aligned arabic numerals without accidentals such as 64 can be created with the method described below.
- Inversion notation using vertically aligned arabic numerals with accidentals such as 6#3, ie altered chord, is unsupported, workaround : create Figured bass text instead; or create separate text objects and manually nudge them into place.
- For other symbols, see the images below.
- Move the cursor forward or backwards to continue entering or editing symbols for other chords;
- When RNA is completed, exit by pressing Esc, or by clicking on a blank section of the score.
RNA input offers the same keyboard shortcuts for navigation as in chord symbols (see above ).
Upon each computer keyboard input, characters are automatically converted to the correct format. MuseScore uses a specialist font, Campania, to provide the correct formatting for RNA. See also Fonts.
Examples of RNA
Type this:

To get this:

Playback of RNA
Musescore 3.6.2 does not create playback for RNA.
Identify harmony or chord
Use a plugin such as:
- Chord Identifier (Pop & Jazz) for music that features harmonic chromaticism heavily, as the RNA created has jazz influence.
- Chord ID and Roman numeral analysis for music that features stable tonality, as conventional RNA are created.
- Harmony analysis tool (keys, chords and harmonies)
External Links
Fingering
Fingering symbols for various instruments are found in the Fingering palette in the Advanced workspace.

-
Keyboard music employs the numbers 1–5 to represent fingers of the left or right hand.
-
Guitar music uses the numbers 0–4 to represent left-hand fingering (T is occasionally used for the thumb). Right-hand fingering is indicated by the letters p, i, m, a, c. Circled numbers represent instrument strings.
-
The last five symbols in the palette are used for lute fingering in historical music.
Note: To enable the display of fingering in tablature, right-click on the TAB, and select Staff/Part Properties...→Advanced Style Properties; then check the box labelled "Show fingering in tablature".
Add fingering to a single note
Use any of the following methods:
- Select a note and click one of the fingering symbols in a Palette (double-click in versions prior to 3.4).
- Drag and drop a fingering symbol from a palette onto a note
When fingering is added to a note, the focus immediately shifts to the symbol, so you can adjust it right away.
Add fingering to several notes
- Select the desired notes;
- Click a fingering symbol in a palette (double-click in versions prior to 3.4).
Easy fingering input mode (version 3.1 and above)
This special feature allows you to add fingering quickly and easily to successive notes.
- Choose one of the following options:
- Add the first fingering symbol using one of the methods shown above: this can be a "Left Hand Guitar Fingering", "Fingering" or "String Number";
- For "Fingering" only: select a note and press the keyboard shortcut for "Add fingering," then type the desired number.
Tip: Create a shortcut for this command in Preferences: Shortcuts: Ctrl+Alt+F, for example.
- Choose one of the following options:
- To move the cursor to the next note: Press Space, or Alt+→;
- To move the cursor to the previous note: Shift+Space, or Alt + ←;
- Type the desired number;
- Repeat steps 2 and 3 as required;
- Press Esc, or click on an empty space in the document window, to exit.
Adjust position of fingering
Single fingering
To change the position of one symbol, use any of the following methods:
- For fine adjustments (0.1 sp) use the arrow keys; For larger adjustments (1 sp) use Ctrl+← → ↑ ↓.
- Change X and Y offsets in the Inspector.
- Drag the symbol using your mouse.
Multiple fingering
To change the position of multiple symbols:
To restore a symbol to its default position, select it and press Ctrl+R.
Edit fingering text
Fingering symbols are text objects and can be edited in the usual way. Text properties and overall style can be adjusted in the Inspector.
Lyrics
Enter a lyrics line
First line
- Enter the notes of the melody line;
- Select the note where you want to start entering lyrics;
- To enter lyrics mode, type Ctrl+L (Mac: Cmd+L); or from the main menu, select Add→Text→Lyrics;
- Type a syllable;
- Use the following options to continue entering lyrics:
- Go to the next syllable: Press Space (or Ctrl+→ (Mac: Alt+→)) at the end of a syllable.
- Hyphen (to connect syllables): Press - at the end of a syllable.
- Go to the previous syllable: Press Shift+Space (or Ctrl+← (Mac: Alt+←)).
- Move left: Press ← (left arrow). If the cursor is at the beginning of a syllable, it will jump to the previous one.
- Move right: Press → (right arrow). If the cursor is at the end of a syllable, it will jump to the next one.
- Move to the syllable below: Press ↓ (down arrow).
- Move to the syllable above: Press ↑ (up arrow).
- Start new lyrics line: Press ↵ (Return) at the end of an existing lyrics syllable (Note: Don't use the Enter key from the numeric keypad!).
- To exit lyrics mode, press Esc or click outside of the text box.
Subsequent lines
If you want to add another lyrics line to an existing one (e.g. a 2nd or 3rd verse etc.):
- Choose one of the following options:
- Select the note where you want to start the new lyrics line. Enter lyrics mode as shown in step 3 (above). The cursor moves to a new (blank) line.
- Enter text edit mode on an existing syllable, go to the end of the syllable and press ↵ (Return). The cursor moves to the next line.
- Continue entering lyrics from step 4 (above).
Example:

Special characters
In most cases, lyrics can be edited just like normal text. However, special keyboard shortcuts are required to enter the following characters:
-
Space character: Ctrl+Space (Mac: Alt+Space).
-
- (hyphen): Ctrl+- (Mac: Alt+-).
-
_ (underscore): Ctrl+Shift+_ (Mac: Alt+Shift_).
-
Line feed: Ctrl+↵ (Mac: Alt+Return) or Enter (from the numeric keypad).
Verse numbers
To number verses, simply type the number (e.g. 1.) and a space before the first syllable. MuseScore will automatically align the numbers and first syllable correctly.
Melisma
A melisma is a syllable or word that extends over two or more notes. It is indicated by an underline extending from the base of a syllable to the last note of the melisma. The underline is created by positioning the cursor at the end of a syllable and pressing Shift+_: once for each note in the melisma. See the image below:

The above lyric was created in the following manner:
- Type the letters, soul,.
- At the end of the word, press Shift+___.
- Type the letters To, then press Esc.
For non-last syllables to extend, just use additional dashes -, usually only one of them will show (more when the distance between the syllables is large enough), and the syllable will right-align to the first note, similar to last syllables that got notated with a melisma, see above.
Elision (Lyric) slur / Synalepha
Two syllables under a note can be joined with an elision slur, also known as a "lyric slur" or "synalepha". For example:

To create the example lyric text, starting with the syllable text "te":
- Type te;
- Click on the keyboard icon
 in the bottom-left corner of the screen, or press F2 to open the Special Characters palette;
 -
Use one of the following options:
- Double-click one of the three elision slurs in the "Common Symbols" tab: "Narrow elision", "Elision", or "Wide elision" (these can be found between the "C Clef" and the "p" dynamic—see image below):

- Double-click the elision slur found after the 7/8 fraction in the "Common Symbols" tab (next to last character in the image above). Depending on the font, add one or more spaces before/after the slur using Ctrl+Space (Mac: Alt+Space).
Note: Not all fonts include the "undertie" character (U+203F ‿ "undertie", present in "Special Characters" mainly for compatibility with MuseScore 1.x scores). To find out which fonts on your computer support it, see "fontlist" (look for any font that shows a tie between "te" and "A" instead of a blank rectangle).
- Double-click one of the three elision slurs in the "Common Symbols" tab: "Narrow elision", "Elision", or "Wide elision" (these can be found between the "C Clef" and the "p" dynamic—see image below):
-
Type A.
As of 3.6: Ctrl+Alt+- or AltGr+- (Mac: Cmd+Alt+-).
Edit Lyrics
- Enter text edit mode on an existing syllable;
- Use standard text editing commands to make changes;
- Continue entering lyrics (see above); or exit lyrics mode by pressing Esc.
Copy lyrics to clipboard
To copy all lyrics to the clipboard:
- From the menu bar, select Tools→Copy Lyrics to Clipboard.
Paste lyrics from clipboard
To copy and paste lyrics from a text file (say) into a score:
- Enter the notes in the score to which the lyrics will be attached.
- Set up your lyrics in a text file, with appropriate spaces, hyphens, line-breaks etc.
- Copy the lyrics from the text-file into the clipboard.
- Select the start note in MuseScore, and press Ctrl+L (Mac: Cmd+L) (step 3 under Enter lyrics in a score).
- Repeatedly applying paste will enter successive words of the lyrics. You may need to enter melismas and make other corrections as you go along.
Adjust settings of lyrics
To edit selected lyrics object(s) on a score:
- Select object(s), see Selection modes.
- Edit properties in the Inspector as required.
Note: in Musescore 3.6.2, the Minimum distance property for lyrics objects is not implemented, see patch file by upx on https://musescore.org/en/node/357739#comment-1218262
To edit default setting, edit the style profile, see https://musescore.org/en/handbook/3/layout-and-formatting#concept2 and https://musescore.org/en/handbook/3/text-styles-and-properties
- "Style for lyrics objects" Format→Style→Lyrics
- "Style for text inside staff text" Format→Style→TextStyles→Staff
- "Style for text inside lyrics odd lines" Format→Style→TextStyles→Lyrics odd lines
- "Style for text inside lyrics even lines" Format→Style→TextStyles→Lyrics even lines
Layout settings are culminative
Adjust the vertical position of lyrics at the same line (same vertical position on a page)
All lyrics at the same line (same vertical position on a page) are in the same system (layout concept), see Layout and formatting chapter. To select them, see Selection mode : Select All similar chapter. Check Same system option in the selection window. To assign one value to all of them, enter a new value in the X and Y offsets property in the Inspector.
See also
External links
- How to insert Lyrics (MuseScore HowTo)
- How to move lyrics (MuseScore HowTo)
- How to add a block of text to a score (MuseScore HowTo)
- How to copy lyrics, or lyrics with rhythm (MuseScore HowTo)
- How to add lyrics in columns (MuseScore HowTo)
- Video tutorial: MuseScore in Minutes: Lesson 6 - Text, Lyrics and Chords
Rehearsal marks
Rehearsal marks can be used in a number of ways:
- To identify specific points in a score to facilitate rehearsing.
- As bookmarks in the score to which you can instantly navigate—using the Find/Search command.
- To mark the various sections in the score.
Typically, rehearsal marks consist of one or more letters and/or numbers, and appear in sequence in the score—e.g. A, B, C…, or 1, 2, 3… etc. Alternatively, they may display measure numbers (usually larger than standard measure numbers, boldface and/or enclosed in boxes). Multimeasure rests are automatically broken before and after rehearsal marks.
Rehearsal marks can be added to the score (i) automatically—which ensures that they are named in sequence—or (ii) manually, allowing you to name them as you wish.
Add a rehearsal mark
Manual Placement
To create a rehearsal mark manually:
- Click on a note (or rest) at the desired location;
- Select one of the following options:
- Press Ctrl+M (Mac: Cmd+M);
- From the menu, choose Add → Text → Rehearsal Mark;
- Enter the desired text.
Automatic placement
Add an alphanumeric rehearsal mark
Use either of the following options:
- Click on a note (or rest) at the desired location, then click the [B1] rehearsal mark icon in the "Text" palette (double-click in versions prior to 3.4).
- Drag and drop the rehearsal mark from the "Text" palette onto the score.
Notes: (1) By default, marks are added in the sequence, A, B, C etc. (2) To change the format of subsequently-added marks (to lower case letters, or numbers), edit the previous rehearsal mark accordingly. (3) Marks added between existing rehearsal marks append a number or letter to the previous mark: it is a good idea to apply the Resequence command afterwards (see below).
Add a measure-number rehearsal mark
- Add the first rehearsal mark in the series as an alphabetical one; then edit it to read the same as the number of the measure it is attached to;
- Add subsequent marks as shown above. They will automatically adopt the measure-number format.
Automatically resequence rehearsal marks
MuseScore allows the user to automatically re-order a series of rehearsal marks if they have got out of sequence for any reason. Use the following method:
- Before making a selection, you can, if desired, establish a new format for the rehearsal marks (lower/upper case, number, or measure number) by manually altering the first mark in the range accordingly.
- Select the range of measures you wish to apply the Resequence command to (if there is no selection then the program assumes you wish to resequence all measures).
- From the menu, select Tools → Resequence Rehearsal Marks.
MuseScore automatically detects the sequence based on the first rehearsal mark in the selection—all rehearsal marks in the selection are then altered accordingly. The following sequences are possible:
- A, B, C etc.
- a, b, c etc.
- Numerical: 1, 2, 3 etc.
- Numerical: according to measure numbers. This requires the number of the first mark in the series to be equal to the number of the measure it is attached to.
Text style
Rehearsal marks are a variety of system text, appearing both on the score and on every part. By default, they are in a large bold font, and enclosed in frames. All aspects of their appearance can be changed globally via the rehearsal mark Text style.
Search for a rehearsal mark
See Find (Viewing and navigation).
See also
External links
- Rehearsal Letter (Wikipedia article)
Formatting
This page is an administration page intended for the editing community only. Click this link to go to the handbook front page intended for public viewing.
Layout and formatting
Overview
To jump to the useful image that illustrates page layout terms, click on this link.
This chapter discusses the settings of score and items on score, how to edit and re-use them, and options and commands under the Format menu.
See also the Instruments, staff setup and templates: Change instrument and staff setup chapter.
Spatium (plural: Spatia) / Space / Staff Space / sp.

The size of everything on a score, such as staff, note heads, note stems, accidentals, clefs etc., uses a basic unit of measurement called "staff space" or "sp." to maintains correct proportions.
One sp is defined as the standard vertical distance between the midpoints of two lines of a music staff (or one quarter of vertical dimension of a full five-line staff, assuming a hypothetical staff line thickness of 0).
When you create a new score, MuseScore tries to adjust the staff space automatically so that the staves all fit on the page initially.
This usually leads to 1 sp = 1.75 mm, which results in a staff height of around 7 mm (more details explained in "Final absolute staff height" section), which is a good staff height for most solo music, choral music, small ensemble scores, and individual parts. Lead sheets and children's music may benefit from a larger staff size. Large ensemble scores may often require a smaller staff size in order to fit all instruments on the page.
You may need to adjust this value further as you add music, if auto-place results in additional space being added between staves in order to avoid collisions.
Modify the definition of "staff space" itself in the "Page settings" window. See Page settings chapter, the overriding options are also explained there.
Final absolute staff height
Staff line thickness is set in Format→Style...→Measure (see main chapter Measure and horizontal spacing). Its default value is 0.11sp, and the default value of sp is 1.75mm, so the default staff line thickness 0.1925mm. The 'absolute' height of default 5-line stave, measuring from the top edge of the top line to the bottom edge of the bottom line, is 0.5x0.11sp + 4sp + 0.5x0.11sp = 0.5x0.1925mm + 4x1.75mm + 0.5x0.1925mm = 7.1925mm. source: https://musescore.org/en/node/362733
Horizontal and vertical spacing and algorithm
Horizontal spacing: All measures are stretched out so that all systems (except the last if desired) are filled to the right margin. You cannot change this behavior, but you can add Frames. See Layout and formatting in Musescore section below. Use Format→Style...→Score, Page, Measure, found them below. See also Measure chapter.

Shown above is an analogy to horizontal spacing in Musescore 3.6.2: it is like being restricted to the "justified" option in a word processor software. UI of Libre Office Writer, not Musescore.
Vertical spacing: Two options of algorithm, use vertical justification or not. Use Format→Style...→Score, Page, found them below.
Style
Styles in Musescore are profiles that contains settings, rather than being the settings themselves. The visual setting for text and musical symbol in musescore some users mistaken for style is called Font.
All styles are built-in, they contain visual and functional settings default values. Each object type, eg Chord Symbol object, Accidental object, has a corresponding style of the same name built-in: "Style for Chord Symbols", "Style for Accidentals". Each Text object, eg Chord Symbol object, Lyrics object, also has one or more corresponding style(s) built-in: "Style for text inside Chord Symbols", "Style for text inside Chord Symbols (Alternative)", "Style for text inside Lyrics Even Lines", "Style for text inside Lyrics Odd Lines". Style is not the object type.
You cannot create a new style, but you can edit the settings values in each style.
After you created an object, you cannot change its object type. The same is almost true for style: an accidental object on a score must use values in "Style for Accidentals", it cannot use values in "Style for Chord Symbols", you cannot change which style (the named profile) an object on a score uses unless the object is a Text object or it contains a Text object within. A Lyrics object on a score, if desired, can use the compatible values in "Style for text inside Chord symbols" rather than the values in "Style for text inside Lyrics Odd Lines" or "Style for text inside Lyrics Even Lines", for more see Text styles and properties chapter.
Read on to see the final visual and function of objects are determined.
Layout and formatting in Musescore
Not to be confused with app appearance set in Preferences.
Layout and formatting in Musescore consists of two main levels, Text objects and objects containing them have more levels, see Text styles and properties. The final visual and function of most object in a score file is determined by:
- Level 1: Properties of each individual object in a score file, such as note, text, or symbol on a score file. By default, objects do not have any specific properties. When properties are assigned in the Inspector, they will always be used.
- Level 2: Includes
- the layout and formatting settings related to whole page,
- which corresponds to the items around the top of the left pane of the "Style" window: Format→Style...→Score, Page, Size, System, Measure etc, explained below, and
- the settings in the Page settings window.
- Additionally, it includes all the styles (profiles). Settings values in styles have less priority than properties mentioned above. Styles includes:
- functional "style for certain type of object": such as "Style for Chord symbols", "Style for Dynamics symbols", which correspond to the items in the left pane of the "Style" window, and
- visual "style for text inside certain type of object", such as "Style for text inside Chord symbols", "Style text inside Lyrics Odd Lines" etc, which correspond to items inside the "Style" window: left pane item "Text Style". See Text styles and properties.
- the layout and formatting settings related to whole page,
Every score file has a "Full Score" layout. It also contains "Parts" when you use Musescore Part feature to generate different versions of the same score. Each "Part" and the "Full Score" has their own separate complete set of layout and formatting information.
Reusing Layout and formatting information
- When create a new score file using a template, the "level 2 information" of the template's "Full Score" is used, see Instruments, staff setup and templates chapter.
- "Level 2 information" of the "Part" (but not the "Full Score") you are currently editing can be easily applied to all other "Parts".
- "Level 2 information" of the "Part" or "Full Score" you are currently editing can be saved as a separate .mss file (also known as a style file) and re-used on the another score (its "Full Score" or any "Part"). Reusing on a "Full Score" does not affect Parts.
- Default "level 2 information" for new score file and Musescore Part see below.
Visit https://musescore.org/en/node/355981 for .mss files shared by other musicians.
Reusing "level 2 information" with .mss file
The concepts and layout logic are explained in the overview. .mss file contains "level 2 information" and can be stored in any folder, Musescore does not automatically use any specific folder. The default folder for easier file management can be set-up in Preferences.
To save: Format→Save Style....
To load: Do either one:
- Right click on any empty space on a score, select "Load Style", or
- Go to Format→Load Style....
Default "level 2 information" for new score file and Musescore Part
Open Preferences menu > Score tab
Style: Browse and set the .mss file Musescore uses as "level 2 information" when creating a new score file. When creating a new score file from a template, the information present in the template is used instead.
Style for part: Similar to the above but for new Musescore Part.
Options under the Format menu:
- Style: opens the Style window to change layout and formatting of the currently editing "Full Score" or "Part", see details below
- Page settings: opens the Page settings window to adjust the overall dimensions of your score such as page size, page margins, and scaling, see Page Settings
- Add / Remove System Breaks: Set the number of measures per system, see details below
- Change Layout Stretch commands: Increase, decrease or reset the horizontal spacing of notes within selected measures, see details below.
- Breaks and spacers: Apply system, page or section breaks, or add extra space between particular systems or staves. see Breaks and spacers chapter.
- Reset Text style overrides : reset all text styles to the "factory" default settings:
- Reset Beams : reset beams to the mode defined in the local time signatures for the selected section. If no section is selected, beams on the whole score are reset. See also Beams.
- Reset Shapes and Positions : reset the default positions, note stem directions and shapes (slurs, ties etc.) for selected score elements. To apply:
- Select the elements or the region of the score that you wish to reset. Or use Ctrl+A to select the whole score.
- Press Ctrl+R; or, from the menu, select Format→Reset Shapes and positions.
- Load Style / Save Style : To re-use some layout and formatting information of the currently editing "Full Score" or "Part", see overview above and details of these commands below.
Add / Remove System breaks
This tool adds or removes system breaks over all or part of the score:
- Select a range of measures: if no selection is made, the command is applied to the whole score.
- Choose Format→Add/Remove System Breaks…. The following dialog appears.

- Choose one of the following options:
- Break systems every X (select number) measures;
- Add system break at end of each system;
- Remove current system breaks;
- Press OK.
Change Layout Stretch
Increase, decrease or reset the horizontal spacing of notes within selected measures.
Increase / Decrease layout stretch
- Select a range of measures. Or use Ctrl+A to select the whole score.
- Choose one of two options:
- To increase stretch:
- Use the shortcut } (right curly bracket) (Mac: Ctrl+Alt+9).
- Or from the menu bar, select Format→Stretch→Increase Layout Stretch.
- To decrease stretch:
- Use the shortcut { (left curly bracket) (Mac: Ctrl+Alt+8).
- Or from the menu bar, select Format→Stretch→Decrease Layout Stretch.
- To increase stretch:
Reset stretch
To reset stretch to the default spacing of 1:
- Select a range of measures. Or use Ctrl+A to select the whole score.
- From the menu, select Format→Stretch→Reset Layout Stretch.
See also Measure Properties: Layout stretch. This allows you to set the stretch more precisely.
Style window

Musescore style and layout concepts are explained in the overview.
To open this window:
- Select Format→Style…
- Right-click on a space in the document window and select Style….
- Use a keyboard shortcut (see Shortcuts).
- To quickly open Style window and then a style, right-click on an item on score and select Style….
In the left pane, there are two types of items:
- Score and page details:
- Various styles:
- functional "style for certain type of object": such as "Style for Chord symbols", "Style for Dynamics symbols" , and
- "Text Style" (scroll to the bottom of left pane): visual "style for text inside certain type of object", such as "Style for text inside Chord symbols", "Style text inside Lyrics Odd Lines". See Text styles and properties.
Changes made are live on the score for preview, click Cancel or Esc to revert and close. Press OK or Return to save and close.
When editing a Musescore Part (but not the "Full score"), press Apply to all parts button to apply the current "level 2 information" (including settings in Page settings) to other Musescore Parts.
Score
To open the Score dialog, select Format→Style…→Score.
This dialog allows you to set global settings, such as the music font, display of multimeasure rests, whether or not to hide empty staves, swing playback etc.
- Musical symbols font: used by notes, rest symbols, accidentals etc, see also Fonts .Tick the box to "automatically load style settings based on font."
- Musical text font: used by Segno, Coda, ottavas, dynamics glyphs such as mf etc. see also Fonts
- Display in concert pitch: Tick this option to display the score at concert pitch. If unticked the score is displayed at written pitch.
- Create multimeasure rests: Tick to display multimeasure rests.
- Minimum number of empty measures: The default is 2.
- Minimum width of measure: The default width is 4 sp.
- Enable indentation on first system: This option enables indentation; also for setting the indentation distance (as of 3.6).
- Hide empty staves within systems: This option saves space by hiding those staves in a system which consist of only empty measures. Used for condensed scores.
- Don't hide empty staves in first system: Always display staves in first system even if they consist of empty measures.
- Always show brackets which span to single staff:
- Display note values across measure boundaries: A feature useful for notating early music. See Unbarred notation.
- Hide instrument name if there is only one instrument: You don't usually need to display the instrument name in this case.
- Swing settings allows you to control the degree of swing for the whole score.
- Swing: Choice of OFF (default) / Eight Note / Sixteenth note.
- Select swing ratio: The default is 60%.
If you prefer to set swing on the score page, see Swing.
- Autoplace allows you to control the range and minimum distance used for the vertical alignment.
- System: Elements (like lyrics) are vertical aligned based on the system.
- Measure/Bar: Elements are vertical aligned based on the current measure/bar.
- Segment: Elements are vertical aligned based on the current segment position.
Page
To open the Page dialog, select Format→Style...→Page.
This dialog allows you to adjust the overall layout of your score by changing the spacing of margins, systems, staves, lyrics lines, and frames. You can also control the display of key signatures, time signatures, and clefs.

- Music top margin: The distance between the top staff line of the first staff on the page and the top page margin.
- Music bottom margin: The distance between the bottom staff line of the last staff on the page and the bottom page margin.
- Enable vertical justification of staves (as of 3.6):
- Factor for distance between systems
- Factor for distance above/below bracket
- Factor for distance above/below brace
- Min. system distance: The minimum distance allowed between one system and the next.
- Max. system distance: The maximum distance allowed between one system and the next.
- Min. staff distance: The minimum distance allowed between one staff and the next.
- Max. staff distance: The maximum distance allowed between one staff and the next.
- Max. grand staff distance: The space between staves that share the same instrument—such as the piano, organ, or those of a guitar staff/tab pair.
Note: As of MuseScore 3.6 staves connected by a curly brace are considered a grand staff (BE: great stave). - Max page fill distance
- Disable vertical justification of staves (as of 3.6, the default prior to that):
- Staff distance: The space between staves which are not part of a grand staff (see below).
- Grand staff distance: The space between staves that share the same instrument—such as the piano, organ, or those of a guitar staff/tab pair.
Note: As of MuseScore 3.6 staves connected by a curly brace are considered a grand staff (BE: great stave).
Note: To alter the space above one particular staff see Extra distance above staff (Staff properties). - Min. system distance: The minimum distance allowed between one system and the next.
- Max. system distance: The maximum distance allowed between one system and the next.
- Vertical frame top margin: The default margin height above a vertical frame.
- Vertical frame bottom margin: The default margin height below a vertical frame.
- Last system fill threshold: If the last system is longer than this percentage of the page width, it gets stretched to fill that width.
- Create clef for all systems / Create key signature for all systems / Create courtesy clefs / Create courtesy time signatures / Create courtesy key signatures: control their display, including the courtesy kind.
Sizes
To open the Sizes dialog, select Format→Style...→Sizes.
Sets the proportional size of "small" notes and grace notes, as well as small staves and small clefs. Changing this would be unusual.
Header, Footer
To open the Header, Footer dialog, select Format→Style...→Header, Footer.
This allows you to add header and footer text using meta tags (see Score properties)—such as page numbers, page headers, copyright information etc. For example, you can create different Headers and Footers for even and odd pages, such as putting page numbers on the right for odd-numbered pages and on the left for even-numbered pages.
If you hover with your mouse over the Header or Footer text region, a list of macros will appear, showing their meaning, as well as the existing meta tags and their content.
To create a header or footer for an individual part, that part needs to be the active tab. To create a header or footer for a score with linked parts, make sure the main score is in the active tab.
Measure Numbers
To open the Measure Numbers dialog, select Format→Style...→Measure Numbers.
This allows you to specify whether measure numbers will appear in the score, and, if so, at what intervals.
- Measure numbers: Tick to turn on automatic measure numbers.
- Show first: Tick if you want the first measure to display a number.
- All staves: Tick to display numbers on all staves of a system. Untick if you want the number to appear on the top staff of the system only.
- Every system: Select this option to place measure numbers at the start of each system.
- Interval: To specify that measure numbers should appear at a measure interval shown by the number. For example, an interval of 1 numbers every measure; an interval of 5 numbers every fifth measure.
System
To open the System dialog, select Format→Style...→System.
This dialog allows you to adjust certain properties of all systems.
Brackets:
- System bracket thickness: Set the width of system brackets.
- Brace thickness: Set the width of system braces.
- System bracket distance: Set the distance between system brackets and the start barlines.
- Brace distance: Set the distance between system braces and the start barlines.
See also Brackets.
Dividers:
- Left / Right: Specify whether to show system dividers, what types, and apply global positioning offset values.
Clefs
To open the Clefs dialog, select Format→Style...→Clefs.
Choose the style of the default tablature clef: Standard or Serif.
Accidentals
To open the Accidentals dialog, select Format→Style...→Accidentals.
Allows you to specify how the score displays key signature accidentals at key changes. See Naturals on key signature changes.
Measure
See the main chapter Measure
To open the Measure dialog, select Format→Style...→Measure.
Adjustment of global settings such as the horizontal distance between various items within measures. A major setting affecting layout is Spacing, which affects the number of measures per system. Global Staff line thickness can be changed here.
Barlines
To open the Barlines dialog, select Format→Style...→Barlines.
- Show repeat barline tips ("winged repeats"):
- Barline at start of single staff: Whether to show barlines at the beginning of a staff.
- Barline at start of multiple staff: Whether to show barlines at the beginning of multiple staves.
- Scale barlines to staff size: Affects "small" staves only.
Other properties allow you to set the thickness of "thin," "thick" and double barlines, the distance between double barlines, and the repeat barline to dot distance.
Notes
To open the Notes dialog, select Style→General...→Notes. The dialog can also be opened direct from the score by right-clicking on any note and selecting "Style…"
Here you can adjust the distance and thickness of note-related objects (stems, ledger lines, dots, accidentals). Changing these would be unusual.
Beams
To open the Beams dialog, select Style→General...→Beams.
This allows you to set the overall properties of note beams in the score:
- Beam thickness
- Beam distance: The vertical distance between beams.
- Broken beam minimum length: Affects secondary beams where they do not fully extend from note to note.
Ticking the Flatten all beams option means that all note beams will be horizontal only—not sloped.
Tuplets
To open the Tuplets dialog, select Format→Style...→Tuplets.
Vertical Distance from Notes:
- Maximum slope: Limit the slope of tuplet brackets.
- Vertical distance from stem: Refers to tuplet numbers and brackets.
- Vertical distance from notehead: Refers to tuplet numbers and brackets.
Horizontal distance from notes:
- Distance before stem of first note: Sets default position of start of tuplet bracket when above/below note stems.
- Distance before head of first note: Sets default position of start of tuplet bracket when above/below noteheads.
- Distance after stem of last note: Sets default position of end of tuplet bracket when above/below note stems.
- Distance after head of last note: Sets default position of end of tuplet bracket when above/below noteheads.
Brackets:
- Bracket thickness:
- Bracket hook height; Sets the default length of the vertical hooks at the ends of tuplet brackets
Properties:
- Direction / Number type / Bracket type
Arpeggios
To open the Arpeggios dialog, select Format→Style...→Arpeggios.
Here you can change the distance to note, line thickness, and hook length of the following arpeggio and strum symbols:

Slurs/Ties
To open the Slurs/Ties dialog, select Format→Style...→Slurs/Ties.
- Line thickness at end
- Line thickness middle
- Dotted line thickness
- Minimum tie length
- Autoplace min. distance
Hairpins
To open the Hairpins dialog, select Format→Style...→Hairpins.
Here you can set the default properties of hairpins (crescendo and decresendo lines):
- Placement: Whether to place above or below the staff.
- Position above/below: Set a numerical value in sp. units.
- Height: The width of the mouth of the hairpin.
- Continue height
- Autoplace distance to dynamics
- Line thickness
Volta
To open the Volta dialog, select Format→Style...→Volta.
Here you can set the default properties of voltas:
- Default position: Set X- and Y-offsets.
- Hook height: The length of descending lines at the ends of voltas.
- Line thickness
- Line style: A solid line is the default option, but there are dotted and dashed alternatives.
Ottava
To open the Ottava dialog, select Format→Style...→Ottava.
Here you can set the default properties of ottavas (octave lines):
- Numbers only: If unticked, the ottava also displays "va" or "vb" after the number.
- Position above/below: Set the X- and Y-offsets for the ottava.
- Hook height above/below: The length of the ascending/descending line at the end of the ottava.
- Line thickness
- Line style: A dotted line is the default option, but there are solid, dotted and dashed alternatives.
Pedal
To open the Pedal dialog, select Format→Style...→Pedal.
Here you can set the default properties of pedal lines:
- Placement: Below or above the staff.
- Position above/below: Set the exact default position using offset values.
- Line thickness:
- Line style: solid is the default but there is a range of dashed and dotted options.
Trill
To open the Trill dialog, select Format→Style...→Trill.
Here you can set the default placement of Trill lines:
- Placement: Below or above the staff.
- Position above/below: Set the exact default position using offset values.
Vibrato
To open the Vibrato dialog, select Format→Style...→Vibrato.
Here you can set the default placement of Vibrato lines:
- Placement: Below or above the staff.
- Position above/below: Set the exact default position using offset values.
Bend
To open the Bend dialog, select Format→Style...→Bend.
Here you can set the display properties of Bends. This includes the line thickness, arrow width and font properties.
Text Line
To open the Text Line dialog, select Format→Style...→Text Line.
Here you can set the default placement of text lines:
- Placement: Below or above the staff.
- Position above/below: Set the exact default position using offset values.
Articulations, Ornaments
To open the Articulations, Ornaments dialog, select Format→Style...→Articulations, Ornaments.
This dialog allows you set the default placement distances and size (as a percentage) of articulations and ornaments.
Fermatas
To open the Fermatas dialog, select Format→Style...→Fermatas.
This dialog allows you set the default placement of fermatas.
Staff Text
To open the Staff text dialog, select Format→Style...→Staff Text.
This dialog allows you set the default placement and autoplacement properties of staff text.
Tempo Text
To open the Tempo text dialog, select Format→Style...→Staff Text.
This dialog allows you set the default placement and autoplacement properties of tempo text.
Lyrics
To open the Lyrics dialog, select Format→Style...→Lyrics.

Lyrics Text
- Placement: Default position of lyric lines in relation to the staff; Above or Below.
- Position above / Position below: The X and Y offsets for "Placement."
- Line height: Default distance between lyric lines.
- Min. top margin: Minimum distance between the lyric lines and the parent staff skyline.
- Min. bottom margin: Minimum distance between the lyric lines and the skyline of the next staff.
- Min. distance: Minimum distance between lyrics syllables.
- Align verse number:
Lyrics Dash
- Min. dash length: Minimum length of inter-syllable dashes.
- Max. dash length: Maximum length of inter-syllable dashes.
- Max. dash distance: Maximum distance allowed between dashes. Reducing this value allows more dashes to form between syllables where possible—and vice versa.
- Dash thickness: The (vertical) thickness of the dash.
- Dash pad: The distance between the - and the syllable
- Dash y position ratio: Affects the vertical placement of the dash.
- Always force dash:Tick to ensure that a dash is always visible between syllables.
Lyrics melisma
- Melisma thickness: The (vertical) thickness of the melisma.
- Melisma pad: The distance between the _ and the syllable
- Align:
See also, Melismas.
Dynamics
To open the Dynamics dialog, select Format→Style...→Dynamics.
This dialog allows you set the default placement and autoplacement properties of dynamics.
Rehearsal Marks
To open the Rehearsal Marks dialog, select Format→Style...→Rehearsal Marks.
This dialog allows you set the default placement and autoplacement properties of rehearsal marks.
Figured Bass
To open the Figured Bass dialog, select Format→Style...→Figured Bass.
This allows you to set the default font, style, alignment and position of figured bass.
Chord Symbols
To open the Chord Symbols dialog, select Format→Style...→Chord Symbols.
There is another global setting for Chord Symbols at Text > Chord Symbol in which the Font is set; Format→Style...→Text .
This section allows you to adjust the format and positioning of chord symbols:
- Appearance: Choose a default chord symbol style—Standard, Jazz or Custom.
- Note spelling: Choose the spelling convention for chord symbols and whether to use capital or small letters.
- Positioning:
- Distance to fretboard diagram: The distance (in sp. units) from a chord symbol to a fretboard diagram when both are applied to the same location on a staff. This value overrides the above "Default vertical position" setting. The user can choose to place a chord symbol below a fretboard diagram by entering a negative value.
- Minimum chord spacing: The minimum space to allow between chord symbols.
- Maximum barline distance: Increases the distance between the final chord symbol in a measure and the following barline. You may wish to adjust this value if there is a recurring problem in the score with overlap between the final chord symbol in one measure and the following chord symbol.
- Capo: Capo fret position: Enter the number of the capo position at which you want to display substitute chords, in brackets, for all chord symbols in the score.
Fretboard Diagrams
To open the Fretboard Diagrams dialog, select Format→Style...→Fretboard Diagrams.
This section allows you to adjust the format and positioning of Fretboard diagrams.
- Default vertical position: the distance in sp. units from a newly applied fretboard diagram to a staff. A negative value may be used.
- Scale: Increase or decrease the size of the fretboard diagram in the score.
- Fret offset number font size: Increase or decrease the size of a fret number displayed next to a diagram.
- Position Left/Right: Display fret number to the left or right of the fretboard diagram.
- Barre line thickness: Make barre lines in fretboard diagrams thicker or thinner.
Text Styles
To open the Text Styles dialog, select Format→Style...→Text Styles.
Select a text type on the middle pane and edit its styles, see Text styles and properties.
See also
External links
- Creating Modified Stave Notation in MuseScore (MuseScore Tutorial)
Measure and horizontal spacing
Overview
This chapter explains the Format→Style...→Measure window used for adjustment of global settings such as the horizontal distance between various items within measures, see Layout and formatting. Other measure related global settings such as measure visibility are under the Format→Style...→Score, Page, Sizes, Measure number.
Change properties for individual measure(s) on score with "Measure Properties" window, see Measure operations chapter. To change all measures of a staff on the whole score, change the staff instead, see Staff / Part properties. See Page settings for how to override theses settings with individual systems pages specific options and on an individual object on a score.
See also Measure rests.
MuseScore automatically adjusts the score to maintain the correct spacing between notes and rests according to best music engraving practice. It will also correctly reposition any elements attached to notes or rests, such as fingerings, dynamics, lines etc.
The main setting is Spacing (1=tight)
All settings related to measure width and note spacing are minimum values. Measures are automatically stretched, if necessary, to maintain existing page margins.
Options
-
Minimum measure width: Sets the minimum horizontal length of measures. In measures containing very little content (e.g., a single whole note or whole measure rest), the measure will only shrink as far as this minimum.
-
Spacing (1=tight): set the ratio of space allocated for one note value compared to the next shorter value. The default spacing ratio value of 1.2 means that each note value takes 1.2 times as much space as the next shorter value. So, a half note takes 1.2 times as much space as a quarter note, etc. This setting thus affects not only space between notes but also between the last note and the ending barline. If you need to change this value, you should consider upgrading to Musescore 4. See https://musescore.org/en/node/326965 and https://musescore.org/en/node/299741#comment-982983 . For the space between the beginning of the measure and the first note or rest, see Note left margin (below)
-
Note left margin: Sets the distance from the start barline to the first note.
-
Barline to grace note distance: Sets the distance between a barline and a grace note that occurs before the first actual note in a measure (independently of the "Note left margin" setting).
-
Barline to accidental distance: Sets the distance between a barline and an accidental placed before the first note in a measure (independently of the "Note left margin" setting).
-
Note to barline distance: Sets the distance from the last note to the following barline.
-
Minimum note distance: Specifies the smallest amount of space MuseScore will allow after each note (depending on other factors, more space may be allowed).
-
Clef left margin: Sets the distance between the very beginning of each line and the clef. (This option is rarely needed.)
-
Key signature left margin: Sets the distance between the beginning of the measure and a key signature.
-
Time signature left margin: Sets the distance between the beginning of the measure and a time signature (if there is no key signature in between).
-
Time signature to barline distance: To be added
-
Clef/key right margin: Sets the distance between a mid-staff clef or key signature and the following note or rest.
-
Clef to barline distance: Sets the distance between a barline and a clef change preceding it.
-
Clef to key distance: Sets the distance from the clef to a key signature following it.
-
Clef to time signature distance: Sets the distance from the clef to the time signature following it (if there is no key signature in between).
-
Key to time signature distance: Sets the distance from a key signature to the following time signature.
-
Key to barline distance: To be added..
-
System header distance: Sets the distance from a clef or key signature at the beginning of a system to the first note or rest.
-
System header with time signature distance: Sets the distance from a time signature at the beginning of a system to the first note or rest.
-
Multimeasure rest margin: Sets the distance between a multimeasure rest and the barlines on either side.
-
Staff line thickness: Sets the thickness of the lines of the staff, which allows you to make the staff thicker and darker, if you need greater visibility on your printouts. See detailed calculation in Layout and formatting : Final absolute staff height chapter.
Note: Changes to an individual measure's Stretch (using Format→Stretch → Increase/Decrease Layout Stretch) are calculated after, and proportional to, the global Spacing setting.
See also
- This chapter explains Format→Style...→Measure window. The Layout and formatting chapter explains all other categories under Format→Style....
- Measure operations explains Measure Properties dialog used to set properties of individual measure(s).
- Barlines
Page settings

To open the Page settings dialog: from the menu, select Format → Page Settings....
"Page settings" allows you to adjust the overall dimensions of your score such as page size, page margins, and scaling. It contains layout score-wide settings of currently editing "Musescore Part" or "Full Score", see also Musescore Parts chapter.
Other overall size and spacing options:
- Format→Style...→Score, Page, Sizes, System, Measures, for the Measure item see Measure chapter, for others see Layout and formatting chapter.
The individual systems pages specific options:
- See Breaks and spacers chapter
- Stretch commands, see Layout and formatting chapter.
- See Frames chapter
Page size
Here you can select the paper format, either by standard name (e.g., Letter or A4), or by specifying the height and width in either mm or inches (use the radio buttons to choose which unit of measurement to use). The initial default page size depends on your localization—in the United States, Letter size paper is standard.
You can also choose to format your music in Landscape or Portrait orientation using the radio buttons. You can optionally use Two sided layout (i.e., book format, with mirror left and right margins for even and odd pages—see below).
Odd/Even Page Margins
The Even Page Margins and Odd Page Margins settings allow you to define the printable area of your pages. Aside from changing the margins around the music on the page, other settings, such as the positions of headers and footers, are calculated relative to the margins defined here.
If the "Two sided" checkbox under "Page Size" is selected, you can set margins differently for mirroring odd and even pages. Otherwise, only one set of margins can be modified, but will apply to all pages.
To display page margins in your score on screen (though not in print), go to View→Show Page Margins.
Scaling
Staff space (sp) : changes the definition of staff space (sp) itself. See Layout and formatting chapter.
Overriding options for individual object on a score are available:
- Each Text object on a score has a :Follow staff size: checkbox property set in the Inspector, see Text styles and properties chapter.
- Various profiles "style for text inside certain type of object" have :Follow staff size" checkboxes set in Format→Style...→Text Styles, see Layout and formatting chapter.
- Each Image on a score has a "Size in staff space units" checkbox property set in the Inspector.
- [Please add missing options if you find them]
Unit
Select between inches and millimeters for values in this dialog.
First page number
Sets the number of the first page of the particular score. Page numbers below 1 won't get printed—e.g., setting the first page number to -1 would result in the first and second page showing no page number, and page number 1 appearing on the third page.
Apply to all Parts
The Apply to all Parts button is available when modifying a part, rather than the main score (see Part extraction). If you change the page settings of one part and want the rest of the parts to have the same settings, this button will apply the change to all parts in one go.
Breaks and spacers
The Breaks & Spacers palette contains the following non-printing symbols:

The first three symbols are called breaks; the vertical lines are known as spacers.
Breaks
A break can be applied to either a measure or a frame. There are three types:
- System break: Forces the next part of the score to start in a new system.
- Page break: Forces the next part of the score to start on a new page.
- Section break: Forces the next part of the score to start in a new system and starts a new section (see below). It can be combined with a page break if required.
Notes: (1) Break symbols are visible on the screen, but do not appear on printouts. (2) To add (or remove) system breaks over all or part of the score, see Add/Remove System breaks. (3) To split a measure, see Measure operations: Split and join.
Add a break to a measure
Breaks can be added using either (1) a keyboard shortcut; or (2) a break symbol from a palette.
Using a keyboard shortcut
To add a System break or a Page break only:
- Select any one of the following:
- Barline;
- Measure;
- Notehead;
- Text element associated with a staff (e.g. lyric syllable, chord symbol, staff text etc.);
- Range of measures (if you choose this option, a break will be applied before and after the selection);
- Choose one of the following options:
- System break: Press↵ (toggle).
- Page break: Press Ctrl+↵ (Mac: Cmd+↵) (toggle).
Using a palette break symbol
Any break can be added from a workspace palette:
- Select any one of the following:
- Barline;
- Measure;
- Notehead;
- Text element associated with a staff (e.g. lyric syllable, chord symbol, staff text etc.);
- Range of measures (if you choose this option, a break will be applied before and after the selection);
- Click a break symbol in a palette (double-click in versions prior to 3.4). Repeat to toggle off.
- Alternatively, drag any break symbol from a palette onto a measure.
Add a break to a frame
To add a break to a frame, use one of the following options:
- Drag a break from a palette onto a frame.
- Select a frame then click a palette break symbol (double-click in versions prior to 3.4).
Delete breaks
Use one of the following options:
- Select one or more breaks and press Del.
See also: Add / Remove System breaks.
Move a break
Although breaks are not visible on printed output, you can reposition one, if required, by entering edit mode on it and using the keyboard arrow buttons (see Adjust position of text objects).
Section break
A Section break, as the name suggests, is used to create separate sections within a score. Like a system break, it forces the next measure or frame to begin a new system, and can also be used in association with a page break if required. A section break could be used, for example, to divide a piece into separate movements.
Each section can have its own measure numbering independent of the rest of the score. By default, the first measure of a section is numbered "1" (see image below), though like the first measure of the score itself, the number is not displayed unless configured in the measure properties dialog. The same dialog can be used to change the numbering according to your preference.
If you change Time signature or Key signature at the beginning of the new section, there will be no courtesy signature at the end of the previous section. See example below:

When you play back the score, the program adds a short pause between each section. In addition, the first end repeat barline in a section always sends the playback cursor to the beginning of the section, so a start repeat barline is optional.
The following properties can be adjusted in the Inspector after selecting the section break:
- Pause: Length of pause, in seconds, at end of the section.
- Start new section with long instrument names (checkbox).
- Start new section with measure number one (checkbox).
- Start new section with first system indentation (checkbox, as of 3.6).
Prior to version 3.4, the same properties are accessed by right-clicking the break and selecting Section Break Properties.
Spacers
There are three types of spacers:
- Staff spacer up (Up-pointing arrow): For adding space above a staff. The user sets a minimum height—which may increase (but not decrease) automatically if required by subsequent changes in layout.
- Staff spacer down (Down-pointing arrow): For adding space below a staff. The user sets a minimum height—which may increase (but not decrease) automatically if required by subsequent changes in layout.
- Staff spacer fixed down (Capital letter "I"): For adding a fixed space below the staff. The height set by the user is always adhered to and overrides any automatic layout settings. This spacer can also be used to draw staves closer than autoplacement would normally allow.
Notes: (1) Spacers are designed for local adjustments only. If you wish to adjust the space between staves across the whole score, use the settings in Format → Style... → Page instead. (2) Spacer symbols are visible on the screen, but do not appear on printouts. (3) Spacers cannot be applied to a frame.
Add a spacer
- Either select a measure, then click a palette spacer symbol (double-click in versions prior to 3.4); or, drag a spacer symbol from a palette onto a measure.
- To set the spacer height use one of the following:
- Adjust the "Height" property in the Spacer section of the Inspector.
- Select the spacer and use the ↑↓ keys and/or Ctrl+↑↓ to move the end-handle up and down
- Drag the adjustment handle of the spacer.
Delete a spacer
- Click on the spacer and press the Del key.
See also
Frames
A Frame is a rectangular container for empty space, text or pictures in the score. It can be one of three types:
- Horizontal: Used to create a break in a particular system. Can contain one or more text objects and/or images.
- Vertical: Inserted above a system or appended to the last system. Can contain one or more text objects and/or images.
- Text: Inserted above a system or appended to the last system. Can contain one text object only.
Horizontal frame
A horizontal frame is used to create a break in a system. For example, you can:
- Create a coda, with an adjustable gap separating it from the rest of the score (as in the example below).

- Create an offset at the beginning of the score, where there is no staff name to perform the same function.
- Create an adjustable right margin at the end of a system.
- Create space for some text or image(s).
- Create a space between a 'historical incipit' and the beginning of the modern edition.
Insert/append horizontal frame
See Create a Frame (below).
Adjust width of horizontal frame
Use one of the following methods:
- Click (double-click prior to version 3.4) the frame and drag the handle to the right or left.
- Select the frame and adjust "Width" in the Inspector.
Add text or image to horizontal frame
-
To add text: Right-click on the frame and select Add → Text.
-
To add an image: Right-click on the frame and select Add → Picture.
Vertical frame
A vertical frame can be inserted above a system or appended to the last system. It can contain one or more text objects and/or images. The height is adjustable and the width equals the system width.
It can be used, for example, to:
- Create an area at the head of a score for Title/Subtitle/Composer/Lyricist text etc. (see below).
- Create a title page (see below).
- Add single- or multi-column lyric text (at the end of a score).
- Create subtitles and other annotations between systems.
Insert/append vertical frame
See Create a Frame (below).
Adjust height of vertical frame
Use one of the following methods:
- Click (double-click prior to version 3.4) the frame and drag the handle up or down.
- Select the frame and adjust "Height" in the Inspector.
Edit vertical frame properties
Selecting the frame allows you to adjust various parameters in the Inspector:

Top Gap: Adjusts distance between frame and element above.
Bottom Gap: Adjusts distance between frame and element below.
Height: Adjusts height of the frame.
Left Margin: Moves left-aligned text objects to the right.
Right Margin: Moves right-aligned text objects to the left.
Top margin: Moves top-aligned text objects downwards (see also Format → Style... → Page).
Bottom Margin: Moves bottom-aligned text objects upwards (see also Format → Style... → Page).
Add text or image to vertical frame
-
To add text: Right-click on the frame, select Add, and choose one of the text options.
-
To add an image: Right-click on the frame and select Add → Picture.
You can create as many objects as you like within a frame. Their positions can be adjusted independently by dragging or, more accurately, by altering the offset values in the Inspector. To format text objects, see Text editing and Text styles and properties.
Insert horizontal frame in vertical frame
- Right-click on the frame and select Add → Insert Horizontal Frame.
The horizontal frame is automatically left-aligned and fills the entire vertical frame. To right-align it:
- Reduce the width of the horizontal frame.
- Deselect the frame then drag it to the right. To restore left-alignment, drag the frame to the left.
"Title" frame
A vertical frame is automatically created at the beginning of a score, showing the title, subtitle, composer, lyricist etc., when you fill in the information fields provided on page 1 of the New Score Wizard.
If the score does not have a vertical frame at the beginning, you can create one as follows:
- From the menu, select Add → Text → Title/Subtitle/Composer/Lyricist;
- Type the desired text;
- Press Esc, or click on an empty space, to exit.
Text frame
A Text frame looks like a vertical frame, but is specialized for text input: one text object is allowed per frame. The height automatically expands to fit the content and there is no height adjustment handle.
A text frame can be used, for example, to:
- Create lyric text at the end of a score.
- Create subtitles and other annotations between systems.
- Create and insert an empty [blank] page anywhere in the score, including at the beginning.
Insert/ append text frame
See Create a Frame (below).
Edit text frame properties
Selecting the frame allows you to adjust various parameters in the Inspector:
Top Gap: Adjusts distance between frame and element above.
Bottom Gap: Adjusts distance between frame and element below.
Height: Not applicable to text frames.
Left Margin: Moves left-aligned text objects to the right.
Right Margin: Moves right-aligned text objects to the left.
Top margin: Moves top-aligned text objects downwards.
Bottom Margin: Moves bottom-aligned text upwards.
Create a frame
Insert a frame into the score
From the menu:
- Select a measure;
- From the menu select Add → Frames → Insert Horizontal/Vertical/Text Frame.
From a measure:
- Right-click on a measure;
- Select Add → Insert Horizontal/Vertical/Text Frame.
From a palette:
See Apply symbols from a palette.
Append a frame to the score
- From the menu select Add → Frames → Append Horizontal/Vertical/Text Frame.
Delete a frame
Use one of the following:
- Select the frame boundary and press Del.
- Select the frame boundary, then right-click on the frame and select Delete.
Apply a break
System, page or section breaks can be applied to frames as well as measures. Use one of two methods:
- Select a frame and click (double-click prior to version 3.4) a palette break symbol (for example, in the Breaks & Spacers palette).
- Drag a break symbol from a palette onto a frame.
See also
- Text Properties: to put a visual frame (border) around text.
- Insert measures: to insert measures before a frame.
External links
Images
Embed Images onto a score as cover art or as symbols that are not found in any Palettes or the Master palette window (check its Symbol category as last resort). MuseScore supports the following formats:
- Scalable Vector Graphics (*.svg): the recommended format, but does not support SVG shading, blurring, clipping or masking technologies, see Musescore Versions Reference and Qt 5.9: Rendering SVG Files
- Bitmap (*.bmp)
- Portable Network Graphics (*.png) supports transparency (alpha channel)
- JPEG (*.jpg and *.jpeg)
- TIFF (*.tif or *.tiff) supports transparency but unpredictable, see discussion.
Does not support the following formats at all:
- Graphics Interchange Format (*.gif)
- WebP (*.webp)
- X PixMap (*.xpm)
Add image
Use one of the following options:
- Drag-and-drop an image file (from outside MuseScore) either into a vertical or horizontal frame, or onto a measure, a note or a rest on the score.
- Right-click on a frame, select Add→Picture, then pick an image from the file selector.
Once imported, it can be added to any palette and reapplied to other scores easily, see added to a palette.
Cut/copy and paste image
- Click on an image in the score.
- Apply any of the standard copy/cut commands.
- Click on a note, rest or frame.
- Apply any of the standard paste commands.
Modify image
To modify the width/height of an image, double-click it and drag any of the handles. If you want to adjust width or height separately, untick "Lock aspect ratio" first in the Inspector. Toggle the "Size in staff space units" checkbox to switch between proportional unit and absolute value, see Layout and formatting.
You can adjust the position of an image by simply dragging it.
See also
External links
- How to create an ossia with image capture (MuseScore HowTo)
- How to create an ossia with another staff (MuseScore HowTo)
Image capture
MuseScore's image capture feature allows you to save a snapshot of any part of the score window. PNG, PDF and SVG formats are supported.
Save a snapshot
- Click on the Toggle image capture button,
 .
. - Press Shift + drag, to create a new selection rectangle.
- Fine tune the rectangle position, if required, by dragging it and/or changing the "Position" values in the "Image Capture" section of the Inspector.
- Fine tune the rectangle area, if required, by dragging the handles, and/or changing the "Size" values in the Inspector.
- Right-click on the selection rectangle to open the Image Capture menu. Select the desired option:
- Save As (Print Mode). This saves an image of the selection area as it would look if printed, e.g.

- Save as (Screenshot Mode). This saves a selection of the actual screen, including any line break symbols, invisible elements etc., e.g.

- Save As (Print Mode). This saves an image of the selection area as it would look if printed, e.g.
You can save the image in either PNG (default), SVG or PDF format.
Note: SVG is a vector graphics format rather than being pixel-based (or raster, like BMP or PNG). The advantage of this format is that enlarging the image or zooming in does not cause blurring or unwanted sawtooth effects.
Image capture menu
Right-clicking on the selection rectangle opens the Image Capture menu (Mac: Ctrl + click, or 2-finger-tap):

- Copy: Choose this to copy an image before pasting it in the same or another MuseScore file.
- Copy with Link to Score: Choose this to copy an image including a link to the MuseScore file. When pasting this into a program that supports this, you can click on the image to open the MuseScore file.
- Resolution: Set the resolution, and hence the size of the saved or copied image. Try 100 dpi to start with, if you are unsure.
- Transparent background: Turn image transparency on or off.
- Auto re-size to page: Adjusts the selection rectangle to fit the page.
- Resize to A/B/C/D: Choose a customized selection rectangle (as set below).
- Set Standard Size: Resize the selection rectangle, then choose "Set size A/B/C/D" to store it.
See also
External links
- Create an ossia with image capture (MuseScore HowTo)
- How to create an ossia with another staff (MuseScore HowTo)
Align elements
While dragging an element:
- To constrain movement to the horizontal only: Click and hold on the element, press Ctrl, then drag the element left or right.
- To constrain movement to the vertical only: Click and hold on the element, press Shift, then drag the element up or down.
Snap to grid
Snap to grid is a feature which allows you to drag an element in precise steps—useful for exact positioning.

To enable snap to grid, select an element and click one or both of the snap to grid buttons, located to the right of the X (horizontal) and Y (vertical) offset fields in the Inspector. You can then drag the element in steps equal to the grid spacing. The default value is 0.5 sp.
To change the grid spacing:
- Right-click on any of the snap to grid buttons in the Inspector, and select Configure Grid.
- Set values for the horizontal and vertical grid spacing as required. Note that this is a fractional setting.
Advanced topics
This page is an administration page intended for the editing community only. Click this link to go to the handbook front page intended for public viewing.
Accessibility
Introduction
This document is written for blind and visually impaired users of MuseScore 3. It is not intended to provide a full description of all of the features of MuseScore; you should read this in conjunction with the regular MuseScore documentation.
MuseScore comes with support for the free and open source NVDA screen reader for Windows. You can also install a script to enable support for JAWS, or install a script for Orca on Linux.
Eventually we hope to support other screen readers such as VoiceOver and Narrator. Currently, unsupported screen readers will usually read menus and dialogs, but reading the score note by note currently requires one of the supported screen readers.
Beginning with MuseScore 3.3, most of the features of MuseScore are fully accessible, it is viable both as a score reader and editor. Previous versions were more limited with respect to editing.
Initial setup
When you run MuseScore for the first time, you will be asked some questions on startup. We recommend you accept the defaults, but answer "no" to the question about showing tours, since these unfortunately are not yet accessible.
When MuseScore starts, the first thing you normally see is the Start Center window. This shows you a list of recent scores that you can access via Shift+Tab and then using the left and right cursor keys. You may find it easier to open scores directly from the File menu, however so you can press Esc to close the Start Center if you prefer. In fact you may want to permanently disable it. After closing the Start Center, open the Edit menu (Alt+E), choose Preferences, and in the General tab, uncheck Show Start Center, then close the Preferences window.
MuseScore includes keyboard shortcuts for many of its commands, and others that do not have shortcuts defined by default can be customized later, in Edit, Preferences, Shortcuts.
Finding your way around
The user interface in MuseScore works much like other notation programs or other document-oriented programs in general. It has a single main document window within which you can work with a score. MuseScore supports multiple document tabs within this window. It also supports a split-screen view to let you work with two documents at once, and you can have multiple tabs in each window.
In addition to the score window, MuseScore has a menu bar that you can access via the shortcuts for the individual menus:
- File: Alt+F
- Edit: Alt+E
- View: Alt+V
- Add: Alt+A
- Format: Alt+O
- Tools: Alt+T
- Plugins: Alt+P
- Help: Alt+H
Hint: once you have opened a menu, it may take several presses of the Up or Down keys before everything is read properly. Also, if at any point the screenreader stops responding, a useful trick to kickstart it again is to press Alt to move focus to the menu bar, then Esc to return to the score. Sometimes switching to another application then back can help as well.
In addition to the menu bar, there are also a number of toolbars, palettes, and sub-windows within MuseScore, and you can cycle through the controls in these using Tab (or Shift+Tab to move backwards through this same cycle). When you first start MuseScore, or load a score, focus should be in the main score window.
If nothing is selected (press Esc to clear any selection), pressing Tab takes you to a toolbar containing a series of buttons for operations like New, Open, Play, and so forth. Tab will skip any buttons that aren't currently active. The names and shortcuts (where applicable) for these buttons should be read by your screen reader.
Once you have cycled through the buttons on the toolbar, the next window Tab will visit is the Palettes. This is used to add various elements to a score (dynamics, articulations, and so forth).
If an element is selected in the score, the first window visited by Tab is the Inspector, which is used for making various manual adjustments in your score. Many of these features are based on the visual appearance of the score (although a few relate to playback).
If you have opened one of the additional optional windows, such as the Selection Filter, the Tab key will also visit these. You can close windows you do not need by going to the View menu and making sure none of the first set of checkboxes is selected (the windows that appear before the Zoom settings). By default, only the Palettes and Inspector should be selected. See Initial Setup for instructions for disabling the Start Center. F9 can be used to toggle the Palettes while F8 will toggle the Inspector.
To return focus to the score window after visiting the toolbar, or a subwindow, press Esc. If something was selected before visiting the other window, the selection is left intact, but pressing Esc once focus is in the score window clears the selection. The selection is automatically restored when you commence navigation using the accessibility commands described below.
The score window
When you first start MuseScore 3 an empty example score is loaded by default. If you wish to experiment with editing features, this would be a good place to begin. Otherwise, you will probably want to start by loading a score. MuseScore uses the standard shortcuts to access system commands like Ctrl+O (Mac: Cmd+O) to open a file, Ctrl+S (Mac: Cmd+S) to save, Ctrl+W (Mac: Cmd+W) to close, etc.
If you press Ctrl+O (Mac: Cmd+O) to load a score, you are presented with a fairly standard file dialog. MuseScore can open scores in its own format (MSCZ or MSCX) as well as import scores in the standard MusicXML format, in MIDI format, or from a few other programs such as Guitar Pro, Capella, and Band-in-a-Box. Once you have loaded a score, it is displayed in a new tab within the score window. You can move between the tabs in the score window using Ctrl+Tab (does not apply for Mac). Hint: if the name of the score in the current tab is not read, ask your screen reader to read the title bar.
To read the score note by note, see below, but there are a few other interesting things you can do with a loaded score. You can press Space to have MuseScore play the score for you. You can use File / Export to convert to another format, including PDF, PNG, WAV, MP3, MIDI, MusicXML, etc. And of course, you can print it via File / Print or Ctrl+P (Mac: Cmd+P).
If a score contains multiple instruments, it may already have linked parts generated. Linked parts are presented as part tabs within score tabs, but currently, there is no way to navigate these part tabs using the keyboard. The parts would not normally contain information different from the score; they would just be displayed differently (each part on its own page). If a score does not already have parts generated, you can do so through File / Parts, and that dialog is accessible. If you wish to print the parts, you can work around the inability of accessing part tabs individually by using the File / Export Parts dialog, which automatically exports PDF’s (or other formats) for all parts in one step.
Score reading
When you first load a score, the score window has the keyboard focus, but there will be nothing selected. The first step to reading a score is to select something, and the most natural place to begin is with the first element of the score. After a score is loaded, Alt+Right (Mac: Alt+Right) will select the literal first element, which is likely the title; Ctrl+Home (Mac: Cmd+Home) will select the first "musical" element (usually a clef or an initial barline).
As you navigate between elements, your screen reader should give the name of the selected element. You will hear it read the name of the element (for example, “Treble clef”) and also give position information (for example, “Measure 1; Beat 1; Staff 1; Violin”). The amount of information read is optimized to not repeat information that has not changed. Pressing Shift currently interrupts the reading, which might also be useful.
Most navigation in MuseScore is centered around notes and rests only—it will skip clefs, key signatures, time signatures, barlines, and other elements. So if you just use the standard Right and Left keys to move through your score, you will only hear about notes and rests (and the elements attached to them). However, there are two special accessibility commands that you will find useful to gain a more complete summarization of the score:
- Next element: Alt+Right (Mac: Alt+Right)
- Previous element: Alt+Left (Mac: Alt+Left
These commands include clefs and other elements that the other navigation commands skip, and also navigate through all voices within the current staff, whereas other navigation commands such as Right and Left only navigate through the currently selected voice until you explicitly change voices. For instance, if you are on a quarter note on beat 1 of measure 1, and there are two voices in that measure, then pressing Right will move on to the next note of voice 1—which will be on beat 2—whereas pressing Alt+Right (Mac: Alt+Right) will stay on beat 1 but move to the note on voice 2. Only once you have moved through all notes on the current beat on the current staff will the shortcut move you on to the next beat. The intent is that this shortcut should be useful for navigating through a score if you don’t already know what the contents are.
When you navigate to an element, your screen reader should read information about it. For notes and rests, it will also read information about elements attached to them, such as lyrics, articulations, chord symbols, etc. The accessibility commands will also navigate through those elements individually.
One important note: Up and Down by themselves, with Shift, or with Ctrl / Cmd are not useful shortcuts for navigation! Instead, they change the pitch of the currently selected note or notes. Be careful not to inadvertently edit a score you are trying to read. Up and Down should only be used with Alt if your intent is navigation only. See the list of navigation shortcuts below.
If you should lose track of your place in the score - or if you lose the selection completely - press Shift+L ("location") to get the current location.
Moving forwards or backwards in time
The following shortcuts are useful for moving “horizontally” through a score:
- Next element: Alt+Right
- Previous element: Alt+Left
- Next chord or rest: Right
- Previous chord or rest: Left
- Next measure: Ctrl+Right
- Previous measure: Ctrl+Left
- Go to measure: Ctrl+F
- First element: Ctrl+Home
- Last element: Ctrl+End
Moving between notes at a given point in time
The following shortcuts are useful for moving “vertically” through a score:
- Next element: Alt+Right
- Previous element: Alt+Left
- Next higher note in voice, previous voice, or staff above: Alt+Up
- Next lower note in voice, next voice, or staff below: Alt+Down
- Top note in chord: Ctrl+Alt+Up
- Bottom note in chord: Ctrl+Alt+Down
The Alt+Up and Alt+Down commands are similar to the Alt+Right and Alt+Left commands in that they are designed to help you discover the content of a score. You do not need to know how many notes are in a chord, how many voices are in a staff, or how many staves are in a score in order to move vertically through the score using these commands.
Filtering score reading
Excluding certain elements like lyrics, or chord names while reading the score is possible by using the Selection filter (F6). Uncheck those elements you don't want to read. However, this feature may not currently be implemented.
Score playback
The Space bar serves both to start and stop playback. Playback will start with the currently selected note if one is selected; where playback was last stopped if no note is selected; or at the beginning of the score on first playback.
MuseScore supports looped playback so you can repeat a section of a piece for practice purposes. To set the “in” and “out” points for the loop playback via the Play Panel (F11):
- First select the note in the score window where the loop should start;
- Go to the Play Panel and press the Set loop In position toggle button;
- Back to the score window, navigate to the note where you want the loop to end;
- Switch again to Play Panel, and press the Set loop Out position toggle button;
- To enable or disable the loop, press the Loop Playback toggle button.
You can also control the loop playback and control other playback parameters, such as overriding the basic tempo of a score, using the View / Play Panel (F11).
Score creation and editing
While some advanced score editing techniques require visual inspection of the score, and a small number of commands may require the mouse, as of MuseScore 3.3 most score editing features are fully accessible.
You can enter music into the default empty score (a score with one staff, using a piano sound), or edit an existing score that you have opened already, or you can create a new score with the set of instruments you want.
Creating a new score
To create a new score, use File, New or Ctrl+N. A wizard then walks you through the score creation process.
The first screen of the wizard has fields to enter the title, composer, and other information. The second allows you to select a template (predefined scores for common ensembles like choral SATB or jazz big band) or to select instruments. The third allows you to select an initial key signature and tempo. Sometimes this screen gets skipped, so if this happens, press the Back button to go back. To select a key, use Up and Down. The key signature control does not work well with some screenreaders, but if you give the "read current line" command (e.g., NVDA+L), it may read the currently-selected key. The next and final screen of the wizard allows you to select an initial time signature, pickup (anacrusis), and the number of measures to start with.
Once you have a score, you can begin editing it.
Note input
To enter notes, you need to be in note input mode. First, navigate to the measure in which you would like to enter notes, then press N. Almost everything about note input is designed to be keyboard accessible, and the standard documentation should be good to help you through the process. Bear in mind that MuseScore can either be in note input or normal mode, and it won’t always be clear which mode of these you are in. When in doubt, press Esc. If you were in note input mode, this will take you out. If you were in normal mode, you will stay there, although you will also lose your selection.
The basic process of note input is to first select a duration (for example, using shortcuts 4-5-6 for eighth, quarter, half), then enter a note by typing its letter name. Once a duration is selected you can enter multiple notes of the same duration. Press 0 to enter a rest.
The Up and Down keys raise or lower the pitch by a half step, adding or removing accidentals as necessary. To change enharmonic spelling of a note, press J.
To enter a tie, select the duration of the tied note then press +. To create triplets, select the total duration for the triplet, then press Ctrl+3 (similarly for quadruplets and other tuplets). To enter music in multiple voices on a single staff, pressing Ctrl+Alt plus a number from 1 to 4 will switch to that voice (keep in mind, the first voice for each staff is always voice 1).
There is much more to note input in MuseScore. See for the section on Note Input in the Handbook.
Selection
MuseScore supports the usual keyboard shortcuts for selection. Navigating is the same as selecting for single elements. To select a range of elements, navigate to the first, press and hold Shift, then navigate to the second. Ctrl+A will select the entire score.
Palettes
As mentioned previously, many symbols other than notes are entered from the palettes window. The basic use model is, first select the element or elements in the score you want to apply the palette item to, then apply the palette element. There are a few different ways to select the palette element.
The simplest method to use at first is to simply browse the palettes window by keyboard. To reach the palettes window, press Shift+Tab. The screenreader may not specifically tell you that you are in the palettes window, but you will discover that you are as you navigate. Depending on whether you have used the palettes before, focus may be where you left off, or at the top. Press Tab a few times to get to the first palette within the window (Clefs). You can browse the list of palettes using the Up and Down cursor keys. The Right cursor key opens a palette, and then all four cursor keys can be used to navigate through the elements (they are arranged in a table). You can also use Tab to navigate the palette names and contents.
Once you have found a palette item you want to apply, press Enter to apply it to the currently-selected score elements and return focus to the score. The next time you press Shift+Tab to return to the palettes, the last-used palette item will still be selected, so Enter will apply it again. The screenreader may stop responding after applying a palette item, even though focus has returned to the score, but the trick of pressing Alt followed by Esc should get it working again.
You can also use the palette search facility to quickly find a palette item. The search box is one of the first elements at the top of the palette, so you can navigate to it, or you can define a shortcut (Edit, Preferences, Shortcuts) for the "Palette search" command, which will subsequently take you directly to the search box. Once you are in the box, type the first few characters of a search term, and only palette items matching that search will shown. You can then navigate to the search results and find the element you want. The Down cursor will take you directly to the first search result, then you can use Right after that. However, on some systems MuseScore may crash when using the palette search function with a screen reader enabled.
Another way to reach the palettes window is with the F9 shortcut, which toggles the palettes window on and off. By default, the palettes window is open, so pressing F9 will close it, but then pressing it again opens the window and puts the cursor in the search box.
There is one other useful technique for palette accessibility, and that is the "Apply current palette element" command (for which you can define a shortcut). If you are in the score, this will apply the last-used palette element automatically (the equivalent of Shift+Tab followed by Enter).
Menus and Shortcuts
Some elements can be added or edited via menu commands or keyboard shortcuts. The Edit menu has standard copy and paste commands (and the usual shortcuts work too). The Add menu has commands to add notes, tuplets, measures, frames, text, and some lines. The Format menu has commands relating mostly to the visual appearance of the score (e.g., page and staff size, position and size of symbols, fonts used for text), which can be extremely useful in producing large print a.k.a. "modified stave notation" scores (see below). The Tools menu has a number of other useful commands, including ones to remove measures or other selected ranges, to transpose a selection, to join and split measures, and more. any of these commands have shortcuts defined by default that should be read by a screenreader. You can define custom shortcuts for most of the rest in Edit, Preferences, Shortcuts.
There are also shortcuts for a number of palette items, and the possibility to define others (although many palette items currently do not support this). Some useful shortcuts to remember include:
Ctrl+T: staff text
Alt+Shift+T: tempo
Ctrl+L: lyrics
Ctrl+K: chord symbol
Ctrl+M: rehearsal mark
S: slur
Shift+S: staccato
Shift+V: accent
Shift+N: tenuto
Shift+O: marcato
slash: grace note
less than: crescendo
greater than: diminuendo
Customization
You can customize the keyboard shortcuts by opening the Edit menu, selecting Preferences, then navigating to the Shortcuts tab. Once there, Tab will take you to the list of shortcuts, and you can navigate the list directly with the Up and Down cursor keys, but it is a very long list. You can instead hit Tab a few more times to reach the Search box, then type the first few characters of the command to filter the list, then navigate back to the list.
Once you have found the command you wish to customize, press Enter. You can then press the key combination you wish to be the shortcut. It can be a single key, a key with Shift, Ctrl, and/or other modifiers, or even a sequence or two or more keys pressed in succession. After entering the shortcut you wish, press Tab to get to the Add or Replace button (Tab is the only key that won't be interpreted as part of a shortcut sequence). If you reach Cancel without ever seeing Add or Replace, it means the shortcut you choose conflicts with another. Navigate back to the where you typed the shortcut and it will tell you the name of the command it conflicts with. Hit Tab to get to the Clear button to clear it, then try again with a different shortcut.
At some point, we may provide a set of special accessibility-optimized shortcuts. There is already a facility in the shortcut dialog to save and load shortcut definitions, so it is possible to share shortcut definitions with other users.
External links
- MuseScore Accessibility Demo (YouTube)
- Creating a New Score in MuseScore with NVDA (MuseScore Tutorial)
- Inputting notes with NVDA (MuseScore Tutorial)
- Creating Modified Stave Notation in MuseScore (MuseScore Tutorial)
Albums
The Album feature has been disabled for 3.x. It will come back in 4.x (x > 0!).
The Album Manager allows you to prepare a list of multiple scores and save the list as an album file ("*.album"), print all the scores as one long print job with consistent page numbers, or even join the scores into a single new MSCZ score. This is ideal for preparing an exercise book or combining multiple movements of an orchestration.
To open the Album Manager, go to File → Album...

Create album
- To create a new album, click the New button. Fill in a title in the "Album Name:" box at the top.
- To add scores to the album, click Add Score. A file selection dialog will appear and let you choose one or multiple scores from your file system. Click OK.
- The scores you add will appear in a list in the Album Manager. You can rearrange their order by selecting a score and clicking the Up or Down button.
Load album
If you have previously created an album, you can open it through the Album Manager by clicking the Load button. A file selection dialog will appear to let you load the .album file from your file system.
Print album
To print an album as if it were a single document, click Print Album. The scores loaded into the Album Manager are printed in the order they are listed in with the correct page numbers, ignoring the page number offset values in Layout → Page Settings... → First page number for all but the first score. As the album is printed in one print job, double-sided printing (duplex printing) also works as expected.
Join scores
To combine multiple scores into a single .mscz file, click Join Scores. The scores are combined in the selected order into one single score. If not already present, line- and section breaks are added to the last measure or frame of each score in the combined file.
All style settings are taken from the first score, different style settings from subsequent score are ignored.
All the scores should have the same number of parts and staves for this to work correctly, ideally with the same instruments in the same order. If the scores have the same total number of instruments but not the same ones, or not in the same order, then the instrument names from the first score will overwrite ones from subsequent scores. If some of the scores have fewer instruments than the first score, then empty staves will be created for those sections. Any part or staff that is not present in the first score will be lost in the joined score.
Save album
Upon clicking the Close button, you will be prompted to save your album as a .album file. This file is not the same as a joined score; it simply consists of the list of scores. Album files can be loaded into the Album Manager as described above.
Automatic placement
MuseScore's automatic placement (AP) feature ensures that, in most cases, elements are correctly spaced and do not collide or overlap with each other.
Note: When you create an element, AP is automatically enabled, but can be turned off if required (see Disable automatic placement).
Default position
A newly-created element, such as staff text or fingering, assumes a default position on the staff specified by "positional" properties contained in the Style menu. These "positional" properties may include things such as:
- Placement: Whether the element appears above or below the staff.
- Offset: For elements with no "Placement above/below" properties, this specifies the default position. See Offset X/Y.
- Autoplace min distance: Minimum distance from other elements when autoplace is enabled.
For details of the settings available for each element type, see Layout and formatting: Style.
Change the default placement of an element
Use one of the following methods:
- From the menu, select Format→Style; choose an element type and then adjust the placement/position settings.
- Select a relevant element in the score and change the placement/position settings in the Inspector; then press the Set as style" button (S) to update the Style settings.
Manual adjustments
Adjust position of element
Use one of the following methods:
- Select the element and adjust the X and Y offsets in the Inspector (see X and Y offsets).
- Move the element using the arrow buttons. Change to edit mode first, if necessary.
- Drag and drop the element using the mouse. Use this method in preference to the above, if you want to move an element across another one (e.g. fingering across a slur). Once located on the other side you can use the X/Y offsets in the Inspector, or the keyboard arrow keys to fine tune the position.
Place element above/below staff
Elements with a "Placement" property available in the Inspector can be easily moved from above the staff to below it, and vice versa:
- Select one or more elements.
- Use one of the following methods:
- Change the "Placement" setting in the Inspector.
- Press X to toggle between above/below.
Note: When automatic placement is enabled for an element, you cannot position it in a way that causes a collision with other elements.
Disable automatic placement
- Select the element and uncheck the "Automatic placement" box in the Inspector.
The element reverts to its default position. It can be repositioned as desired and is no longer avoided when placing other elements.
Stacking order
To change the value for Stacking order:
- Select the element and change the "Stacking order" value in the Inspector.
In cases where elements are allowed to overlap, Stacking order controls the order in which they are placed on top of each other. The element with the lower value will be placed behind.
Default stacking order values (source)
| Item | Default stacking order value |
|---|---|
| Accidental | 1600 |
| Ambitus | 2200 |
| Arpeggio | 1500 |
| Articulation | 2800 |
| Barline | 1100 |
| Beam | 3200 |
| Bend | 4800 |
| Breathmarks | 2500 |
| Caesura | 2500 |
| Change instrument | 4400 |
| Clef | 2000 |
| crescendo - diminuendo | 5100 |
| D.C. | 3700 |
| D.S. | 3700 |
| Dynamic | 3100 |
| Fall etc. | 3000 |
| Fermata | 2900 |
| Fingering | 3800 |
| Flag | 3300 |
| Fretboard diagram | 4700 |
| Glissando | 6100 |
| Hairpin | 5100 |
| Hook/Flag | 3300 |
| Instrument names | 800 |
| Key signature | 2100 |
| Ledgerlines | 1700 |
| Line | 5700 |
| Minus sign measure | 1099 |
| mf + hairpin | 5100 |
| Note anchored line | 5700 |
| Note dot | 6600 |
| Noteheads | 1900 |
| Ornament | 2800 |
| Ottava's | 5200 |
| Palm mute | 5600 |
| Parenthesis | 500 |
| Pedal lines | 5900 |
| Rehearsal mark | 4300 |
| Repeat measure sign | 2600 |
| Rest | 2400 |
| RH fingering | 2800 |
| Sawtooth | 5500 |
| Segno | 3600 |
| Slide etc. | 3000 |
| Slur | 900 |
| Stafflines | 1200 |
| Staff text | 4100 |
| Stem | 1800 |
| System text | 4200 |
| Tempo | 4000 |
| Text line | 5700 |
| Thumb pos | 2800 |
| Tie | 1000 |
| Time signature | 2300 |
| Title text | 600 |
| Tremolo | 6700 |
| Tremolobar | 4900 |
| Trill lines | 5300 |
| Volta | 5800 |
Cross-staff notation
In piano scores, it is common to write a musical phrase extending across both staves—bass and treble. This can be entered in MuseScore as follows:
-
To start with, enter the notation in one staff. e.g.

-
Select a note and press Ctrl+Shift+↓/↑ (Mac: Cmd+Shift+↓/↑). This moves the selected note, and all other notes in the same voice, down (or up) to the other staff, e.g.

Note: It follows that if you want to ensure that notes remain on the same staff during the operation, they should be in a different voice to the one selected above. Be aware that notes which have been moved to a different staff still belong logically to the staff of origin. This is why no rest is shown in the place where the moved notes originated.
-
To adjust the beam, double-click it to show the handles. Use the keyboard arrows or drag the handles to change the beam angle and height:

See also
External links
- How to span a chord or stem over two staves (MuseScore HowTo)
Early music features
MuseScore offers several specialized functions to create engravings of early music (particularly medieval and renaissance) akin to commercial editions from the 20th century onwards.
Unbarred (or unmetered) notation
In MuseScore, notes lasting longer than the duration of a measure are normally tied across barlines. However MuseScore has a special feature which allows it to display the note values intact, without splitting and tying them in this way. This enables you to notate music which is unbarred (i.e. not divided into measures), such as that of the renaissance:
- From the menu bar, select Format→Style...→Score.
- Tick the box labelled "Display note values across measure boundaries … ."

- Click "OK" or "Apply." The existing score is immediately updated.
Example
- The example below shows an excerpt from the original score of "De Profundis Clamavi" for 4 voices by Nicolas Champion:

- The same excerpt displayed in MuseScore:

- And after activating "Display note values across measure boundaries … ."

- To get rid of the barlines, just untick the “Show barlines” box in the Staff / Part properties dialog. See also Mensurstrich (below).
Note: The feature is still in development and may contain bugs. The longest supported note value is the longa (a dotted longa is still broken up and tied over).
Mensurstrich
Since a complete lack of barlines could make performing the music more difficult for current musicians, many modern engravers settled on a compromise called Mensurstrich, where barlines are drawn between, but not across, staves.

To place barlines between staves:
- In the lowest staff (usually the bottom staff of a system) where the proposed Mensurstriche is required, uncheck "Show barlines" in the Staff/Part Properties dialog;
- In the staff above where you want the Mensurstriche, click on one barline;
- In the Barline section of the Inspector, tick the "Span to next staff" option;
- In the Barline section of the Inspector, adjust the "Span from" value so that the top of the barline meets the bottom line of the staff (e.g., set to 8);
- Click the "Set as staff default" button.
Ambitus
Before there was the concept of an absolute pitch, performers were required to transpose vocal music to a singable range for their ensemble "on the fly." To aid them, an ambitus was sometimes included, marking the entire range of a voice at the beginning of the piece.
To apply an ambitus, use one of the following methods:
- Drag the ambitus symbol (from the Lines palette of the Advanced workspace) onto a clef.
- Select one or more clefs, then click (double-click prior to version 3.4) the ambitus symbol (in the Lines palette of the Advanced workspace).

When applied, the ambitus automatically displays the note range of the score: if there is a section break then only the note range of the section is displayed. Beyond the section break a new ambitus may be applied.
The note range of the ambitus can be adjusted manually by selecting it and changing the "Top note" and "Bottom note" values in the Inspector. For automatic adjustment click the Update Range button in the inspector.
Mensural time signatures
In the mensural notation system, time signatures did not define the length of a measure, but the length of breves and semibreves. MuseScore supports mensural time symbols as a display method in the Time signature properties dialog rather than as symbols, but they are just for show, as the proportion of e.g. half notes per whole notes cannot be modified.
One way to make use of these symbols is to replicate when composers of the renaissance had multiple voices in different time signatures simultaneously without using tuplets. Edit the time signature on a per-staff basis, as long as the beginning and end of a measure in all staves match up. If they do not, then consider increasing the size of the measures to the lowest common denominator.

De Profundis Clamavi for 5 voices by Josquin Des Prez
Period tablature
Authentic-looking period tablature is possible for instruments such as the lute, theorbo etc. The various historical styles are well supported by a choice of fretmark and note symbol fonts, optional “upside-down” tablature, and special symbols for bass-string notes. See Tablature.
See also
Figured bass
Not to be confused with Chord notation systems: Roman Numeral Analysis
Adding a new figured bass indication
- Select the note to which the figured bass applies;
- Press the Figured Bass shortcut. The default isCtrl+G (Mac: Cmd+G): this can be changed in Prefences: Shortcuts if desired;
- Enter the text in the editor 'blue box' as required (see below);
- Use one of the following options as required:
- Press Space to move to the next note ready for another figured bass indication (or click outside the editor box to exit it). The editor advances to the next note, or to the rest of the staff to which figured bass is being added. (To move to a point in between, or to extend a figured bass group for a longer duration, see Duration (below)).

- Shift+Space moves the editing box to the previous staff note or rest.
- Tab advances the editing box to the beginning of the next measure.
- Shift+Tab moves the editing box to the beginning of the previous measure.
- Press Space to move to the next note ready for another figured bass indication (or click outside the editor box to exit it). The editor advances to the next note, or to the rest of the staff to which figured bass is being added. (To move to a point in between, or to extend a figured bass group for a longer duration, see Duration (below)).
Text format
Digits
Digits are entered directly. Groups of several digits stacked one above the other are also entered directly in a single text, stacking them with Enter:

Accidentals
Accidentals can be entered using regular keys:
| To enter: | type: |
|---|---|
| double flat | bb |
| flat | b |
| natural | h |
| sharp | # |
| double sharp | ## |
These characters will automatically turn into the proper signs when you leave the editor. Accidentals can be entered before, or after a digit (and of course, in place of a digit, for altered thirds), according to the required style; both styles are properly aligned, with the accidental 'hanging' at the left, or the right.
Combined shapes
Slashed digits or digits with a cross can be entered by adding \, / or + after the digit (combining suffixes); the proper combined shape will be substituted when leaving the editor:

The built-in font can manage combination equivalence, favoring the more common substitution:
1+, 2+, 3+, 4+ result in  (or
(or  )
)
and 5\, 6\, 7\, 8\, 9\ result in  (or
(or  )
)
Please remember that / can only by combined with 5; any other 'slashed' figure is rendered with a question mark.
+ can also be used before a digit; in this case it is not combined, but it is properly aligned ('+' hanging at the left side).
Parentheses
Open and closed parentheses, both round: '(', ')' and square: '[', ']', can be inserted before and after accidentals, before and after a digit, before and after a continuation line; added parentheses will not disturb the proper alignment of the main character.
Notes: (1) The editor does not check that parentheses, open and closed, round or square, are properly balanced. (2) Several parentheses in a row are non-syntactical and prevent proper recognition of the entered text. (3) A parenthesis between a digit and a combining suffix ('+', '\', '/') is accepted, but prevents shape combination.
Continuation lines
Continuation lines are input by adding an '_' (underscore) at the end of the line. Each digit of a group can have its own continuation line:

Continuation lines are drawn for the whole duration of the figured bass group.
'Extended' continuation lines
Occasionally, a continuation line has to connect with the continuation line of a following group, when a chord degree has to be kept across two groups. Examples (both from J. Boismortier, Pièces de viole, op. 31, Paris 1730):

In the first case, each group has its own continuation line; in the second, the continuation line of the first group is carried 'into' the second.
This can be obtained by entering several (two or more) underscores "__" at the end of the text line of the first group.
Duration
Each figured bass group has a duration, which is indicated by a light gray line above it (of course, this line is for information only and it is not printed or exported to PDF).
Initially, a group has the same duration of the note to which it is attached. A different duration may be required to fit several groups under a single note or to extend a group to span several notes.
To achieve this, each key combination in the table below can be used to (1) advance the editing box by the indicated duration, and (2) set the duration of the previous group up to the new editing box position.
Pressing several of them in sequence without entering any figured bass text repeatedly extends the previous group.
| Type: | to get: |
|---|---|
| Ctrl+1 | 1/64 |
| Ctrl+2 | 1/32 |
| Ctrl+3 | 1/16 |
| Ctrl+4 | 1/8 (quaver) |
| Ctrl+5 | 1/4 (crochet) |
| Ctrl+6 | half note (minim) |
| Ctrl+7 | whole note (semibreve) |
| Ctrl+8 | 2 whole notes (breve) |
(The digits are the same as are used to set the note durations)
Setting the exact figured bass group duration is only mandatory in two cases:
- When several groups are fit under a single staff note (there is no other way).
- When continuation lines are used, as line length depends on the group duration.
However, it is a good practice to always set the duration to the intended value for the purposes of plugins and MusicXML.
Editing existing figured basses
To edit a figured bass indication already entered use one of the following options:
- Select it, or the note it belongs to and press the same Figured Bass shortcut used to create a new one.
- Double-click it.
The usual text editor box will open with the text converted back to plain characters ('b', '#' and 'h' for accidentals, separate combining suffixes, underscores, etc.) for simpler editing.
Once done, press Space to move to a next note, or click outside the editor box to exit it, as for newly created figured basses.
Style
To configure how figured bass is rendered: from the menu, select Format → Style… → Figured Bass.

- Font: The dropdown list contains all the fonts which have been configured for figured bass. A standard installation contains only one font, "MuseScore Figured Bass," which is also the default font.
- Size: Select a font-size in points. Note: This value is also modified by any change made to Scaling (Format → Page Settings…), or Scale ("Staff properties").
- Vertical Position: The distance (in spaces) from the top of the staff to the top margin of the figured bass text. Negative values go up (figured bass above the staff) and positive values go down (figured bass below the staff: a value greater than 4 is needed to step over the staff itself).
-
Line Height: The distance between the base line of each figured bass line, as a percentage of font size.
The following picture visualizes each numeric parameter:

-
Alignment: Select the vertical alignment: with Top, the top line of each group is aligned with the main vertical position and the group 'hangs' from it (this is normally used with figured bass notation and is the default); with Bottom, the bottom line is aligned with the main vertical position and the group 'sits' on it (this is sometimes used in some kinds of harmonic analysis notations):

-
Style: Choose between "Modern" or "Historic." The difference between the two styles is shown below:

Proper syntax
For the relevant substitutions and shape combinations to take effect and for proper alignment, the figured bass mechanism expects input texts to follow some rules (which are in any case, the rules for a syntactical figured bass indication):
- There can be only one accidental (before or after), or only one combining suffix per figure;
- There cannot be both an accidental and a combining suffix;
- There can be an accidental without a digit (altered third), but not a combining suffix without a digit.
- Any other character not listed above is not expected.
If a text entered does not follow these rules, it will not be processed: it will be stored and displayed as it is, without any layout.
Summary of keys
| Type: | to get: |
|---|---|
| Ctrl+G | Adds a new figured bass group to the selected note. |
| Space | Advances the editing box to the next note. |
| Shift+Space | Moves the editing box to the previous note. |
| Tab | Advances the editing box to the next measure. |
| Shift+Tab | Moves the editing box to the previous measure. |
| Ctrl+1 | Advances the editing box by 1/64, setting the duration of the previous group. |
| Ctrl+2 | Advances the editing box by 1/32, setting the duration of the previous group. |
| Ctrl+3 | Advances the editing box by 1/16, setting the duration of the previous group. |
| Ctrl+4 | Advances the editing box by 1/8 (quaver), setting the duration of the previous group. |
| Ctrl+5 | Advances the editing box by 1/4 (crochet), setting the duration of the previous group. |
| Ctrl+6 | Advances the editing box by a half note (minim), setting the duration of the previous group. |
| Ctrl+7 | Advances the editing box by a whole note (semibreve), setting the duration of the previous group. |
| Ctrl+8 | Advances the editing box by two whole notes (breve), setting the duration of the previous group. |
| Ctrl+Space | Enters an actual space; useful when figure appears "on the second line" (e.g., 5 4 -> 3). |
| BB | Enters a double flat. |
| B | Enters a flat. |
| H | Enters a natural. |
| # | Enters a sharp. |
| ## | Enters a double sharp. |
| _ | Enters a continuation line. |
| __ | Enters an extended continuation line. |
Note: For Mac commands, Ctrl is replaced with Cmd.
File formats
MuseScore can import and export a wide variety of file formats, allowing you to share and publish scores in the format that best meets your needs.
MuseScore native format
See also Native format compatibility.
MuseScore saves files in the following native formats:
- *.mscz: The default MuseScore file format. Being compressed it takes up relatively little disk space.
- *.mscx: An uncompressed MuseScore file format, mainly used for debugging or storing in a versioning system
- .*.mscz, / .*.mscx,: These are backup files. Notice the point (full stop) added before the file name, and the comma added to the file extension.
A note about fonts: MuseScore does not embed text fonts in saved or exported native format files. If you want your MuseScore file to be viewed by other MuseScore users, make sure you are using the built-in Edwin (since version 3.6), FreeSerif, or FreeSans font families for your text, or a font that the other parties have installed too. If a system does not have the fonts specified in your original file, MuseScore will use a fallback option, which may cause your score to appear differently. For more see Fonts.
MuseScore format (*.mscz)
MSCZ is the standard MuseScore file format and recommended for most uses. A score saved in this format takes up very little disk space, but preserves all the necessary information. The format is a ZIP-compressed version of .mscx files and includes any images the score may contain and a thumbnail.
Note: An .mscz file can be unzipped using a ZIP software utility to extract an uncompressed .mscx file. (Note that changing the file extension from .mscz to .zip may be required to unzip the .mscz file, depending on the software utility used.)
Uncompressed MuseScore format (*.mscx)
MSCX is the uncompressed version of the MuseScore file format. A score saved in this format will retain all information, except images. It can be opened with a text editor, allowing the user access to the file's source code.
MuseScore backup file (.*.mscz,) or (.*.mscx,)
Backup files are created automatically and saved in the same folder as your normal MuseScore file. The backup copy contains the previously saved version of the MuseScore file and can be important if your normal copy becomes corrupted, or for looking at an older version of the score.
The backup file adds a period to the beginning of the file name (.) and a comma (,) to the end (e.g. if your normal file is called "untitled.mscz", the backup copy will be ".untitled.mscz,"), and the period and comma need to be removed from the name in order to open the backup file in MuseScore. As it is stored in the same folder as your normal MuseScore file, you may also need to give it a unique name (e.g. changing ".untitled.mscz," to "untitled-backup1.mscz").
Note: In order to see the MuseScore backup files, you may need to change your system settings to "Show hidden files". See also How to recover a backup copy of a score.
Graphic files (export only)
MuseScore can export a score as a graphic file in either PDF, PNG or SVG format.
PDF (*.pdf)
PDF (Portable Document Format) files are ideal for sharing your sheet music with others who do not need to edit the content. This is a very widely-used format and most users will have a PDF viewer of some kind on their computers.
To set the resolution of exported PDFs:
- From the menu bar, choose Edit→Preferences... (Mac: MuseScore→Preferences...), and select the "Export" tab;
- Set the resolution in the "PDF" section.
PNG (*.png)
PNG (Portable Network Graphics) files are based on a bitmap image format, widely supported by software on Windows, Mac OS, and Linux, and very popular on the web. MuseScore creates PNG images as they would appear if printed, one image per page.
To set the resolution of exported PNG images:
- From the menu bar, choose Edit→Preferences... (Mac: MuseScore→Preferences...), and select the "Export" tab;
- Set the resolution and transparency in the PNG/SVG section.
Note: If you want to create images that show only parts of the score (with or without screen-only items such as frame boxes, invisible notes, and out-of-range note colors), use Image capture instead.
SVG (*.svg)
SVG (Scalable Vector Graphics) files can be opened by most web browsers (except Internet Explorer before version 9) and most vector graphics software. However, most SVG software does not support embedded fonts, so the appropriate MuseScore fonts must be installed to view these files correctly. SVG is the current format for all scores saved on MuseScore.com.
To set resolution and transparency of exported SVG files, see the instructions under PNG (above). Note that MuseScore does not (yet) support gradients on export (although it does for images in a score).
Audio files (export only)
MuseScore can create normalized, stereo audio of the score in any of the following formats: WAV, MP3, OGG VORBIS, FLAC. To export an audio file:
- From the menu, select File → Export...;
- Choose the desired format from the dropdown menu, then press Save.
You can adjust the sample rate of all audio formats as follows:
- From the menu bar, select Edit→Preferences... (Mac: MuseScore→Preferences...), and click on the Export tab;
- Set "Sample rate" in the "Audio" section.
WAV audio (*.wav)
WAV (Waveform Audio Format) is an uncompressed sound format. This was developed by Microsoft and IBM, and is widely supported by software for Windows, OS X, and Linux. It is an ideal format for use when creating CDs, as full sound quality is preserved. For sharing via email or the internet, use a compressed alternative such as MP3.
MP3 (*.mp3)
MP3 is a very widely-used compressed audio format. MP3 files are ideal for sharing and downloading over the internet due to their relatively small size.
To set the MP3 bitrate:
- From the menu bar, choose Edit→Preferences... (Mac: MuseScore→Preferences...), and select the "Export" tab;
- Set the MP3 bitrate in the "Audio" section.
FLAC audio (*.flac)
Free Lossless Audio Codec (FLAC) is compressed audio format. FLAC files are approximately half the size of uncompressed audio and just as good quality. Windows and OS X do not have built-in support for FLAC, but software such as the free and open source VLC media player can play FLAC files on any operating system.
Ogg Vorbis (*.ogg)
Ogg Vorbis is intended as a patent-free replacement for the popular MP3 audio format (which MuseScore also supports—see above). Like MP3, Ogg Vorbis files are relatively small (often a tenth of uncompressed audio), but some sound quality is lost. Windows and OS X do not have built-in support for Ogg Vorbis. However, software such as VLC media player and Firefox can play Ogg files on any operating system.
Share with other music software
MuseScore can import and export MusicXML and MIDI files; it is also able to import a variety of native format files from other music notation programs.
MusicXML (*.musicxml, *.xml)
MusicXML is the universal standard format for sharing sheet music between different scorewriters—including MuseScore, Sibelius, Finale, and more than 100 others. MuseScore supports both export and import.
Compressed MusicXML (*.mxl)
Compressed MusicXML creates smaller files than regular MusicXML. This is a newer standard and isn't as widely supported by older scorewriters, but MuseScore has full import and export support.
MIDI (*.mid, *.midi, *.kar)
MIDI (Musical Instrument Digital Interface) is a format widely supported by sequencers and music notation software. For details of the protocol see the MIDI Association website.
MIDI files are very useful for playback purposes but contain little in the way of score layout information (formatting, pitch spelling, voicing, ornaments, articulations, repeats, key signatures etc.). To share files between different music notation software, MusicXML is recommended instead.
For details about how to import MIDI files see MIDI import.
MuseData (*.md) (import only)
MuseData is a format developed by Walter B. Hewlett beginning in 1983 as an early means of sharing music notation between software. It has since been eclipsed by MusicXML, but several thousand scores in this format are still available online.
Capella (*.cap, *.capx) (import only)
CAP and CAPX files are created by the score writer, Capella. MuseScore imports version 2000 (3.0) or later fairly accurately.
Bagpipe Music Writer (*.bww) (import only)
BWW files are created by the niche score writer, Bagpipe Music Writer.
BB (*.mgu, *.sgu) (import only)
BB files are created by the music arranging software, Band-in-a-Box. MuseScore's support is currently experimental.
Overture / Score Writer (*.ove, *.scw) (import only)
OVE files are created by the score writer Overture 4 or older. This format is mainly popular in Chinese-language environments, such as Mainland China, Hong Kong, and Taiwan. Overture 5, the current version of Overture, uses the extension .ovex, which MuseScore can't read.
SCW files are created by Score Writer, they are identical to OVE files, only differences is the extension.
MuseScore's support is currently experimental and seems to support Overture / Score Writer 3 and 4 only.
Guitar Pro (various—import only)
MuseScore can open Guitar Pro files with the following extensions: *.gtp, *.gp3, *.gp4, *.gp5, *.gpx, and, as of version 3.5, *.gp.
Power Tab Editor (*.ptb) (import only)
PTB files are created by Power Tab Editor. MuseScore's support is currently experimental.
See also
External links
- How to recover a backup copy of a score (MuseScore HowTo)
Fonts
To change the appearance of Musescore user interface, see Preferences instead.
To edit sound samples, see SoundFonts and SFZ files instead.
Overview
A computer font (font family, font face, typeface, wikipedia) is a digital data file containing a set of graphically related glyphs, characters, or symbols. This chapter discusses object's font assignment and font options and other related info. There are several different usage of font data by an object depending on:
- the object's type (see "Text objects" section and "non-text objects" section, and Notation types and Text types chapters); and
- each character's type (see "Text objects" section).
Font file cannot be embedded into a score file.
Formatting of Text objects
A Musescore Text object is an object that contains individual characters that can be entered and removed by using (typing on) a computer keyboard. Text object can be edited in Edit mode, simply double-click on it to enter Edit mode. Text line object (Line object containing Text) has Begin Text, Continue Text, End Text properties, see Lines chapter.
There are two types of characters in a Text object, plain character and professional glyph ("Musical text" character), they have different formatting options.
Plain characters
Plain characters, entered using a computer keyboard, use font assigned in Inspector (musescore 3), Properties panel (musescore 4) and the Style windows (Format → Style → [item] and Format → Style → Text Styles → [item]), see formatting concept in the Layout and formatting in Musescore and Text styles and properties chapters. Their font options are explained in the "Font options of plain characters" section below.
Professional glyphs and internal encoding
Musicians use symbols and marks to indicate various aspects of a composition, most of these glyphs cannot be found on any typical computer keyboard. To add new professional glyphs into any Text object on a score, use the "Symbols and special characters" window's Common Symbols tab and Musical Symbols tab (Some items under these two tabs are not professional glyphs.), or Keyboard shortcuts, see Text editing chapter. They are also present in some of the pre-configured Text objects found in Palettes. Musescore displays them using data that only exist in fonts designed specifically for musical notation. The font assignment and font options are distinct from plain characters, see "Font options of glyphs" section below.
Special internal encoding such as <sym> is used to store professional glyph inside Text object, rather than using its raw unicode codepoint. Some features relies on this special internal encoding to work, including
- Professional glyph's musically coherent impact on the score, see Notation types chapter. For example only the augmentation dot professional glyph works with Tempo marking's "Follow text" function; and
- "Musical text", a feature that aims to provide easy score-wide font switching for professional glyphs.
It is possible but not advisable to achieve similar visual result by directly using raw unicode characters defined in Private Use Area (PUA, wikipedia). To do this, use "Symbols and special characters" window Unicode tab, or the Master palette window Symbol category, or copy from other programs or from the internet. Unicode characters entered this way are plain characters. Using raw PUA unicode characters bypasses font fallback mechanism and creates unnecessary risk of displaying the unsupported character symbol (tofu, wikipedia).
Formatting of non-Text objects
There are objects that are text visually but are not Musescore Text object technically because they cannot be edited using (typing on) a computer keyboard. These objects utilize font file data. Also, some non textual objects utilize font file data. All of these objects are referred to as non-Text objects in this chapter. To change their "font" (font assignment and font option) see "Font options of Professional glyphs inside Text objects; all non-Text objects" section below.
Font options
Plain characters inside Text objects
Plain characters can use fonts already built into Musescore program, and fonts installed on the operating system(OS).
It is advisable to only use fonts that are generally available across different machines. Scores containing text that uses fonts such as Times New Roman, Arial etc. should render correctly on all machines. Same goes for scores on www.musescore.com , but for related issues please contact official dot com support rather dot org volunteers.
Professional glyphs inside Text objects; all non-Text objects
There is only one level of font assignment for Non-Text objects and professional glyphs, which is score-wide or staff-wide setting.
- In the Style window (Format > Style):
- "Musical symbol font": used by notes, rest symbols, accidentals etc. Font compatible often does not have wording "...Text" in its name, for example "MuseJazz". (6 options in musescore 3; 8 options in musescore 4)
- "Musical text font": used by professional glyphs, inside Segno, Coda, ottavas, dynamics etc. Font compatible often has wording "...Text" in its name, for example "MuseJazzText". (6 options in musescore 3; 8 options in musescore 4)
- In Staff / Part properties : Advanced Style Properties: settings for tablature staff used by Tablature :
- in "Fret Marks" tab: used by fret marks. (8 options) .
- in "Note Values" tab: used by "Note symbols" (5 options) .
- Figured bass (1 option, the MuseScore Figured Bass).
Professional glyphs inside Text objects ignore the object's font assignment (the Inspector settings etc explained in "Plain characters" section, those are used by plain characters only).
Both the Non-Text objects and professional glyphs only use fonts already built into the Musescore program, they cannot directly use fonts installed on the OS. As Musescore program is shipped with a limited set of font due to licensing reason, it leads to limitation on their font options.
However, if a different version of a particular built-in font is installed on the OS, Musescore uses it instead. This allows using custom fonts indirectly on that particular machine. Musescore check the font's name only, when determining whether these verions belongs to the same font. See details of this method at https://johngrren007.blogspot.com/2018/04/musejazz-customised-font.html, and https://musescore.org/en/node/299448#comment-1171159. Score files (*.mscz) using this trick do not reliably render identically on other machines, because the modified font files are not embedded into the score file. To install a new font file onto an OS, refer to the instructions written for that OS, or try google.
Font option restriction explained in this chapter is valid for Musescore 3.6.2, but musescore is open-source and there are forks (wikipedia), see MuseScore, MuseScore 3, MuseScore 4 and How can I add third party SMuFL Fonts?.
Default font
- Default Chord symbols font is Edwin (you can choose other font, as with all text objects). Except on a new score created with any of the Jazz templates such as "Jazz Lead Sheet" where default is MuseJazzText instead.
- Default Roman Numeral Analysis font is Campania . Musescore relies on OpenType formatting functionailty provided by Campania for correct RNA foramtting.
- Default "Musical symbol font" is Leland (musescore 3.6.2)
- Default "Musical text font" is Leland Text
Fonts shipped with Musescore
Musescore create in-app user interface, and musical symbols and notation on score, with data content from font files. Some fonts are invented by Musescore project development team for Musescore and maintained by the team. Some fonts are from other companies, the team does not edit their content at all. Read the readme file https://github.com/musescore/MuseScore/blob/master/fonts/README.md . Musescore software development focuses on engraving creation, based on real world notation popularity and significance, it does not aim to create support for every symbols included in any one particular font.
Emmentaler has been renamed as "mscore" after musescore 3.6.2
Standard Music Font Layout (SMuFL)
Standard Music Font Layout (SMuFL) is a standard way of mapping the thousands of musical symbols required by conventional music notation, to the code-points of Private Use Area (PUA, wikipedia) in Unicode's Basic Multilingual Plane. It improves font format independence. The SMuFL standard itself is not managed by the Musescore project development team.
"Musical text" is a component of Musescore's implementation, the internal encoding schema does not conform to any standard, research the musescore 3.6.2 archived source code
Other useful methods to create desired engraving
- Noteheads and notehead schemes
- Staff / Part properties for Tablature elements
- Plugins that analyze notes and add musical symbols such as fingering diagrams are available at https://musescore.org/plugins .
- The MuseScore Drumline extension also contains extra pictograms, to download see Language, translations, and extensions.
See also
- Instruments, staff setup and templates
- Layout and formatting : styles and reuse
- Master palette
- How can I add third party SMuFL Fonts?
- https://github.com/fp22june/MuseScoreTag362/tree/master/fonts
- The numeric glyphs used on multimeasure rests (see Measure rests chapter) when Format > Style > Musical symbol font set to "MuseJazz" is not used on numbers (0-9) entered into Musescore Text objects with Font family set to "MuseJazz Text", see workaround by worldwideweary using "Lily Jazz" font on Font Question
Fretboard diagrams
Note: This page applies to MuseScore 3.1 and above only. Users of versions prior to 3.1 should go to Fretboard diagrams (prior to version 3.1).
Fretboard Diagrams overview
MuseScore allows the use and creation of fretboard (or chord) diagrams. They usually appear above the staff on lead sheets and piano scores. They are commonly used for guitar chords, but MuseScore permits the creation of diagrams for any instrument.
Below is a simple example of Fretboard Diagrams use.

(Note: Fretboard Diagrams are an alternative to and quite different from Tablature, which is a specialized notation form that is preferred by some string instrument players.)
The Fretboard Diagram mechanism can be used in several different ways.
-
Standard chords. A set of 21 common chord diagrams for the guitar are found in the Fretboard Diagrams palette in the Advanced Workspace. These consist of a single example of a major, minor, and seventh chord for each diatonic scale tone (CDEFGAB). These 21 chords are adequate for many simple pop or folk music scores. See the overview of this palette below.
-
Modified chords. In many cases, the standard chords from the Fretboard Diagrams palette are used as a starting point for creating modified chord diagrams, via the Inspector. This technique enables chord extensions, alterations, different voicings, different positions, etc. to be applied to the 21 standard diagrams. There are literally thousands of guitar chords in general use, making a comprehensive palette or dictionary impractical. See How to use Fretboard Diagrams for custom/complex chords for examples.
-
"Freehand" chords. More advanced guitarists often prefer to start from a blank chord grid, and then draw the specific chord tones desired. See How to use Fretboard Diagrams for custom/complex chords for examples.
Note: Many aspects of music notation follow well-established engraving standards. Guitar chord diagrams are an exception. Usage has varied widely from year to year, from publisher to publisher, from teacher to teacher, and from arranger to arranger. Many inconsistent practices persist today, and distinct styles of chord notation are preferred in different musical genres and regions. For this reason, the MuseScore Fretboard Diagram interface supports diagrams of various types. Users are free to choose their preferences.
Overview of the standard guitar chord palette
The Fretboard Diagrams palette in the Advanced Workspace provides 21 diagrams, comprising a single major, minor, and seventh chord for each diatonic scale tone (CDEFGAB). The name of each diagram appears when the cursor hovers over the entry.

Note: This range of chord diagrams, or indeed any selection of 21 chords, would not typically be sufficient for publication purposes. Arrangers must consider many other voicings, positions, and chord qualities. This palette is also an example of the diverse diagram formats in use, as discussed above. These 21 chords happen to incorporate open/mute string indicators (the X and O symbols above the diagrams). Although those symbols do often appear in published scores, their usage varies by context. For example, jazz arrangements generally omit mute string indicators, unless contextually important, and rarely use open strings.
Additional palettes that contain a broader range of standard chords are expected be available in the future. These would try to address the needs of specific musical genres and situations.
Overview of creating modified or custom chords
Modified Fretboard Diagrams are created by adding and then editing an existing diagram from the palette. By modifying standard chords, it is possible to create Fretboard Diagrams for any playable chord, and to reflect fingering on any Western fretted stringed instrument, regardless of tuning, number of strings, or number of frets. Most of the material below deals with the process of modifying diagrams and creating new ones.
Custom diagrams can be saved to a custom palette if desired for future use. Modified diagrams can of course be copied/pasted within a score in the usual ways.
To add a Fretboard Diagram
To add a Fretboard Diagram to the score, use one of the following methods:
- Select a note in voice 1 and double-click a Fretboard Diagram from the palette.
- Drag and drop a Fretboard Diagram from a palette to the desired position in the score.
As the cursor hovers over the chosen diagram within the palette, its name will appear as a pop-up hint (see the example in the overview).
Chord Symbols linked to Fretboard Diagrams
When adding a Fretboard Diagram to a score, a chord symbol is also automatically created. The chord symbol is normally placed above the diagram, and uses the chord name from the chord's palette cell. Automatic placement and formatting of a diagram's chord symbol is controlled by style settings (see style settings, below).

A Fretboard Diagram's generated chord symbol can be selected, moved, and modified like any other text element. It behaves generally like the normal chord symbols that are added using Add→Text→Chord Symbol or the shortcut Ctrl+K.

Note 1: A field on the Chord Symbols style page (Style submenu: select Format→Style…→Chord symbols) – rather than on the Fretboard Diagrams style page – controls the chord symbol's "Distance to Fretboard Diagram". This value interacts with the Element "Minimum distance" field, within the Inspector, to control automatic placement of the chord symbol relative to the diagram. Note also that the Fretboard Diagram's "top edge" includes the blank space where open/mute string indicators would appear, even if that area is empty. This may leave a larger gap than is desired. As usual, manual placement can be used to override the automatic settings.
Note 2: Automatic chord symbols generated for Fretboard Diagrams are not completely integrated with normal Chord Symbols that may be directly associated with notes on the staff. Specifically, focus does not flow from a Fretboard Diagram's chord symbol back to the sequence of other symbols on the page when using Space to move through the chord symbols. This minor issue will be addressed in a future update.)
Use of Chord Symbols with Fretboard Diagrams
- Add a diagram's Chord Symbol automatically simply be adding a Fretboard Diagram as described above.
- Delete a diagram's Chord Symbol by selecting the symbol and deleting it, as with any text item.
- Add a new Chord Symbol to a diagram without one by selecting the Fretboard Diagram and using Add→Text→Chord Symbol or the shortcut Ctrl+K.
To adjust a Fretboard Diagram's element properties (position, color, stacking order...)
The position of a Fretboard Diagram can be adjusted using the keyboard arrows in Edit mode; or with the X- and Y-offsets in the "Element" section at the top of the Inspector.
Visibility, Color and Stacking order can also be adjusted in the "Element" section: see the diagram under editing.
To adjust global/default Fretboard Diagram style properties
Certain default and global properties of Fretboard Diagrams (see diagram below) can be adjusted from the Style submenu: select Format→Style…→Fretboard Diagrams. Some of these properties are subject to override via the Inspector; but most affect all Fretboard Diagrams in the score.

- Default vertical position specifies the default placement of the diagram relative to the staff. (Subject to override via Inspector).
- Scale specifies the default scale (i.e. diagram size). (Subject to override via Inspector).
- Fret number font size and ...position control placement of fret numbers on all diagrams. (Global).
- Barre line thickness controls how large a line is used to represent a barre on all diagrams. By default, this is the same thickness as the solid dots. A smaller line will allow dots to be visible under the barre, for situations where that is desirable. (Global).
- Relative dot size controls the size of dots on all diagrams, relative to the size of the scaled grid. (Global).
- String spacing controls the spacing between strings, and thus the total width of all diagrams. (Global).
- Fret spacing controls the spacing between frets, and thus the total height of all diagrams relative to the number of frets they each display. (Global).
Most Fretboard Diagram properties exposed by the Inspector offer "reset to style default" and "save as style default" buttons. These values do not typically appear on the style page, but are manipulated via the Inspector.
To edit a Fretboard Diagram
When a Fretboard Diagram is selected, it can be edited in the Inspector as follows:
The Inspector displays three sections related to the Fretboard Diagram:
- An Element section that controls the Fretboard Diagram's visibility, placement, color, and other aspects that are used in common with other MuseScore elements; see adjust element properties and the Inspector for details.
- A Fretboard Diagram section, with control fields and buttons that define the appearance of this diagram.
- A magnified version of the Fretboard Diagram, showing its details and allowing editing.
Below is an example of the Inspector with a Fretboard Diagram selected.

Editing Fretboard Diagram properties
(See Inspector properties above in the editing example.)
- To adjust the scale (size) of the diagram: Use Scale.
- To adjust the diagram's placement relative to the staff: Use Placement.
- To adjust the number of instrument strings: Use Strings. Strings are added/removed from the left side of the diagram.
- To adjust how many frets to display (i.e. the height of the diagram): Use Frets. Frets are added/removed from the bottom of the diagram.
- To adjust the first fret position: Use Fret number. A digit is shown next to the first visible fret.
- To specify thickening of the nut (a heavy line above the first fret): Use Show nut.
- Place the finger dots as described below.
Finger dot editing (basic use)
(See Inspector properties above in the editing example.)
- To remove all current dots, use the "Clear" button above the diagram. (Note: you could save a blank grid in a custom palette, as a starting point for custom diagrams.)
- To create a dot, click on a fret in the diagram at the bottom of the inspector; click again to remove the dot.
- To move a dot, clear its current position by clicking on it; then create the desired dot.
- To create a barre or partial barre: Click the "Barre" button above the diagram; then click at the leftmost position desired for the barre. The barre will extend to the right edge of the fretboard. Keyboard shortcut: Holding the Shift key, click on the string where you want a barre to begin.
- To end a barre before the rightmost string: Click the "Barre" button above the diagram; then click at the rightmost position desired on an existing barre. The barre will end at that string. Keyboard shortcut: Holding the Shift key, click on the string where you want a barre to end.
- To delete a barre: Click the "Barre" button above the diagram; then click at the leftmost position of the barre. It will be removed. Keyboard shortcut: Holding the Shift key, click on the leftmost position of the barre.
- To create multiple barres: Use the above steps to create one than one barre, e.g. to show the third finger covering two strings.
- To adjust the barre thickness: Use the Style options (Format->Style->Fretboard Diagrams) to adjust the barre line thickness relative to the dots. This will allow dots to be visible on the barre, for cases where that is desired.
- To Indicate open and mute strings (optional). Click just above the diagram to toggle a string between:
- Open (o)
- Mute/unplayed (x)
- No indication
Finger dot editing (advanced use)
Some arrangers and educators use a more advanced form of Fretboard Diagram that a) incorporates multiple types of "dot", and that b) allows multiple dots per string.
This technique is particularly associated with the many books and arrangements published by Ted Greene and his successors. (Note: No other notation software currently supports this diagram style.)
-
Multi-dot notation style. With this approach, the round dots are played first. Then, on successive beats, the notes represented by the other dots are then played in order. This allows a single diagram to represent several beats of music. (The usual sequence is: dot→X→square→delta. Usage varies however.) Here are two examples of multi-dot diagrams.


-
Optional-note notation style. Another use of multiple dots per string allows other symbols to show optional notes, rather than delayed notes. Typically, a related chord voicing is shown, such as an optional extension or an optional rootless chord version. Here is an example of an optional extension.

MuseScore Fretboard Diagrams allow the creation of these and other types of multi-symbol diagrams. A chord is first created and edited using the basic steps described above. Then, the multiple dot buttons above the diagram are used to add secondary notes.

- To begin adding multiple dots (i.e. symbols) to a diagram, click "Multiple dots".
- To add another dot to a string, click above or below an existing symbol. The next symbol in sequence will be placed at that position, e.g. if there is already a dot, an X will appear next.
- To remove any symbol from a diagram, click on it.
- To enter a particular symbol out of sequence, click on the button with that symbol before adding the dot; e.g. to enter an X on a string with no current dots, because that note should be played after the rest of the chord, click on the X and then place it as desired.
(Note: Experienced users of Ted Greene style diagrams will find that several secondary features from Ted's diagrams are not yet supported in MuseScore. These include: a. Displaying the fret number on a higher fret than the first visible fret. b. Allowing the note symbols to include digits, not just the four dot styles currently supported. c. Allowing the creation of annotation on and between diagrams, such as circling a particular note, or drawing lines linking notes in adjacent diagrams. However, MuseScore does provide many tools for drawing and annotation that can serve in place of these techniques.)
(Note: Because multi-note symbols are not standardized, even within the Ted Greene community, users must be careful to indicate how they are being used within a given score.)
External links
- How to use Fretboard Diagrams for custom/complex chords (MuseScore HowTo)
- Palette with fretboard diagrams for Mandolin (Forum article)
- Palette with fretboard diagrams for Ukulele (Forum article)
Fretboard diagrams (prior to version 3.1)
Note: This page applies to versions of MuseScore prior to 3.1 only. Users of MuseScore 3.1 and above should go to Fretboard diagrams.
A range of fretboard (or chord) diagrams for the guitar are provided in the Fretboard Diagrams palette in the Advanced Workspace.

You can create a chord diagram for any fretted, stringed instrument by editing an existing one. It can be saved to a custom palette for future use if required.
Add a fretboard diagram
To add a fretboard diagram to the score, use one of the following methods:
- Select a note in voice 1 and double-click a fretboard diagram from a palette.
- Drag and drop a fretboard diagram from a palette to the desired position in the score.
As the cursor hovers over the chosen diagram within the palette, its name will appear as a pop-up hint.
Edit a fretboard diagram
When a fretboard diagram is selected, it can be edited in the Inspector as follows:
- To adjust the number of instrument strings: Use Strings.
- To adjust the fret position number: Use Offset.
- To adjust how many frets to display (height-wise): Use Frets.
- To place the finger dots: Click on a fret to establish a dot; click again to remove the dot.
- To create a barre or partial barre: First make sure that the desired fret position is clear of black dots (click on a dot to remove it). Then, holding the Shift key, click on the string where you want the barre to begin. (Note: Only one barre can be applied per diagram; a partial barre must end on the first string).
- To delete a barre: Click on the black dot where the barre begins.
- To Indicate open and mute strings (if applicable): Click just above the diagram to toggle a string between:
- Open (o)
- Mute/unplayed (x)
- No indication.
- To adjust the size: Use the Scale property.
To adjust a diagram's element properties
The position of a Fretboard Diagram can be adjusted using the keyboard arrows in Edit mode; or with the X- and Y-offsets in the "Element" section at the top of the Inspector.
Visibility, Color and Stacking order can also be adjusted from the "Element" section.
To adjust a diagram's style properties
Certain default and global properties of Fretboard Diagrams (e.g. barre thickness, vertical position, scale, fret-number font-size and position) can be adjusted from the Style submenu: select Format→Style…→Fretboard Diagrams. Some of these properties are subject to override via the Inspector; but most affect all Fretboard Diagrams in the score.
Layer (experimental)
This feature is still experimental and only visible if MuseScore is started using the '-e' option, see Command line options
For the Open-Goldberg project, the ability to create different versions of the score was needed. One version is the "Urtext", a score which is close to the original version of Bach. A second version could be a Czerny variation, which in addition to the Urtext, contains fingerings.
The layer feature allows creating different versions out of one score file. If you want to add fingerings, you have to create a layer and tag the fingering elements with the layer name.
First, create layers:

Second, create a score variant:

Add the visible layer to the score variant, then select all fingerings and tag them with the name of the score variant:

Default layer:

Czerny layer:

See also
MIDI import
MuseScore can import MIDI files (.mid/.midi/.kar) and convert them into music notation.
- To import a MIDI file, use the standard Open command. This converts the MIDI file into a MuseScore file (.mscz) and applies the default quantization settings.
The MIDI Import Panel appears at the bottom of the screen: you can expand this by dragging the interface with the document window upwards. The panel shows all the tracks in the file (only those with note events are shown) and allows you to adjust parameters affecting the conversion process. If there are multiple tracks, then one more track is added at the top of the list to select all tracks at once.

-
To accept the default conversion: Simply press the "X" symbol on the top-left of the Import Panel to close it. The panel can be re-opened at any time during the session by pressing "Show MIDI import panel" at the bottom of the document window.
-
To reimport the file: Adjust the desired parameters in the Import Panel (see below) and press Apply. If you have made changes to the Import Panel but wish to UNDO them, press Cancel. To close the Import Panel, press the "X" symbol at the top-left of the panel.
If you reimport the file after making changes to the temporary generated result score, MuseScore will prompt you what should happen with that modified score: Save it somewhere, Discard it or Cancel. The Save option will save the modified score as a Musescore file in your \bin directory without modifying the original MIDI file. It will then reimport the original MIDI file and apply the import panel settings. The import panel settings are NOT applied to the saved file. The Discard option will UNDO your changes to the Musecore file, then reimport the original MIDI file and apply the new settings. The Cancel option will reimport the original MIDI file in the first tab and apply any import panel setting then create a new tab with your modified score but without applying any import panel settings. The second tab is the same as hitting SAVE, then opening the saved file. Therefore, you cannot apply import panel settings to a user modified score. You must first apply the import panel settings, make any changes to the score, then save the score using the standard Save command.
Mouse wheel scrolling (MIDI Import Panel): Vertical scrolling is the default. For horizontal scrolling, press Shift or Ctrl while using the wheel.
Available operations
- MuseScore instrument
- Assign a MuseScore instrument (listed in instruments.xml or in specified custom xml file in Preferences) that defines staff name, clef, transposition, articulations, etc.
- Quantization
-
Quantize MIDI notes by some regular grid. The grid MAX resolution can be set via the drop-down menu:
- Value from preferences (default) - quantization value is taken from the main Preferences dialog of MuseScore (in the “Import” tab)
- Quarter, Eighth, 16th, 32nd, 64th, 128th - user-defined values
-
However, the actual quantization grid size is adaptive and reduces when the note length is small, so for each note the quantization value is different. But there is an upper limit for the quantization value, and that value can be set by the user as "max. quantization".
For example, if some note is long - say, half note, and the max. quantization is set to 8th, then the note will be quantized with the 8th-note grid, not the half- or quarter-note grid as it supposed to be by the algorithm.
Such quantization scheme allows to quantize all notes in the score (with different lengths!) adequately. - Max. voices
- Sets maximum count of allowed musical voices.
- Search tuplets
- When enabled, this option attempts to detect tuplets and applies the corresponding quantization grid to the tuplet chords.
- Is human performance
- If enabled, this option reduces the accuracy of MIDI-to-score conversion in favor of readability. It is useful for unaligned MIDI files, when no regular quantization grid is provided. For such files the automatic beat tracking algorithm is used which tries to detect the bar positions throughout the piece.
- 2x less measure count
- The option is active for unaligned MIDI files (when "Is human performance" is checked by default). It halves measure count obtained in the internal beat tracking operation. It may be convenient when the beat tracking gives 2x more frequent bar subdivision than necessary.
- Time signature
- The option is active for unaligned MIDI files. The user can choose an appropriate time signature for the whole piece if the default detected value is wrong. The option is useful because it handles imported tuplets correctly unlike the direct time signature setting from the palette.
- Split staff
- This option is suited mainly for piano tracks - to assign notes to the left or right hand of the performer. It uses constant pitch separation (the user may choose the pitch via sub-options) or floating pitch separation (depending on the hand width - sort of a guess from the program point of view).
For drum tracks (“Percussion” sound in the track list) it splits the staff into multiple staves, each of which gets only one drum pitch (i.e. drum sound). There is also a sub-option to allow/disallow the application of the square bracket for the newly created set of drum tracks. - Clef changes
- Small clefs can be inserted within a staff to keep chords closer to the 5 staff lines. Clef changes depend on the average pitch of the chord. Tied groups of notes are not broken by the clef insertion (if it occurs, one can report a bug for algorithm in
importmidi_clef.cpp). This option is available for non-drum tracks only. - Simplify durations
- Reduces number of rests to form more "simple" note durations. For drum tracks this option can remove rests and lengthen notes as well.
- Show staccato
- Option to show/hide staccato markings in the score.
- Dotted notes
- Controls whether MuseScore will use dotted notes or ties.
- Show tempo text
- Shows/hides tempo text markings in the score.
- Show chord names
- Shows/hides chord names in the score, if any, for XF MIDI file format.
- Recognize pickup measure
- When enabled, this option doesn't change the time signature of the first bar that is shorter than the second bar. It is also called anacrusis. This option is only available for all tracks at once.
- Detect swing
- MuseScore tries to detect swing, and automatically replace a pattern of 4th + 8th notes in triplets (for the most common swing feel, 2:1), or a dotted 8th + 16th pattern (for shuffle, 3:1), with two straight 8ths and a “Swing” or “Shuffle” text at the beginning.
External links
Master palette
The Master Palette is a repository of symbols and text used to:
- Edit and compose custom Palettes,
- Create new Time Signatures or Key Signatures, and
- Add to the score a rare symbol as a one time action without editing any palettes, for example, adding the rarely used ppppppp this one time for this score.
Items are categorized based on musical meaning. Hovering the mouse over an item shows a tool tip (a short definition in black on yellow background).
Functional and non-functional items : the Master Palette contains two distinctly different types of notation items:
- Non-functional items under the Symbols category, and
- Functional items under all other categories.
See Notation types for their difference in usage.

Ability to adjust the size of the symbol or text
Sometimes there are two approaches to adding a symbol or text, consider your need to adjust its size before adding, see Notation types: Resizing.
Open the Master Palette window
To open the Master Palette window, use either of the following options:
- Press Shift+F9 (Mac: fn+Shift+F9), or
- From the menu, select View → Master Palette.
Open the Symbols category directly
Open the Symbols category directly from the score by using the shortcut "Show symbol palette", or press Z.
Edit and compose custom palette
See Palettes : Customize palettes.
You cannot add items to a toolbar from the Master palette, see Viewing and navigation: Toolbars instead.
Create new Time Signatures or Key Signatures
See Time Signatures and Key Signatures.
Add an item to the score directly
Either:
- Drag-and-drop on to the score/staff/notes/rests, or
- Select a note or rest and double-click a symbol.
Find a Non-functional symbol
IMPORTANT: Make sure you understand and really need the Non-functional symbol
Use the font drop down list on the bottom right of the box to specify Emmentaler-, Gonville- or Bravura-specific symbols.
Search for a particular symbol by entering a keyword in the search box.
Connect Non-functional symbols to move together
Elements from the Symbols section can be connected to each other on the score page, so that they can be moved as one unit:
- Apply first symbol to the score. Adjust position as required.
- Double-click, or drag-and-drop, a second element onto the first symbol. Adjust position as required.
- Drag the first element, the second attached element will follow.
See also
- Fonts
- Palettes
- Workspaces
- Symbols and special characters (add musical symbols to text objects)
External links
Note input modes
MuseScore allows you to choose from any of several note input modes. Step-time (see below) is the default, but others can be accessed by clicking the small dropdown arrow next to the note entry button on the note input toolbar.

Step-time
This is the default method of note input and involves entering notes one at a time: first by selecting a note duration using the mouse or computer keyboard, then choosing a pitch using the mouse, computer keyboard, MIDI keyboard or virtual piano keyboard.
For details see Basic note entry.
Re-pitch
Re-pitch mode allows you to correct the pitches of a sequence of notes while leaving their durations unchanged (not to be confused with Accidental: Respell pitches).
- Select a note as your starting point;
- Select the Re-Pitch option from the Note input drop-down menu; or use the keyboard shortcut, Ctrl+Shift+I (Mac: Cmd+Shift+I).
- Now enter pitches using the computer keyboard, MIDI keyboard or virtual piano keyboard. Note: you cannot use the mouse to input notes in the Re-pitch method.
You can also use the Re-pitch function to create a new passage from an existing one of the same sequence of durations—by copying and pasting the latter, then applying Re-pitch.
Rhythm
Rhythm mode allows you to enter durations with a single keypress. Combining Rhythm and Re-pitch modes makes for a very efficient method of note entry.
- Select your starting point in the score and enter Rhythm mode.
- Select a duration from the note input toolbar, or press a duration shortcut (numbers 1-9) on your computer keyboard. A note will be added to the score with the selected duration. In contrast to Basic note entry, pressing the . key will toggle dotting or not dotting all subsequent durations. All following rhythms will be dotted until the . key is pressed again. Unlike Basic note entry, the dot is to be pressed prior to entering the rhythm.
- Entering rests is similar to adding dotted notes. Press the 0 key to toggle entering rests. All rhythms entered will be rests until the 0 key is pressed again. This can be used concurrently with dotted notes.
- Continue pressing duration keys to enter notes with the chosen durations.
- Now use Re-pitch mode to set the pitches of the notes you just added.
Real-time (automatic)
The Real-time modes basically allow you to perform the piece on a MIDI keyboard (or MuseScore's virtual piano keyboard) and have the notation added for you. However, you should be aware of the following limitations which currently apply:
- It is not possible to use a computer keyboard for Real-time input
- You cannot enter tuplets or notes shorter than the selected duration
- You cannot enter notes into more than one voice at a time
However, these restrictions mean that MuseScore has very little guessing to do when working out how your input should be notated, which helps to keep the Real-time modes accurate.
In the automatic version of Real-time input, you play at a fixed tempo indicated by a metronome click. You can adjust the tempo by changing the delay between clicks from the menu: Edit → Preferences... → Note Input (Mac: MuseScore → Preferences... → Note Input).
- Select your starting position in the score and enter Real-time (automatic) mode.
- Select a duration from the note input toolbar.
- Press and hold a MIDI key or virtual piano key (a note will be added to the score).
- Listen for the metronome clicks. With each click the note grows by the selected duration.
- Release the key when the note has reached the desired length.
The score stops advancing as soon as you release the key. If you want the score to continue advancing (e.g. to allow you to enter rests) then you can use the Real-time Advance shortcut to start the metronome.
Real-time (manual)
In the manual version of Real-time input, you have to indicate your input tempo by tapping on a key or pedal, but you can play at any speed you like and it doesn't have to be constant. The default key for setting the tempo (called "Real-time Advance") is Enter on the numeric keypad (Mac: Fn+Return), but it is highly recommended that you change this to a MIDI key or MIDI pedal (see below).
- Select your starting position in the score and enter Real-time (manual) mode.
- Select a duration from the note input toolbar.
- Press and hold a MIDI key or virtual piano key (a note will be added to the score).
- Press the Real-time Advance key. With each press the note grows by the selected duration.
- Release the note when it has reached the desired length.
Real-time Advance shortcut
The Real-time Advance shortcut is used to tap beats in manual Real-time mode, or to start the metronome clicks in automatic Real-time mode. It is called "Real-time Advance" because it causes the input position to move forward, or "advance", through the score.
The default key for Real-time Advance is Enter on the numeric keypad (Mac: Fn+Return), but it is highly recommended that you assign this to a MIDI key or MIDI pedal via MuseScore's MIDI remote control. The MIDI remote control is available from the menu: Edit → Preferences... → Note Input (Mac: MuseScore → Preferences... → Note Input).
Alternatively, if you have a USB footswitch or computer pedal which can simulate keyboard keys, you could set it to simulate Enter on the numeric keypad.
When the notes are entered they will be placed just before the selected starting element, which will be highlighted with a square blue marker. The start element and any subsequent notes or rests within the same measure will be shifted forward. You can move the insertion point forward and backward using the arrow keys → or ←, and the new insertion point will then be highlighted.
Insert
Insert Input mode (called Timewise in versions prior to 3.0.2) allows you to insert and delete notes and rests within measures, automatically shifting subsequent music forwards or backwards. Measure duration is automatically updated as you go.
- Make sure you are in Note input mode, and that you have the element selected where you want to start inserting notes/rests;
- Click on the arrow next to the Note input icon, and select Insert (or if Insert is the current default, just press N);
- Enter a note or rest as you would in Step-Time mode. Each note is inserted before the current cursor position;
- Move the cursor forward and backward if required (using the arrow keys), to change the insertion point.
Alternatively, if you have only one or two notes to insert, you may prefer to use a shortcut:
- Press Ctrl+Shift (Mac: Cmd+Shift) while adding the note by Mouse-click or keyboard shortcut (A-G).
If, at any time, the total duration of the notes and rests within the measure does not match the time signature, a small + or - sign will be shown above the measure.

See also: Remove selected range (Tools).
Normal mode
To leave Note Input mode, click on the Note Input tool button, press N, or press Esc. This puts you in Normal mode, in which you can change durations and delete notes or rests as follows:
- If you select a note and press Del the note will be replaced by a rest of the same duration.
- If you select a note or rest and press Ctrl+Del the note/rest will be deleted, and subsequent notes moved backward (see Remove selected range).
- If you reduce the duration of a note or rest the remaining duration will be filled with rests.
- If you increase the duration of a note or rest it will subtract duration from the subsequent notes/rests to make up the duration. If this is done on the last note/rest in the measure, a note or rest with the required duration will be inserted in the start of the following measure, and the two will be tied together.
See also
External links
Parts
Not to be confused with MuseScore Voices feature, see also Glossary: Part.
To add, duplicate, edit or remove instruments, see Change instrument setup instead.
Overview
Parts is a MuseScore feature to aid extracting staffs to generate different versions of the same score.
A Part is an independent viewing profile that contains layout and formatting style configuration, Mixer settings and chord playback settings only. Most of the musical score data (except for certain items like image attached to first staff) is shared among Parts. Modification such as changing a note when viewing one Part will reflect on the same places if the item exists on other Parts.
Tempo markings are always shown on all Parts. Text and Line object's visibility depends on its object type, for example a System text added on any one staff is visible on all Parts, even if it is not included in that Part.
To manage Parts, open the Parts window by selecting File → Parts…, Parts are shown in Select Part pane.

New score file created contains no Parts by default. Full Score is shown, there are no sub-tabs under the score file tab:

score adapted from https://musescore.com/user/9928481/scores/5706424
When a score contains at least one Part, the Full Score and Part(s) are shown as tabs under the score file tab, click on any one tab to view it. Either the Full Score or any one of the Parts can be viewed at a given time:

Common reasons to create Parts
- You have a (orchestral) full-score and you need to:
- remove one staff along the whole score from the on-screen view but keep its notes and notation data intact. Like from a 3 pages "soprano + piano" score, remove the piano accompaniment on computer screen temporarily so that you can read a 1 page soprano score.
- extract staff(s) to print hard copies for individual players to read in real life, or exporting digitally. Like from a "woodwind + brass + strings" score, batch create individual printable versions for different players for emsemble rehersal.
- extract staff(s) based on type or family they belong to. Like from a "woodwind + brass + strings" score, create MIDI file of "flute 2 + first violin" score.
- You have a two-part score and need to create a one-part score.
- You have a single staff that represents two instruments in real life, and need to extract it to create staff that represent one instrument in real life only. Like from a single staff "Flute 1 & 2", create "Flute 1".
Use Include or exclude Voices in a Part for the last two.
Create a new Part
To add new instruments, see Change instrument setup instead.
A Part can be manually named, and include instrument(s) or their Voice(s).
- Click Single Part (or prior to MuseScore 3.4: New ) to create a new empty Part (empty Instruments in Part pane). The Part is named automatically "Part", and with a trailing number if needed. The Part is shown in Select Part pane.
- Customize Parts.
- Click OK to finish and exit. Once this window is closed, created Parts cannot be edited due to a bug.
Automatically create separate Parts for each instrument
To batch create separate Parts for each instrument:


- Click All Parts (or MuseScore 3.2-3.3.4: Generate; prior to MuseScore 3.2: New All) to batch create separate Parts for each instrument.
- Customize Parts. Each Part is automatically named with the instrument name, and with a trailing number if needed. They are shown in Select Part pane. You may want to rename Parts to prevent confusion if you have already changed the long or short name to something other than instrument name.
- Click OK to finish and exit. Once this window is closed, created Parts cannot be edited due to a bug.
Customize Parts
Parts are only editable during creation - A bug in Musescore 3.6.2 prevents user from editing existing Parts. You may need to delete it and edit it during recreation.
Rename a Part
Change Part name in Part title:, it is displayed at the tab heading. It is also used as filename suffix when exporting. You may want to rename Parts to prevent confusion if you have already changed the long or short name to something other than instrument name.
Add instruments to a Part
To add an instrument to an existing Part:
- Select the Part in the Select Part pane.
- Select the instrument from the Instruments in Score pane.
- Press + to add it to the Instruments in Part pane.
Remove instruments from a Part
To remove instruments from an existing Part:
- Select the Part in the Select Part pane.
- Select an instrument from the Instruments in Part pane.
- Press - to remove.
Include or exclude individual staff(s)
This feature is not working in Musescore 3.6.2 due to a bug, use Include or exclude Voices instead.
- Select the Part in the Select Part pane.
- Click the small arrow to the left of an instrument in Instruments in Part to expand the listing to show all its staves and Voices.
- Select staff(s) to be excluded from this Part.
- Press -.
Include or exclude Voices
- Select the Part in the Select Part pane.
- Click the small arrow to the left of an instrument in Instruments in Part to expand the listing to show all its staves and Voices.
- Uncheck to exclude Voice from this Part.
This feature only works if all notes need to be strictly written in separate Musescore Voice respectively. To extract, for example, "Flute 1 & 2 in the same staff" into two Parts, notes need to be strictly written in Musescore Voice 1 and Voice 2 respectively, even in passages where they share content, you might need to create duplicate Voice 1 unison and assign it to Voice 2. Flute 1 and Flute 2 notes should not be merged into one chord in one Voice at all.

piano left hand separation like shown above does not work

assign piano left hand notes to Voice 2 as shown above, working result is shown below


The same result can also be achieved without fiddling with note Voices assignment, because piano left hand is on the Bass staff.

Delete a Part
- Select the Part in the Select Part pane.
- Press Delete.
When you delete Parts, most of the musical score data are intact, because Part contains layout and formatting style configuration and its playback options only
Playback options
Instruments not included in the currently opened Part does not create playback by default, to change this behavior toggle Mixer Play Part Only option. This option is not modifiable when the "Full Score" is currently opened, as shown below. It is only modifiable when a "Part" is currently opened, for example, click either "Send to Chris" or "Print one for Jimmy" to open that Part.
Exporting and printing Parts
To export Part(s):
- Select File → Export….
- Select Full Score and Parts in What to export pane, or click Select all or Clear selection
- Fill in other settings as required, click OK.
Score file name will be used as prefix for Parts, generating files with the names "<Score file name>" + "-" + "<Part name>.<extension>". When exporting as PDF, an additional file named "<Score file name>" + "-Score_And_Parts.pdf" is generated.
To print a Part:
- Make sure the Part is currently opened, see Overview.
- Select File → Print.
Save Parts
Parts are embedded into a score file, and saved along with the score file. No other action is required.
To save a Part as an separate file:
- Make sure the Part is currently opened, see Overview.
- Select File → Save As….
| Vedlegg | Størrelse |
|---|---|
| Part_Creation5_en.png | 10.48 KB |
| Part_Creation4_en.png | 11.28 KB |
| Part_Creation3_en.png | 11.06 KB |
| Part_Creation2_en.png | 10.36 KB |
| Part_Creation1_en.png | 10.01 KB |
| Parts-create-all_en.png | 18.89 KB |
| Parts-create-voices_en.png | 19.64 KB |
| Parts_create_All_Parts_en.png | 48.29 KB |
| Parts_create_Single_Part_en.png | 51.83 KB |
Plugins
Not to be confused with VST and VSTi. VST support is added in Musescore 4, Musescore 3 does not support VST.
Visit Developers' Handbook Plugins for 3.x Chapter for step by step guide to write a new plugin or edit a current one.
Overview
A MuseScore plugin is a small piece of software that adds extra functionality to the program. A plugin need to be enabled first, and then executed by using the Plugins menu. Some plugins come pre-installed, they are disabled by default. There are also plugins created and shared by other musicians, anyone can download and use them.
Installing a new plugin
- Search for available plugins at, for example:
- https://musescore.org/en/plugins?category=All&compatibility=432 [musescore.org→Download→Plugins]
Warning: Plugins can potentially contain bad or malicious codes, which damage scores and compromise the machine. All plugins shared on musescore.org's plugin repository are unvetted. No warranty of any kind is provided. Users should download from a trusted author or double-check the code themselves. Seek advice on the Plugins forum. - https://github.com/topics/musescore-plugin
- https://github.com/topics/musescore-plugins
- https://musescore.org/en/plugins?category=All&compatibility=432 [musescore.org→Download→Plugins]
- Make sure it is compatible with version of Musescore used.
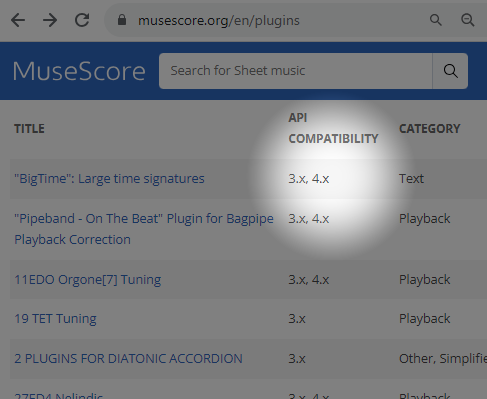
- Download the file:
- for musescore.org hosted .qml files, sometimes a web browser open it as plain text and refuses to download it as file. In this case, right click on a link and select Save link as...
- for github.com unpackaged code, download the project as a zip file by clicking Code: Download ZIP

- for github.com packaged release, click on an appropriate item under Assets
- (If it is a zip file) Extract it using an archive extraction software.
- Move the files to MuseScore's plugins folder, configurable at Edit → Preferences:General tab window, see Preferences chapter. The default directories are
- Windows:
%HOMEPATH%\Documents\MuseScore3\Plugins - macOS:
~/Documents/MuseScore3/Plugins - Linux:
~/Documents/MuseScore3/Plugins
- Windows:
Note: (1) The folder name "Plugins" is translated according to Musescore's language setting, see Preferences:General chapter. (2) Some plugins require installing other components such as a specialized Font file.
Enabling and disabling plugins
- Click Plugins: Plugin Manager
-
Tick a plugin to enable it.

Running a plugin
Select Plugins → [The plugin name]
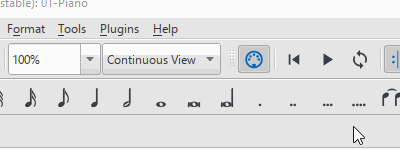
To assign a keyboard shortcut to a plugin, use the Plugin Manager.
Creating a plugin
One way to create and edit a plugin is using Musescore's Plugin Creator window, but see the developers' handbook Plugin documentation chapter. That chapter contains coding tutorials and code boilerplates.
- Click Plugins → Plugin Creator.

Pre-installed plugins
Some plugins come pre-installed with MuseScore. They are not enabled by default, see "Enabling and disabling plugins" section. They are available at MuseScore repository https://github.com/fp22june/MuseScoreTag362/tree/master/share/plugins.
- ABC Import :
This plugin imports ABC text from a file or the clipboard and converts it to MusicXML with Wim Vree's abc2xml Python script. Internet connection is required, because it uses an external web-service at https://abc2xml.appspot.com/ for the conversion. As of June 2023, the pre-installed ABC Import plugin does not work anymore due to expiration of web domain. Working alternatives:- ABC Import/Export plugin: Works offline, need to download and install python, abc2xml and xml2abc. Depending on python version, editing out the incompatible hash symbol (python comment token) at LINE 1 may be needed.
- ABC Import and ABC Export plugin: Connects to https://musescore.jeetee.net/abc/
- Color Notes: Notes → Color Notes .
Colors notes in the selected range (or the entire score), depending on their pitch. It colors the note head of all notes in all staves and voices according to the Boomwhackers convention. Each pitch has a different color. C and C♯ have a different color. C♯ and D♭ have the same color.
To color all the notes in black, just run that plugin again (on the same selection), or use Remove Notes Color plugin. - Create Score :Creates a new score. It creates a new piano score with 4 quarter notes: C, D, E, F. It's a good start to learn how to make a new score and add notes from a plugin.
- helloQml : Demonstrates some basic tasks.
- Note Names : Notes → Note Names. This plugin names notes in a selected range or for the entire score. It displays the names of the notes (as staff text) according to MuseScore's language settings: voices 1 and 3 notes above the staff; voices 2 and 4 notes below the staff; and chord notes in a comma separated list, starting with the top note.
- Panel : This demo plugin creates a GUI panel.
- random/random2 : Creates a random score.
- run : This demo plugin runs an external command. Probably this will only work on Linux.
- scorelist : This test plugin iterates through the score list.
- ScoreView : Demo plugin to demonstrate the use of a ScoreView
- Walk : This test plugin walks through all elements in a score
Pre-installed plugins are in the folder:
- Windows:
%ProgramFiles%\MuseScore 3\Plugins(or%ProgramFiles(x86)%\MuseScore 3\Pluginsfor the 32-bit versions) and in%LOCALAPPDATA%\MuseScore\MuseScore 3\pluginson Windows 7 and later - macOS:
/Applications/MuseScore 3.app/Contents/Resources/plugins(to reveal files in the app bundle, right-click onMuseScore 3.appand choose "Show package contents"), and in~/Library/Application Support/MuseScore/MuseScore 3/plugins. - Linux:
/usr/share/mscore-3.x/pluginsand in~/.local/share/data/MuseScore/MuseScore3/plugins. These folders should not be modified. The directory names might be different depending on language setting of the operating system.
See also
External links
- Developers' Handbook Plugins for 3.x
Preferences
You can customize many of MuseScore's default behaviors via the menu: Edit→Preferences... (Mac: MuseScore→Preferences...).
The Preferences dialog has multiple tabs:

Reset All Preferences to Default will reset all preferences to the ones MuseScore had when you installed it. Ok will save the settings and close the dialog. Cancel will close the dialog without applying changes. Apply will make changes take effect without closing the dialog.
General

Here you can define:
- Program Start: Specify whether to start the session empty or to display a score. The options are one of the following: Start empty (no score) / Continue last session / Start with new score (i.e. New Score Wizard automatically opens) / Start with score (the program default, or one of your own choosing).
You can also choose which panels to display. This can be any combination of: Splash screen, Play Panel, Navigator, or Start Center. Also select if Tours will be active. - Folders: Specify the default folders for score files, style files, custom score templates, plugins, additional SoundFonts, images, and extensions.
- Language: Choose the language used by the program. Translations may be updated from here too. Note that language translation updates can also be done via the menu: Help→Resource Manager.
- Telemetry: Tick/untick to authorize MuseScore to collect usage data. The type of data collected is listed, and updated as needed, in telemetry.
- Appearance: Specify a dark or light theme, and the width and height of icons. Set display "Font face" and "Font size".
- Auto Save: How frequently the program autosaves.
- OSC Remote Control
Canvas

Use Canvas to set your preferred color and wallpaper for the score background and paper. The default "Background" is dark blue (RGB 20, 36, 51; Alpha 255) and the default "Paper," white.
- Background: Use this to set the color or background around the score pages. Select "Color" then click on the bar to the right and make a choice from the color picker; or select "Wallpaper," click on the file icon and set a background image.
- Paper: Sets the color or background of the score pages. Controls identical to "Background" (above). You can also tick/untick "Use the same color in palettes".
- Zoom: This defines the Default zoom level and keyboard/mouse zoom precion.
- Scroll Pages: This defines the way that the pages are laid out in the score. Choose "Horizontally" for a row layout, or "Vertically" for a column layout. To limit scrolling, tick "Limit scroll area to page borders".
- Miscellaneous: "Draw antialiased" (the default option) makes diagonal lines and edges of shapes look smoother. "Proximity for selecting elements" controls the distance the mouse may be from an object and still act on it. Smaller numbers require more precision, making it harder to click on small objects. Larger numbers are less precise, making it harder not to click on nearby objects unintentionally. Choose a comfortable working value.
Note input

On this tab there are note input and MIDI remote control preferences. Here the following can be set:
Note Input
- Enable MIDI Input: Leave checked to allow MIDI input of notes.
- Color notes outside of usable pitch range: For details, see Coloring of notes outside an instrument's range and Usable pitch range (Staff properties: all staves).
- Delay between notes in automatic real-time mode: See Real-time (automatic).
- Play notes when editing: When ticked, MuseScore sounds the note when it is entered or selected. Tick "Play whole chord when adding note," if you want to hear all the notes of a chord when it is added to. You can also edit the "Default duration".
MIDI Remote Control
Midi Remote Control allows you to use certain keys on your MIDI keyboard to enter notes and rests and to select note durations, without involving the computer mouse or (computer) keyboard. The default setting is off.
To assign a command to a MIDI key:
- Ensure that "MIDI Remote Control" is checked (your MIDI keyboard should be connected before opening the program).
- Click the red button next to the option you wish to assign a MIDI key to: the red button now lights up.
- Press a MIDI keyboard key. The red button becomes unlit and the green button lights up instead. The MIDI key has now been assigned to the desired option.
- Repeat "2" and "3" to assign other keys.
Once you have defined your key settings you can use the MIDI keyboard to control note input operations. You can verify your key settings by observing the MuseScore Note Input toolbar while pressing the MIDI keys.
To temporarily deactivate Midi Remote Control: uncheck "Midi Remote Control": all MIDI input key action buttons are now greyed out. Note: Your key assignments are always saved between MuseScore sessions and are not affected by deactivation.
Notes: (1) The "Clear" option turns off all the green buttons for the current MuseScore session but all the user-recorded MIDI key settings are retained and will be reloaded on the next session. (2) A MIDI key setting that is activated cannot afterwards be turned off, and the green button will always remain lit: however it can be overwritten with a different MIDI key by using the red button again. (3) If the same MIDI key is accidentally assigned to more than one option, then all the associated green buttons remain lit although only one will work. To fix, see "(2)".
Score

Score preferences include:
Default Files
- Instrument list 1: Default instrument list file one, see Soundfont, MIDI velocity and instruments.xml.
- Instrument list 2: Default instrument list file two
- Score order list 1: Default score order list file one (used for instrument ordering)
- Score order list 2: Default score order list file two
- Style and Style for part: Default style for new score file and Musescore Parts, covered in Layout and formatting : Default style chapter. See also Layout and formatting concepts.
View
- Show MIDI controls in mixer: Enable this option to show MIDI controls by default in the mixer.
I/O

PortAudio
A known bug of musescore 3.6.2: After changing settings inside this box, you must press Restart Audio and MIDI Devices to apply the change, using Apply or OKbutton alone will not apply the change.
API and Device:
- For output of analog audio generated by musescore, select your built-in speakers/headphones, USB headset, wireless, etc.
- Common API options available on windows:
- MME: widely supported by softwares because it was released in 1991.
- WASAPI: aim to provide lower latency than MME, preferred for recording.
- DirectSound: a DirectX-related Interface of WASAPI.
- To delegate the musescore's audio output routing to the Windows "Control Panel" > "App volume and device preferences" > "Musescore Output" option, select "DirectSound" as API and then select "Primary sound Driver" as Device.
- If you need low latency, try 3rd party drivers such as ASIO4ALL.
MIDI Input, MIDI Output and MIDI Output Latency :
- For input and output of MIDI data, also see Mixer.
- To simultaneously input notes and receive audio generated by musescore with your MIDI device, you need to select the correct MIDI Input and MIDI Output options (on Windows MIDI Output might be "MMS<device name>") and close and reopen musescore to apply the settings.
Jack Audio Server
Check these options as required if using the JACK Audio Connection Kit.
Audio Engine
In case of lost communication between your audio device or your MIDI keyboard and MuseScore (no sound output or MIDI action), click on Restart Audio and MIDI Devices to restore them.
Import

These settings determine how files from other sources are imported:
- Style Used for Import: Use either the built in MuseScore style or a style you choose (see Load/Save Style)
- MusicXML: Set the MusicXML import options
- Character Set Used When Importing Binary Files: Character Set used for Binary Files (Guitar Pro and Overture character sets)
- MIDI: Define the shortest note when importing MIDI files
- When opening scores from older MuserScore versions: When enabled, you will be prompted if you want to apply the new default engraving and style settings or not when opening a score created with a version before 3.6.
Export

These settings determine how various files are exported from MuseScore:
- PNG: PNG/SVG image resolution (in DPI) and whether to use transparent background.
- MIDI: Whether to expand repeats in exported MIDI files.
- PDF: PDF resolution (in DPI).
- Audio: Set audio sample rate, MP3 bitrate, and whether to "normalize" exported audio.
- MusicXML: Whether to export the layout and how to export system and page breaks to MusicXML.
Shortcuts

This tab lists all the commands in MuseScore and any keyboard shortcuts associated with them. Shortcuts listed in preferences also appear next to their associated commands in the menus.
Note: Some shortcuts, including default ones, may not work with some keyboards.
-
To search for a particular command: Enter its action name in the "Search" box near the bottom of the window.
-
To create a new shortcut for a command:
- Find the relevant command by doing either:
a. Use the Search box near the bottom of the window, or
b. Clear out the Search box, and then browse through the list. - Click to select it and then click Define...; or double-click it.
- Enter the new shortcut using up to four keys. Press Clear if you need to re-enter the shortcut.
- Either press Replace to change the existing shortcut; or press Add to keep the old shortcut and add the new one.
- Find the relevant command by doing either:
-
To reset a shortcut to its system default: Select a command in the list and press Reset Shortcut to Default.
-
To save the shortcuts list: Press Save and save to a file name of your choice.
-
To load a saved shortcut list: Press Load etc.
-
To clear all shortcuts for an entry: Select the entry and press Clear.
-
To print out the shortcuts list (incl. export to pdf): Press Print etc.
Update

This sets whether MuseScore will check for updates and extensions at startup.
Updates may be checked manually in Help→Check for updates.
Advanced

Allows you to control specific settings for "application, "export", "i/o" and "user interface", as well as color settings.
See also
Recovered files
If MuseScore or your computer should crash, or if power is lost, a pop-up message upon restarting MuseScore will ask if you wish to restore the previous session:

Click Yes, to initiate attempted recovery of files from the interrupted session. Or click No to ignore message.
Saving after session recovery
When MuseScore recovers files after a crash, it renames them with the full path name added in front of the original file name. This very long name will appear in the tab(s) above the active score window.
To ensure that the file is saved in its original location. You should immediately save the restored file using the "Save As..." option: this will open a window to allow you to navigate to the correct folder and directory. If you use the "Save" command instead, the file will be saved in its current location which is unlikely to be the original one.
Finding recovered files
In the event that "Save" is used instead of "Save As..." with a recovered file, you will have to find the files in your computer. The actual location of those files will vary, depending on your operating system, and in which directory MuseScore is installed.
For Windows 7, with a default installation of MuseScore to the program files directory, recovered files are auto-saved to C:\Program Files\MuseScore 3\bin (actually %ProgramFiles%\MuseScore 3\bin).
For Windows 10, look in C:\Users\[User Name]\AppData\Local\VirtualStore\Program Files\MuseScore 3\bin (actually %LOCALAPPDATA%\VirtualStore\%ProgramFiles:~3%\MuseScore 3\bin).
or in C:\Users\[User Name]\AppData\Local\MuseScore\MuseScore3\ (actually %LOCALAPPDATA%\MuseScore\MuseScore3\).
You may need to run a system-wide search in order to find files saved directly after a session recovery. Use keywords from the original file name as well as wildcards, and specify the date modified.
See also
External links
How to recover a backup copy of a score (MuseScore HowTo)
Score Comparison
The Score Comparison Tool allows you to compare two versions of a score to find the differences between them.
Introduction
To open the Score Comparison Tool:
-
From the menu, select View→Score Comparison Tool.

The dialog opens below the document window and consists of three sections (left to right):
- Choose scores to compare: Select the scores you want to compare.
- Diff mode: Select how to view the comparison.
- Comparison: A line by line comparison of the scores is displayed.
Select score
The first step is to select the score. Use the combo box next to "Score 1" to choose between the currently open scores, or click on the Browse button to open the File Explorer and select a score from disk. Secondly, use the next combo box on the right to choose whether the first score should be the current version, or the last saved version. Score 2 is set to the same score you selected for Score 1, but you may choose another of the open scores.
When you have selected the scores and versions press Compare to do the comparison.
Choose view
"Intelligent comparison" is the default option in Diff mode: this displays the differences between the scores in a human-readable format (e.g. "Measure 1: Note: property pitch changed from B4 to C5"). Change the Diff Mode selection to "Raw" if you prefer to see the results displayed in XML code.
View comparison
When you press Compare a list of differences will be displayed to the right, and the score view will automatically change to Documents Stacked. In the Comparison section, double-click on a difference from the list and both score views will automatically pan to show you the changed element, which will also be highlighted.
Leave comparison
To exit the Score Comparison tool, turn off the two options "Score Comparison Tool" and "Documents Stacked" in the View menu.
Example
Below you will see two small scores with a few differences between them.
Last saved:

Current:

The result of the comparison will look like this:

Score properties
The Score Properties dialog contains document meta tags such as "workTitle," "Composer," "Copyright" etc. To view the dialog:
- Make sure that the applicable score or instrument part is the active tab;
- From the menu, select File → Score Properties.
Several meta tags are generated automatically when you create a score using the New Score Wizard, and others may be added later. Meta tags can also be incorporated into a header or footer if required—see below.
Edit meta tags
- Make sure that the applicable score or instrument part is the active tab;
- From the menu, select File → Score Properties;

- Edit the text of the various meta tags as required;
- To add another meta tag, click on the New button. Fill in the "New tag name" field and press OK;

Pre-existing meta tags
Every score displays the following fields in Score Properties:
- File Path: The score file's location on your Computer.
- MuseScore Version: The version of MuseScore the score was last saved with.
- Revision: The revision of MuseScore the score was last saved with.
- API-Level: The file format version.
- arranger: (empty)
- composer: This is initially set to the same text as "Composer" on the first page of the New Score Wizard.
- copyright: This is initially set to the same text as "Copyright" on the first page of the New Score Wizard (if you need a copyright symbols, copy/paste this: ©).
- creationDate: Date of the score creation. This could be empty, if the score was saved in test mode (see Command line options).
- lyricist: This is initially set to the same text as "Lyricist" on the first page of the New Score Wizard.
- movementNumber: (empty)
- movementTitle: (empty)
- originalFormat: This tag exists only if the score is imported (see file formats).
- platform: The computing platform the score was created on. This might be empty if the score was saved in test mode.
- poet: (empty)
- source: May contain a URL if the score was downloaded from or saved to MuseScore.com.
- translator: (empty)
- workNumber: (empty)
- workTitle: This is initially set to the same text as "Title" on the first page of the New Score Wizard.
If you need to display multiline text in a header or footer (as a result of these meta tags), you must first enter the multiline text into a Text Editor (e.g. Notepad for Windows, TextEdit for Mac, Nano for Linux). Then you can copy and paste that multiline text into the relevant meta tag field. For example a multiline copyright:
 Words: © 2000 The Archbishops' Council. Used with permission.

Music: © 2006, 2021 The Royal School of Church Music. All Rights Reserved.
Entering Work / Movement / Part metadata
- workNumber is the number of the larger work (e.g. 8—for "The Four Seasons," Op. 8, by Vivaldi).
- workTitle is the title of the larger work (e.g "The Four Seasons,").
- movementNumber is the number of the movement in the larger work (e.g. 3 for Autumn).
- movementTitle is the title of the movement in the larger work (e.g.“Autumn”).
It is customary, when using the New Score Wizard, to create a work with the movementTitle as title (even though it ends up in workTitle then) and, directly after creating the score, amending this information in the Score Properties dialogue.
Every part additionally has the following meta tag, generated and filled on part creation:
- partName: The name of the part as given on part creation (which is also used to fill the corresponding part name text in the top vertical frame—be aware that later changes to one are not reflected in the other).
This meta tag is not present in the main score and thus is not available for use in its header/footer or in an added part name box in the top vertical frame, unless manually added as a new tag to its score properties.
Header/Footer
To show the content of one or more meta tags in a header or footer for your score/part:
- Make sure that the correct score or instrument part is the active tab;
- From the menu, select Format → Style... → Header, Footer:

If you hover with your mouse over the Header or Footer text region, a list of macros will appear, showing their meaning, as well as the existing meta tags and their content.

In this list $I and $i are only available in extracted, linked parts, because the partName score property is only defined there, unless, as described above, it got manually added to the main score properties. Not shown in this tooltip, but available likewise, is the $:partName: meta tag.
Furthermore $v and $r are only available as of MuseScore 3.6. - Add tags (e.g. $:workTitle:, note the leading and trailing colons) and macros (e.g. $M, no colons) to the appropriate boxes, as required;
- Click Apply to see how the header or footer looks in the score. Make corrections to the dialog if required;
- If an instrument part is in the active tab, click Apply to all parts, if you want to apply these settings to all the score parts;
- Click OK to assign the header or footer and exit the dialog.
See also
Staff / Part properties
The Staff / Part Properties dialog allows you to make change display properties of one staff and the properties of the of the instrument it belongs to. To open:
- Right-click onto either an empty area in a staff, or the instrument name, and select Staff/Part Properties....
Clicking on Navigation arrows ↑ and ↓ buttons at the bottom left will cancel any unsaved changes and switch to edit the previous or next staff.

Staff Types
There are four different types of staff:
1a. Standard staff I. A pitched staff used for most instruments except fretted, plucked-string ones.
1b. Standard staff II. A pitched staff containing a fretted, plucked-string instrument, with options to set the number of instrument strings and tuning.
2. Tablature staff. A staff containing a fretted, plucked-string instrument, which displays music as a series of fret-marks on strings. Also contains options to set the number of instrument strings and tuning.
3. Percussion staff. A pitched staff for percussion instruments.

Four instruments shown above are examples of the four staff types respectively. Download this testing score file.
For each type, there are pre-defined Template to choose from in the Advanced Style Properties (Edit Staff Type) window
Replacing an instrument also changes staff types but may create unreasonable result and wrong playback. For example, replacing Piano (a standard staff, type 1a) with Drumset (percussion staff, type 3).
Staff / Part Properties: common to all four staff types
Inside "Staff properties" box on upper part:
First column:
- Style group
Display the staff Types. Type 1a and type 1b as Standard , type 2 as Tablature , type 3 as Percussion. - Lines
The number of lines making up the staff. For tablature, this number usually matches the number of strings in the Change string tuning dialog (exceptions being the Baroque Lute, Theorbo etc. which have more strings than lines). - Line Distance
The distance between two staff lines of current staff. Changes rarely needed. See how to change the scaling of all staffs in Layout and formatting chapter. - Extra distance above staff
Increases or decreases the distance between the selected staff and the one above in all systems. Note: This setting does not apply to the top staff of a system, which is controlled by the minimum/maximum system distance (see Layout and formatting: Format → Style … → Page). Notes: To alter the spacing above just one staff line in a particular system, see Breaks and Spacers. - Scale
Changes the size of of current staff and all associated elements. Using a value greater than 100% may results in unwanted layout. Changes rarely needed. See how to change the scaling of all staffs in Layout and formatting chapter.

shown above last chord in the 130% scaled Tenor staff is misaligned
Second column:
- Hide when empty dropdown list
Staff level setting for empty staff hiding along one system, see musescore 4 handbook Showing staves only where needed chapter. - Show clef
Whether the staff's clef will be shown. - Show time signature
Whether the staff's time signature(s) will be shown or not. - Show barlines
Whether the staff's barlines will be shown. - Hide system barline
Show/hide barline at left-hand edge of the staff. - Merge matching rests (as of version 3.5)
Collapse rests of the same duration, at the same position but different voices, into just one.
Third column:
- Do not hide if system is empty
Designate as the staff to show when all staffs in a system are empty, see musescore 4 handbook Showing staves only where needed chapter. - Small staff
Create a reduced-size staff. You can set the default from the menu in Format → Style ... → Sizes. - Invisible staff lines
Make staff lines invisible. - Staff line color
Use a color picker to change the color of the staff lines. - Cutaway
Setting for hiding empty measures, see musescore 4 handbook Showing staves only where needed : Hiding empty measure chapter.
Inside "Part properties" box on lower part:
- Instrument
The instrument the current staff belongs to. Replace it by pressing the Change Instrument ... button. Manage score instrument setup by pressing keyboard shortcut (I). Note: The properties below (i.e. Part Name, Long Instrument Name etc.) are set to the default values defined in the MuseScore instruments.xml file. - Part name
The name displayed in Parts window, the Mixer and the Instruments dialog (I). Note: The Part name is defined by the value of the trackName element in the instruments.xml file. If trackName has not been defined, the value of longName (i.e. "Long instrument name"—see below) is used instead. - Long instrument name and Short instrument name
Long instrument name is displayed to the left of the staff in the first system of the score. The long instrument name may also be edited directly as a text object (see Text editing).
Short instrument name is displayed to the left of the staff in subsequent systems of the score. The short instrument name may also be edited directly as a text object (see Text editing). Editing affects all occurrences in the score. - Usable pitch range
- Amateur: Notes outside this range will be colored olive green/dark yellow in the score.
- Professional: Notes outside this range will be colored red in the score.
To disable out-of-range coloration of notes: From the menu, select Edit→Preferences... (Mac: MuseScore→Preferences...), click on the "Note Input" tab, and uncheck "Color notes outside of usable pitch range."
See also, Coloring of notes outside an instrument's range.
- Transposing instrument options
This option ensures that the staves of transposing instruments display music at the correct written pitch. Set the transpose in term of a musical interval (plus octave if required) up or down.
For transposing instruments an additional option is shown: "Prefer sharps or flats for transposed key signatures". There are three options:- Default: Let Musescore decide
- Flats: Prefer flats
- Sharps: Prefer sharps
- Use single note dynamics checkbox (Musescore 3.1 or later)
Untick to use MIDI Velocity for playback, see Dynamics: Loudness of a note.
Tick to switch to the alternative playback mechanism that utilize the MIDI Continuous Controller / Control Change (MIDI CC) Messages (wikipedia), see Synthesizer: Dynamics.
For either option, you must use a compatible sound, sound is defined by SoundFont creator and cannot be edited within MuseScore, see Soundfont, MIDI velocity and instruments.xml.
Override staff settings by using the per score master control at Synthesizer: Dynamics.
A bug exists in staffs with "single note dynamics" ticked: Dynamics and Hairpins symbols, when assigned Dynamic range properties > Staff option, do not create correct playback, see forum discussion.
Staff / Part Properties: settings for plucked strings only (Type 1b and type 2)
In addition to those listed above, staves of fretted, plucked-string instruments (Type 1b and type 2) have a few extra options at the bottom part of the window,
- Number of strings
Displays the number of instrument strings. - Edit String Data…
This button opens a dialog box which allows you to set the number and tuning of strings. See Change string tuning.
Advanced Style Properties

Clicking the Advanced Style Properties... button opens the Edit Staff Type window, the properties available vary depending on staff type.
Advanced Style Properties: common to all four staff types
First row: Lines, Line Distance: duplicated UI for the exact same property as above
Second row: Show clef, Show time signature, Show barlines: duplicated UI for the exact same property as above
At the bottom of the window:
- Template dropbox
Assigning a template changes the number of lines (type 3 percussion staff) or switch staff types altogether (type 1a, type 1b and type 2). To apply a template:-
- Make a selection from the drop-down list labelled "Template";
-
- Press < Reset to Template;
-
- Press OK to accept the changes and exit the dialog (or Cancel to cancel the operation).
-
Advanced Style Properties: settings for standard and percussion staff (Type 1a, type 1b and type 3)
Third row:
- Show key signature, Show ledger lines
Option to turn the display of these elements ON or OFF. - Stemless
If checked, staff notes will have no stem, hook or beam.
Advanced Style Properties: settings for standard staff (Type 1a, type 1b)
- Notehead scheme
See Notehead scheme.
Advanced Style Properties for tablature staff (Type 2)

The preview window at the bottom displays a short score in tablature format with all the current parameters applied.
Properties includes:
- Upside down
If not checked, the top tablature line will refer to the highest string, and the bottom tablature line to the lowest string (this is the most common option). If checked, the top tablature line refers to the lowest string, and the bottom tablature line to the highest line (e.g. Italian-style lute tablatures). For example:

'Upside down' tablature.

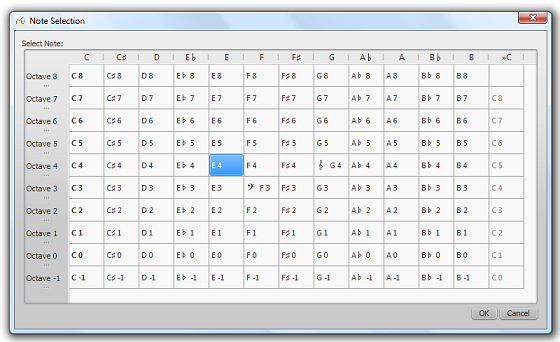
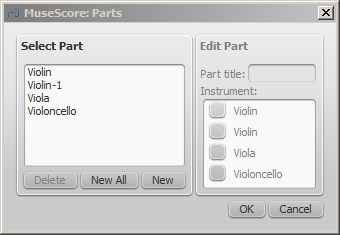
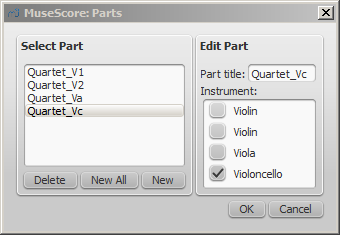
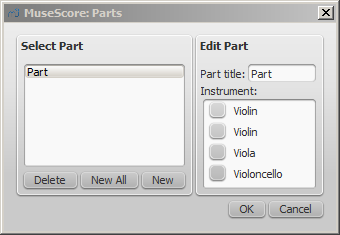
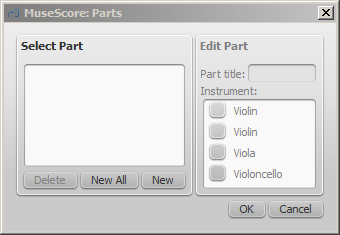
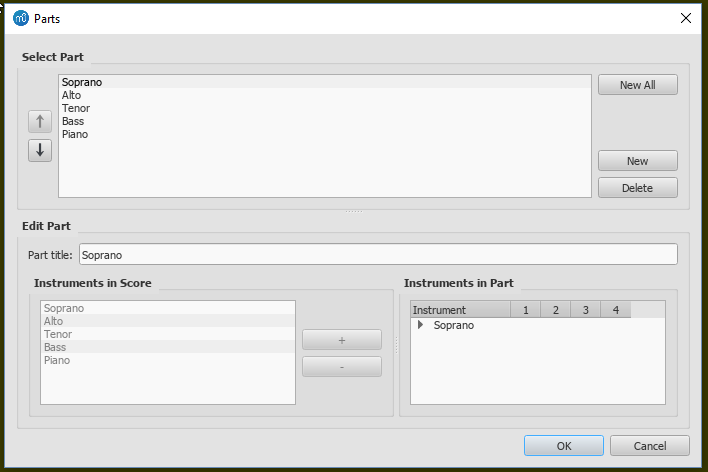
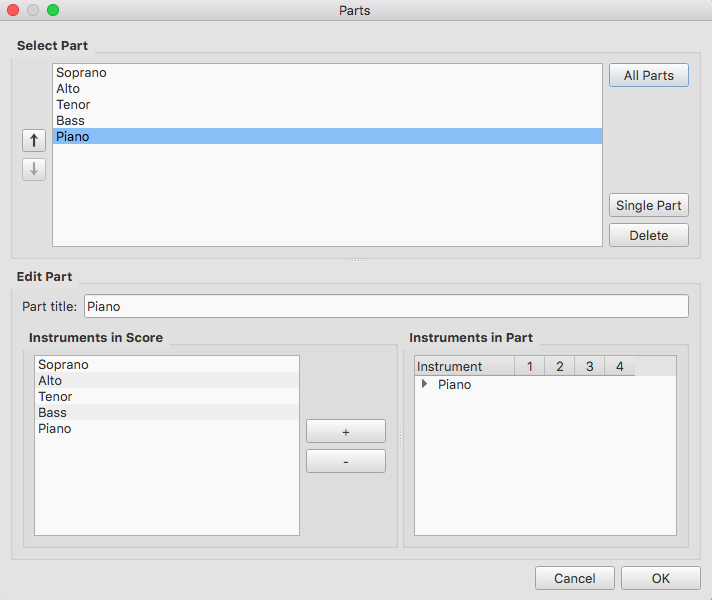
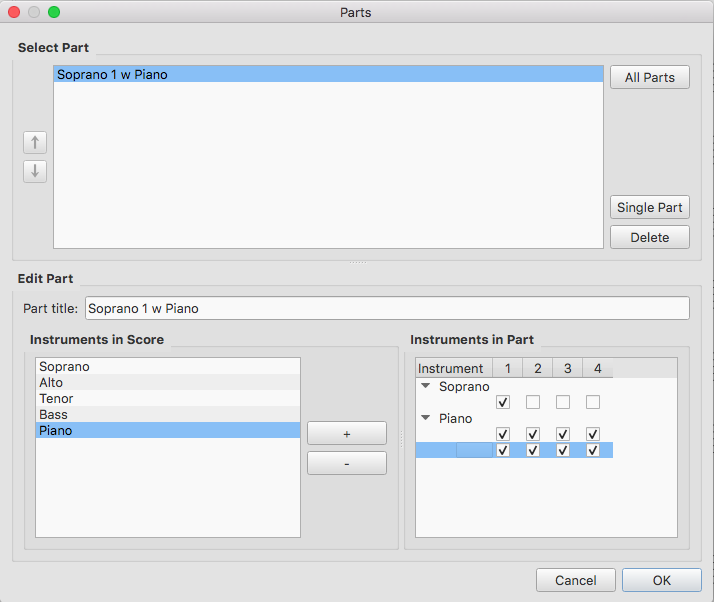
- Fret marks are the numbers or letters used to indicate the location of notes on the fingerboard. The following group of properties define the appearance of fret marks:
- Font
The font used to draw fret marks. 8 fonts are provided supporting all the necessary symbols in 8 different styles (modern Serif, modern Sans, Renaissance, Phalèse, Bonneuil-de Visée, Bonneuil-Gaultier, Dowland, Lute Didactic). - Size
Font size of fret marks in typographic points. Built-in fonts usually look good at a size of 9-10pt. - Vertical offset
MuseScore tries to place symbols in a sensible way and you do not usually need to alter this value (set to 0) for built-in fonts. If the font has symbols not aligned on the base line (or in some other way MuseScore does not expect), this property allows you to move fret-marks up (negative offsets) or down (positive offsets) for better vertical positioning. Values are in sp. - Marks are
Choice of Numbers (‘1’, ‘2’...) or Letters (‘a’, ‘b’...) as fret marks. When letters are used, ‘j’ is skipped and ‘k’ is used for the 9th fret. - Marks are drawn
Choice of placing fretmarks On lines or Above lines. For example:

Fretmark letters placed above line. - Lines are
Choice of Continuous (lines pass through fret marks) or Broken (a small space appears in the line where the fretmark is displayed). For example:

Tablature with lines broken. - Show back-tied fret marks
If unticked, only the first note in a series of tied notes is displayed. If ticked, all notes in the tied series are displayed. - Show fingering in tablature
Tick to allow the display of fingering symbols applied from a palette.
Under Note Values tab: properties define the appearance of the symbols indicating note values

- Font
The font used to draw the value symbols. Currently 5 fonts are provided supporting all the necessary symbols in 5 different styles (modern, Italian tablature, French tablature, French baroque (headless), French baroque). Used only with the Note symbols option. - Size
Font size, in typographic points. Built-in fonts usually look good at a size of 15pt. Used only with the Note symbols option. - Vertical offset
Applies only when Note symbols is selected (see below). Use negative offset values to raise the note value symbols, positive values to lower them. - Shown as:
- None: No note value will be drawn (as in the examples above)
- Note symbols: Symbols in the shape of notes will be drawn above the staff. When this option is selected, symbols are drawn only when the note value changes, without being repeated (by default) for a sequence of notes all of the same value. E.g.

- Stems and beams: Note stems and beams (or hooks) will be drawn. Values are indicated for each note, using the same typographic mechanics as for a regular staff; all commands of the standard Beam Palette can be applied to these beams too. E.g.

- Repeat: (only available if "Shown as: Note symbols" is selected)
If several notes in sequence have the same duration, you can specify if and where to repeat the same note symbol: available options are Never, At new system, At new measure, Always - Stem style: (only available when "Shown as: Stems and Beams" is selected)
- Beside staff: Stems are drawn as fixed height lines above/below the staff.
- Through staff: Stems run through the staff to reach the fret marks.
- Stem position: (only available when "Shown as: Stems and Beams" and "Stem style: Beside staff" is selected)
- Above: Stems and beams are drawn above the staff.
- Below: Stems and beams are drawn below the staff.
- Half notes: (only available when "Shown as: Stems and Beams and "Stem style: Beside staff" is selected)
Available options are None, As short stems, As slashed stems - Show rests
Whether note symbols should be used to indicate also the rests; when used for rests, note symbols are drawn at a slightly lower position. Used only with the Note symbols option.
Change instrument
Not to be confused with Mid-staff instrument change.
This replaces the instrument that this staff belongs to, and change all of its staffs everywhere on a score. It changes playback, staff name, and staff transposition etc. The Staff Type change may be unreasonable and create wrong playback.
- Right-click on an empty part of any measure OR on the instrument name and choose Staff Properties...;
- Click on Change Instrument... (under "Part Properties");
- Choose your new instrument and click OK to return to the Staff Properties dialog;
- Click OK again to return to the score.
External links
- How to create an ossia with another staff and using image capture (for MuseScore 2, still works for MuseScore 3, but here the Cutaway option might be the better choice)
- Musescore 4 handbook Showing staves only where needed chapter.
Staff Type Change
You can change the appearance of a staff mid-score by adding a Staff type change element to a measure, and adjusting its properties in the Inspector.
Add a Staff Type Change
- Select a measure in the score and, in the "Text" palette, click (double-click prior to version 3.4) the "Staff type change" symbol,
 ; alternatively, drag the "Staff type change" icon onto a measure;
 - Select the symbol, and adjust its properties (see below) in the Inspector as required.
Staff type change properties
When you alter a Staff type change property in the Inspector, the new value takes precedence over the value shown in the global Staff properties dialog. Only those property values in "Staff Properties" that cannot be changed in the "Staff type change" dialog will be valid throughout the score.
The properties that can be altered in the Staff type change dialog in the Inspector are:
Offset
How far the changed staff shall be moved up or down: measured in spaces (abbr.: sp) .
Small
Tick the box to create a reduced-size staff.
Scale
Changes the size of the staff and all associated elements, as a percentage.
Lines
The number of lines making up the staff.
Line distance
The distance between two staff lines, measured in spaces (abbr.: sp).
Step offset
How many steps up or down the notes in the staff are offset.
Show barlines
Whether the staff barlines will be shown.
Show ledger lines
Whether ledger lines will be shown for notes above/below the staff lines.
Slash style
Whether the notes shall be shown in standard or slash style.
Notehead scheme
Allows selection of how noteheads are displayed.
Generate clefs
Whether the staff clef will be shown.
Generate time signatures
Whether the staff time signature(s) will be shown or not.
Generate key signatures
Whether the staff key signatures will be shown or not.
Example
To illustrate the use of Staff type change, the staff shown below was created using the following steps:
- Add a Staff type change to measure 2.
- Set size to "Small".
- Set "Lines" to 4.
- Add a second Staff Type Change to measure 3.
-
Change "Lines" to 7,

Afterwards the global Staff Properties are changed using Staff properties:
1 Set "Lines" to 2.
2. Change "Staff Line Color".

As can be seen, the change in "Lines" is only effective up to the first staff type change, whereas the change to "Staff Line Color" is effective throughout the score.
Supported notehead schemes

Download this testing score file ms3_noteheadschemes.mscz
Notehead schemes are used by musicians to designate notehead shape meaning, see the main chapter Noteheads. In Musescore 3, scheme option for all notes on a staff is named "Notehead Scheme", scheme option for individual note is named "Head scheme". Specific Notehead shape can also be assigned to individual note directly, when a note has specific notehead shape assigned, it does not use pitch information to determine notehead shape.
Musescore supports nine schemes. Five of them are directly fully supported, notes written create correct playback. Four "shape note notations" are supported in terms of notehead engraving, users need to take advantage of 'Transposing instruments' feature to create desired playback, see Noteheads. To create custom "shape note notations" using a scheme other than the four, see Noteheads: adding pitch info.
The nine supported by Musescore are:
- Normal: The default scheme used by vast majority of musicians.
4 solfege related notations:
- Pitch name: Noteheads automatically and dynamically change to include the English pitch name in the notehead.
- German pitch name: similar to Pitch name but B replaced with H, and B♭ with B.
- Solfège Movable Do (also called Tonic Solfa): Noteheads with solfege literally written. It uses Ti and not Si.
- Solfège Fixed Do: Noteheads with solfege literally written. Used in France, Italy, Spain, etc. It uses Si and not Ti.
4 shape note notations, need further config if you wish to create desired playback:
- 4 Shape (Walker): used in books such as William Walker’s Southern Harmony (1835).
- 7 Shape (Aikin): used in books such as Jesse B. Aikin’s The Christian Minstrel (1846), and books by the Ruebush & Kieffer Publishing Company. It's the most used 7-shape system.
- 7 Shape (Funk): used in books such as Joseph Funk’s Harmonia Sacra (1851).
- 7 Shape (Walker): used in books such as William Walker’s Christian Harmony (1867).
External links
- Solfège on Wikipedia.org
- The Music Notation Project Wiki > Shape Note Notation
- IMSLP.org Wiki > 4-shape notation
- IMSLP.org Wiki > 7-shape notation
- staff/part properties preview window score https://github.com/musescore/MuseScore/tree/master/src/notation/view/re…
- shape note SMuFL specification
Noteheads
Overview
This chapter discusses the appearance of notehead in Musescore.
Notehead schemes
One aspect of music notation systems is notehead scheme. A scheme is a set of rules used to decide notehead shape's meaning, some of them are supported in Musescore. Supported schemes relate notehead meaning to a note's:
- duration: as in the most widely used scheme.
- pitch (using movable-do or absolute pitch solfege): literally written on it, and
- pitch (relative pitch using shape note solfege): as in "shape note notation" (see reference under External links).
The most widely used scheme is very likely the only one known to many musicians. It is referred to as "Normal" in Musescore and is the default settings for new staff. Details of the nine schemes available in Musescore are covered in Notehead schemes.
Understanding relative pitch notations (shape note solfege, shape note notation) can enhance the reader's comprehension of this chapter. Most of the time, a notehead shape conveys one specific meaning, and that meaning is only associated with one notehead shape. Shape note solfege is like a variant of movable-do solfege that belongs to the exceptions. For example, in one type of "shape note notation", a triangle must be used to notate a relatively pitched "C4", but triangles are also read as relatively pitched "C"s or "F"s only, and triangles must sing "Fa" or a syllable agree upon by singers on-site. The loosely related shape note solfege notates interval perception much better than the "Normal" setting.
Notehead shape

Shown above diamond notehead can be used for harmonic notes in guitar, violin etc; and slash notehead for guitar strums etc.
Final display of notehead shape in Musescore is determined by three factors: the notehead type factor, the pitch factor, and the duration factor (or note-value, rhythm).
Pitch factor
Note pitch may affect affect notehead shape, depending on the scheme, but it only happens on notes that do not use an overriding Head group property. See "Notehead type factor" section.
Duration factor
The duration factor is determined by note's duration, to edit duration see Entering notes and rests and Editing notes and rests chapters. It also can be visually overridden for individual note, while keeping the real value and playback intact.
Notehead type factor
Options available for notehead type factor depends on staff type:
- On Standard staffs (type 1a, type 1b), the final result is determined in Musescore using three level:
- Level 1 Notehead scheme of a staff (option named "Notehead Scheme" in Musescore 3): Default is "Normal".
- Level 2 Notehead scheme of a note (option named "Head scheme" in Musescore 3):
- The default option "Auto" means "ignore this level".
- Other options: scheme to use on this note, overrides Level 1.
- Level 3 Head group property of a note. Affects notehead shape if and only if the result scheme of Level 1 and Level 2 is "Normal".
- Tablature (type 2) do not use notes, but you can toggle fret mark / crosshead ghost note with Shift+X,
- On percussion staffs (type 3), instrument (like snare or hi-hat, not the "drumset" Musescore Instrument) determines the notehead type factor. See Entering and editing percussion notation: Notehead shape chapter.
Notehead scheme determines the notehead shape for every note on a staff, unless overridden by individual note's Head group property. When Notehead scheme is not overridden, notes' pitch may affect notehead shape, depending on the scheme. "Normal" Notehead scheme does not use pitch to determine notehead shape. When a note uses an overriding Head group property, a note's pitch does not affect notehead shape at all.
Changing notehead shape
Notehead type factor
- (Valid on standard staffs only) To change level 1 notehead scheme of a single staff, affecting all notes:
- Right click on an empty part of the desired staff and select Staff/Part properties.
- Click on the Advanced style properties button (opens Edit Staff Type window).
- Select an option in Notehead scheme dropdown.
- (Valid on standard staffs only) To change level 2 notehead scheme of note(s):
- Select note(s) on a score.
- In the Inspector Note section, select an option from the Head scheme dropdown: the default "Auto" means "ignore this level".
- (Valid on standard staffs only) To change level 3 Head group property:
- Tablature do not use notes, but you can toggle fret mark / crosshead ghost note with Shift+X.
- To change noteheads on percussion staffs, see Entering and editing percussion notation: Notehead shape chapter. Only some items in Noteheads palette work on percussion staffs.
Duration factor
- To change note duration, see Note input.
- To change the apparent duration without altering real value so that playback is not affected:
- Select note(s) on a score.
- In the Inspector Note section, select an option from the Head type dropdown: the default "Auto" means "no override"
Adding pitch information to notes
There are six methods to change "pitch".
Most of the time, a note's pitch only affects its staff space / vertical position, to change it:
- Change note pitch, see Note input.
- Modify the playback pitch of note(s) on score without altering notation:In the Inspector Note section, edit Tuning. This is useful for reasons explained in Tuning systems, microtonal notation system, and playback.
Tablature, percussion notation, and some notehead scheme (see Overview) use notehead shape to convey pitch information:
- The brackets (parentheses, dead note or ghost note) item in Noteheads palette can be added to a note or accidental.
- Toggle Tablature fret mark / crosshead (ghost note or dead note) with Shift+X
- To use custom notehead shape for visual pitch representation:
- Change level 1 setting as required for the staff.
- Use an level 2 overriding setting on selected note(s):
- Select note(s) on a score.
- In the Inspector Note section, select "Normal" from the Head scheme dropdown.
- Assign level 3 Head group property. Use either one of the following:
- These note(s) will be always use this item, regardless of any future pitch change by user unlike other notes on this staff.
- Change duration factor as required.
- To loosen the relationship between note vertical position and pitch so that all notes on a staff create desired playback, take advantage of 'Transposing instruments' feature
Changing notehead direction

To move notehead(s) horizontally to the other side of stem, use one of the following:
- Press Shift+X, or
- in Inspector Note section, select an option in Mirror head drop-down.
(Note: Contrast this command with X which moves the stem and the beam horizontally and vertically to other side of the notehead)
Notehead properties
Other properties for notehead, see Inspector: Note
Notehead style and font
There are 6 font options for notehead set in Format→Style→Score. Notehead does not use style profiles (Layout and formatting).
Noteheads palette are displayed with Bravura font.
Shared noteheads
When two notes in different voices, but of the same written pitch, fall on the same beat, one of two things may happen:
- The notes may share the same notehead.
- The notes may be offset: i.e. arranged side by side.
MuseScore uses the following rules:
- Notes with stems in the same direction do not share noteheads.
- Dotted notes do not share noteheads with undotted notes.
- Black notes do not share noteheads with white notes.
- Whole notes never share noteheads.
Note: If two unison notes occur in the same voice they are always offset.
Change offset noteheads to shared
To turn offset noteheads in opposite voices into shared noteheads :
- Make the smaller-value notehead invisible by selecting it and using the keyboard shortcut V (or unchecking the "Visible" option in the Inspector).
In a small minority of cases (where the smaller value note is dotted) this workaround is not applicable, so use the following alternative:
- Select the smaller value notehead and, in the "Note" section of the Inspector, change "Head type" to match that of the larger value note in the opposite voice.
Examples of notehead sharing
- In the first example below, the notes of voices 1 and 2 share noteheads by default, because they are all black, undotted notes:

-
By contrast, in the next example, white notes cannot share noteheads with black notes, so are offset to the right:

To create a shared notehead, change the black eighth note's head type to match that of the white note or, pre-3.5, make it invisible (as explained above):

Remove duplicate fret marks
In certain cases, a shared notehead, when pasted to a tablature staff, may result in two separate fret marks on adjacent strings. To correct this, make any extraneous tablature notes invisible by selecting them and using the keyboard shortcut V (or by unchecking the "visible" option in the Inspector).
See also
External links
Timeline
Introduction
The timeline was developed as part of the Google Summer of Code 2017, and is included for the first time in MuseScore 3.0.
Overview
The timeline is a navigation tool that displays an abstraction of the score to the order of measure numbers and instrument names. There are four parts to the timeline:
Meta labels
This is found in the top left corner of the timeline. These are the names of the meta rows.
Instrument labels
This is found in the bottom left corner of the timeline. These are the names of the rows in the main grid.
Meta rows
This is found in the top right corner of the timeline. These hold the meta values of the score.
Main grid
This is found in the bottom right corner of the timeline. This holds multiple 'cells' (a specific measure and staff in the score represented as a square)
Meta
Meta are elements found on the score that are not notes, but are still important to the score (key signature, time signature, tempo, rehearsal marks, bar lines, and jumps and markers).

Basic interaction
Select a measure
To select a measure in the timeline, press the mouse button on the cell. A blue box will appear around the selected cell and the respective measure in the score will be selected. The score view will place the selected measure in view.
Select multiple measures
Drag selection
Holding Shift and holding the left mouse button and dragging the mouse over the main grid will create a selection box. Upon releasing the mouse button, all the cells underneath the selection box will be selected, as well as all the measures in the score.
[Shift] selection
If a cell is already selected, holding Shift and selecting another cell in the timeline will stretch the selection to that new cell, similar to how the score does
[Ctrl] selection
If no cells are currently selected, holding Ctrl and selecting a cell will select the entire measure
Clearing selection
To clear selection, holding Ctrl and clicking anywhere on the grid or the meta rows will clear any current selection.
Meta values selection
Selecting the meta values on the timeline will attempt to select the respective meta values in the score.
Scrolling
Standard scrolling
Scrolling the mouse wheel up or down will move the grid and instrument labels down or up respectively. The meta labels and rows do not move.
[Shift] scrolling
Holding Shift and scrolling the mouse wheel up or down will move the grid and meta rows left or right respectively. The meta labels and instrument labels do not move.
[Alt] scrolling
Holding Alt and scrolling the mouse wheel up or down will move the grid and meta rows left or right respectively, faster than Shift scrolling. The meta labels and instrument labels do not move.
Dragging
To drag the contents of the timeline, hold the left mouse button and move it around.
Labels interaction
Rearranging meta labels
All meta labels besides the measures meta may be rearranged in any way. By moving the mouse cursor onto one of the meta labels, small up and down arrows will appear. Click the left mouse button on the up arrow to swap the meta label with the one above it. Click the left mouse button on the down arrow to swap the meta label with the one below it.
Collapsing the meta labels
In order to hide all the meta labels while keeping all the meta information on the timeline, there is an arrow that appears on the measures meta when the mouse is over it. Click the left mouse button on the large up arrow to collapse all the currently visible meta rows into one row, where the meta values are staggered in that row. Click the left mouse button on the large down arrow to expand the meta rows again.

Hiding instruments
All instruments--hidden or not--will be displayed on the timeline. To start this interaction, the mouse cursor is moved over an instrument label. A small eye will appear on the right side of the label that is open if the instrument is visible on the score, and closed if the instrument is hidden. Click the left mouse button on the eye to toggle between the two options.

Zooming
To zoom in or out of the score, hold Ctrl and scroll the mouse wheel up or down respectively (Mac: Cmd + scroll).
Context menus
To bring up a context menu, right-click on the timeline. There are three context menus found in these locations: meta labels, instrument labels, and meta rows.
Meta labels context menu
Upon clicking the right mouse button on the meta labels, a context menu appears that displays all possible meta labels as well as two options: "Hide all" and "Show all." Next to each meta label in the menu, there is a check box that shows if the meta label is currently being shown on the timeline. To show or hide one of the meta labels, select the box of the meta label in the context menu. Selecting "Hide all" will hide all meta labels except for the measures meta. Selecting "Show all" will display all meta labels.
Meta rows context menu
Clicking the right mouse button on the meta rows will display the same context menu as the meta labels.
Instrument context menu
Clicking the right mouse button on the instrument labels will display a context menu with the option to "Edit Instruments." Selecting this will bring you to the same dialog as Edit > Instruments... or pressing I for the shortcut.
Tools
A number of useful commands can be found in the Tools menu.
Transpose
This opens the Transpose dialog with various options for transposing passages of music.
Explode
The explode command allows you to select a passage of music in a single staff and split (explode) the chords into their constituent notes or voices as follows:
- If the passage is all in voice 1, the top note of the chord is retained on the top staff, while the lower notes are moved to subsequent staves.
- If the passage contains multiple voices, voice 1 notes are retained on the top staff, while other voices are moved to subsequent staves. All exploded voices are now in voice 1.
To explode a section of the score:
- Ensure that there are enough staves underneath the source staff to receive the exploded notes. Create extra staves if necessary using the Instruments dialog.
- Choose one of two options:
- Select a range of measures in the source staff: this allows all notes to be exploded if there are enough staves available.
- Select a range of measures that includes both the source staff and also extends downwards to include one or more destination staves: This limits the number of exploded notes/voices to the number of selected staves.
- Choose Tools→Explode.
Notes: (1) If the selection is all in voice 1, MuseScore will discard the lowest note(s) of any chord that contains more notes than the number of staves in the selection. (2) If the selection is all in voice 1, and If a given chord has fewer notes than the number of destination staves, then notes will be duplicated as needed so that every staff receives a note. (3) Any existing music in the destination staves is overwritten. (4) If you select a partial measure, the explode command will automatically expand it to a full measure.
Implode
The Implode command works in the opposite way to "explode":
- With one staff selected, all notes in voices 1–4 are combined into voice 1.
- With multiple staves selected, the notes in the second staff are copied to the first available voice in the top staff, the notes in the third staff are copied to the next available voice in the top staff and so on.
Apply implode to a single staff
- Select a range of measures in the desired staff.
- Choose Tools→Implode.
All selected notes in the staff are now displayed in voice 1.
Apply implode to multiple staves
- Ensure that there is only one voice in each staff.
- Select a range of measures in the destination staff and extend this selection downwards to include the other staves to be imploded.
- Choose Tools→Implode.
Voices
This allows you to swap the voices of a selected measure-range of notes. See Exchange voices.
Measure
Join or split measures. See Measure operations: Split and join.
Remove selected range
This command is used to completely remove an element, or range of elements from the score.
To remove measures (including partial measures):
- Select a range of notes/rests, or a range of measures;
- Use one of the following methods:
- Press Ctrl+Del (Mac: Cmd+Del).
- Select Tools→Remove selected range.
Note: If the selected range includes only part of a measure, the result will include a measure of smaller duration than the indicated Time Signature. This is indicated by a small - (minus) sign just above the system.
To join measures:
- Select (i.e. click on) a barline;
- Use one of the following methods:
- Press Ctrl+Del (Mac: Cmd+Del).
- Select Tools→Remove selected range.
The following table is a comparative summary of the Delete and Remove selected Range commands when applied to single elements:
| Selected Element | Apply Delete | Apply Remove selected range | |
|---|---|---|---|
| Note | Replaces with rest | Removes score section | |
| Rest (voice 1) | No effect | Removes score section | |
| Rest (voices 2-4) | Deletes rest | Removes score section | |
| Barline | No effect | Deletes barline and joins measures | |
| Measure | Replaces contents with rest | Removes measure |
Note: To insert notes, see Insert.
Fill with slashes
This command fills the selection with slashes, one per beat:
- Select one or more measures;
- From the menu, select Tools→Fill With Slashes.
If a measure is empty the slashes are added to voice 1, full-sized and centered on the middle line of the staff:

Notes: (1) If there are already notes in a measure in the selection, the command will put the slashes into the first available empty voice. (2) Voice 2 slashes are full-sized and centered on the middle line of the staff; voices 3 slashes appear small and above the staff; voice 4 slashes are small and below the staff. (3) If a measure contains notes in all 4 voices, voice 1 will be overwritten. (4) All slashes are set to not transpose or playback.
Toggle rhythmic slash notation
This command toggles selected notes between normal notes and rhythmic slash notation:
- Select a range of notes or measures (Note: use the selection filter if you need to exclude certain voices);
- From the menu, select Tools→Toggle Rhythmic Slash Notation.
The selected noteheads are changed to slash noteheads which do not transpose or playback.

Slash-notehead notes in voices one or two are fixed to the middle staff line; those in voices three or four are small ("accent" notation) and fixed above or below the staff:

In percussion staves, notes in voices 3 and 4 are not converted to small slashes but to small notes above or below the staff.

Respell pitches
Corrects accidentals to fit in with the current key signature. See Accidentals: Respell pitches.
Regroup Rhythms
This option corrects note ties, durations and beaming so that they are grouped according to standard music notation practice. For example:
Before:

After:

Any notes that are tied and are the same length as a dotted note will be changed to the dotted note with two limitations. (i) Only the last note of a group of tied notes will have a single dot. Notes with more than one dot are not produced using this option. (ii) Dotted notes will not span from one group of beamed notes to another unless their duration is the same as all of the beam groups it covers. Any notes with more than one dot will be regrouped according to the above rules.
To apply:
- Select the section of the score you want to reset. If nothing is selected, the operation will apply to the whole score;
- Select Tools→Regroup Rhythms.
Note: This is an experimental feature and there are known bugs. Articulations and ornaments are deleted and some pitches respelled. Ties across barlines may be lost on UNDO.
Resequence rehearsal marks
The Resequence Rehearsal Marks command allows you to re-order the numbering/lettering of rehearsal marks if, for any reason, they have got out of sequence. For details see Automatically resequence rehearsal marks.
Unroll Repeats (version 3.1 and above)
This command creates a copy of the score (in a new tab), eliminates the repeat barlines and notates the repeat sections in full instead.
Copy lyrics to clipboard
This command copies all the lyrics of the score to the clipboard:
- From the menu, select Tools→Copy Lyrics to Clipboard.
Image capture
Take a snapshot of a selected part of the document window. PNG, PDF and SVG formats are supported. See Image capture.
Remove empty trailing measures
This automatically removes any blank measures at the end of the score.
See also
External links
- How to merge/combine/implode two staves in one with two voices (MuseScore HowTo)
Tuning systems, microtonal notation system, and playback
To setup a transposing instrument, visit Staff / Part properties instead.
Musical tuning systems and notation systems
Default tuning
The default tuning is equal temperament (12-EDO/12-TET), and the default concert pitch setting is A4 = 440Hz. Concert pitch is configurable in synthesizer.
Other tuning systems
MuseScore supports tuning systems such as Just intonation, Pythagorean tuning, and Scordatura etc. indirectly, see create desired playback below.
Default notation
Default notation uses 7 accidentals: ♭ (flat), ♮ (natural), ♯ (sharp), 𝄪 (double sharp), 𝄫 (double flat), ♯𝄪 (triple sharp), ♭𝄫 (triple flat), see source code.
You can add these 7 accidentals using any of the following:
- Shortcut keys: e.g. keyboard up/down keys ( these can be assigned in Preferences: Shortcuts: "Pitch up", "Pitch down", "Diatonic pitch up", "Diatonic pitch down", "Change enharmonic spelling"), or
- Toolbar buttons, or
- Palette : Accidentals section (a sidebar), or
- Master palette : Accidentals category (a popup window). Do not add from Symbols category, they are non-functional visual symbols, see Notation types.
See the main chapter Accidentals for more information.
Microtonal notation systems
MuseScore supports microtonal notation systems such as Helmstolk Ellis notation, Johnston notation etc., so that tuning systems such as Just intonation, Pythagorean tuning etc can be notated precisely. MuseScore development focuses on engraving support, rather than playback support, see create desired playback below.
Professional glyphs of some SMuFL (Wikipedia) symbols are shipped with Musescore, add them by using any of the following:
- Palette : inside the More button of the Accidental section (a sidebar), or
- Master palette : Accidentals category and Symbols category (a popup window), or
- A Plugin.
Note: Adding symbols other than the 7 accidentals used in the default notation system may damage compatibility with plugins such as Chord Identifier (Pop Jazz), because of the implicit change explained in microtonal playback below.
Creating the desired playback
To create desired playback for a custom tuning or notation system, use one of the following methods:
With default notation
With some tweaking, you can create desired playback on a whole score or a phrase to:
- emulate a performer's decision to play different pitches: for example, on the same sheet music, a violinist plays Pythagorean, a pianist plays Equal Temperament, or
- emulate an instrument tuned to a custom tuning system.
To create the desired playback, use:
- Cent adjustment of notes with the Tuning property in Inspector: Note. To get a sensible result, you need to work out tables of cent values based on the tuning system and fundamental frequency beforehand, and may need to apply different tables to different sections; or
- A plugin that automates this process, such as:
- Tunings and Temperaments (as of Jan 2023, this plugin does not differentiate between enharmonic notes, i.e. Ab=G#), the workaround is to manually select and use separate values.)
- Scordatura
With microtonal notation systems
Direct playback of microtonal notation is not supported, create desired playback by using:
- Cent adjustment of notes with the Tuning property in Inspector, pay attention to points listed below.
- A plugin that automates this process such as one of these suggested in a forum discussion.
Points to consider when adjusting Tuning property.
- Many SMuFL symbols provide visual / engraving purpose only and do not affect playback.
- When applying some symbols to an existing accidental-marked note, Musescore automatically and implicitly change the note's internal / playback pitch to its "accidental-less" version, see Nominal-accidental chain—Xenharmonic WIKI, this discussion, and source code. Purpose of this design is to allow implementation of different tuning systems.
- For example, adding a quarter-tone sharp symbol (small upward arrow with sharp sign, 𝄲) to F# changes its playback to F in pitch inside Musescore, and the quarter-tonesSharp symbol itself does not affect playback inside Musescore.
Alternatively, use a software in microtonal composition and playback such as Mus2, see a list on Xenharmonic Wiki.
Keywords for search engine
Tuning, Temperament, Intonation, Notation, EDO (Equal Division of the Octave), TET (Tone Equal Temperament), HEJI (Helmholtz-Ellis Just Intonation), HEWM (Helmholtz-Ellis-Wolf-Monzo), Sagittal notation system, Stein, Dicot, Porcupine, Meantone, Superpyth, Well-tempered.
See also
- About the 7 accidentals: Source code accidental.cpp at github
Support
This page is an administration page intended for the editing community only. Click this link to go to the handbook front page intended for public viewing.
Helping to improve translations
You can help translate the MuseScore software and documentation into your own language, visit Translation instructions
See also
Revert to factory settings
MuseScore has the option to revert back to the standard built-in presets or "factory-settings". This can be necessary if your settings are corrupted. Warning: Reverting to factory settings removes any changes you have made to the preferences, palettes, or window settings. This is not a commonly needed procedure; consult the forums first, as there may be a way to solve your problem without resetting everything.
Via menu
If MuseScore still starts, it is possible to revert from within MuseScore.
Go to Help→Revert to Factory Settings. A warning dialog will appear:

Clicking Yes resets all MuseScore's settings as if the program was installed for the first time, and MuseScore will immediately restart. No will safely cancel the revert.
Via command line
If MuseScore does not start, you must run this process via the command line.
Instructions for Windows
- If you have MuseScore open, you need to close it first (File→Quit)
- Type ⊞ Win+R to open the Run dialog. Alternatively select "Start" using your mouse and type "run," then click the "Run" program.
- Click Browse...
- Look for MuseScore3.exe on your computer. The location may vary depending on your installation, but it is probably something similar to My Computer → Local Disk → Program Files → MuseScore 3 → bin → MuseScore3.exe
-
Click Open to leave the Browse dialog and return to the Run dialog. The following text (or something similar) should display in the Run dialog
C:\Program Files\MuseScore 3\bin\MuseScore3.exe(actually%ProgramFiles%\MuseScore 3\bin\MuseScore3.exe)For the 32-bit version of MuseScore in a 64-bit version of Windows, the location is
C:\Program Files (x86)\MuseScore 3\bin\MuseScore3.exe(actually%ProgramFiles(x86)%\MuseScore 3\bin\MuseScore3.exe)For the Windows Store version (Windows 10), it is pretty well hidden, search for it via Windows Explorer
-
Click after the quote and add a space followed by a hyphen and a capital F: -F
- Press OK
After a few seconds, MuseScore should start and all the settings reverted to "factory settings".
For advanced users, the main preference file is located at:
C:\Users\[USERNAME]\AppData\Roaming\MuseScore\MuseScore3.ini
(actually%APPDATA%\MuseScore\MuseScore3.ini)
The other preferences (palettes, session, shortcuts, workspaces...) are in:
-
C:\Users\[USERNAME]\AppData\Local\MuseScore\MuseScore3\(actually%LOCALAPPDATA%\MuseScore\MuseScore3\)For the Windows Store version (Windows 10), these are pretty well hidden, search for them via Windows Explorer
Instructions for MacOS
- If you have MuseScore open, you need to quit the application first (MuseScore→Quit)
- Open Terminal (in Applications/Utilities, or via Spotlight search) and a session window should appear
-
Type (or copy/paste) the following command into your terminal line (include the '/' at the front):
/Applications/MuseScore\ 3.app/Contents/MacOS/mscore -F
This resets all MuseScore preferences to factory settings and immediately launches the MuseScore application. Note that you cannot quit the Terminal without quitting MuseScore. You can safely quit MuseScore, quit the Terminal, and then reopen MuseScore in the normal fashion, ready to continue using.
For advanced users, the main MuseScore preference file is located at ~/Library/Preferences/org.musescore.MuseScore3.plist. Often, deleting this file has no effect: macOS stores a cached copy of the settings in some unknown location. The correct way to delete this file, is by running the following command in the Terminal app:
defaults delete org.musescore.MuseScore3
The other preferences (palettes, session, shortcuts, workspaces...) are in ~/Library/Application\ Support/MuseScore/MuseScore3/. (Those are not cached by macOS.)
Instructions for Linux
The following is true for Ubuntu, and most likely all other Linux distributions and UNIX-style operating systems.
- If you have MuseScore open, you need to quit the application first (File→Quit)
- From the Ubuntu main menu, choose Applications→Accessories→Terminal. A Terminal session window should appear
-
Type, (or copy/paste) the following command into your terminal line (Ctrl+Shift+V to paste in Terminal):
mscore -FOr, if you are using the AppImage version, you must first use the
cdcommand to change directory to wherever you saved the AppImage. For example, if you saved it to your Desktop (and there is only one):cd ~/Desktop ./MuseScore*.AppImage -F
This resets all MuseScore preferences to factory settings and immediately launches the MuseScore application. You can now quit Terminal, and continue using MuseScore.
For advanced users, the main MuseScore preference file is located at ${XDG_CONFIG_HOME:-~/.config}/MuseScore/MuseScore3.ini.
The other preferences (palettes, session, shortcuts, workspaces, …) are in ${XDG_DATA_HOME:-~/.local/share}/MuseScore/MuseScore3/.
See also
Bug reports and Feature requests
The musescore.org issue tracker has been retired on March 2023, please report bugs on GitHub instead:
https://github.com/musescore/MuseScore/issues
Forum, musescore.org issue tracker and github.com issue tracker
Before filing bug reports or feature requests in the Issue Tracker, it is recommended first to search for similar ones, post in the relevant Forum if none is found, so others may help establish a bug as genuine, provide ideas and second opinions for new features, and gather concensus.
Include a link to such discussion when creating the Issue in Issue Tracker.
The role of Issue Tracker on musescore.org is to triage before opening an issue on github. The expectancy is that the .org tracker will at some point undergo some changes to facilitate it linking to github issues, source.
Once the issue is referred/reposted to github, the one on musescore.org will be marked Duplicate to unclutter the triage system.
Bug reports
- Try to reproduce the issue with the latest nightly. You may also view the version history to check whether it has been fixed/implemented already.
-
Please include as much of the following information as you know and limit each issue to one report:
- Version/revision of MuseScore you are using (e.g. version 3.0, revision 871c8ce). Check Help → About... (Mac: MuseScore → About MuseScore...).
- Operating system being used (e.g. Windows 10, macOS 10.15 or Ubuntu 20.04)
- Describe the precise steps that lead to the problem (where do you click, what keys do you press, what do you see, etc.).
If you are not able to reproduce the problem with the steps, it is probably not worth reporting it as the developers will not be able to reproduce (and solve) it either. Remember that the goal of a bug report is not only to show the problem, but to allow others to reproduce it easily.
-
Attach the score that shows the problem, at least a minimal example —use the "File attachments" option at the bottom of the page, just above the Save and Preview buttons when you're typing your post.
-
Fill in the correct issue detail field, eg If you did not gather any shared experience in forum, use Frequency: Once. Once the issue is referred/reposted to github, the one on musescore.org will be marked Duplicate to unclutter the triage system, jump to triage above.
Feature requests
- Be brief, but describe the goal as precisely as you can
- Describe the context in which the new feature is intended to work
- Suggest a specific workflow, if you can
Cross linking issues
When you write a comment in a forum topic, you can refer to an issue in the issue tracker using the following notation: ´[#number]´
That way the link in the comment will include the issue title and reflect the current status of the issue. Furthermore, it'll lead to the forum topic being listed in the issue itself.
Type [#153286] get #153286: Change instrument causes a crash
External links
- How to write a good bug report: step-by-step instructions (MuseScore HowTo)
- How to attach a file (MuseScore HowTo)
- Compose tips
Appendix
This page is an administration page intended for the editing community only. Click this link to go to the handbook front page intended for public viewing.
Keyboard shortcuts
Most keyboard shortcuts can be customized via the menu: select Edit→Preferences...→Shortcuts (Mac: MuseScore→Preferences...→Shortcuts). Below is a list of some of the initial shortcut settings.
Navigation
Beginning of score: Home (Mac: Fn+←)
Last page of score: End (Mac: Fn+→)
Find/Go to (measure number, rehearsal mark, or pXX when XX is a page number): Ctrl+F (Mac: Cmd+F)
Next score: Ctrl+Tab
Previous score: Shift+Ctrl+Tab
Zoom in: Ctrl++ (doesn't work on some systems) (Mac: Cmd++); or Ctrl (Mac: Cmd) + scroll up
Zoom out: Ctrl+- (Mac: Cmd+-); or Ctrl (Mac: Cmd) + scroll down
Next page: Pg Dn; or Shift + scroll down (Mac: Fn+↓)
Previous page: Pg Up; or Shift + scroll up (Mac: Fn+↑)
Next measure: Ctrl+→ (Mac: Cmd+→)
Previous measure: Ctrl+← (Mac: Cmd+←)
Next note: →
Previous note: ←
Note below (within a chord or on lower staff): Alt+↓
Note above (within a chord or on higher staff): Alt+↑
Top note in chord: Ctrl+Alt+↑ (Ubuntu uses this shortcut for Workspaces instead)
Bottom note in chord: Ctrl+Alt+↓ (Ubuntu uses this shortcut for Workspaces instead)
Next element (accessibility): Alt+→
Previous element (accessibility): Alt+←
Note input
Begin note input mode: N
Leave note input mode: N or Esc
Duration
1 ... 9 selects a duration. See also Note input.
Half duration of previous note: Q
Double duration of previous note: W
Decrease duration by one dot: (as of version 2.1) Shift+Q (e.g. a dotted quarter note becomes a quarter note; a quarter note becomes a dotted eighth note)
Increase duration by one dot : (as of version 2.1) Shift+W (e.g. an eighth note becomes a dotted eighth note; a dotted eighth note becomes a quarter note)
Voices
To select a voice in note input mode.
Voice 1: Ctrl+Alt+1 (Mac: Cmd+Alt+1)
Voice 2: Ctrl+Alt+2 (Mac: Cmd+Alt+2)
Voice 3: Ctrl+Alt+3 (Mac: Cmd+Alt+3)
Voice 4: Ctrl+Alt+4 (Mac: Cmd+Alt+4)
Pitch
Pitches can be entered by their letter name (A-G), or via MIDI keyboard. See Note input for full details.
Repeat previous note or chord: R (the repeat can be of a different note value by selecting duration beforehand)
Repeat selection: R (The selection will be repeated from the first note position after the end of the selection)
Raise pitch by octave: Ctrl+↑ (Mac: Cmd+↑)
Lower pitch by octave: Ctrl+↓ (Mac: Cmd+↓)
Raise pitch by semi-tone (prefer sharp): ↑
Lower pitch by semi-tone (prefer flat): ↓
Raise pitch diatonically: Alt+Shift+↑
Lower pitch diatonically: Alt+Shift+↓
Change enharmonic spelling in both written and concert pitch views: J
Change enharmonic spelling in current view only: Ctrl+J (Mac: Cmd+J)
Rest: 0 (zero)
Interval
Add interval above current note: Alt+[Number]
Layout
Flip direction (stem, slur, tie, tuplet bracket, etc.): X
Mirror note head: Shift+X
Increase stretch of measure(s): }
Decrease stretch of measure(s): {
Line break on selected barline: Return
Page break on selected barline: Ctrl+Return (Mac: Cmd+Return)
Articulations
Staccato: Shift+S
Tenuto: Shift+N
Sforzato (accent): Shift+V
Marcato: Shift+O
Grace note (acciaccatura): /
Crescendo: <
Decrescendo: >
Text entry
Staff text: Ctrl+T (Mac:Cmd+T)
System text: Ctrl+Shift+T (Mac: Cmd+Shift+T)
Tempo text: Alt+Shift+T
Rehearsal Mark: Ctrl+M (Mac: Cmd+M)
Lyrics entry
Enter lyrics on a note: Ctrl+L (Mac: Cmd+L)
Previous lyric syllable: Shift+Space
Next lyric syllable: if the current and the next syllables are separated by a '-': -, else Space
Move lyric syllable left by 0.1sp: ←
Move lyric syllable right by 0.1sp: →
Move lyric syllable left by 1sp: Ctrl+← (Mac: Cmd+←)
Move lyric syllable right by 1sp: Ctrl+→ (Mac: Cmd+→)
Move lyric syllable left by 0.01sp: Alt+←
Move lyric syllable right by 0.01sp: Alt+→
Up to previous stanza: Ctrl+↑ (Mac: Cmd+↑)
Down to next stanza: Ctrl+↓ (Mac: Cmd+↓)
For more lyric shortcuts, see Lyrics.
Display
Timeline: F12 (Mac: Fn+F12)
Play Panel: F11 (Mac: Fn+F11)
Mixer: F10 (Mac: Fn+F10)
Palette: F9 (Mac: Fn+F9)
Inspector: F8 (Mac: Fn+F8)
Piano Keyboard: P
Selection filter: F6
Display full screen: Ctrl+U (Mac: none, use View→Full screen instead)
Miscellaneous
Toggle visibility on selected element(s): V
Show Instruments dialog: I
Toggle multimeasure rests on or off: M
Reset element to default location: Ctrl+R (Mac: Cmd+R)
See also
Command line options
MSCORE(1) — General Commands Manual Page
NAME
mscore, MuseScore3 — MuseScore 3 sheet music editor
SYNOPSIS
You can launch MuseScore from the command line by typing
- mscore [options] [filename …] (Mac and Linux/BSD/Unix)
- musescore [options] [filename …] (Linux/BSD/Unix)
- mscore-portable [options] [filename …] (Linux AppImage)
- MuseScore3.exe [options] [filename …] (Windows)
[options] and [filename] are optional. For this to work the MuseScore executable must be in %PATH% (Windows) resp. $PATH (Mac and Linux). If it is not, see Revert to factory settings for detailed instructions on how and where to find and execute the MuseScore executable from the command line on the various supported platforms.
A more detailed synopsis follows:
mscore [-deFfhIiLmnOPRstvw]
[-a | --use-audio driver]
[-b | --bitrate bitrate]
[-c | --config-folder pathname]
[-D | --monitor-resolution DPI]
[-d | --debug]
[-E | --install-extension extension file]
[-e | --experimental]
[-F | --factory-settings]
[-f | --force]
[-h | -? | --help]
[-I | --dump-midi-in]
[-i | --load-icons]
[-j | --job file.json]
[-L | --layout-debug]
[-M | --midi-operations file]
[-m | --no-midi]
[-n | --new-score]
[-O | --dump-midi-out]
[-o | --export-to file]
[-P | --export-score-parts]
[-p | --plugin name]
[-R | --revert-settings]
[-r | --image-resolution DPI]
[-S | --style style]
[-s | --no-synthesizer]
[-T | --trim-image margin]
[-t | --test-mode]
[-v | --version]
[-w | --no-webview]
[-x | --gui-scaling factor]
[--diff]
[--highlight-config]
[--long-version]
[--no-fallback-font]
[--raw-diff]
[--run-test-script]
[--score-media]
[--save-online]
[--score-meta]
[--score-mp3]
[--score-parts]
[--score-parts-pdf]
[--score-transpose]
[--source-update]
[--template-mode]
[file ...]
DESCRIPTION
MuseScore is a Free and Open Source WYSIWYG cross-platform multi-lingual music composition and notation software, released under the GNU General Public Licence (GPLv2).
Running mscore without any extra options launches the full graphical MuseScore program and opens any files specified on the command line.
The options are as follows:
- -a | --use-audio driver
-
Use audio driver: one of jack, alsa, portaudio, pulse
- -b | --bitrate bitrate
-
Set MP3 output bitrate in kbit/s
- -c | --config-folder pathname
-
Override configuration and settings directory
- -D | --monitor-resolution DPI
-
Specify monitor resolution (override autodetection)
- -d | --debug
-
Start MuseScore in debug mode
- -E | --install-extension extension file
-
Install an extension file; soundfonts are loaded by default unless -e is also specified
- -e | --experimental
-
Enable experimental features, such as layers
- -F | --factory-settings
-
Use only the standard built-in presets (“factory settings”) and delete user preferences; compare with the -R option (see also Revert to factory settings)
- -f | --force
-
Ignore score corruption and version mismatch warnings in “converter mode”
- -h | -? | --help
-
Display an overview of invocation instructions (doesn’t work on Windows)
- -I | --dump-midi-in
-
Display all MIDI input on the console
- -i | --load-icons
-
Load icons from the filesystem; useful if you want to edit the MuseScore icons and preview the changes
- -j | --job file.json
-
Process a conversion job (see EXAMPLES below)
- -L | --layout-debug
-
Start MuseScore in layout debug mode
- -M | --midi-operations file
-
Specify MIDI import operations file (see EXAMPLES below)
- -m | --no-midi
-
Disable MIDI input
- -n | --new-score
-
Start with the New Score wizard regardless whether it’s enabled or disabled in the user preferences
- -O | --dump-midi-out
-
Display all MIDI output on the console
- -o | --export-to file
-
Export the given (or currently opened) file to the specified output file. The file type depends on the extension of the filename given. This option switches to “converter mode” and avoids the graphical user interface.
- -P | --export-score-parts
-
When converting to PDF with the -o option, append each part’s pages to the created PDF file. If the score has no parts, all default parts will temporarily be generated automatically.
- -p | --plugin name
-
Execute the named plugin
- -R | --revert-settings
-
Use only the standard built-in presets (“factory settings”) but do not delete user preferences; compare with the -F option
- -r | --image-resolution DPI
-
Set image resolution for conversion to PNG files. Default: 300 DPI (actually, the value of “Resolution” of the PNG option group in the Export tab of the preferences)
- -S | --style style
-
Load a style file first; useful for use with the -o option
- -s | --no-synthesizer
-
Disable the integrated software synthesizer
- -T | --trim-image margin
-
Trim exported PNG and SVG images to remove whitespace surrounding the score. The specified margin, in pixels, will be retained (use
0for a tightly cropped image). When exporting to SVG, this option only works with single-page scores. - -t | --test-mode
-
Set test mode flag for all files, includes --template-mode
- -v | --version
-
Display the name and version of the application without starting the graphical user interface (doesn’t work on Windows)
- -w | --no-webview
-
Disable the web view component in the Start Center
- -x | --gui-scaling factor
-
Scale the score display and other GUI elements by the specified factor; intended for use with high-resolution displays
- --diff
-
Print a conditioned diff between the given scores
- --highlight-config
-
Set highlight to svg, generated from a given score
- --long-version
-
Display the full name, version and git revision of the application without starting the graphical user interface (doesn’t work on Windows)
- --no-fallback-font
-
Don’t use Bravura as fallback musical font
- --raw-diff
-
Print a raw diff between the given scores
- --run-test-script
-
Run script tests listed in the command line arguments
- --save-online
-
Upload score(s) to their source URL. Replaces existing online score(s). (As of 3.6)
- --score-media
-
Export all media (except MP3) for a given score as a single JSON document to stdout
- --score-meta
-
Export score metadata to JSON document and print it to stdout
- --score-mp3
-
Generate an MP3 for the given score and export it as a single JSON document to stdout
- --score-parts
-
Generate parts data for the given score and save them to separate mscz files
- --score-parts-pdf
-
Generate parts data for the given score and export it as a single JSON document to stdout
- --score-transpose
-
Transpose the given score and export the data to a single JSON file, print it to stdout
- --source-update
-
Update the source in the given score
- --template-mode
-
Save files in template mode (e.g. without page sizes)
MuseScore also supports the automatic Qt command line options.
Batch conversion job JSON format
The argument to the -j option must be the pathname of a file comprised of a valid JSON document honoring the following specification:
-
The top-level element must be a JSONArray, which may be empty.
-
Each array element must be a JSONObject with the following keys:
in: Value is the name of the input file (score to convert), as JSONString.plugin: Value is the filename of a plugin (with the.qmlextension), which will be read from either the global or per-user plugin path and executed before the conversion output happens, as JSONString. Optional, but at least one ofpluginandoutmust be given.out: Value is the conversion output target, as defined below. Optional, but at least one ofpluginandoutmust be given.
-
The conversion output target may be a filename (with extension, which decided the format to convert to), as JSONString.
-
The conversion output target may be a JSONArray of filenames as JSONString, as above, which will cause the score to be written to multiple output files (in multiple output formats) sequentially, without being closed, re-opened and re-processed in between.
-
If the conversion output target is a JSONArray, one or more of its elements may also be, each, a JSONArray of two JSONStrings (called first and second half in the following description). This will cause part extraction: for each such two-tuple, all extant parts of the score will be saved individually, with filenames being composed by concatenating the first half, the name (title) of the part, and the second half. The resulting string must be a valid filename (with extension, determining the output format). If a score has no parts (excerpts) defined, this will be silently ignored without error.
-
Valid file extensions for output are:
flac- Free Lossless Audio Codec (compressed audio)
metajson- various score metadata (JSON)
mid- standard MIDI file
midi- standard MIDI file
mlog- internal file sanity check log (JSON)
mp3- MPEG Layer III (lossy compressed audio)
mpos- measure positions (XML)
mscx- uncompressed MuseScore file
mscz- compressed MuseScore file
musicxml- uncompressed MusicXML file
mxl- compressed MusicXML file
ogg- OGG Vorbis (lossy compressed audio)
pdf- portable document file (print)
png- portable network graphics (image) — Individual files, one per score page, with a hyphen-minus followed by the page number placed before the file extension, will be generated.
spos- segment positions (XML)
svg- scalable vector graphics (image)
wav- RIFF Waveform (uncompressed audio)
xml- uncompressed MusicXML file
See below for an example.
ENVIRONMENT
SKIP_LIBJACK- Set this (the value does not matter) to skip initialization of the JACK Audio Connection Kit library, in case it causes trouble.
XDG_CONFIG_HOME- User configuration location; defaults to
~/.configif unset. XDG_DATA_HOME- User data location; defaults to
~/.local/shareif unset.
Note that MuseScore also supports the normal Qt environment variables such as QT_QPA_GENERIC_PLUGINS, QT_QPA_PLATFORM, QT_QPA_PLATFORMTHEME, QT_QPA_PLATFORM_PLUGIN_PATH, QT_STYLE_OVERRIDE, DISPLAY, etc.
FILES
/usr/share/mscore-3.0/ contains the application support data (demos, instruments, localization, system-wide plugins, soundfonts, styles, chords, templates and wallpapers). In the Debian packages, system-wide soundfonts are installed into /usr/share/sounds/sf2/, /usr/share/sounds/sf3/ or /usr/share/sounds/sfz/, respectively, instead.
The per-user data (extensions, plugins, soundfonts, styles, templates) and files (images, scores) are normally installed into subdirectories under ~/MuseScore3/ but may be changed in the configuration. Note that snapshot, alpha and beta versions use MuseScore3Development instead of MuseScore3 in all of these paths.
$XDG_CONFIG_HOME/MuseScore/MuseScore3.ini contains the user preferences, list of recently used files and their locations, window sizes and positions, etc. See above for development version paths.
$XDG_DATA_HOME/data/MuseScore/MuseScore3/ contains updated localization files downloaded from within the program, plugin information, cached scores, credentials for the musescore.com community site, session information, synthesizer settings, custom key and time signatures and shortcuts. See above for development version paths.
EXAMPLES
Convert a score to PDF from the command line
mscore -o 'My Score.pdf' 'My Score.mscz'
Run a batch job converting multiple documents
mscore -j job.json
This requires the file job.json in the current working directory to have content similar to the following:
[
  {
    "in": "Reunion.mscz",
    "out": "Reunion-coloured.pdf",
    "plugin": "colornotes.qml"
  },
  {
    "in": "Reunion.mscz",
    "out": [
      "Reunion.pdf",
      [ "Reunion (part for ", ").pdf" ],
      "Reunion.musicxml",
      "Reunion.mid"
    ]
  },
  {
    "in": "Piece with excerpts.mscz",
    "out": [
      "Piece with excerpts (Partitura).pdf",
      [ "Piece with excerpts (part for ", ").pdf" ],
      "Piece with excerpts.mid"
    ]
  }
]
The last part of the job would, for example, cause files like “Piece with excerpts (part for Violin).pdf” to be generated alongside the conductor’s partitura and a MIDI file with the full orchestra sound, whereas the equivalent part of the Reunion conversion will be silently ignored (because the Reunion piece (a MuseScore demo) has no excerpts defined).
MIDI import operations
The attached midi_import_options.xml is a sample MIDI import operations file for the -M option.
DIAGNOSTICS
The mscore utility exits 0 on success, and >0 if an error occurs.
SEE ALSO
fluidsynth(1), midicsv(1), timidity(1), qtoptions(7)
- https://musescore.org/handbook
-
Online Handbook, full user manual
- https://musescore.org/forum
-
Support Forum
- https://musescore.org/en/node/278582
-
Reverting to factory settings (troubleshooting)
- https://musescore.org/project/issues
-
Project Issue Tracker — Please check first to if the bug you’re encountering has already been reported. If you just need help with something, then please use the support forum instead.
- http://doc.qt.io/qt-5/qguiapplication.html#supported-command-line-optio…
-
Documentation of automatic Qt command line options
STANDARDS
MuseScore attempts to implement the following standards:
- MusicXML 3.1 (score interchange format)
- SF2 (SoundFont 2.01)
- SF3 (SoundFont with OGG Vorbis-compressed samples)
- SFZ (Sforzato soundfont)
- SMuFL (Standard Music Font Layout 1.20)
HISTORY
MuseScore was split off the MusE sequencer in 2002 and has since become the foremost Open Source notation software.
AUTHORS
MuseScore is developed by MuseScore BVBA and others.
This manual page was written by mirabilos <tg@debian.org>.
CAVEATS
The automatic Qt command line options are removed from the argument vector before the application has a chance at option processing; this means that an invocation like mscore -S -reverse has no chance at working because the -reverse is removed by Qt first.
BUGS
-
MuseScore does not honor /etc/papersize.
-
Probably some more; check the project’s bug tracker (cf. SEE ALSO).
MuseScore — August 28, 2023
New features in MuseScore 3.6
New score setup and layout features
MuseScore 3.6 introduces a new music font, Leland, a new default text font, Edwin (a version of New Century Schoolbook), and many new default settings. It also introduces a number of new features which are available in all newly-created scores by default, and which can also be applied automatically or manually to existing scores.
The three main features, which are interrelated, are:
- Automatic instrument ordering
- Automatic brackets and braces
- Vertical justification of staves
The first two features apply at score creation time and are available in the New Score Wizard, though they can also be accessed later in the Instruments panel. Previously, it was up to the user to arrange instruments and add brackets manually once the score was created. The aim of these new features is to save time and give a better default result in the majority of cases, but it is not intended to accommodate every possible score setup. For unusual layouts, the results can be customised after the score is created, the features can be turned off completely, or a template could be used.
Automatic instrument ordering

When creating a new score via 'Choose Instruments', there is now an 'Ordering' dropdown showing the current system of instrument ordering. 'Orchestral' is the default. As instruments are added to the score, they will be added in the correct position according to the select ordering. (Previously, each instrument would appear below whichever was currently selected in the right-hand list.) This also makes it easy to, for instance, add a double wind section, by selecting Flute, Oboe, Clarinet and Bassoon in the left-hand list, and clicking 'Add to score' twice.
Each ordering defines a position in the score for solo instruments. For example, in an orchestral ordering, this is above the strings. With an instrument selected in the right-hand list, the 'Make soloist' button will move it to that position. You can designate multiple soloists; within the soloist 'section' the overall ordering will apply. Solo instruments will have "solo" added to their name by default, and will be numbered separately from non-solo instruments, where relevant. Note that the soloist designation is a score layout feature only and has no impact on playback.
One quirk is that, for now, only a single soloist position is defined per ordering, so a work with a chorus plus both vocal and instrumental soloists will place the instrumental soloists above the chorus. These will need to be moved manually.
As before, instruments can be moved up and down manually with the buttons that are now to the right of the list. In the dropdown the ordering will have '(Customised)' appended to its name. The customised ordering is saved with the score. You can reset the order by selecting the original ordering (or a different one) from the dropdown.
Selecting the 'Custom' ordering disables this feature entirely, as well as the automatic bracketing.
Automatic brackets and braces
The predefined ordering assigns instrument families (flutes, oboes, clarinets, etc.) and arranges those families into sections (woodwind, brass, percussion, etc.). Brackets are added automatically according to these simple rules:
- A heavy bracket is applied to all adjacent instruments of the same section, assuming there is more than one
- a thin square bracket is applied to all adjacent identical instruments (four horns, for example)
- a curly brace is applied to each single instrument which is notated on more than one stave (piano and harp, most commonly)
Again, while this should provide reasonable defaults for most scores, it won't give perfect results for every possible style or layout. Fortunately, it is easy to make adjustments once the score is created.
Vertical justification of staves
There is a new algorithm for vertically justifying staves to properly fill the page, which is turned on by default for new scores in MuseScore 3.6. To turn this off, untick Format > Style > Page > Enable vertical justification of staves.

The basic principle of the algorithm is to try to make the space between staves equal, subject to two settings (all in Format > Style > Page):
- The space either side of a system may be increased proportionally by adjusting the "Factor for distance above/below bracket" setting to a value greater than 1. For example, if this is set to 1.5, the algorithm will attempt to make the space either side of a bracket 1.5 times the 'standard' space used elsewhere.
- The same thing can be applied to braces with the "Factor for distance above/below brace" setting.
The space between a brace and bracket will be determined by the larger of these two values. The "Max. great staff distance" setting is used to limit the amount of distance between staves joined by a curly brace. This is useful as these staves generally need to be read at once in a single glance by the player.
The "Max. system distance" and "Max. stave distance" should have reasonably large values to enable the routine to fill even quite sparse pages. Sometimes a page will not have enough staves for it to make sense to justify. In this case, once the algorithm first equalises the space as described above, it then adds extra space between the staves up to a maximum of the setting given in "Max. page fill distance" (multiplied by any relevant factor setting). If you find many pages are not fully justified, but you'd like them to be, try adjusting this setting. In general, a low value is likely to be best for a score with a small number of staves per system, and a larger one for larger numbers of staves.
The vertical justification is dynamic, and not tied to the section assignments of instruments used to determine the score order at the setup stage, so if you add or remove brackets the spacing will change accordingly. In the same way, if empty staves are hidden on a given system, the spacing will be determined only by the brackets which are present on that system.
Hopefully the default settings give good results in most cases, but it might take a bit of experimentation with the settings depending on the makeup of a score. If you are used to using spacers to achieve similar results, it is best to try to find settings which give a good result for the majority of the score, and use spacers only where local adjustments are necessary. It is planned for future versions to make this more configurable. For example, extra space could be suppressed for a specific bracket, or the value might be increased or decreased for a particular page or system.
Indentation of first systems
This new option, which is turned on by default, is found in Style > Score > Enable indentation on first system. As the name suggests, it will indent the first system of a section in the customary way for classical scores. (The old workaround of using a frame for this is no longer necessary.) If there are instrument labels present, the maximum of either the value given for this setting or the length of the labels will apply.
Applying new features to existing scores
When opening an old score, a dialog box gives the option to apply either the new notation font Leland, or the new text font Edwin, or both. Each of these applies a subset of the new default 3.6 style settings beyond just the font changes, for example, line widths and text sizes, but does not apply every one of the the new defaults, in the interest of minimising disruptive layout changes.

To apply all of the new defaults, including these text and notation font changes, open the Format > Style window and click the "Reset All Styles to Default" button at the bottom. This was formerly the Format > Reset Style menu option. The button behaves the same way, except that it no longer resets the page layout options which are set in the Format > Page Settings window; that window now has its own equivalent button, which will reset only those settings it contains. This means that the new style options can be tried out without completely ruining the layout of the score, though a few settings in the Score and Page settings of the Style window may need to be re-set manually.
If it is an option, delete any non-essential system and page breaks, then select the whole score and select Format > Stretch > Reset Layout Stretch. Also delete spacers if you want to see the default results of the new vertical justification algorithm (see below).
Edwin has wider character sizes in general than FreeSerif (though slightly smaller default point sizes are used) so it is quite likely that the Edwin option will cause layout changes, particularly in scores with lyrics. Leland will affect the spacing less radically, but some adjustments may still be necessary.
Text items which have local style overrides applied will not have those customisations removed, either as part of the score migration process, or via the Reset Styles options. This may result in an inconsistent score where some text retains its old font face or size. The new menu option Format > Reset Text Style Overrides will remove these customisations, resetting all text items to match the currently defined text styles. (This is equivalent to clicking 'Reset to style default' for each attribute in the Text area of the Inspector.) Note that this does not remove Custom Formatting, which must be done manually if required.
Applying new automatic instrument ordering and bracketing
Press I to open the Instruments panel, or choose the Edit > Instruments menu item. Assuming the score was created pre-3.6, the selected ordering will be 'Custom'. If you wish to apply a standard ordering, select one from the menu, for example 'Orchestral'. The instruments in the score will be reordered according to that definition, and have brackets and braces applied accordingly. Note that any existing brackets and braces will be deleted.
Applying vertical justification of staves
If you want to use this feature but have previously been using spacers to create extra or fixed distance between staves, it would be best to delete all those spacers first, as they will distort how the new algorithm works. A quick way to do this is by right-clicking any spacer, choosing Select > All Similar Elements, and pressing Delete.
Turn this feature on by selecting Style > Page > Enable vertical justification of staves. Then you can reintroduce spacers if there are specific places where the default spacing needs adjustment.
Other engraving changes in 3.6
In the process of investigating style settings, engraving issues, and creating a new music font, many issues were uncovered which needed to be corrected and which may have a small impact on the appearance of existing scores. In some cases it is possible to undo these manually.
Beam spacing
A long-standing error in the interpretation of the beamDistance setting that is defined alongside SMuFL fonts meant that this value was frequently half as big as it ought to be in MuseScore, including with Emmentaler and Bravura. (MuseScore defines the distance between beams as a percentage of the thickness of a beam, but for SMuFL the setting is an absolute distance in stave spaces. The normal thickness of a beam is 0.5sp, and the standard distance between beams is also 0.25sp, which MuseScore interpreted as 25% of 0.5sp, i.e. 0.125sp.)
The new correct interpretation of this value, 50%, will be applied even to existing scores, unless this value had been explicitly overridden. The extra space is added inwards, so the position of the outermost beams remains the same. If you really want the old, very-tight spacing, set Style > Beams > Beam distance manually to 25%.
Before (beam distance 25%):
")
After (beam distance 50%):
")
Ledger line length
In a similar way, MuseScore interpreted this SMuFL value as the total extension of the ledger line beyond the notehead (i.e. x/2 at each side), when the value is meant to be the extension at each side. This error was also masked by a square cap being used for the line, rather than a straight cap, thus also adding half of the line thickness at each end.
As with beam spacing, if this setting was not explicitly overridden in the file, a new default will be applied even in old scores, but this will give identical results. If you did adjust this value, this value will be preserved, but will produce ledger lines that are too long. You can convert the value manually with the formula:
new value = (x / 2) - (y / 2)
where x is the previous 'Ledger line length' value, and y is the 'Ledger line thickness' value. Or, just use the now correctly-interpreted default settings for each font:
- Leland: 0.35sp
- Bravura, Gonville, Petaluma: 0.40sp
- Emmentaler: 0.38sp
Stem caps and flag positions
Round caps were previously drawn on stems. This has been replaced with a flat cap. Partly this is to make the length of the stem more exact, but mainly it is so that the round cap does not obscure the design of the tip of the flag symbols in each font. Emmentaler's flags, for instance, are designed with a flat tip; Bravura and Leland have rounded tips which are not exactly symmetrical.
The placement of flags was also previously at odds with SMuFL fonts: a calculation was made of how much to extend the stem for a given number of flags, and then the flag symbol was drawn with the top or bottom of its bounding box at the end of the stem. Now, the presence of flags does not affect stem length (i.e. a normal length stem is used for a note according to its vertical position and stem direction) and the flag symbol is then placed with its y=0 at the end of the stem. Any 'extension' of the stem is thus determined by the extent to which the flag symbol extends above or below y=0. The flags in Emmentaler, as used within MuseScore, have been repositioned to reflect this, and to match other SMuFL fonts.
The result of this is that flags may appear slightly lower or higher than they did previously; however, their positioning now reflects the intentions of the designers of each of the available fonts. Beamed notes are not affected.
Before (Bravura, in 3.5):
")
After (Bravura, in 3.6):
")
Bracketed accidentals
Previously MuseScore did not add any space between the bounding boxes of accidentals and brackets around them. Now a small amount of padding is added, which can be customised via Style > Accidentals > Padding inside parentheses.
Before (Bravura, in 3.5):
")
After (Bravura, in 3.6):
")
Accidentals in Emmentaler
These have been replaced with those taken from Parnassus. For details, see PR #6747.
New features in MuseScore 3
MuseScore 3 includes a number of new and improved features. For a brief summary, see the Release notes for MuseScore 3. More details can be found in the summaries below and by referring to the relevant pages of the handbook.
Automatic Placement
MuseScore initially places elements in the score according to (a) the properties specified in style defaults and (b) any manual adjustments made. For elements that have automatic placement enabled, however, MuseScore will attempt to avoid collisions by moving one or more of them as needed.
See Automatic placement.
Default position
The default position for most elements is controlled by settings in Format → Style. You can either change the default there, or, in the Inspector, apply a manual adjustment (see below) and then use the "Set as style" control (the S to the right of the value you wish to set).
The specific properties you can set vary by element type but include:
- placement (whether the element appears above or below the staff by default)
- position above/below (specific positions when placed above or below)
- offset (same as position above/below, for which placement is the default)
- autoplace min distance (minimum distance from other elements when autoplace is enabled)
See Automatic placement.
Manual adjustments
Many elements can be placed either above or below the staff. To flip an element from above to below or vice versa, use the "Placement" setting in the Inspector, or press the shortcut "X".
Manual adjustments to position can be performed by dragging or by changing the offsets in the Inspector. Neither method will allow you to position an element in a way that causes a collision, however. To take full control of the position of an element, you can disable automatic placement for it.
See Automatic placement.
Disabling automatic placement
To disable automatic placement for an element, untick the "Automatic placement" box in the Inspector. The element will revert to its default position, and it will no longer be considered when automatically placing other elements.
See Automatic placement.
Stacking order
The "Stacking order" setting in the Inspector controls which elements overlap which in the cases where they actually do overlap and are not moved due to autoplacement.
See Automatic placement.
Text Formatting
Formatting of text is controlled by three factors:
- The text style associated with the element sets the defaults for properties such as the font, alignment, and frame.
- Changes to these text properties can be applied to selected elements via the Inspector.
- Custom formatting can be applied to specific characters within the text using the text toolbar.
See Text basics, Text styles and properties.
Text Styles
Each text element has a text style associated with it. The default style for an element is determined by the type of the element itself - staff text defaults to the Staff text style, dynamics to the Dynamics text style, etc. This text style determines the default font face, size, style (bold/italic/underline), alignment, and frame properties.
You can change the defaults for any of these text styles using Format → Style → Text Styles. For instance, you can make rehearsal marks bigger, or change lyrics to be italicized. This will affect all existing elements using that style as well as elements you add later. Some elements also contain a limited set of text style controls in their own sections of the Format → Style dialog (although this might not be the case in the final release). The settings are linked: you can change the font size for measure numbers in either Format → Style → Measure Numbers, or in Format → Style → Text Styles: Measure Number. The effect is the same: all measure numbers in the score will take on this size. You can also change the defaults for a text style using the Inspector; see Text Properties below.
For most text elements that you create directly (like staff text, rehearsal marks, and lyrics), you can apply a different text style using the Style control in the Inspector. This will cause them to display using that style instead of the "native" style for the element. For example, you can select one or more staff text elements and give them the Tempo style to force them to display as if they were tempo markings.
See Text basics, Text styles and properties.
Text Properties
The text style controls the default properties for elements using that style, but you can override any of these properties for selected elements using the Inspector. For example, you can select a handful of staff text elements using Ctrl+click, then use the Inspector to make them larger. The Reset to Default button next to each property control returns it to the default. You can also click the Set as Style button to change the style to match. So another way to change the size of all measures numbers is to select one, change its size in the Inspector, then click Set as Style.
See Text basics, Text styles and properties.
Custom Formatting
Custom formatting is applied to text using the toolbar at the bottom of the main window in the same manner as in previous releases. Thus, you can embolden one word in a sentence while the rest is normal, or superscript a particular character etc. You can also remove all custom formatting from select text elements using the "Remove Custom Formatting" button in the Inspector. This returns the text to the settings currently shown in the Inspector.
See Text editing.
Staff Type Change
You can change various staff properties mid-score, including staff size, notehead scheme (e.g., for pitch name noteheads), generation of time signatures, and others. The staff type change element is found on the Text palette (currently, but see #278205: Move Staff Type Change to another palette (it is not text) - it may move). Add it to the measure where you want the change to occur, then use the Inspector to change properties of the staff type change element.
Temporary and Cutaway Staves
To create a temporary staff that appears on certain systems only: first add the staff normally (Edit / Instruments), then add notes, then right-click the staff, click Staff Properties, and set "Hide when empty" to "Always". This will cause the staff to show only where needed even without needing to turn on "Hide empty staves" for the whole score (in Format / Style). The default for "Hide when empty" is "Auto", meaning the staff will be hidden when empty if "Hide empty staves" is enabled. Additional values include "Never" (the staff will not be hidden when empty even if "Hide empty staves" is enabled) and "Instrument" (for instruments containing multiple staves, the staff is hidden only if all staves for that instrument are empty).
To create a cutaway staff in which only the measures containing notes are visible (for ossia or cutaway scores, for example), right-click the staff, click Staff Properties, and enable the "Cutaway" option. This can be used independently of "Hide when empty" or "Hide empty staves".
System Dividers
System dividers are a set of short diagonal lines that are used to visually separate systems on a page. MuseScore can add these to your score automatically. In Format → Style → System, you can enable dividers on the left, right, or both, and you can set their default position. You can also adjust the position of individual dividers in your score manually or mark them invisible (this currently does not survive saving).
Staff Spacing
As part of the automatic placement in MuseScore, staves are now spaced automatically, so you can set a comfortable minimum distance and depend on MuseScore to open up more space where needed. You can use staff spacers as in MuseScore 2 to increase distance between staves, but MuseScore 3 now also provides a way to decrease it—the "fixed" staff spacer, found on the Breaks & Spacers palette. Just add the spacer and adjust its height. This will also prevent MuseScore from automatically adding more space to avoid collisions, allowing you to manage this yourself.
See Spacers.
Don't Break
Currently disabled
In addition to the system, page, and section breaks familiar from MuseScore 2, the "Breaks & Spacers" palette now contains a new "Don't Break" element. This allows you to force two measures to be kept together, for example, if there is some complex passage that spans the measures and you want to make sure they are adjacent. If both measures don't fit on a system, MuseScore moves them both to the next system. (currently, this leaves a "hole" at the end of the first staff - is this a bug or is there some purpose behind it?)
Parts from Voices
In addition to the ability to generate parts from the different instruments in your score, you can now also associate a part with a specific staff within the instrument or even a specific voice within a specific staff. This allows you to combine multiple parts (e.g., Flute 1 & 2) onto a single staff in the score while still generating separate parts.
The Parts dialog now contains two sections at the bottom, Instruments in Score and Instruments in Part. Once you have generated a part (or all parts) using the New and New All buttons, you can select any part at the top and use the controls at the bottom to control not only what instrument is in the part, but also which staves and voices within the instrument are included.
To add an instrument to a part, select it from "Instruments in Score" and press "+". To remove an instrument from a part, select it from "Instruments in Part" and press "-". To customize the part at the staff or voice level, click the arrow next to the instrument in "Instruments in Part" to expand the listing to show all staves and voices of the instrument. You can remove a staff by selecting it and pressing "-", or remove a voice by unchecking it.
Limitations: If you select only voice 1 for a given staff, then only the content in voice 1 for that staff will be included in the part. Thus, in order to share flute 1 & 2 on the same staff, you will need to enter all notes onto both voices, even in passages where they share content. You also cannot enter the two parts as chords in the passages where they share rhythms.
Explode and Implode
Explode has been updated to allow separation of voices as well as notes. See Explode.
The implode tool (Tools / Implode) works in one of two modes.
With a single staff selected, the implode command merges notes in different voices into chords where possible (when notes are on the same beat and have the same duration). This is the same as recent versions of MuseScore, although some bugs have been fixed.
With multiple staves selected, the implode command combines the content of the first four non-empty voices (on any staves) into multiple voices on the top selected staff. This is different from MuseScore 2, where notes would be combined into chords rather than using multiple voices, and thus required the rhythms to match. The MuseScore 3 approach preserves the original rhythms even where they differ, and is intended to produce the expected results when combining two different parts onto one staff for use with the parts from voices feature, or when reducing an open (four-stave) SATB score into a closed (two-stave) version. To further merge the voices into chords where possible, simply run the command again.
See Tools.
Insert mode
You can insert and delete notes and have the measure automatically expand or contract to accommodate the change. This can be useful in creating unmetered music or in ordinary editing.
To insert a note before the currently-selected note, press Ctrl+Shift while adding the note normally. For example, in note input mode, Ctrl+Shift+click will insert a note of the currently-selected duration at that location. Ctrl+Shift+B will insert a B of the currently-selected duration before the note at the current cursor position. You can also switch to Insert mode using the dropdown menu next to the note input button on the toolbar. In this mode, all notes you add act as if you were pressing Ctrl+Shift - they are inserted rather than replacing the existing notes or rests at that location.
To delete notes, you must be in normal (not note input) mode. Select either a single note or a range and press Ctrl+Del.
See Note input modes, Remove selected range (Tools)
Split/Join Measures
To split a measure before a given note, simply insert a barline from the palette at that point while holding Ctrl. For example, you can select the note, and Ctrl+double-click the barline in the palette, or Ctrl+drag the barline to the note. You can also use Tools → Measure → Split Measure Before Selected Note/Rest.
To join two measures, Ctrl+Del the barline between them. You can also use the menu command Tools → Measure → Join Measures.
See Measure operations.
Timeline
The Timeline presents a graphical overview of your score. To access it, use View →Timeline (F12). The top portion of the Timeline shows the location of tempo, key, and time signature changes as well as rehearsal marks, repeats, and double barlines. The bottom portion shows the staves of your score, with non-empty measures highlighted. You can click anywhere within this view to jump to the corresponding spot in the score.
See Timeline
Score Comparison Tool
The Score Comparison Tool (View / Score Comparison Tool) allows you to compare two versions of a score to find the differences between them. Select the two scores you want to compare and whether you want to compare the current version or the last saved version (note you can compare the current version of a score against the last saved version of the same score to see what you have changed since the last save), then click the Compare button. A list of differences will be displayed to the right. The score view will automatically change to Documents Side by Side, with the two scores you have selected displayed within. Double-click on a difference from the list and both score views will automatically pan to show you the changed element, which will also be highlighted.
Normally you would want the default Intelligent comparison, which displays the differences in human-readable format (e.g. "Measure 1: Note: property pitch changed from B4 to C5"). There is also a Raw mode to show the results according to the actual XML code.
See Score comparison.
Mixer
See Mixer.
Piano Roll Editor
See Piano roll editor (preliminary page).
Capo changes
Capo changes are now a property of staff text, and can be used to automatically change the pitch of all notes that follow them, up until another capo change.
See Capo playback.
Fretboard Diagrams
New UI. See Fretboard diagrams.
External links
Known limitations of MuseScore 3.x
While all members of the development team did their best to make the software easy to use and bug-free, there are some known issues and limitations in MuseScore 3.x.
Local time signatures
The local time signature feature, which allows you to have different time signatures in different staves at the same time, is very limited. You can only add a local time signature to measures that are empty, and only if there are no linked parts. When adding notes to measures with local time signatures, you can enter notes normally via note input mode, but copy and paste does not work correctly and may lead to corruption or even crashes. The join and split commands are disabled for measures with local time signatures.
Regroup Rhythms
The Regroup Rhythms command found under the Tools menu may have unintended side effects, including changing the spelling of pitches and deleting some elements like articulations, glissandos, tremolos, grace notes and, esp. on undo, ties. Use this tool with caution on limited selections, so that you can tell if any unwanted changes are made.
Tablature staff linked with standard staff
When entering multiple-note chords on a standard staff in a linked staff/tablature system, the notes should be entered in order from the top (first) string to the bottom string to ensure correct fret assignment.
This limitation does not apply if entering notes directly onto a tablature staff, or when using an unlinked staff/tablature system.
Mixer
Changing settings in the mixer other than the sound doesn't mark the score 'dirty'. That means if you close a score you may not get the warning "Save changes to the score before closing?". Changing mixer values are also not undoable.
Header & footer
There is no way to edit Header and Footer in a WYSIWYG manner. The fields in Format → Style → Header, Footer are plain text. They can contain "HTML like" syntax, but the text style, layout, etc. can't be edited with a WYSIWYG editor.
Upgrade from MuseScore 1.x or 2.x
How to upgrade MuseScore
Download and install the latest version from the download page as described at Installation.
Installing MuseScore 3 won't uninstall 1.x nor 2.x —all three versions can coexist peacefully and can even be used in parallel. So this isn't really an upgrade but an installation of a new and different program.
Opening 1.x or 2.x scores in MuseScore 3
MuseScore 3 significantly improved the typesetting quality to make scores attractive and easier to read. Improvements cover many items such as beam slope, stem height, layout of accidentals in chords and general note spacing. However, this means that sheet music made with MuseScore 1.x or 2.x looks slightly different from sheet music made with 3.x.
It also means that scores saved with 3.x won't open with 1.x nor 2.x.
To prevent you from accidentally overwriting your 1.x or 2.x scores, 3.x treats them as an import, which means:
- The score gets marked as being modified, even if you haven't changed anything
- On exiting MuseScore you're asked to save the score (as a result from the above)
- MuseScore uses the "Save As" dialog to save it, not the "Save" dialog
- MuseScore uses the score's title to create a default filename rather than taking the old filename
Relayout
If you did not manually adjust the layout of a 1.x or 2.x score, then MuseScore uses the 3.x typesetting engine to layout the score. If you did touch the layout of the 1.x or 2.x score, the individual adjustments you may have made should remain after opening it in MuseScore 3.x, but due to slight changes in the surrounding layout they may still not appear correct in context. If you wish to reset even manual adjustments to use the 3.x typesetting engine throughout, select the complete score with the shortcut Ctrl+A (Mac: Cmd+A) and reset the layout with Ctrl+R (Mac: Cmd+R).
Note: When you open a 1.x or 2.x file in MuseScore 3, it will ask you if you want to reset the layout to the defaults.
Getting the sound from MuseScore 1.x
While the sound in 2.x/3.x has been much improved, you may still prefer the sound from MuseScore 1.x. In that case, you can get the 1.x sound in 3.x by downloading the 1.3 SoundFont and add it in 3.x. You can do this in two steps:
Known incompatibilities
Hardware incompatibilities
The following software is known to crash MuseScore on startup:
- Samson USB Microphone, driver name "Samson ASIO Driver", samsonasiodriver.dll. More info
- Digidesign MME Refresh Service. More info
- Windows XP SP3 + Realtek Azalia Audio Driver. More info
- Wacom tablet. More info and QTBUG-6127
Software incompatibilities
- Maple virtual cable is known to prevent MuseScore from closing properly.
- KDE (Linux) window settings can cause the whole window to move when dragging a note. Changing the window settings of the operating system avoids the problem.
- Nitro PDF Creator may prevent MuseScore 2 from starting on Windows 10, if being used as the default printer. Same for Amyumi/Quickbooks PDF Printer, see here and also some cloud printing services, see here.
- Creative Sound Blaster Z Series ASIO driver may prevent MuseScore 2 from starting on Windows 10.
- Untrusted Font Blocking policy prevents MuseScore 2 from starting (except in debug mode, i.e. using the -d option) on Windows 10. (Solution in the links provided here)
- The SteelSeries Engine 3 Audio Visualizer will prevent MuseScore from starting up, or cause MuseScore to crash if the Audio Visualizer is started when MuseScore is already running.
- MacOS 10.5+ Accessibility setting "Hover Text" crashes MuseScore 3. Workaround is to disable that setting
AVG Internet Security hangs MuseScore
MuseScore requires access to your internet connection with AVG. MuseScore doesn't need an internet connection to function, but if AVG blocks it, MuseScore hangs.
If AVG prompts you, Allow MuseScore and check "Save my answer as a permanent rule and do not ask me next time."
If it doesn't prompt you anymore,
- Open the AVG user interface (right-click on the AVG icon, close to your clock -> Open AVG User Interface)
- Click on Firewall
- Click Advanced Settings
- Click Applications
- Find MSCORE.EXE in the list and double-click it
- Change Application Action to Allow for All
Font problem on macOS
MuseScore is known to display notes as square when some fonts are damaged on macOS.
To troubleshoot this issue:
- Go to Applications -> Font Book
- Select a font and press ⌘+A to select them all
- Go to File -> Validate Fonts
- If any font is reported as damaged or with minor problems, select it and delete it
- Restart MuseScore if necessary
In this forum article, a user believes to have found the font "Adobe Jenson Pro (ajenson)" to be the culprit, regardless of not being reported as broken, or problematic as per the above validation, and solved the problem by deleting that font, so this is worth checking too.
Font problem on Linux
If the default desktop environment application font is set to bold, MuseScore will not display the notes properly.
To troubleshoot this issue (gnome 2.*/MATE users):
- Right-click on your desktop and select Change Desktop background
- Click on Fonts tab
- Set Regular style for Application font
- Restart MuseScore if necessary
For GNOME 3/SHELL users
- Open the shell and open "Advanced Settings"
- Click on the Fonts option in the list
- Set the default font to something non-bold
- Restart MuseScore if necessary
Save As dialog empty on Linux
Some users reported that the Save As dialog is empty on Debian 6.0 and Lubuntu 10.10.
To troubleshoot this issue:
-
Type the following in a terminal
which mscore -
The command will answer with the path of mscore. Edit it with your preferred text editor and add the following line at the beginning
export QT_NO_GLIB=1
Launch MuseScore and the problem should be solved.
Glossary
Listed below are technicial terms and musical terms, which are frequently used in MuseScore or in the Handbook. Links to relevant handbook chapter are provided. To help musicians who are capable of reading a notation but do not know its proper name, image is provided. This chapter does not aim to be a dictionary of all musical notations, see External links.
The differences between American English and British English are marked with "(AE)" and "(BE)", respectively. Editors and translators of this chapter should add the individual entry for each term.
A
- Acciaccatura
 A short →grace note which appears as a small note with a stroke through the stem. Musescore creates a quick playback, the playback duration is not affected by duration of the parent note. See Grace notes chapter.
- Accidental
- An accidental is a sign appearing in front of a note that raises or lowers its pitch. See Accidental chapter. Musescore creates playback for common accidentals only, they includes →sharps, →flats, →naturals, →double sharps, →double flats, and triple flats. To create microtonal accidentals such as quarter tone, see Tuning systems, microtonal notation system, and playback Chapter.
- Ambitus
- Note (or vocal) range used in a →staff. Used particularly in Early Music. See Ambitus chapter.
- Anacrusis (mostly BE)
- See →Pickup measure.
- Anchor
- The point of attachment to the score of objects such as Text and Lines: When the object is dragged, the anchor appears as small brown circle connected to the object by a dotted line. Depending on the object selected, its anchor may be attached to either (a) a note (e.g. fingering), (b) a staff line (e.g. staff text), or (c) a barline (e.g. repeats).
- Appoggiatura
- A long →grace note which takes value from its associated note. Musescore creates playback as such. It is acceptable to execute written appoggiatura as acciaccatura nowadays but Musescore does not create such playback. Appoggiatura's functions include: passing tone, anticipation, struck suspension, and escape tone.

- Arpeggio
- An arpeggio tells the performer to break up the chord into the constituent notes, playing them separately and one after the other. The arrow arpeggio symbol indicates the direction in which the player should play the notes of the chord. See Arpeggios and glissandi chapter.

- Articulation
- A marking or symbol indicating how a note should be played, usually by altering the length of a note or shaping its attack and decay. See Articulations and ornaments chapter.
B
- Bar (BE)
- See →measure.
- Barline
- Vertical line through a →staff, staves, or a full →system that separates →measures. See Barline chapter.
- Beam
- Notes with a duration of an →eighth or shorter either carry a →flag or a beam. Beams are used for grouping notes. See also French Beam. See Beam chapter.
- BPM
- A tempo displaying unit only used inside Musescore's Play panel. BPM is the amount of quarter notes would have been within one minute. It is not the number used in metronome tempo markings on a score. See Play mode: Play panel chapter.
- Breve, Brevis
- A double whole note or breve is a note that has the duration of two whole notes.
C
- Caesura
- A caesura (//) is a brief, silent pause. Time is not counted for this period, and music resumes when the director signals. See Breaths and pauses chapter.

- Capo (text)
- A text to indicate the setting of the transposing device used on an instrument. See Staff Text and System Text chapter. Not to be confused with Da capo (D.C.).
- Cent
- An interval equal to one hundredth of a semitone, used by Tuning property of a note, see Inspector : note and Tuning systems, microtonal notation system, and playback chapter.
- Channel
- 1. Instrument and channel in Musescore are software abstractions, see Mixer chapter.
- 2. A MIDI output data, see MIDI controls in Mixer chapter.
- Chord
- 1. A group of two or more notes sounding together.
- 2. In Musescore, only notes sounding together that have same duration inside one Musescore Voice constitute a chord. To select a chord in MuseScore, press Shift and click on a note. See Voice chapter.
- 3. In Musescore, a chord symbol. See Chord notation systems chapter.
- Clef
- A musical symbol used to indicate which notes are represented by the lines and spaces on a →staff. See Clefs chapter. See also courtesy clef.
- Coda
- 1. A passage that brings a piece (or a movement) to an end.
- 2. The navigation marker which resembles a set of crosshairs. It is used where the exit from a repeated section is within that section rather than at the end. See also dal segno sign. See Repeats and jumps chapter.

- Concert pitch
- 1. The sounding, or real pitch of a note, contrast with written pitch.
- 2. A score viewing mode in Musescore, see Concert pitch and Transposition chapters.
- 3. The frequency of A4, see Synthesizer chapter.
- Courtesy clef
- A reduced-size clef applied to the end of a system indicating a clef change at the start of the next system. See Clefs chapter.
- Cross-staff notation
- A musical phrase extending across two neighboring staffs eg bass staff and treble staff.

- To create notation where the two stems are at opposite sides of the beam, as shown above, see Cross-staff notation chapter.

- To create notation where the stems are on the same side of the beam, as shown above, see How to span a chord or stem over two staves chapter.
- Crotchet (BE)
- See →Quarter note.
D
- Da capo (D.C.)
- A directive to repeat the previous part of music. See Repeats and jumps chapter.
Not to be confused with capo (text). - Dead note
- See ghost note.
- Demisemiquaver (BE)
- A thirty-second note.
- Double Flat
- A double flat (♭♭ or 𝄫) is a sign that indicates that the pitch of a note has to be lowered two semitones.
- Double Sharp
- A double sharp (♯♯ or 𝄪) is a sign that indicates that the pitch of a note has to be raised two semitones.
- Duplet
- See →tuplet.
- Dynamic, dynamics, dynamic symbol, dynamics symbol
- A symbol indicating the relative loudness of a note or phrase of music—such as mf (mezzoforte), p (piano), f (forte) etc., starting at that note. See Dynamic chapter.
- Dynamic, Single note
- NOTE: Single note dynamics (SND) has several meanings, see Single note dynamics (SND)
- A dynamics symbol with non-zero "Velocity change" property. When setup properly, it creates an Attack envelope simulation effect (wikipedia) on note playback, eg sfz symbol on violins, for more info see Dynamics
- * Two popular build-in SNDs : sfz (sforzando), fp (fortepiano)
- * It is designed to work on certain instruments only eg sfz symbol's effect on violin does not exist on piano.
E
- Edit mode
- The program mode in which editing of score element by user is allowed, contrast with normal mode and note input mode. See Edit mode chapter.
- Eighth note
- A note whose duration is an eighth of a whole note (semibreve). Same as a quaver (BE).
- Endecalineo

- Endecalineo or endecagram, the stave for Solfège, to create see Solmisation chapter.
- Endings
- See →volta.
- Enharmonic notes
- Notes that sound the same pitch but are written differently. Example: G♯ and A♭ are enharmonic notes. See Accidentals: Change enharmonic spelling chapter.
- Explode

- A Musescore feature that split (explode) the chords in a passage of music in a single staff into their constituent notes or voices, see Tools
- Also see Implode
F
- Flag
- See →beam.
- Flat
- Sign (♭) that indicates that the pitch of a note has to be lowered one semitone, see →accidentals and →key signature.
- French Beam

- Beams where the stems only extend to the first beam, but don't intersect all the way through. To create use the French Beams plugin.
G
- Ghost note
- In music, notably in jazz, a ghost note (or a dead, muted, silenced or false note) is a musical note with a rhythmic value, but no discernible pitch when played. Musescore supports crosshead (cross notehead, looks like letter x), diamond notehead, and adding brackets (parentheses) to a note, see Noteheads chapter.


- Grace note
- Grace notes appear as small notes in front of a normal-sized main note, see also →acciaccatura and →appoggiatura. See Grace note chapter.
- Grand Staff (AE)
- Great Stave (BE)
- An instrument or →part of two or more staves, featuring treble and bass clefs, used to notate music for keyboard instruments and the harp. As of MuseScore 3.6: Any number of staves connected by a curly brace.
H
- Half Note
- A note whose duration is half of a whole note (semibreve). Same as a minim (BE).
- Hemidemisemiquaver (BE)
- A sixty-fourth note.
I
- Implode


- A Musescore feature similar to, but not exactly, score reduction (wikipedia), see Tools, also see Explode. See Tools chapter.
- Interval
- The difference in pitch between two notes, expressed in terms of the scale degree (e.g. major second, minor third, perfect fifth etc.). See Degree (Music) (Wikipedia).
- Interleaved

- Two interlocking, oppositely beamed sets of notes. To recreate, use the voice function and the beam palette, see Interleaved beam directions
- Instrument
- 1. Musescore Instrument, see Instruments, staff setup and templates. Instrument contains channel(s).
- 2. Real world instrument
- Irregular measure marker

- A plus sign or minus sign at the top right of a measure indicates that its duration differs from that set by the time signature. See Viewing and navigation: Mark irregular measures and Measure operations chapters.
J
- Jump
- In MuseScore, "jumps" are notations such as "D.S. al Coda". See Repeats and jumps chapter.
K
- Key Signature
- Set of sharps and flats at the beginning of the →staves. It gives an idea about the tonality and avoids repeating those signs all along the staff. A key signature with B flat means F major or D minor tonality. See Key Signature chapter.
L
- Legato
- Legato is a play style which involves playing the notes in a slurred manner. Legato may be written as text or shown through the use of slurs.
- Local time signature

- Staffs with different time signatures running at the same time, to create see Time signatures chapter.
- Longa
- A longa is a quadruple whole note.
- Ledger Line (AE)
- Leger Line (BE)
- Line(s) that are added with and for notes above or below the staff.
- Line
- Musescore Lines, a type of objects capable of attaching (anchoring) to a horizontal continuous range of more than two notes or rests, or vertical collection of notes (chord). See Lines chapter.
M
- Measure (AE)
- A segment of time defined by a given number of beats. Dividing music into measures provides regular reference points to pinpoint locations within a piece of music. Same as → bar (BE).
- Measure repeat sign
- See Repeats and jumps chapter.

- Metronome mark
- A kind of tempo marking. See Tempo chapter.
- Minim (BE)
- See →Half note.
- Multimeasure rest
- See Measure rests chapter.

N
- Natural
- A natural (♮) is a sign that cancels a previous alteration on notes of the same pitch, see →accidentals and →key signature.
- Normal mode
- The operating mode of MuseScore outside note input mode or edit mode. Press Esc to use normal mode. Allows user to select and move elements, adjust Inspector properties, and alter the pitches of existing notes.
- Note input mode
- The program mode used for entering music notation, contrast with normal mode and edit mode. See Note input modes chapter.
O
- Operating System (OS)
- Underlying set of programs which set up a computer, enabling additional programs (such as MuseScore). Popular OSes are Microsoft Windows, macOS, and GNU/Linux.
- Not to be confused with a sheet music →system.
- Ossia

- An alternative passage which may be played instead of the original passage, from the Italian for "alternatively", meaning "or be it". To create see How to create an ossia with another staff
P
- Part
- 1. MuseScore 3's automatic score separation and printing function, see Parts chapter.
- 2. Music to be played or sung by one or a group of musicians using the same instrument. In a string quartet, 1st part = Violin 1, 2nd part = Violin 2, 3rd part = Viola, 4th part = Cello, in a choir there might be parts for soprano, alto, tenor and bass. A part has one or more →staves (e.g. Piano has 2 staves, Organ can have 2 or 3 staves). MuseScore 3 Dynamics's Dynamic range property use this definition.
- 3. A single melody line in a polyphonic musical composition. MuseScore 3 never use this definition, but there is a similar feature Voices.
- Pickup Measure (mostly AE, also known as an Anacrusis (mostly BE) or Upbeat)
- Incomplete first measure of a piece or a →section of a piece of music. See Measure duration, Create new score: Pickup measure, and Measure operations: Exclude from measure count chapters. May or may not be compensated for at the end of the score or section.
- Properties
- Settings of an individual object on a score in Musescore, see Inspector chapter. Contrast with style (profile).
Q
- Quadruplet
- See →tuplet.
- Quarter note
- A note whose duration is a quarter of a whole note (semibreve). Same as a crotchet (BE).
- Quaver (BE)
- See →eighth note.
- Quintuplet
- See →tuplet.
R
- Respell Pitches
- Change accidental used on a note but keep note's pitch. See Accidentals: Change enharmonic spelling chapter.
- Rest
- A musical symbol that indicates silence. See Note input chapter.
- Re-pitch mode
- One of the note input modes. See Note input modes chapter.
S
- Score
- 1. In MuseScore support forums and most chapters of the MuseScore Handbook, score generally refers to a computer file with the suffix .mscz - and to its visual representation on a computer screen as well as its audio playback.
- 2. In some chapters of the MuseScore Handbook, score means the layout and formatting of "Full score" or one particular Musescore part. See Layout and formatting and Musescore Part chapters.
- 3. In other contexts (for example the IMSLP score-sharing website at https://imslp.org), a score generally refers either to a PDF file of the sheet music for a specific work or to an actual paper copy of the sheet music.
- Section
- In MuseScore, a region of the score between section breaks; also from the start of a score to the first section break, and from the last section break to the end of the score.
- Segno, or Dal Segno
 A navigation marker. See Repeats and jumps chapter.
- Semibreve (BE)
- A whole note (AE). It lasts a whole measure in 4/4 time.
- Semiquaver (BE)
- A sixteenth note.
- Semihemidemisemiquaver (Quasihemidemisemiquaver) (BE)
- An hundred and twenty eighth note.
- Sextuplet
- See →tuplet.
- SF2
- A virtual instrument format developed by E-mu Systems and Creative Labs, see SoundFonts.
- SF3
- An invention of Werner Schweer, the Musescore developer (source). This format supports sound sample compression, see SoundFonts.
- SFZ
- 1. Dynamics symbol sfz (small letters) , see Dynamic
- 2. A virtual instrument format supported by MuseScore (along with →SoundFonts). An SFZ library consists of one or more SFZ text files, each defining a particular instrument setup, and many audio sound samples.
- Shared note head
 A note notated with two beams. To recreate in Musescore, use the voice function and the notehead function and see Noteheads
- Sharp
- Sign (♯) that indicates that the pitch of a note has to be raised one semitone, see →accidentals and →key signature.
- Single note dynamics (SND)
- Due to continuous software development, Single note dynamics (SND) has come to bear several different meanings:
- 1. A dynamics symbol with non-zero "Velocity change" property. When setup properly, it creates an Attack envelope simulation effect (wikipedia) on note playback, eg sfz symbol on violins, for more info see Dynamics
- * Two popular build-in SNDs : sfz (sforzando), fp (fortepiano)
- * It is designed to work on certain instruments only eg sfz symbol's effect on violin does not exist on piano.
- 2. The audio creation mechanism on which the definition 1 is based. This mechanism is utilized to simulate 'variation of loudness' effect by hairpins on certain instruments. eg crescendo on one violin long note, for more info see Hairpins
- * It is designed to work on certain instruments only eg you cannot create crescendo while pressing a piano note
- 3. The notation interpretation setting of an instrument: 'Use single note dynamics' in Staff / Part properties. See definition 1 and 2 for more info on notations. The setting in default definition file instruments.xml is named
<singleNoteDynamics>. Instruments' settings can be ignored by the master control in Synthesizer. - 4. A soundfont's attenuation response to MIDI CC messages. Musescore can only create correct audio for all dynamics and haripins with a compatable soundfont. Because musescore synthesizer setting is global, and the default soundfont responses to MIDI CC 2 only. For most users, SND compatable soundfont means soundfont that reponses to CC 2. More on Synthesizer chapter, also developers' handbook Edit a soundfont to use MIDI CC.
- Slash (slash chord, slash notehead)
- Indicates strum. See Slash notation and Noteheads chapter. See also https://en.wikipedia.org/wiki/Slash_chord.
- Slash notation
- A form of music notation using slash marks placed on or above/below the staff to indicate the rhythm of an accompaniment: often found in association with chord symbols. There are two types: (1) Slash notation consists of a rhythm slash on each beat: the exact interpretation is left to the player (see Fill with slashes); (2) Rhythmic slash notation indicates the precise rhythm for the accompaniment (see Toggle rhythmic slash notation).
- Slur
- A curved line over or under two or more notes, meaning that the notes will be played smooth and connected (legato). See Slur chapter. A slur is not a →tie.
- Solmisation
- see Endecalineo
- SoundFont
- A virtual instrument format supported by MuseScore (along with →SFZ). A SoundFont is a special type of file (extension .sf2, or .sf3 if compressed) containing sound samples of one or more musical instruments. In effect, a virtual synthesizer which acts as a sound source for MIDI files. MuseScore 2.2 comes with the SoundFont "MuseScore_General.sf3" pre-installed. See SoundFont chapter.
- Spatium (plural: Spatia) / Space / Staff Space / sp. (abbr./unit)
- A unit of measurement, see Layout and formatting chapter.
- Staff / Staffs
- A set of lines and spaces, each representing a pitch, on which music is written. In ancient music notation (before 11th century) the staff may have any number of lines.
- Staff Space
- See Spatium (above).
- Stave / Staves (BE)
- See Staff (above).
- Step-time input
- MuseScore's default note input mode. See Note input modes chapter.
- Style
- A profile that contains settings in MuseScore, contrast with Properties. See Layout and formatting chapter.
- System
- 1. Set of staves to be read simultaneously in a score, ie one row of current staffs, see Layout and formatting chapter.
- 2. All instruments, MuseScore 3 Dynamics's Dynamic range property use this definition.
- See also →Operating System (OS).
- System divider
- Separates systems on the same page. Can be switched on for the score in Format→Style→System, see Layout and formatting: Style window. Also available in master palette, see Master palette chapter.

T
- Text
- A Musescore Text object is an object that contains individual characters that can be entered and removed by using (typing on) a computer keyboard. See Text types chapter.
- Tie
-
A curved line between two adjavent notes of the same pitch to indicate a single note of combined duration. See Tie chapter. A tie is not a slur.
- Quarter note + Tie + Quarter note = Half note
- Quarter note + Tie + Eighth note = Dotted Quarter note
- Quarter note + Tie + Eighth note + Tie + 16th note = Double Dotted Quarter note
- Transposition
-
The act of moving the pitches of one or more notes up or down by a constant interval. See Transposition chapter. There may be several reasons for transposing a piece, for example:
- The tune is too low or too high for a singer. In this case the whole orchestra will have to be transposed as well—easily done using MuseScore.
- The part is written for a particular instrument but needs to be played by a different one.
- The score is written for an orchestra and you want to hear what the individual instruments sound like. This requires changing the transposing instrument parts to concert pitch.
- A darker or a more brilliant sound is desired.
- Triplet
- See →tuplet.
- Tuplet
- A tuplet divides its next higher note value by a number of notes other than given by the time signature. See Tuplet chapter. For example a →triplet divides the next higher note value into three parts, rather than two. Tuplets may be: →triplets, →duplets, →quintuplets, and other.
U
- Upbeat
- See →pickup measure.
V
- Velocity
- A property of objects inside Musescore that controls how loudly note(s) are played, see Loudness of a note. The two important types of object that have it are note (see Inspector chapter), and dynamics symbol (see Dynamics chapter).
- Voice
- 1. In Musescore, Voice is a software feature, you can use up to 4 Voices per staff, see Voice: When to use Voices chapter.
- 2. Daily usage of the term voice refers to a musical line or part which can have its own rhythm. MuseScore does not have a feature to implement the exact same idea, if the voice feature does not suit your need, try adding separate instruments instead.
- Volta
- In a repeated section of music, it is common for the last few measures of the section to differ. Markings called voltas are used to indicate how the section is to be ended each time. These markings are often referred to simply as →endings. See Volta chapter.
W
- Written pitch
- Transposing instruments (such as the clarinet, French horn, trumpet etc.) are notated at a different pitch (and key signature) to how they sound. The notated pitch is called the written pitch. Contrast with concert pitch. See Staff / Part properties chapter.